Unlock the Secrets: Unravel the Mysteries of Momosik Shrine in Zelda: Tears of the Kingdom
Embark on an epic quest in Zelda: Tears of the Kingdom! Discover the hidden Momosik Shrine nestled deep within TotK and complete the treacherous Death Caldera Crystal Walkthrough to retrieve a precious gem of immense power
Momosik Shrine Location in TotK
Just like many other shrines in the Eldin region of The Legend of Zelda: Tears of the Kingdom, players will need to explore a blazing cave in order to uncover their desired treasure. The Momosik Shrine is no exception, testing Link's abilities as he embarks on a quest to retrieve a radiant crystal from within the scorching depths of the Death Caldera.
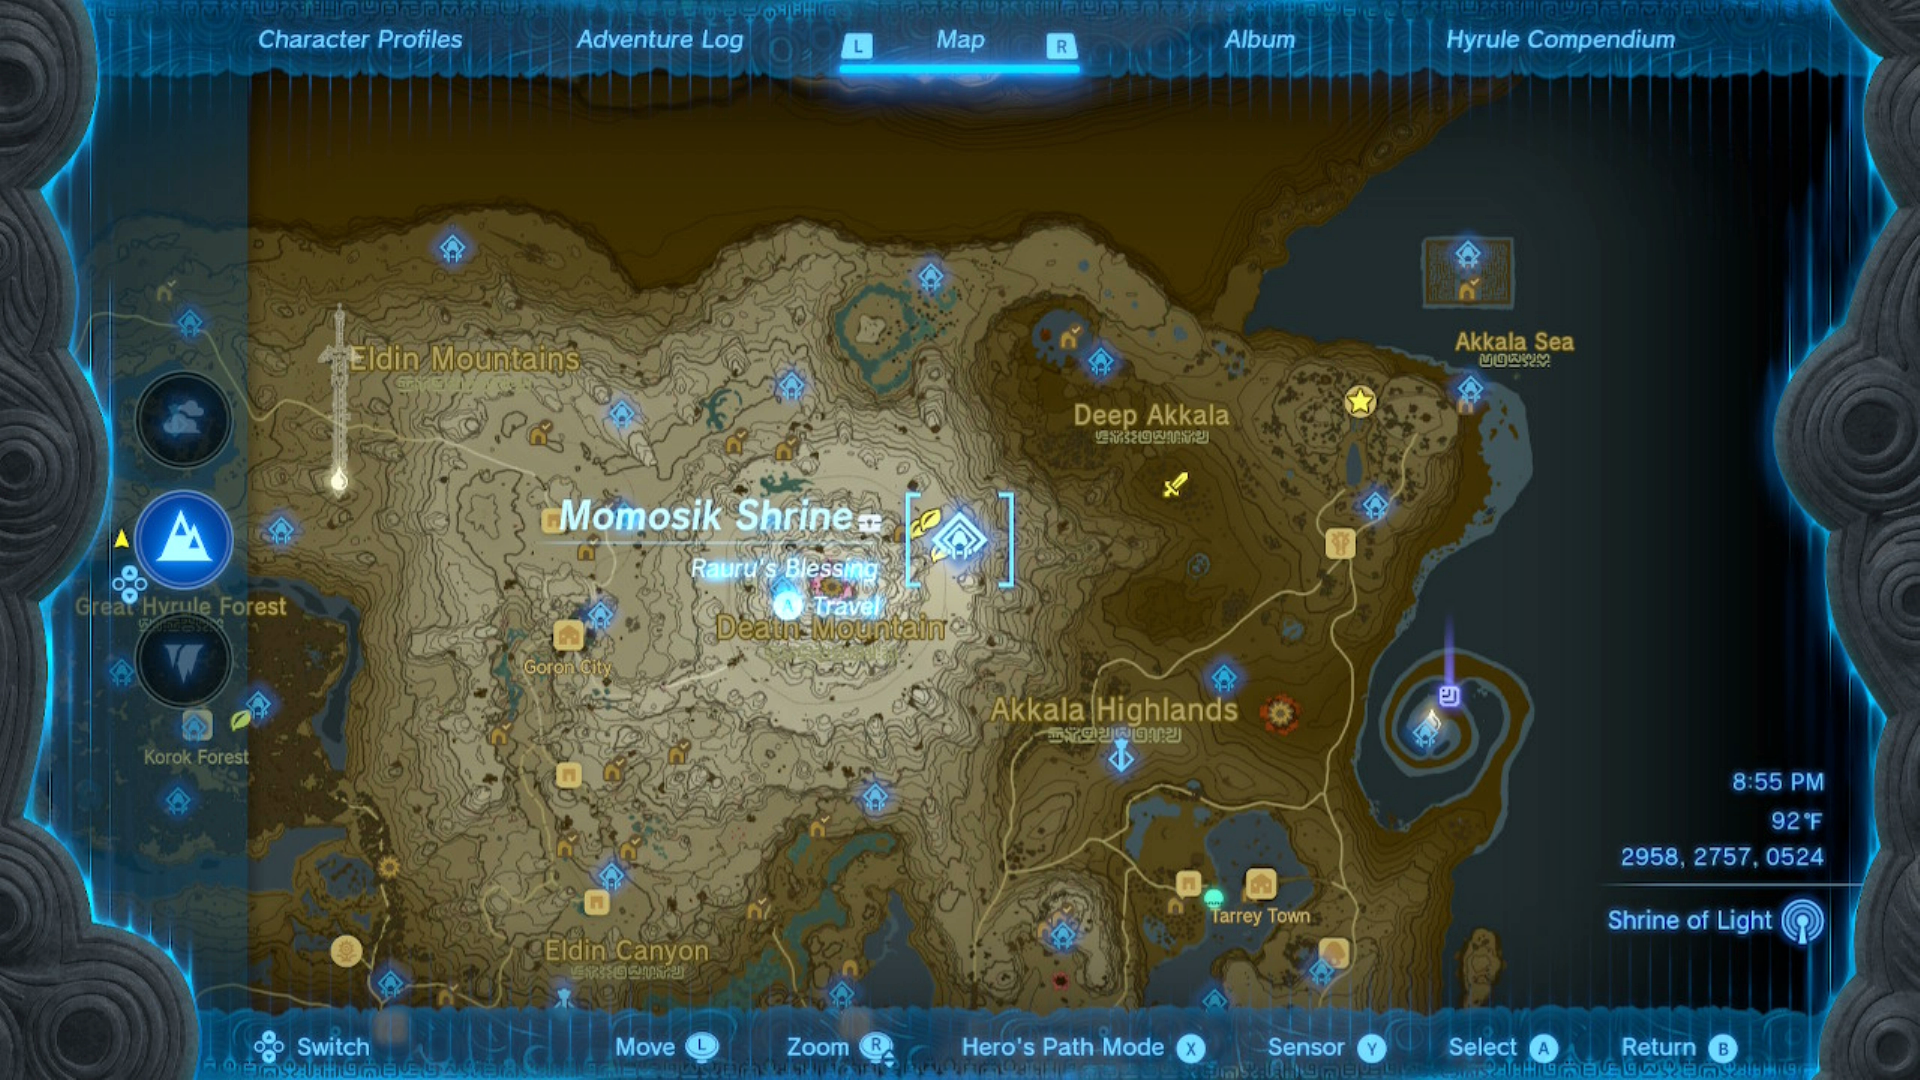
In Tears of the Kingdom, players can find the Momosik Shrine on the eastern side of Death Mountain at the coordinates 2958, 2757, 0524.

Players can use the Ulri Mountain Skyview Tower in the Akkala Highlands to quickly reach the empty shrine.
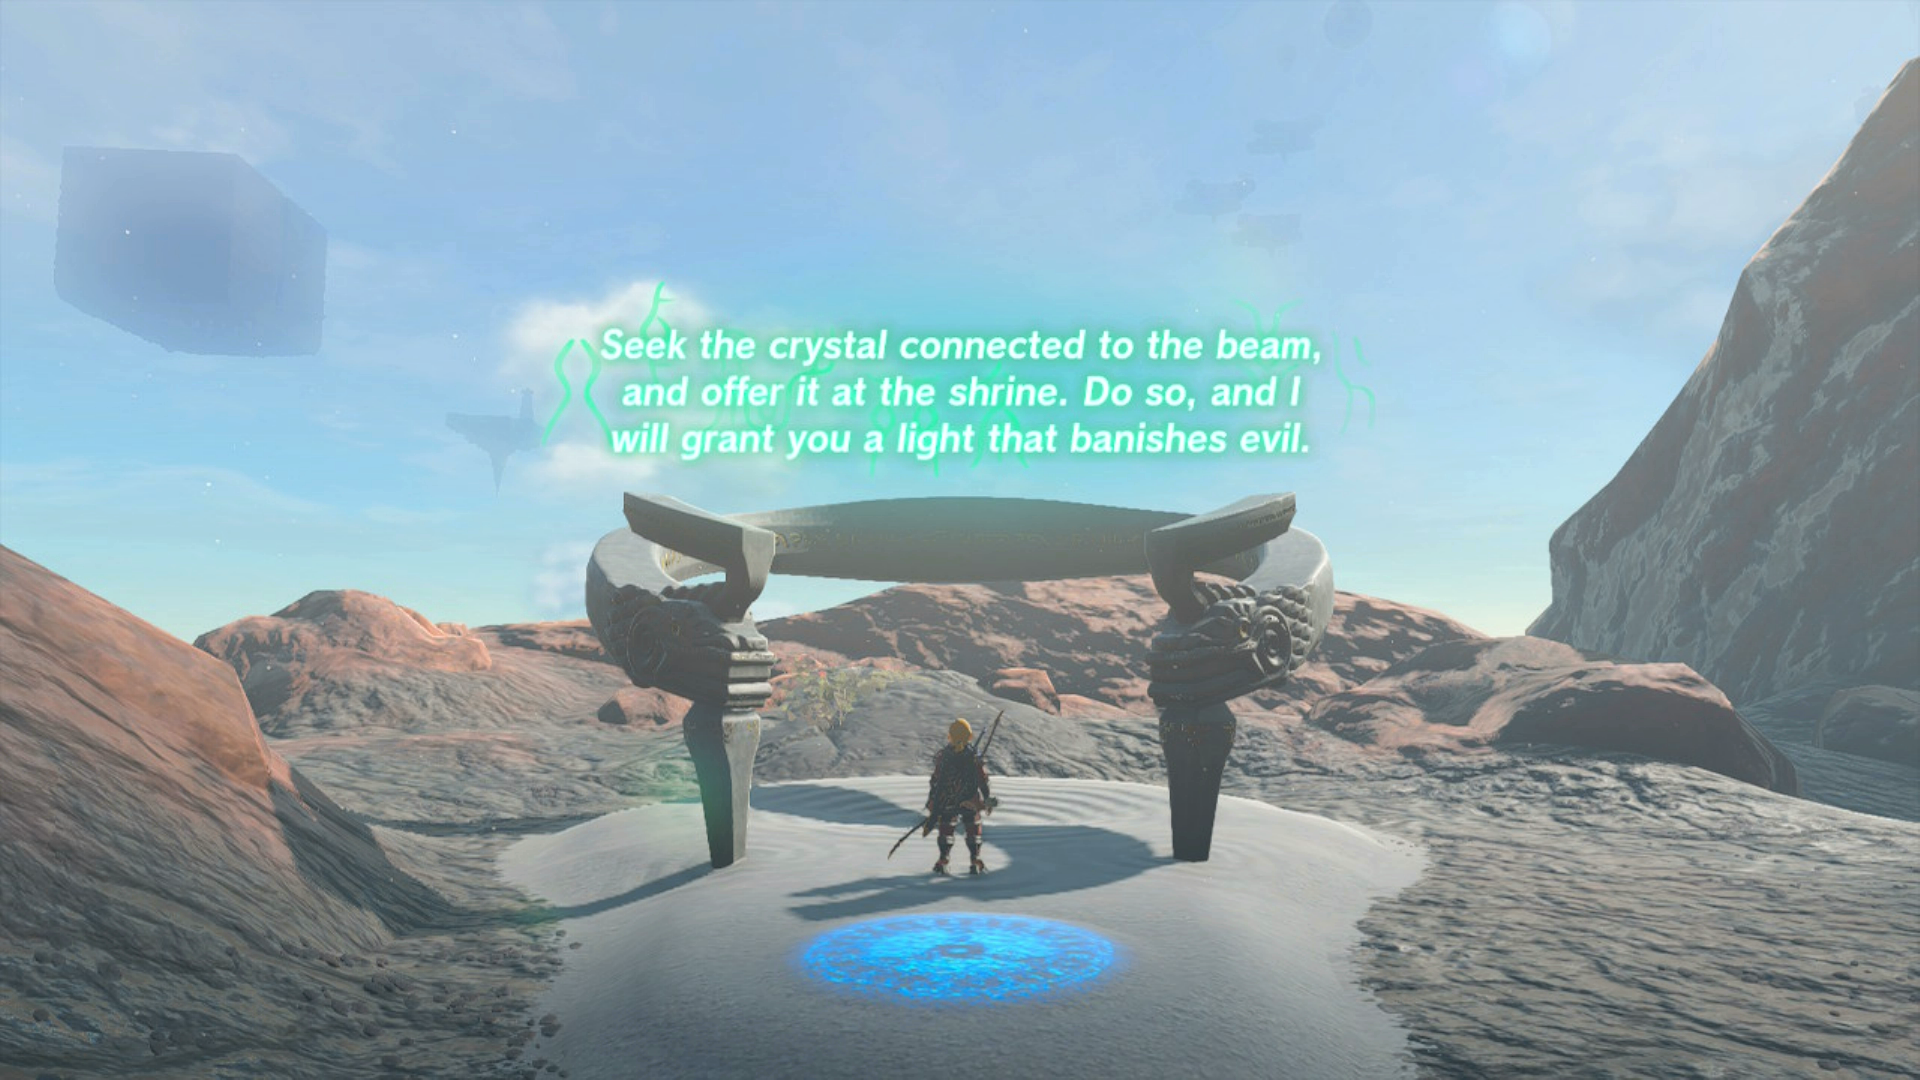
Activating the terminal will task Link with locating and returning the shrine's crystal and create a bright green tether between it and the shrine.
The Death Caldera Crystal Walkthrough

Players will begin "The Death Caldera Crystal" shrine quest once the shrine has been activated and the tether created.
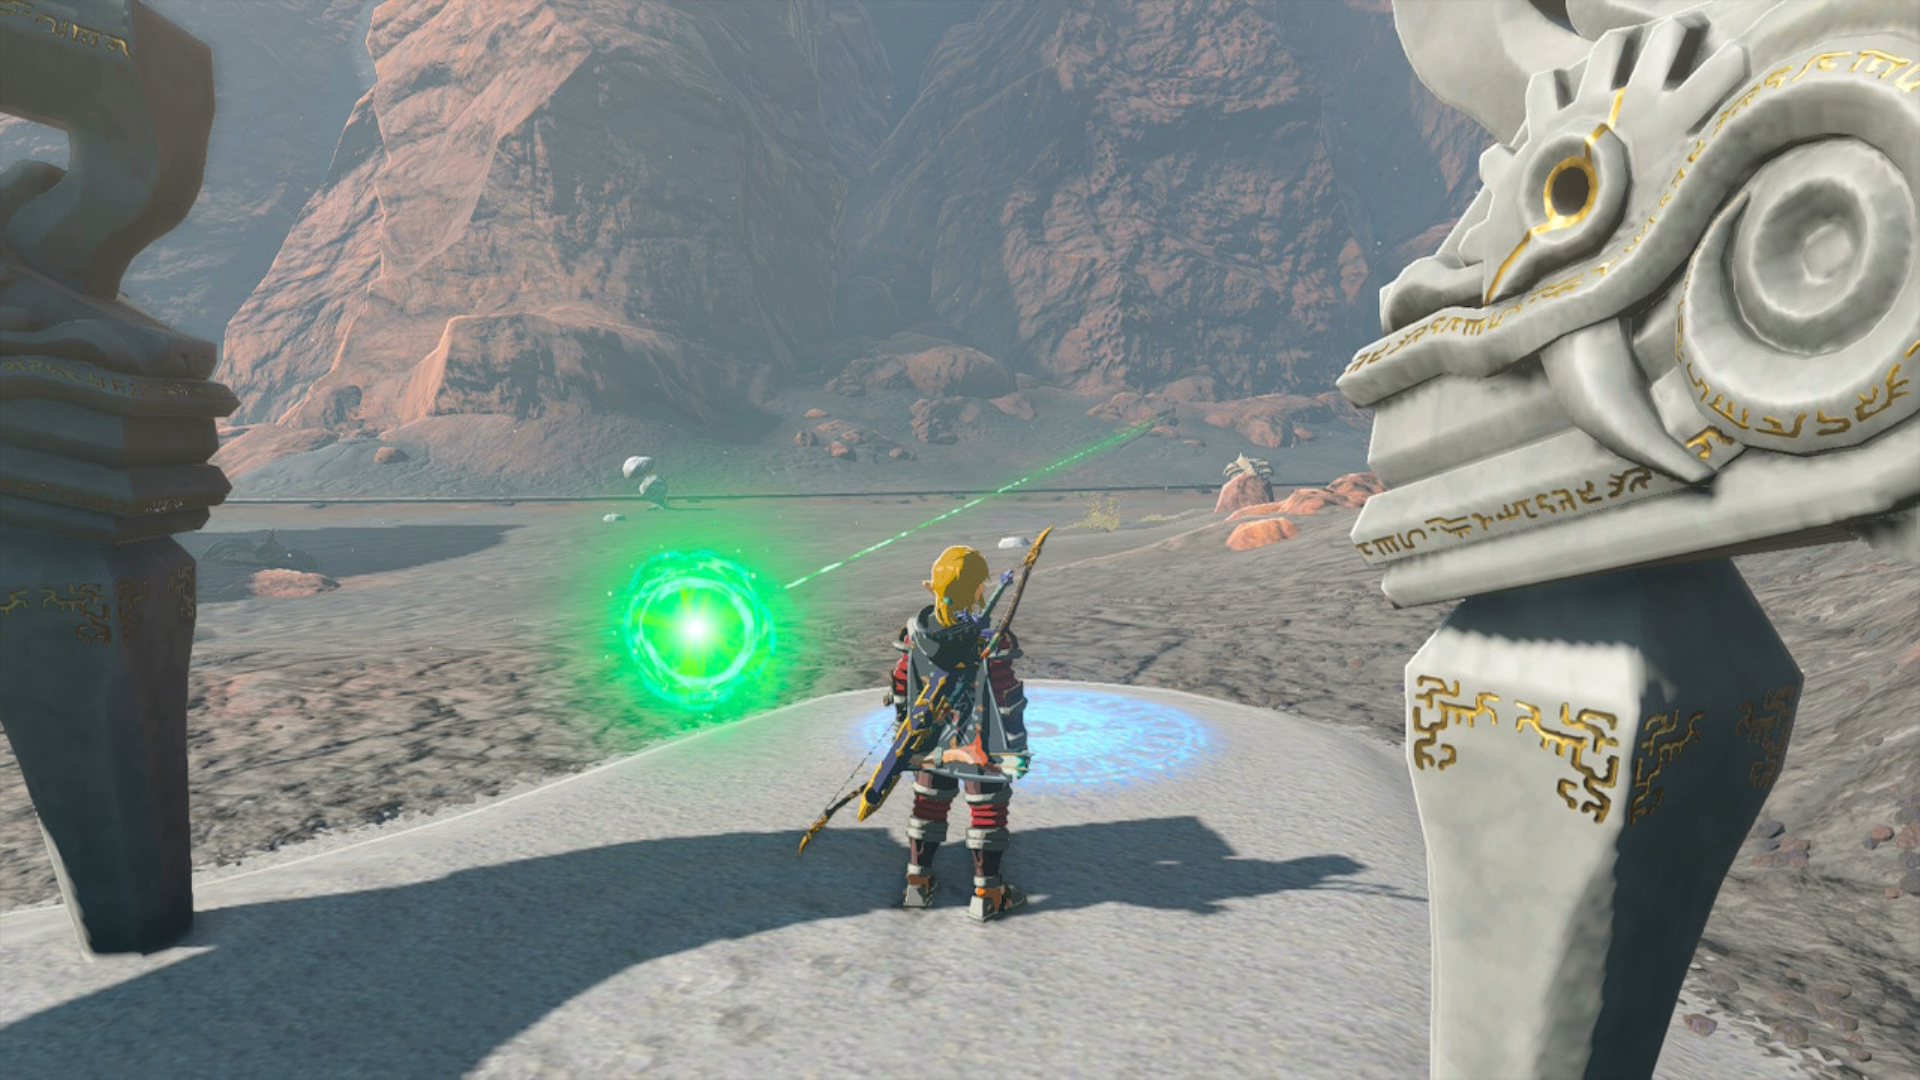
The green beam will appear to disappear into the side of Death Mountain, but as players approach the area, they will notice the mouth of a cave to the right of where the beam ends.