Uncover the Hidden Metal: Turakamik Shrine Walkthrough in Zelda
Unleash your inner adventurer as you navigate through the electrifying Turakamik Shrine in Zelda: Tears of the Kingdom Follow our comprehensive walkthrough to discover the hidden metal and conquer this challenging shrine
Quick Links
Discovering Turakamik Shrine in Tears of the KingdomThe vast world of Hyrule in The Legend of Zelda: Tears of the Kingdom presents players with exciting new challenges as they journey through 152 shrines, an increase from its predecessor Breath of the Wild. Turakamik Shrine is one of these shrines, offering unique puzzles that test Link's newly acquired abilities. This walkthrough focuses on discovering the hidden metal in Turakamik Shrine.
The Turakamik Shrine poses a significant challenge, as it demands the utilization of three of Link's unique skills to unravel the mystery. Keep reading to uncover the solution to the puzzle concealed within the Turakamik Shrine in Tears of the Kingdom.
Turakamik Shrine Location in Tears of the Kingdom
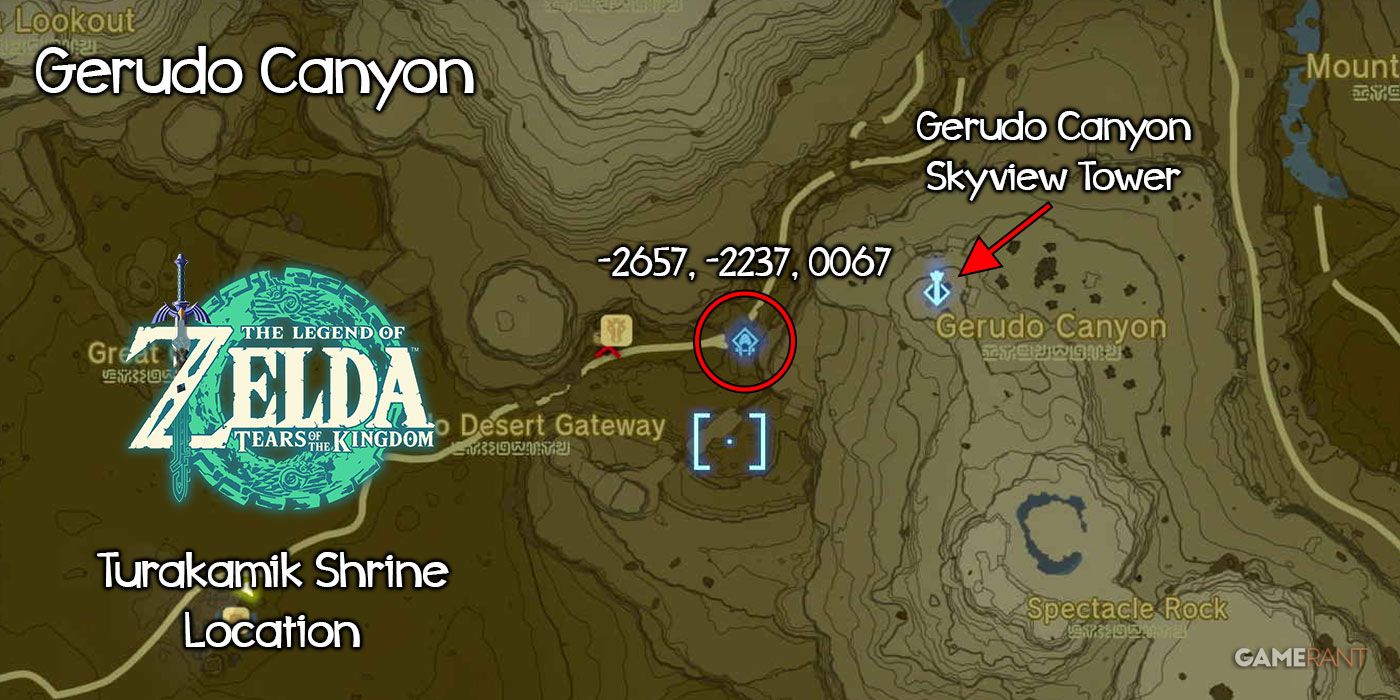
To get to the Turakamik Shrine, head towards the Gerudo Canyon region and reach the coordinates -2657, -2237, 0067. A faster way to reach the shrine is by using the Gerudo Canyon Skyview Tower located at coordinates -2432, -2178, -0307 and then gliding eastwards using a paraglider. You will easily spot the shrine on a low ledge above the canyon road that leads to the Gerudo Desert.
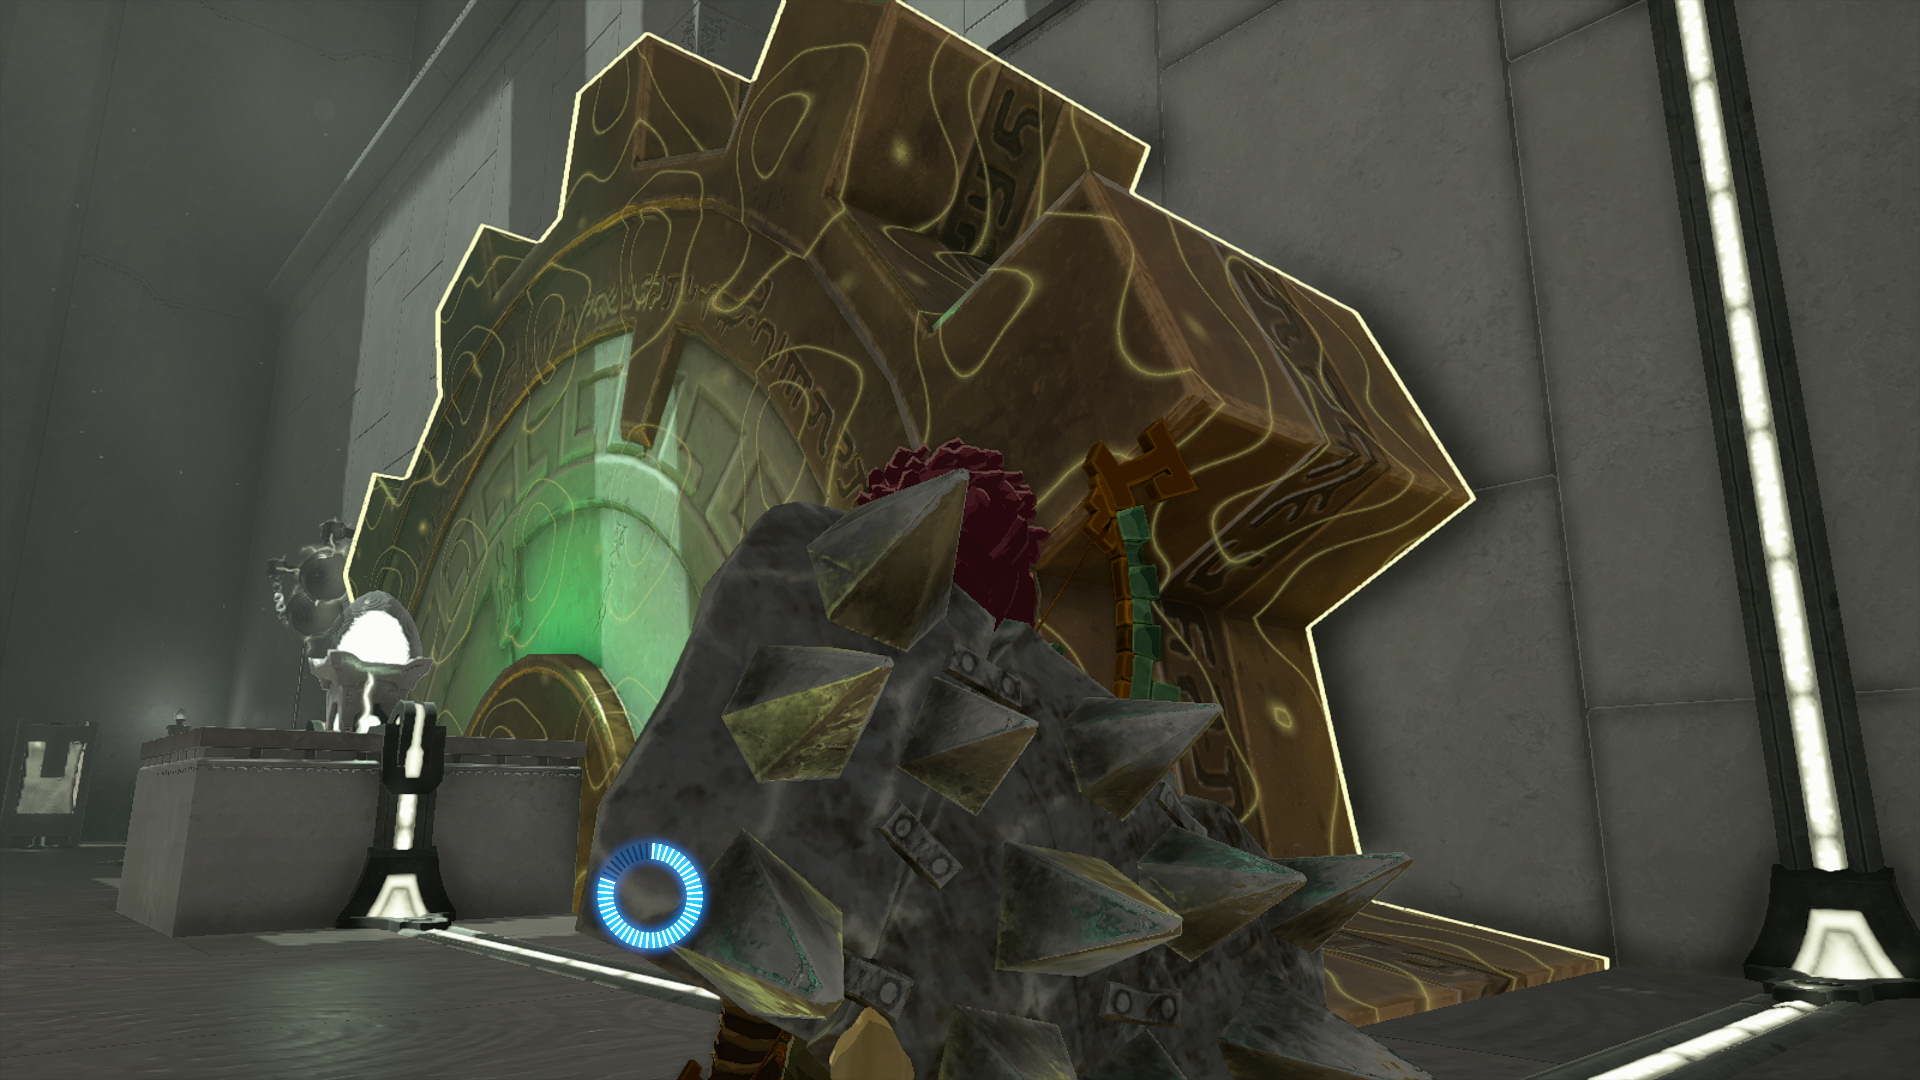
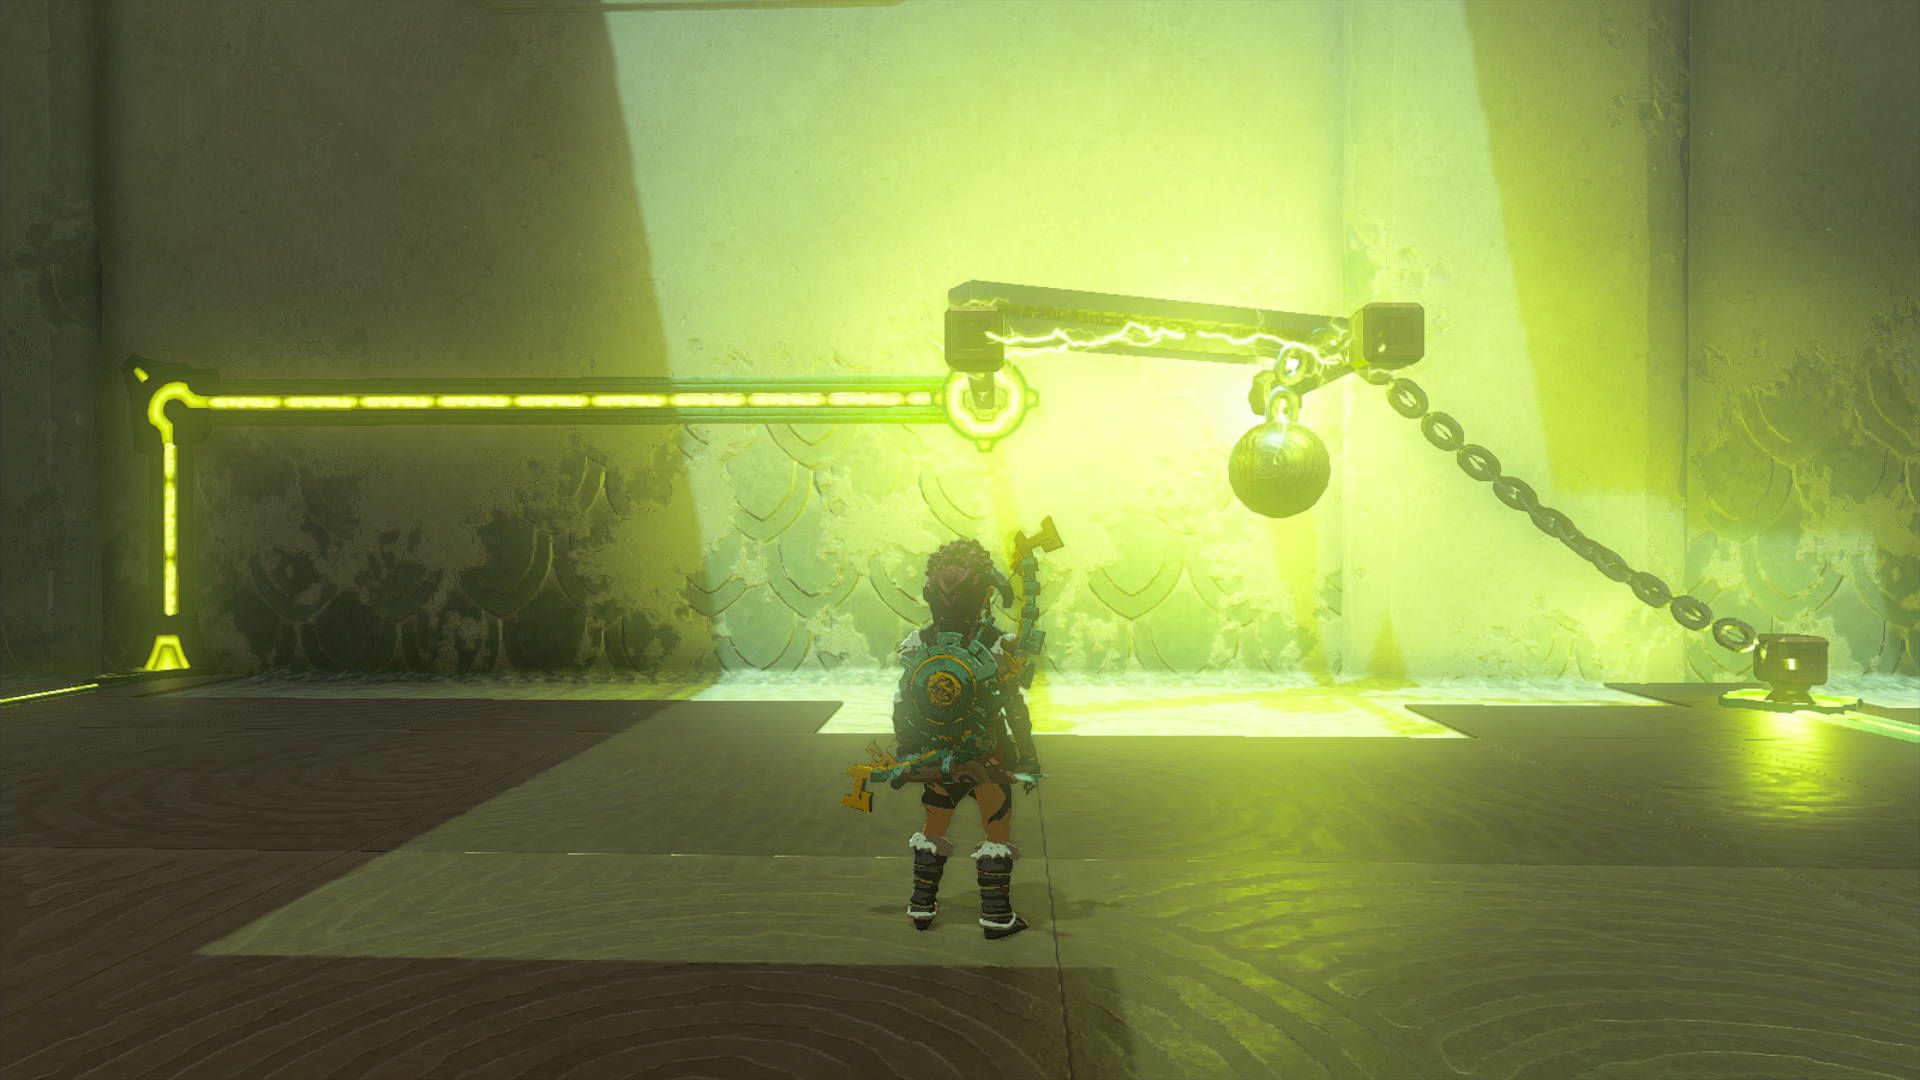
Turakamik Shrine Walkthrough (Hidden Metal)
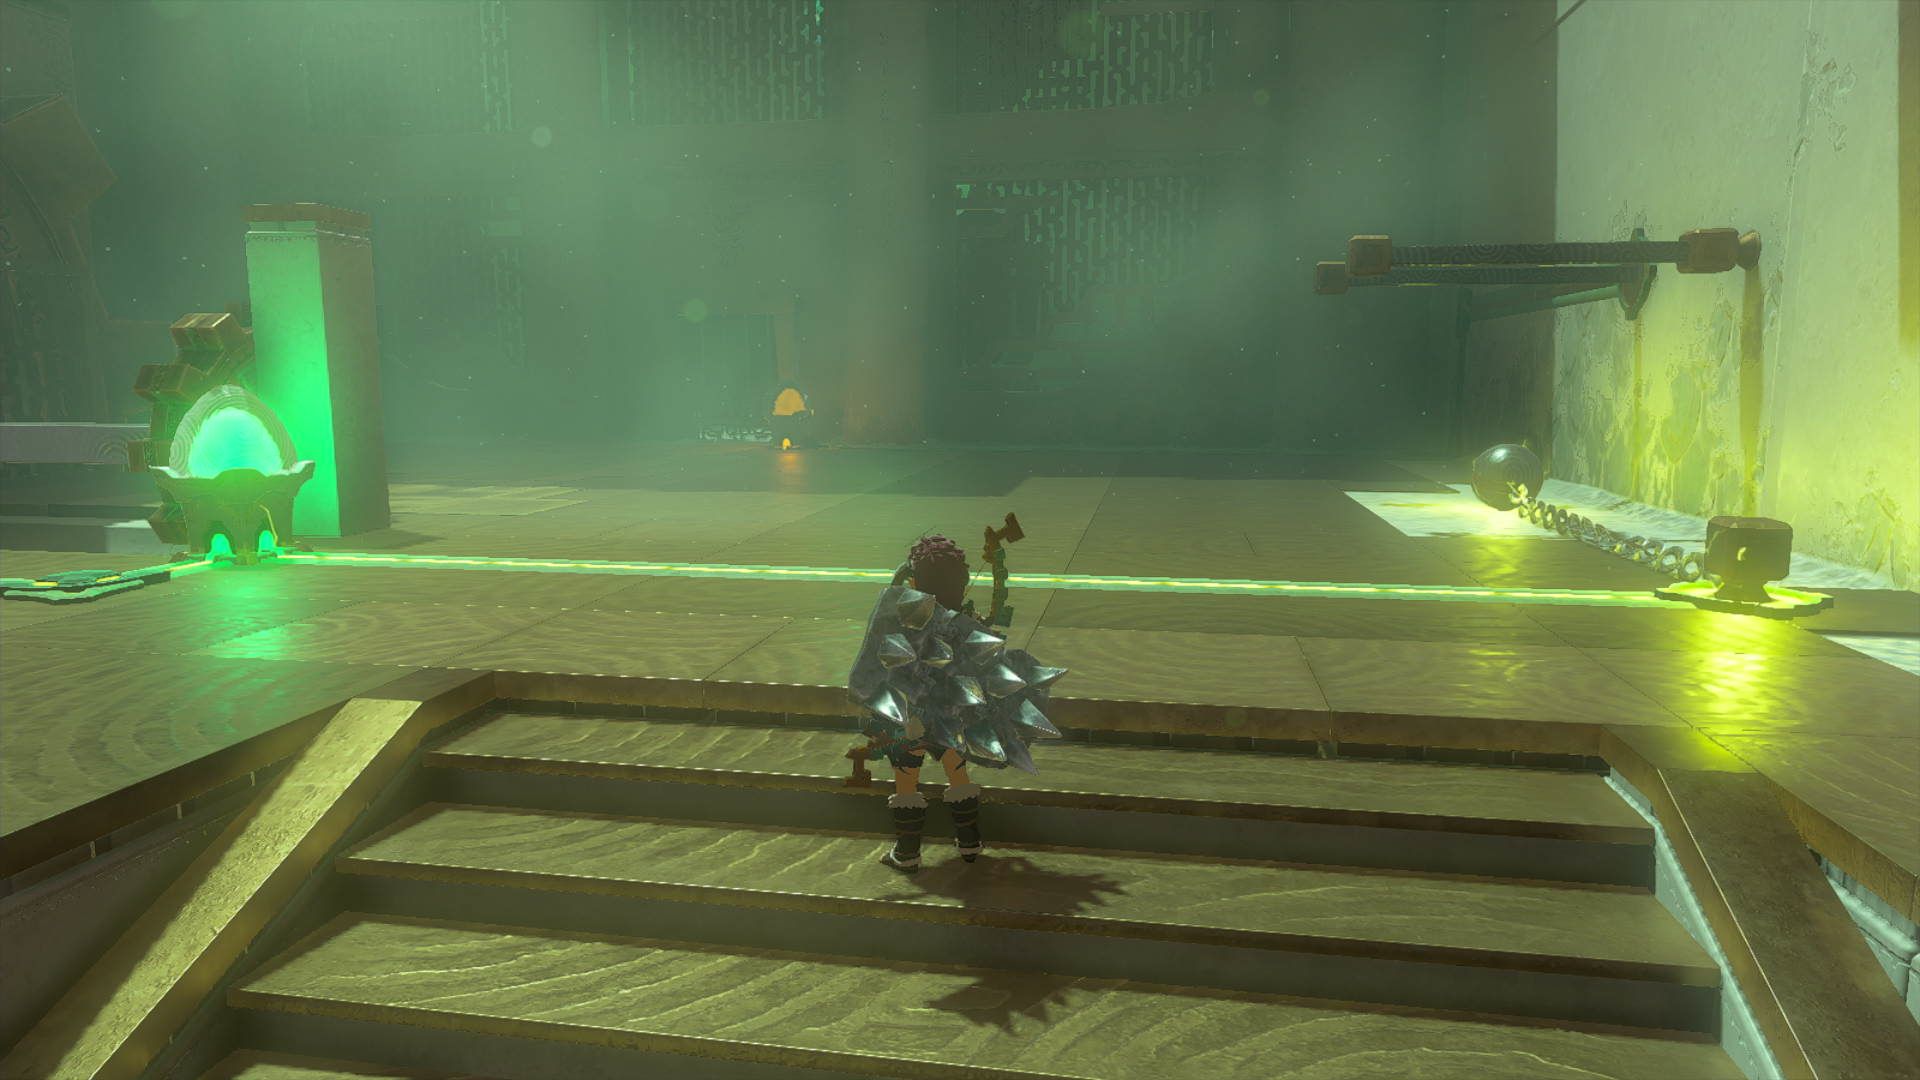
Upon entering the shrine, the player will immediately notice two metal balls hanging from chains, one with power and one without.
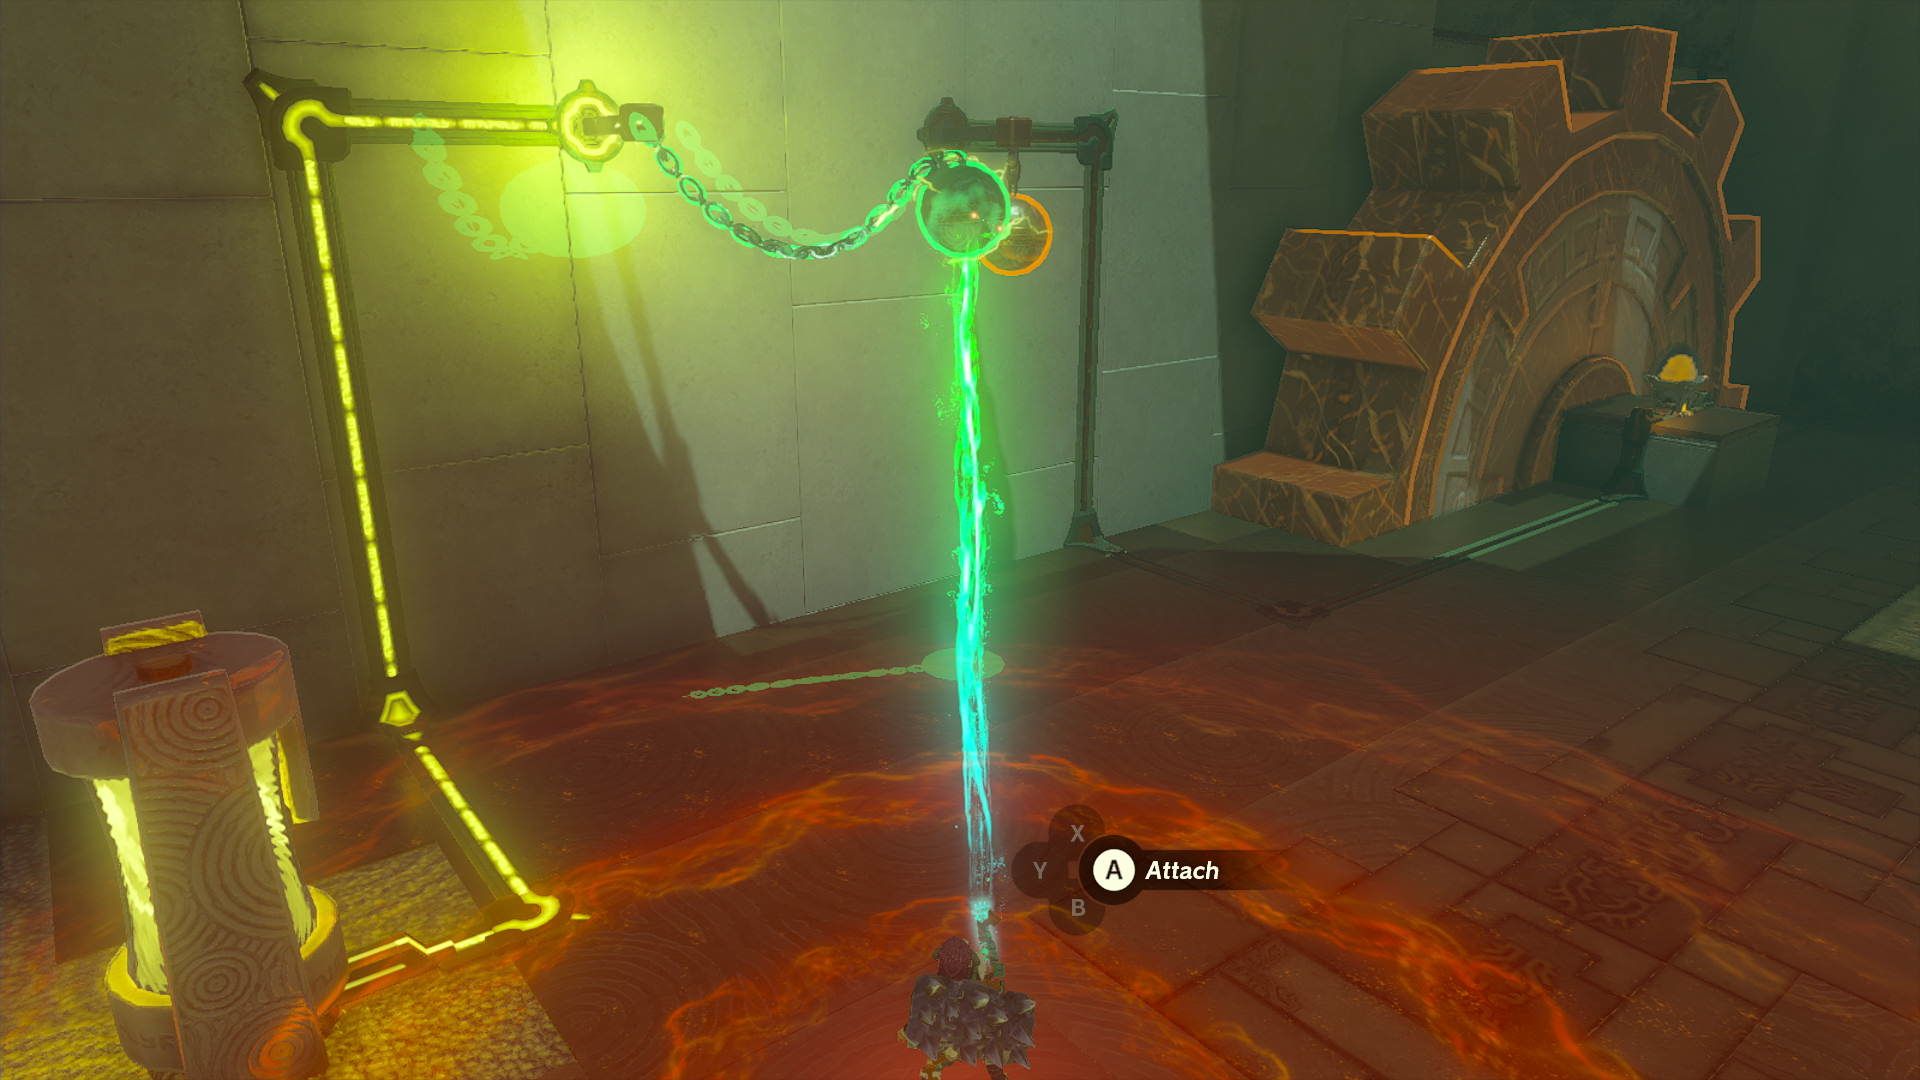
Grab the powered ball with the Ultrahand and fuse it to the other ball on the chain. This causes power to flow between both, setting the nearby large cogwheel in motion.
Use the Rewind ability to set the large cog wheel in motion, turning it counterclockwise. As it gains momentum, hop onto one of its teeth and hitch a ride to the next level. Don't forget to keep an eye out for any obstacles along the way!
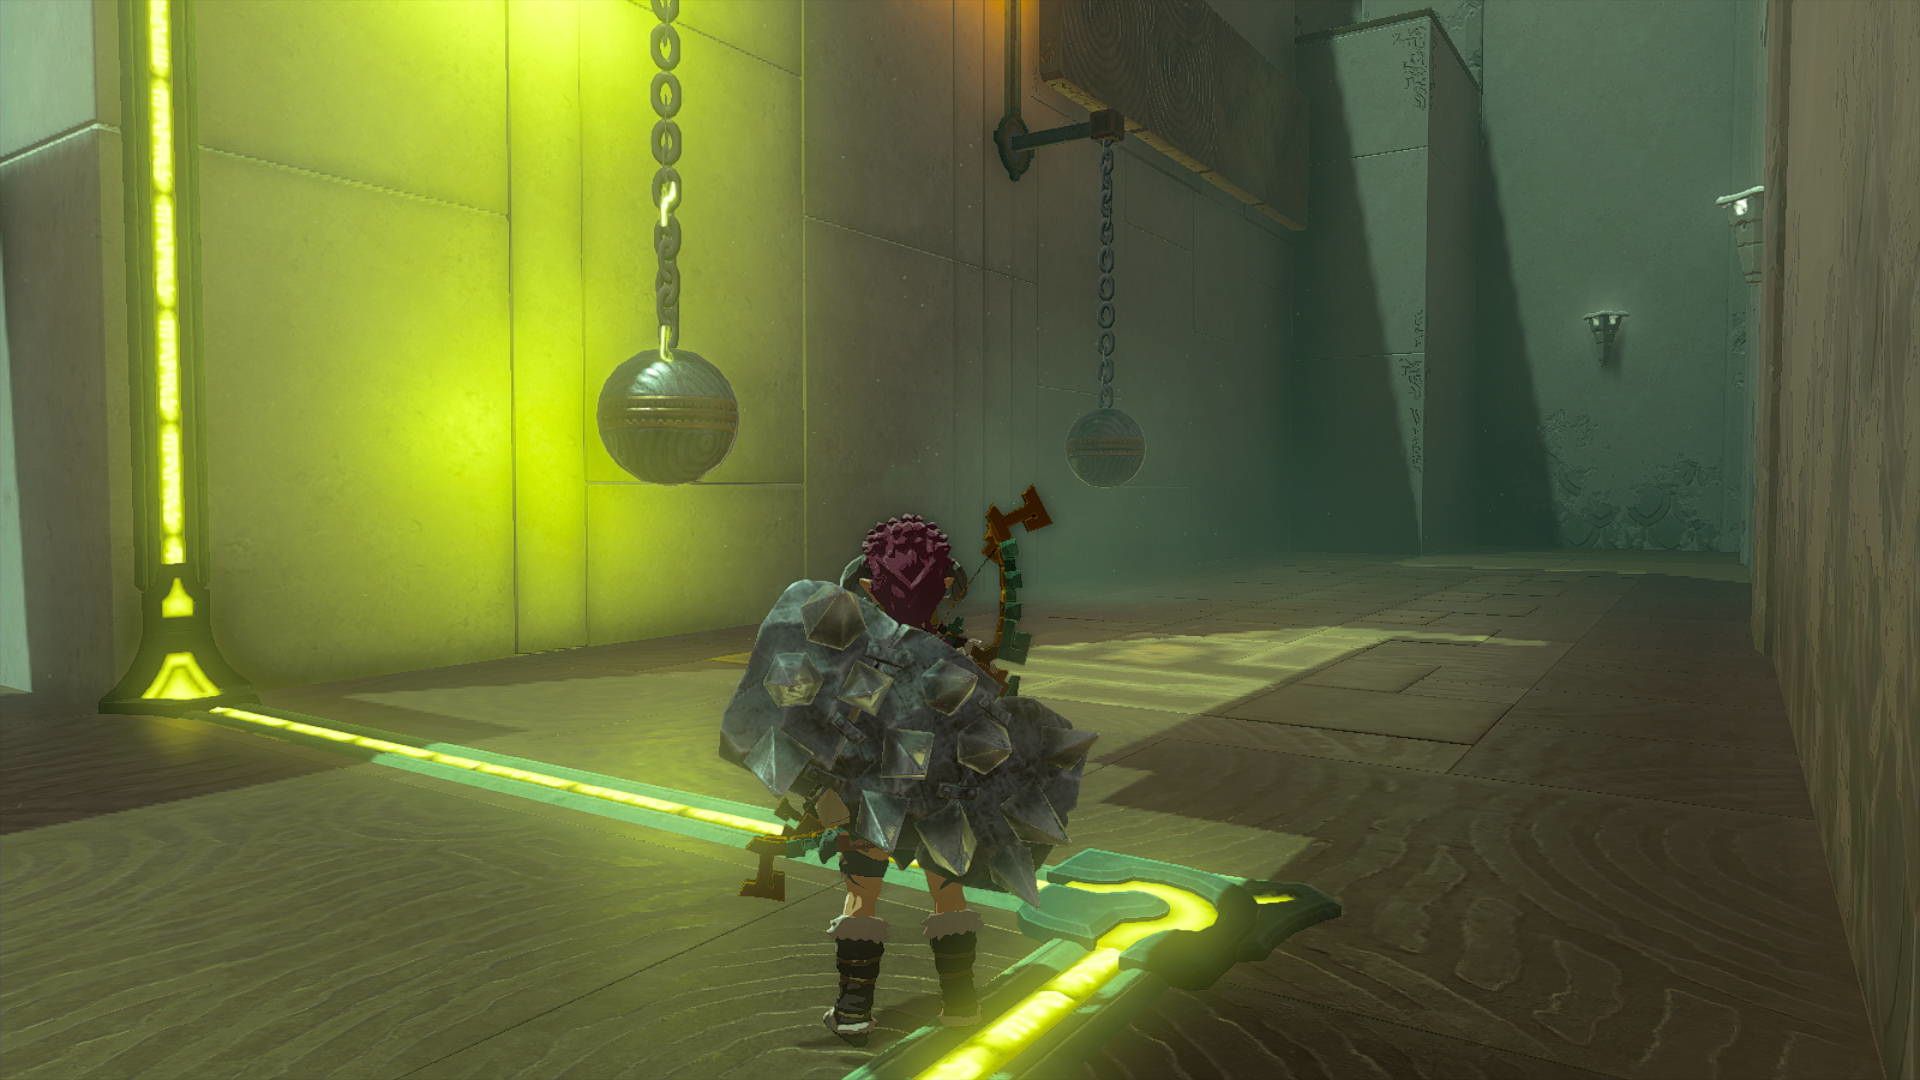
On the next level, the player will notice two more hanging balls to their left. Again, one of them lacks power, while the other is powered.
Use the Ultrahand ability to grab the closest ball and lift it high in the opposite direction. Release the ball with ultrahand, causing it to swing back and forth widely.
Using the Ultrahand, grab the second ball that is powered and pull it towards the middle point between the two balls while the first ball is swinging. Attach the powered ball to the swinging first ball when it becomes reachable.
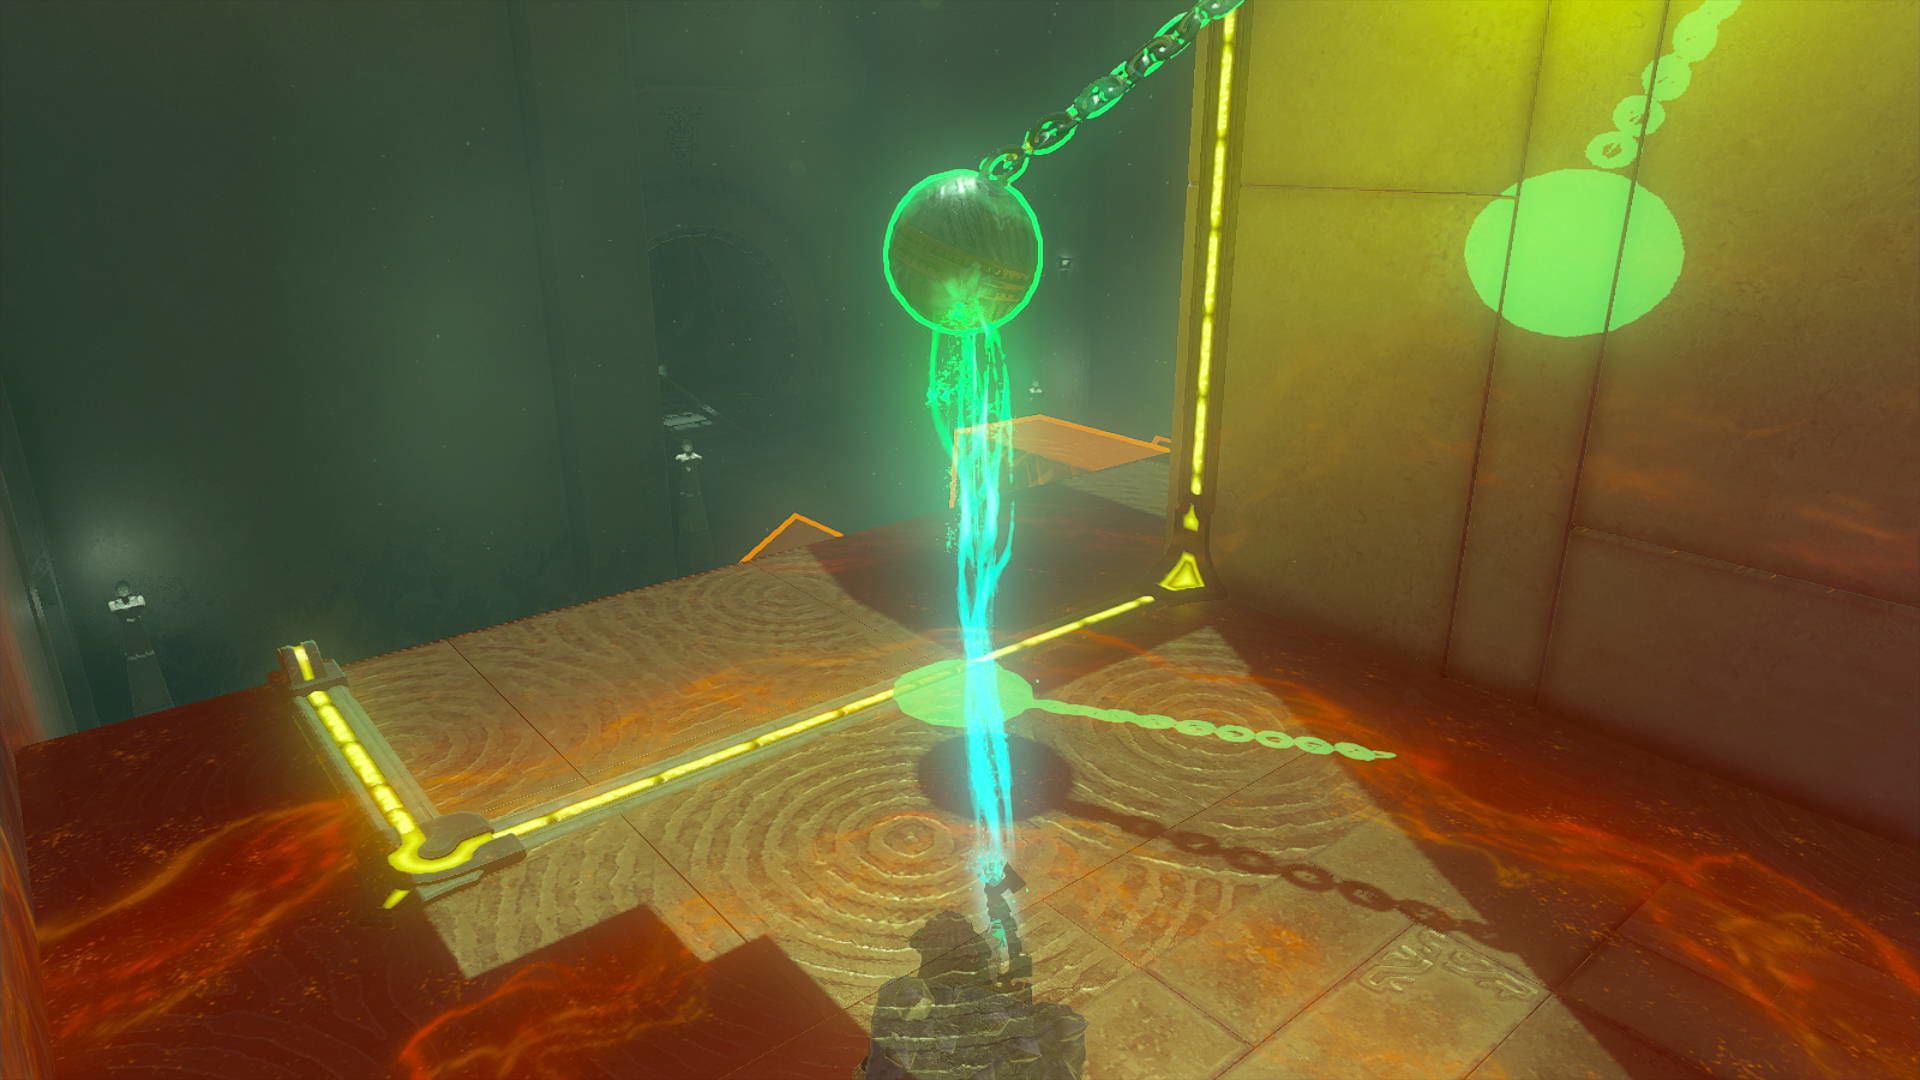
Using the electricity transfer will trigger a sequence of four platforms to move in and out of the nearby wall. Wait for the platform closest to the far wall to fully extend, then activate the Ascend ability to teleport onto it. This will transport you to the other side, where you can effortlessly jump onto the platform to the right and continue deeper into the shrine.
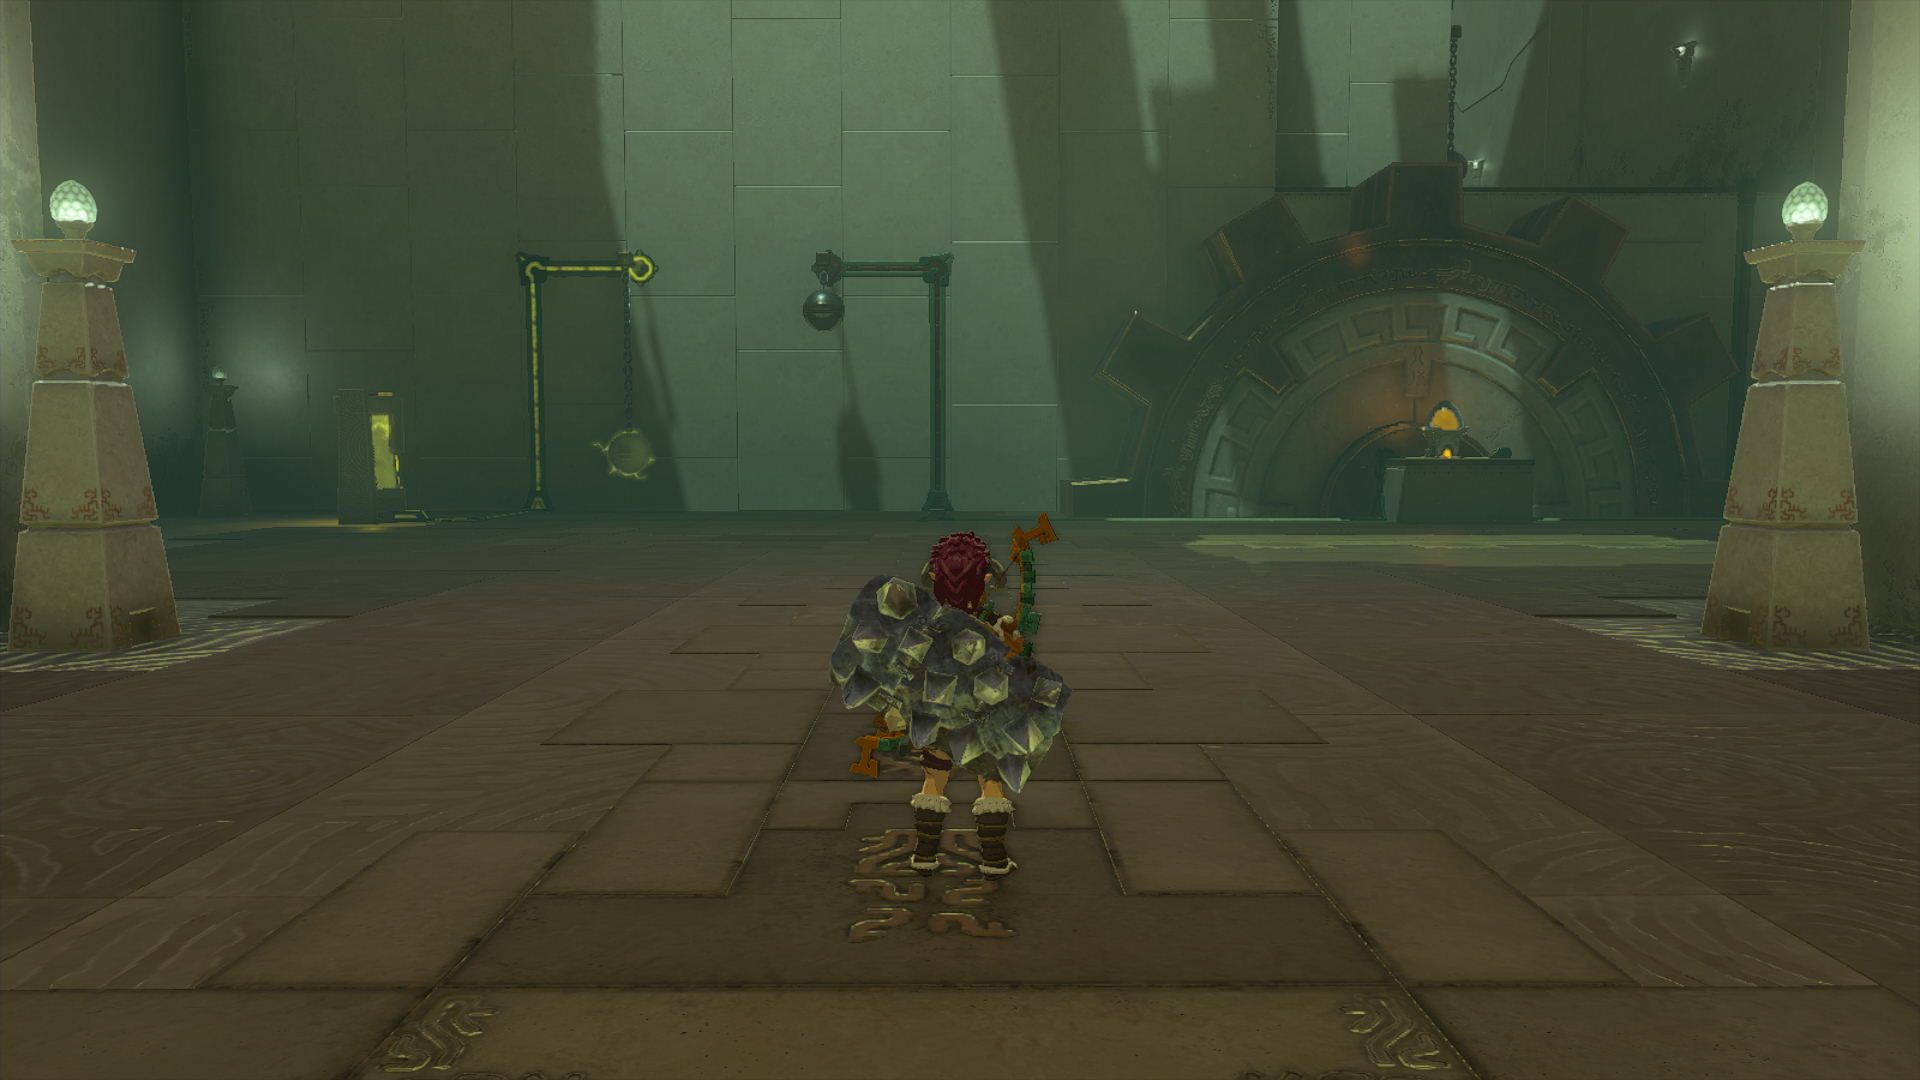
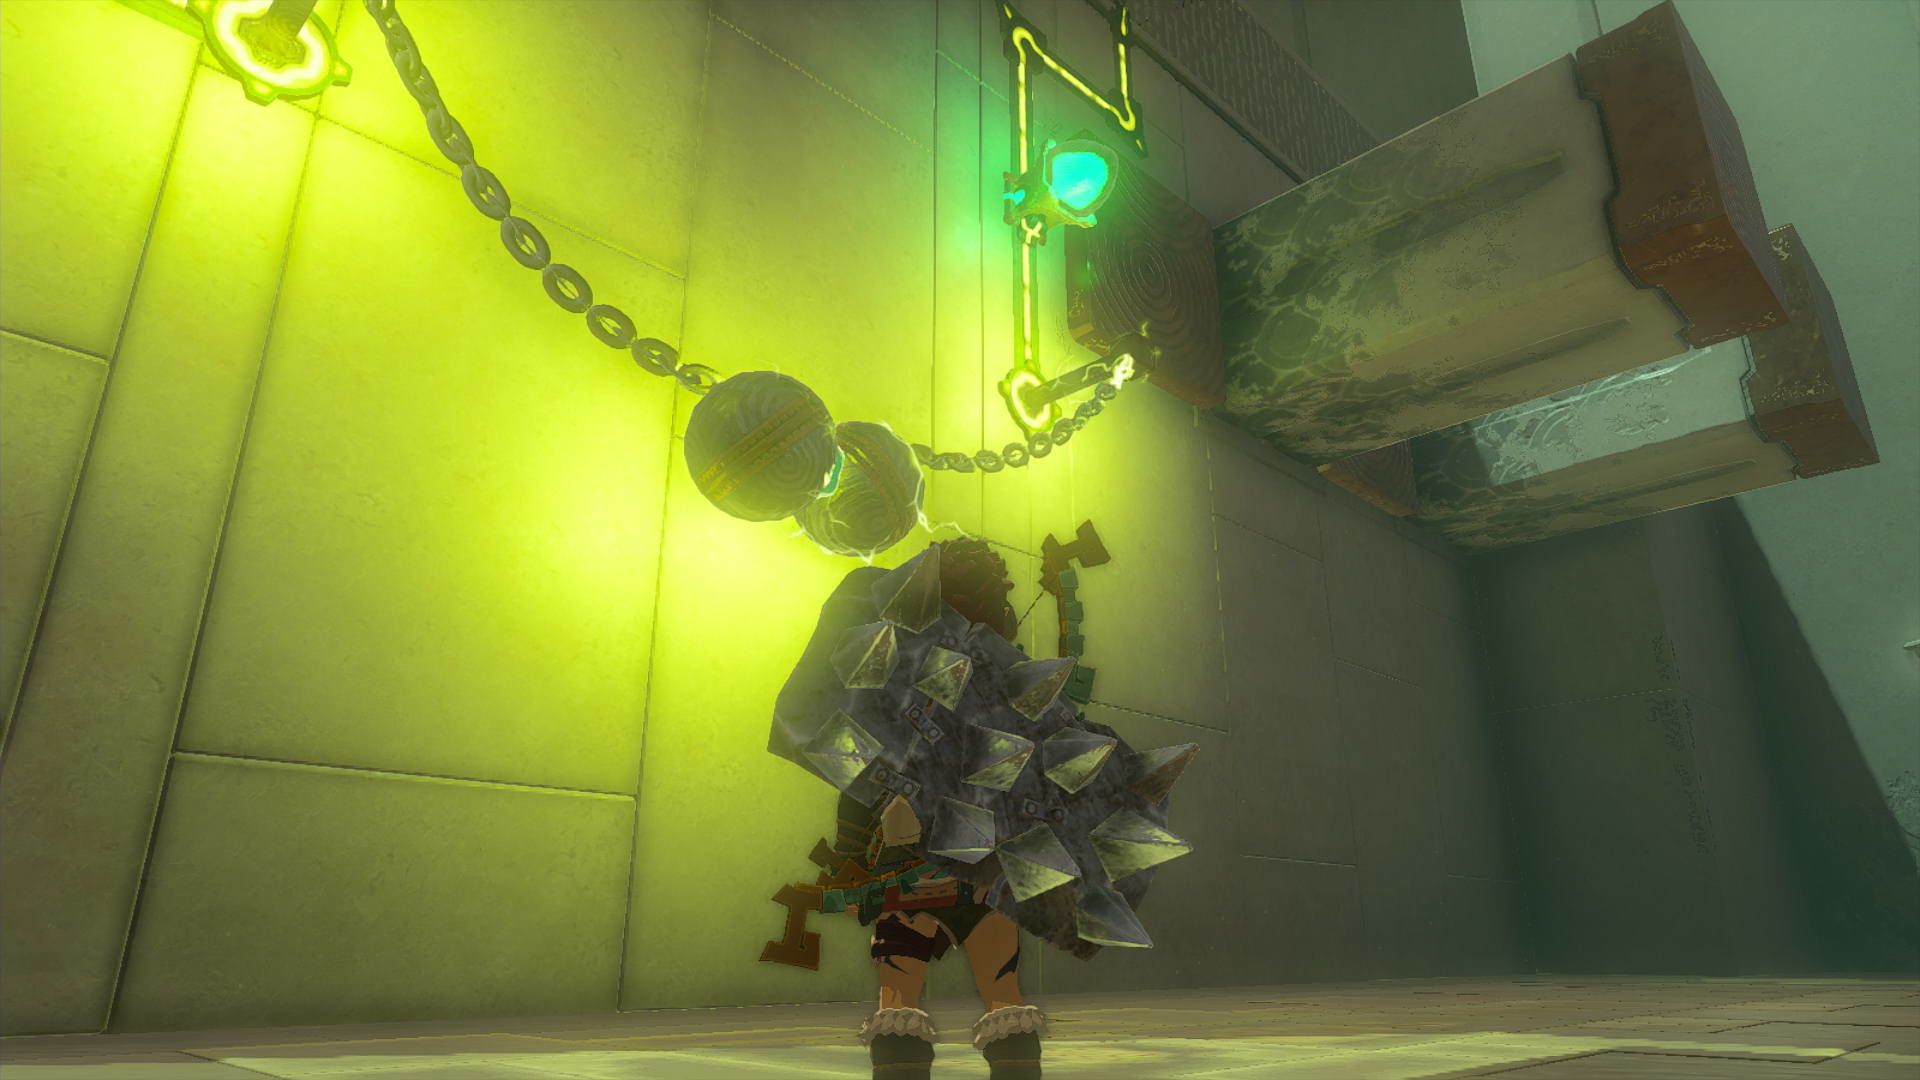
Upon entering the next room, you'll come across an array of structures, including a large cogwheel and several other contraptions. On the opposite end of the room, an electrified suspended ball can be seen, along with two poles extending from the wall, and a circuit line linking them to the door. At the base of the ledge where the chest was previously found, there's a construction consisting of two smaller cogwheels connected by a fused rod. All of these elements are necessary to solve the puzzle and unlock the door.
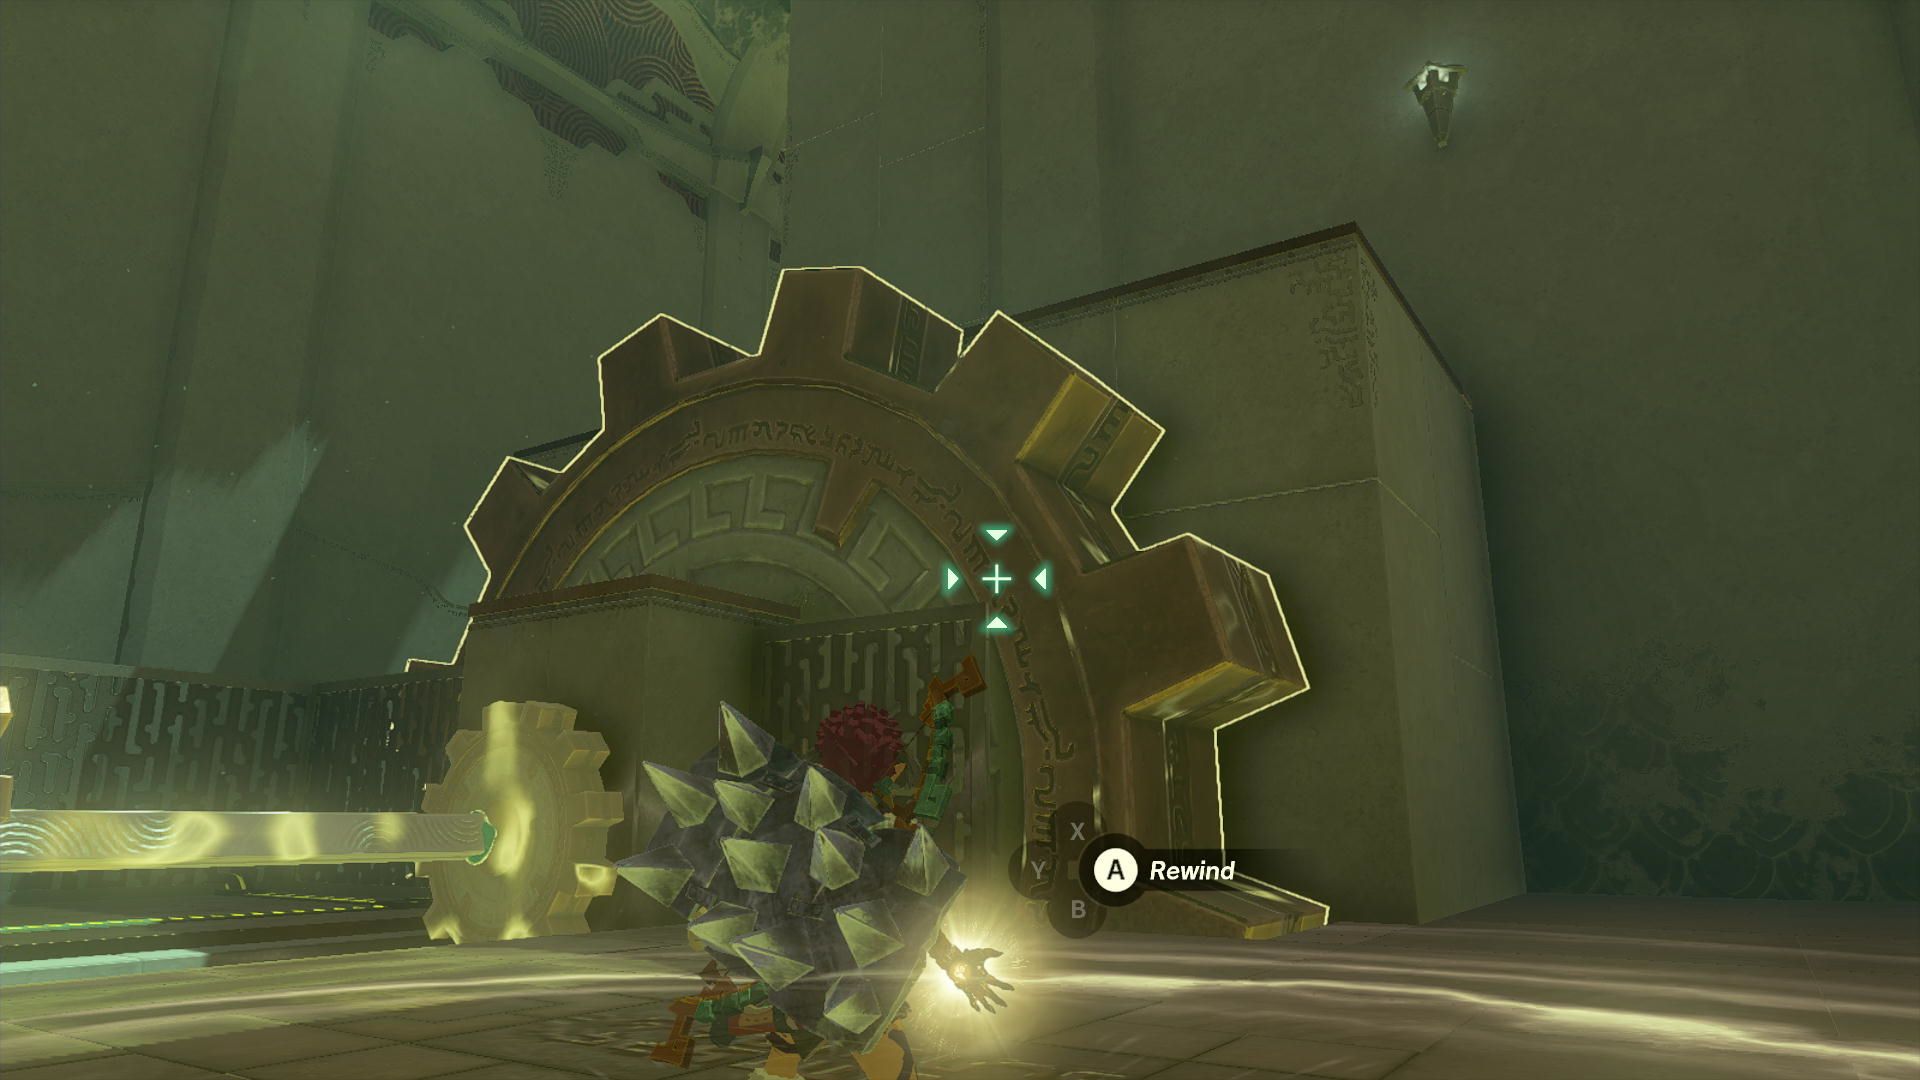
Using the same technique as earlier, make use of the Rewind ability to reverse the rotation of the large cogwheel, which will unlock the path to a nearby platform. On reaching this higher platform, players will come across a chest containing a durable Zonaite Shield. After descending to the lower level, it's time to tackle the final puzzle of Turakamik Shrine. To begin with, use Ultrahand to pick up the hanging ball and hang it on the first rod, thereby electrifying it.
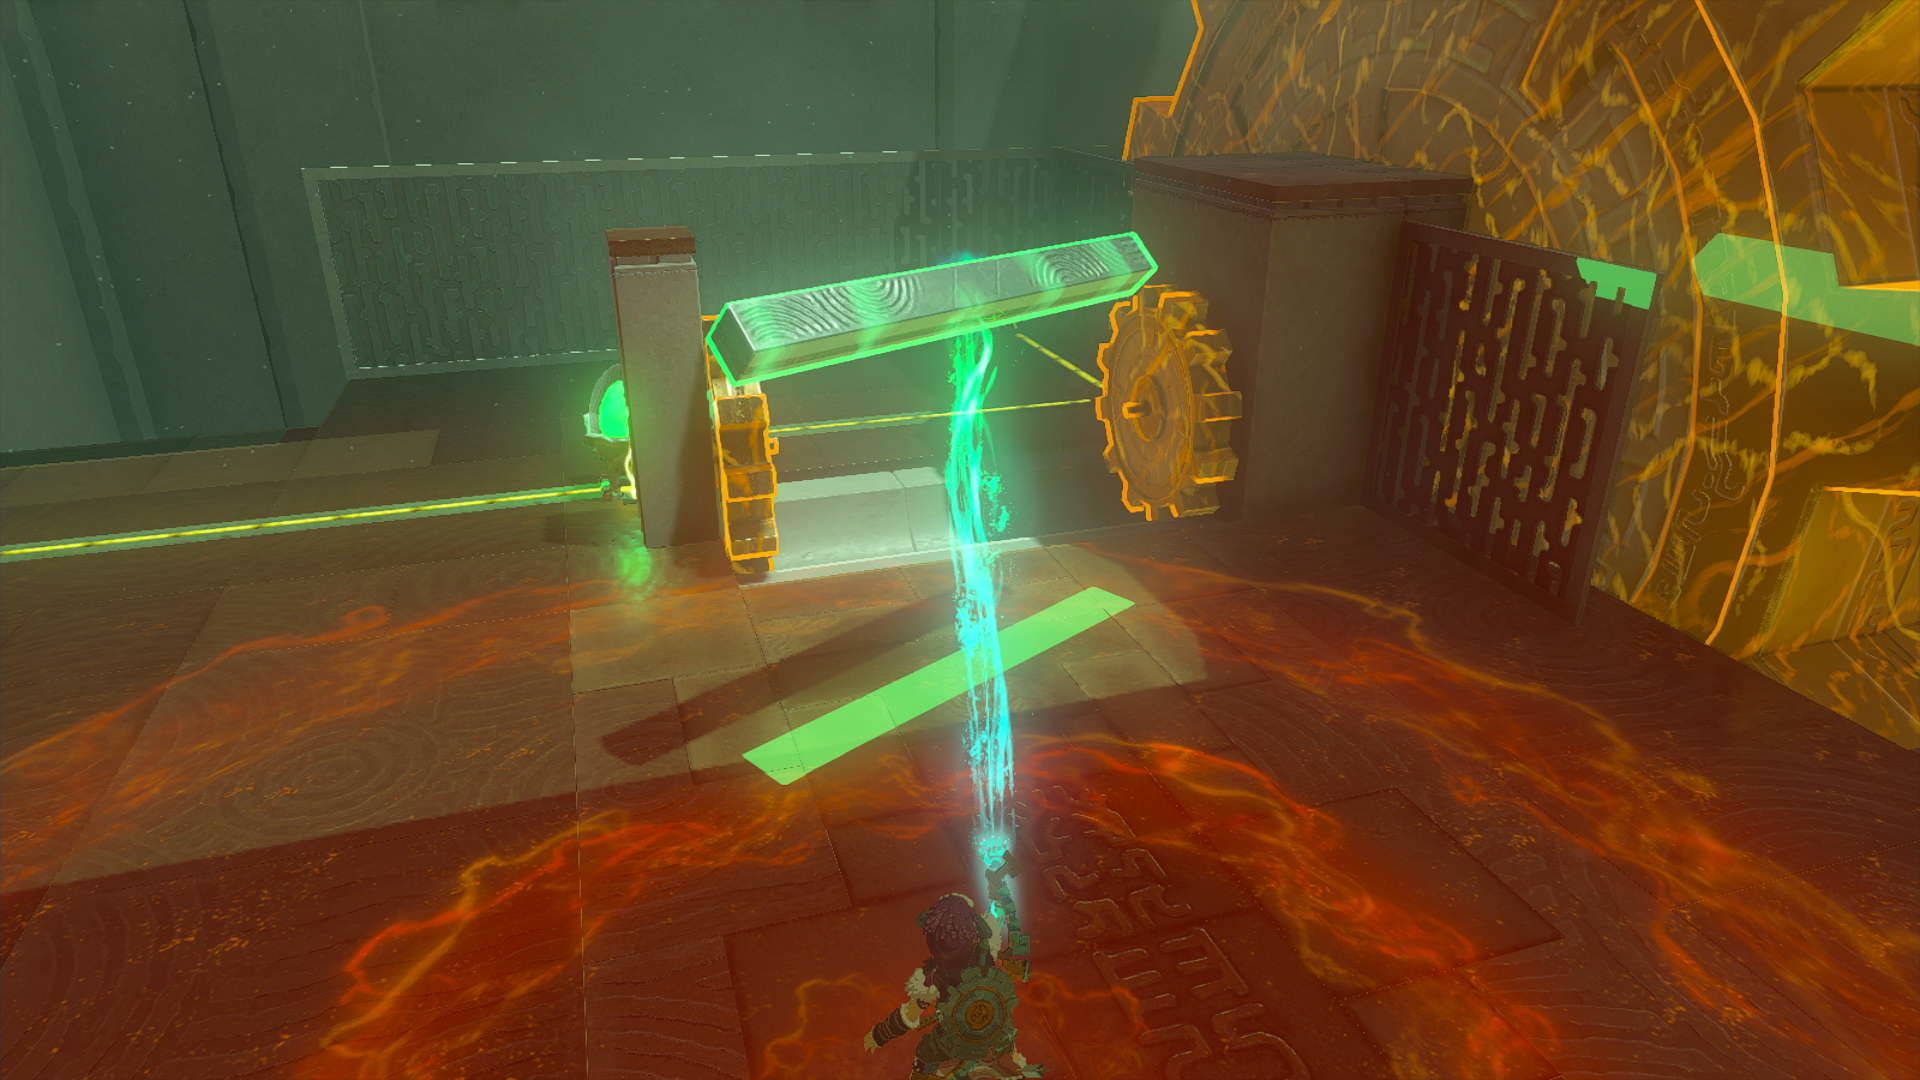
From the structure featuring the small cogwheels with a rod in between them, use Ultrahand to grab and remove the rod.
Place the rod on top of the two poles on the wall to complete the circuit and allow electricity to flow through the rods. This will unlock the door and enable you to finish Turakamik Shrine.
The Legend of Zelda: Tears of the Kingdom is available now for the Nintendo Switch.