Uncover All Hidden Treasures in LOTR: Gollum - Complete Collectibles Guide
Discover hidden treasures as you progress through The Lord of the Rings: Gollum's seventh chapter With thirteen collectibles to find, some are harder to locate than others Explore the cellar, river path, great cavern, queen's waterfall, riddlemaster's chamber, king's chambers, and king's garden to uncover unique items such as animal figurines, brooches, and pearls Will you be able to find them all?
After losing the One Ring, Gollum embarks on a journey to Mordor with hopes of reclaiming it. Unfortunately, he is captured and imprisoned by Sauron's followers. Though he manages to escape, his search is cut short when he is captured by a group of Elves and imprisoned in the Mirkwood. As players progress through The Lord of the Rings: Gollum, they are given the opportunity to explore Thranduil's Halls and discover thirteen Collectibles scattered throughout the six different areas. However, players may struggle with locating them all. In Chapter 7, players can find two Collectibles in the Cellars shortly after Gollum's release from his cell.
Upon leaving his cell, Gollum has the option to either continue straight ahead towards a locked door or turn left towards a doorway that leads deeper into the cellars. However, turning right and entering a well-lit room presents a more fruitful opportunity. On the far side of the room, behind a wooden fence next to the door, Gollum can retrieve the Animal Figurine Collectible resting on a table.
To find the Rope Collectible, Gollum must venture into the kitchen located on the floor above. To get there, he should proceed straight across the room outside his cell, follow the passageway leading upwards, and then turn left at the end. The Rope Collectible is located just behind the table in the right-hand corner of the kitchen.
- Rope
Gollum's escape attempt requires him to sneak past the large Elf encampment and reach the river. However, this is only the beginning of his challenges. To continue his escape, he must navigate through the rocks sticking out of the water. This area can be quite tricky, and players may easily get lost or miss out on the Collectibles hidden there.
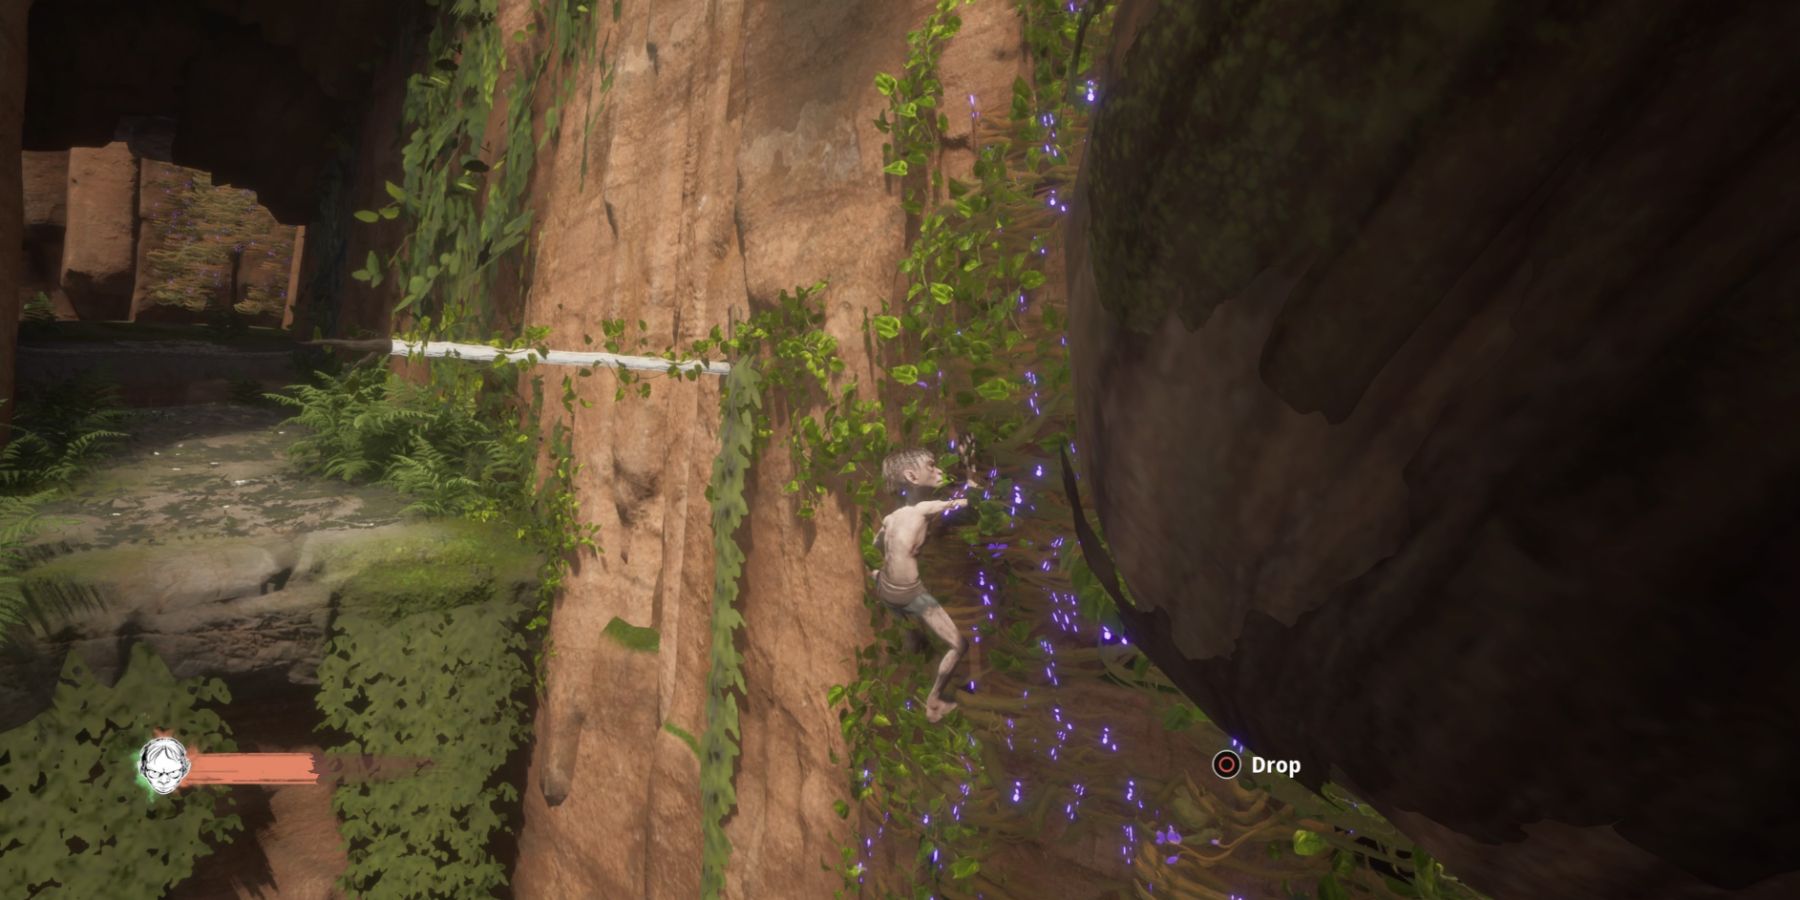
As Gollum travels along the river, he will come across a pole on the left that he can swing to and a collection of purple vines on the right that he can leap to. These options provide him with different paths to take, and players must choose wisely to ensure his successful escape.
To obtain the Fish Bones Collectible, players can traverse the left wall, leap from pole to pole, and climb the wall ahead. Gollum must continue climbing and swinging on poles until reaching the top. From there, he must jump to the pole above and swing to a somewhat concealed area where the Fish Bones are located.
- Shells
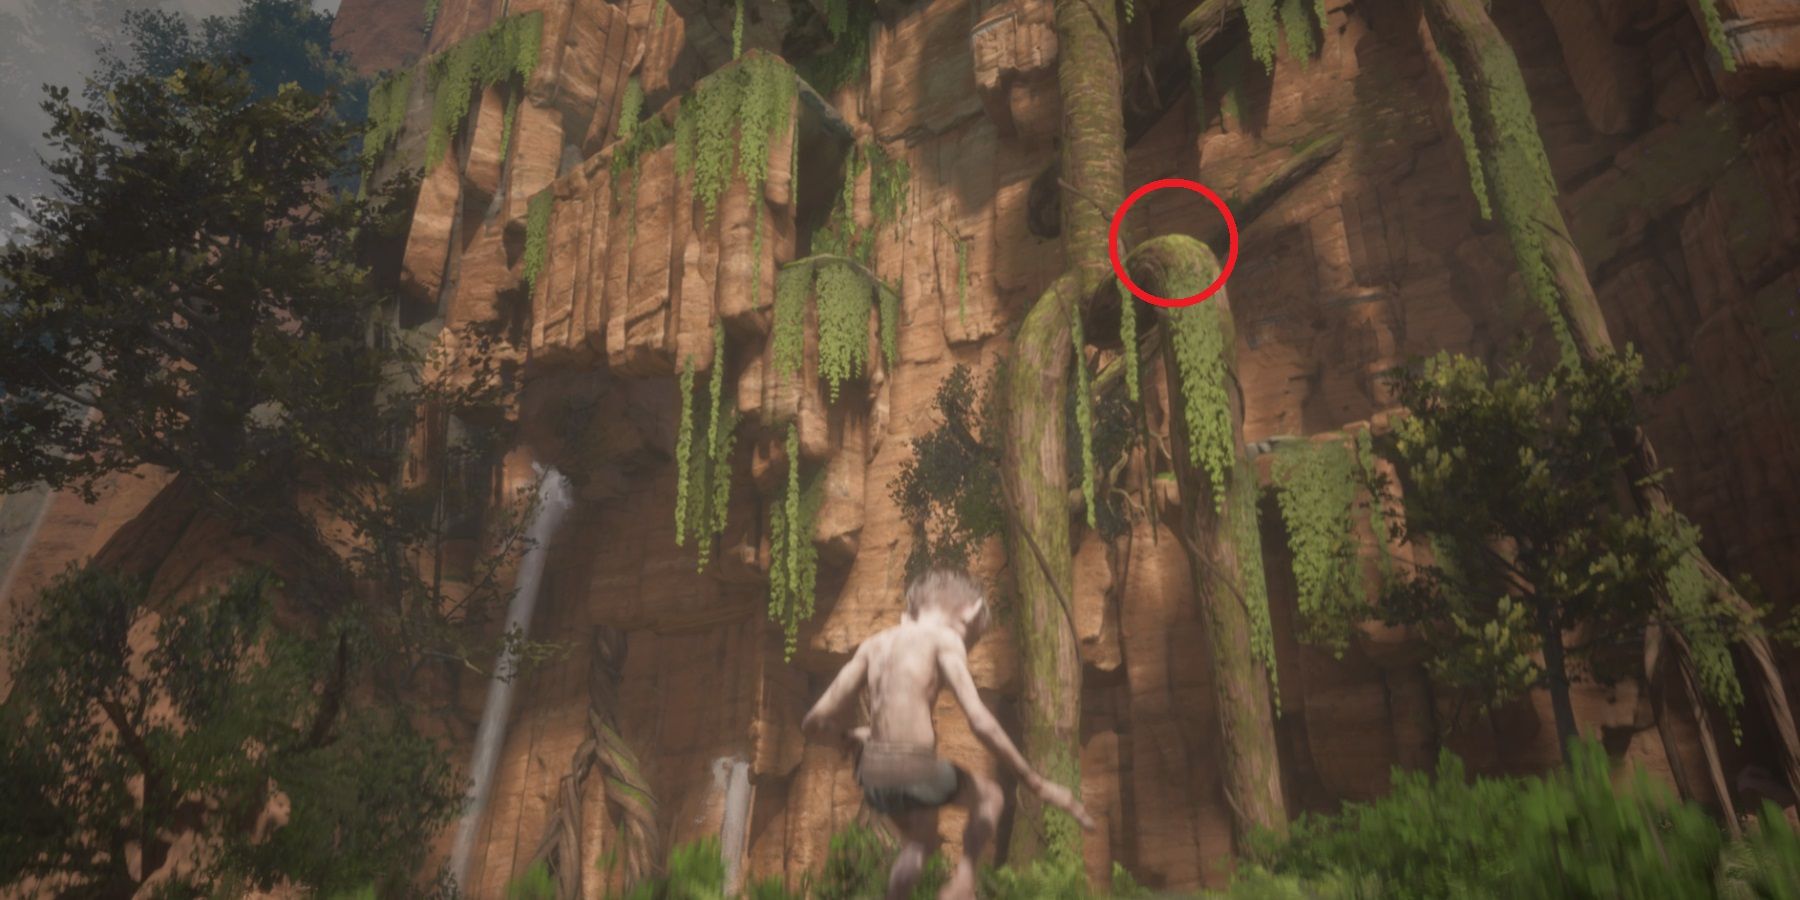
Once Gollum emerges from the River Path, he will find a brightly lit area with a mountain that he must climb. The Shells Collectible can be found on a large tree along the path, but Gollum will need to ascend quite high before he can reach it.
Gollum can ascend to the top by using the purple vines on the wall and then swing into a small cave with a pole. On the other side of the cave, he can use more purple vines to climb onto the top of the cave itself.
Scaling the next set of violet vines, Gollum can ascend towards the right to reach the previously passed tree. Navigating to the tree's base, he will stumble upon the coveted Shells Collectible.
After scaling past the rapid river, Gollum must climb the towering mountain on his right to advance the story. Upon reaching the summit, two Elves will surface and proceed to escort him back to his point of origin, prompting him to devise a new escape strategy. Commencing this segment, players must tail the Elves past a vast body of water, where they can discover the singular collectible in this vicinity.
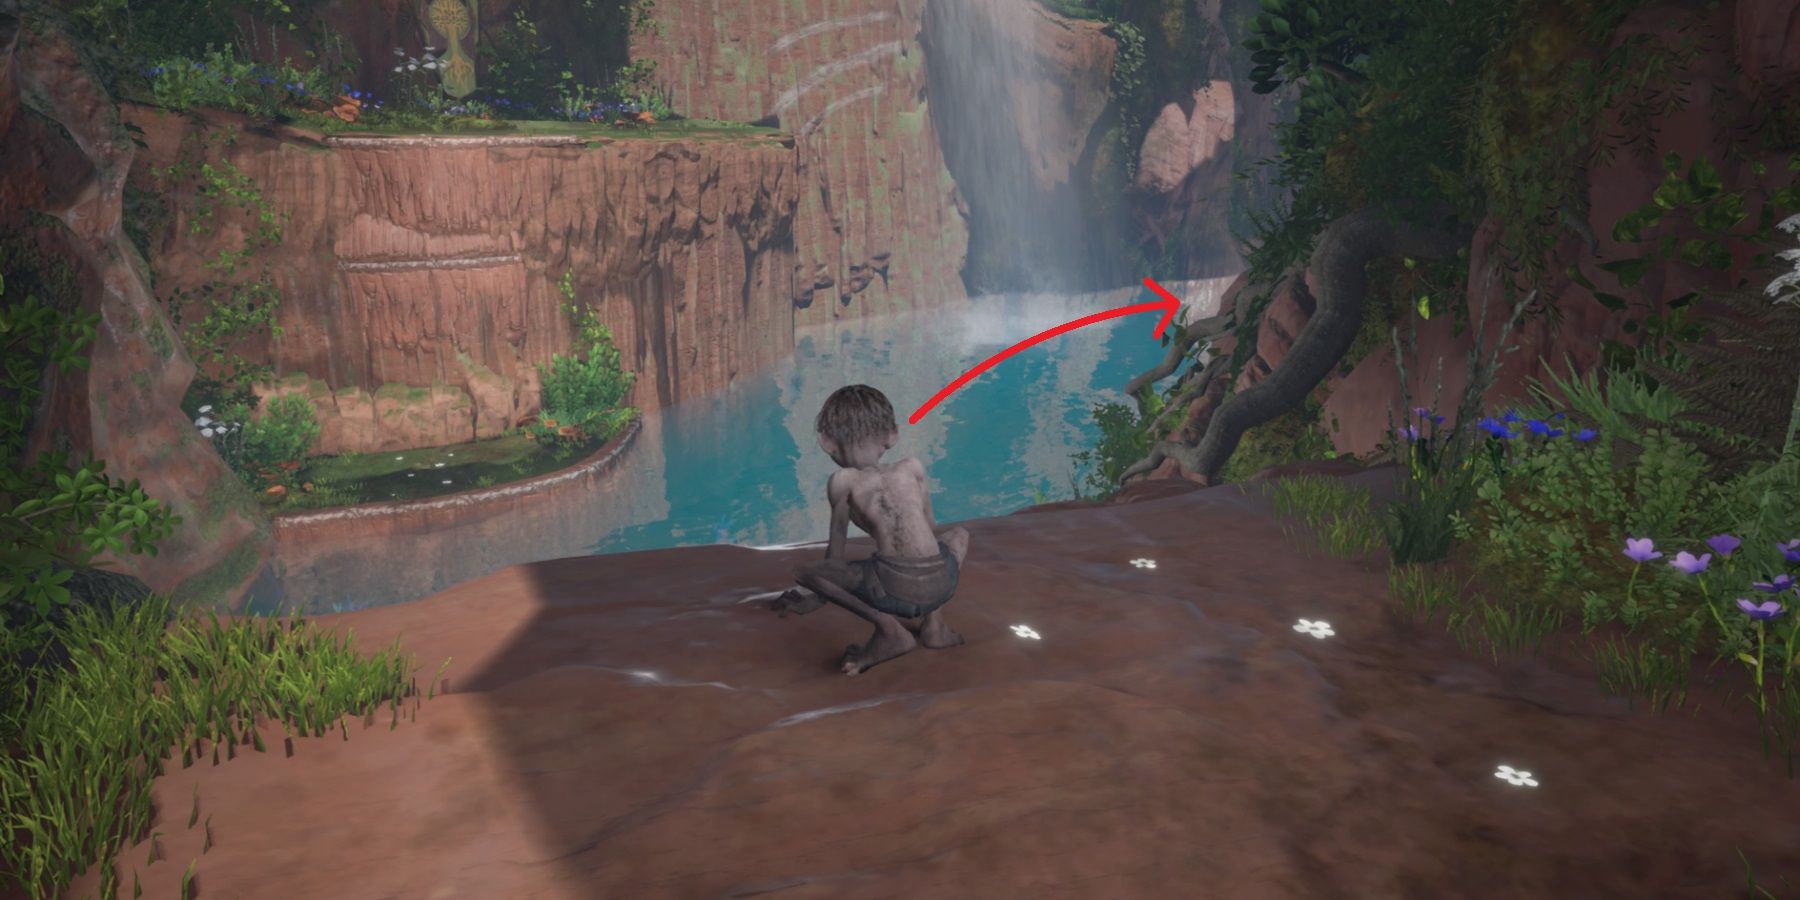
Gollum must take the plunge and swim across to the other side of the water, reaching the designated diving point as indicated in the image above. Once submerged, he can navigate through a small door at the bottom, leading him to a cave where the Brooch awaits on the ground. The Queen's Waterfalls boast two Collectibles, but obtaining the second requires a prior visit to the Riddlemaster's Chambers, followed by ringing the bell in the second tower to unlock the path ahead.
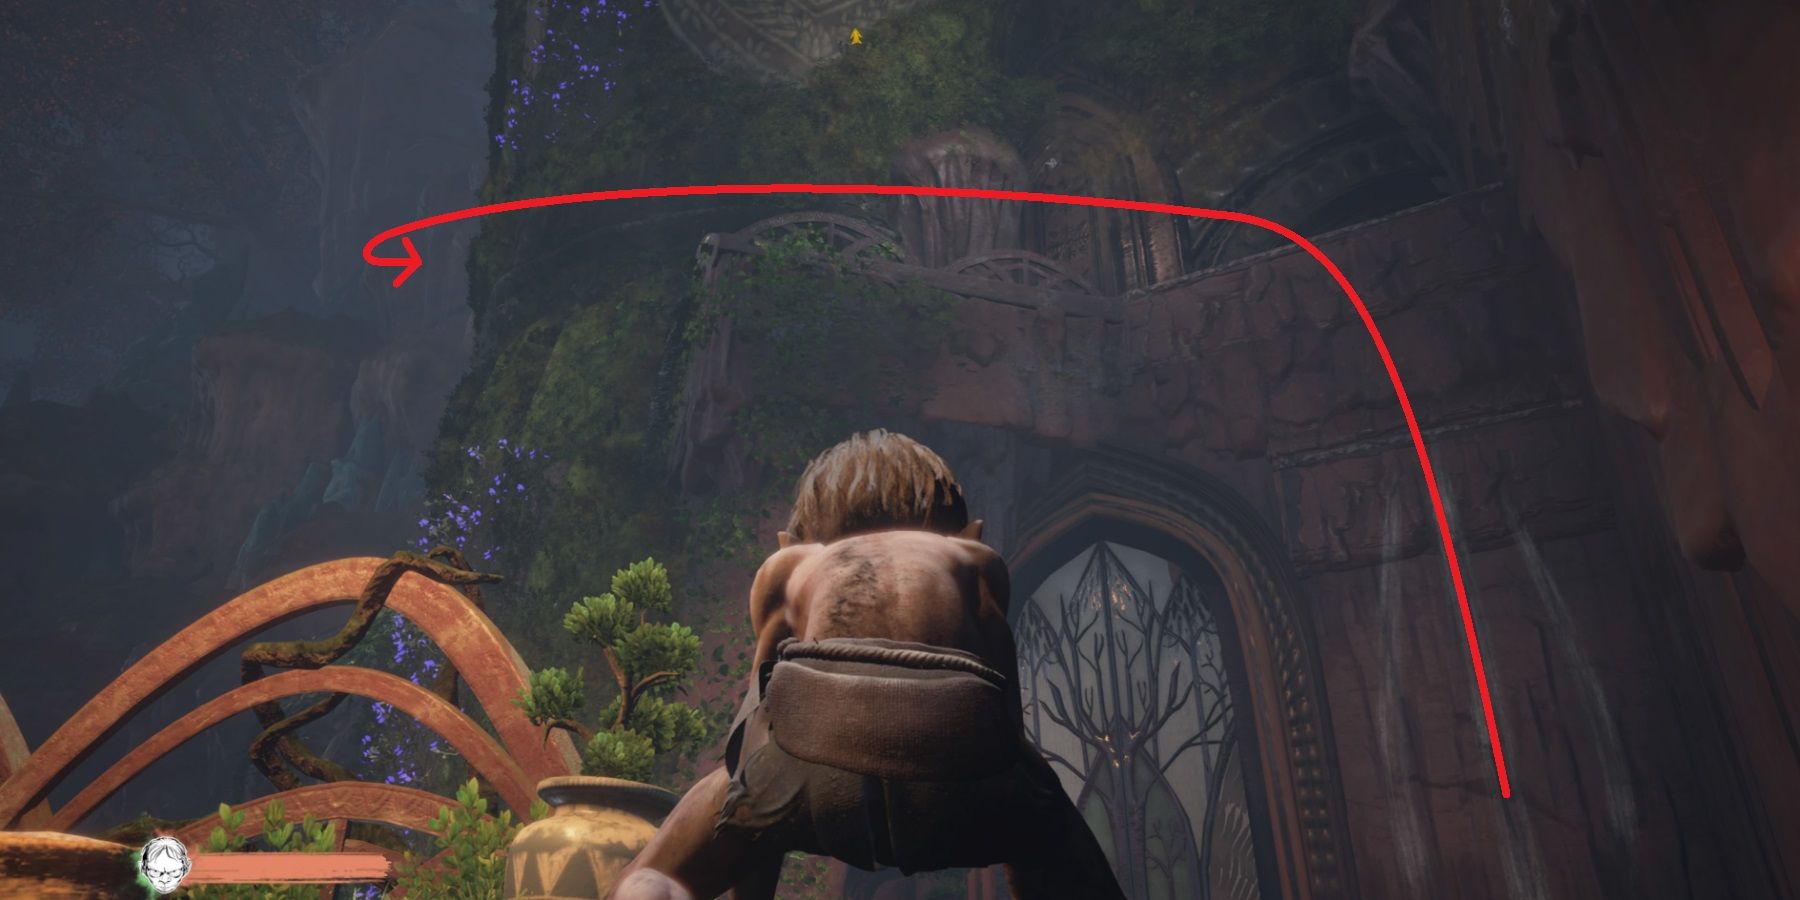
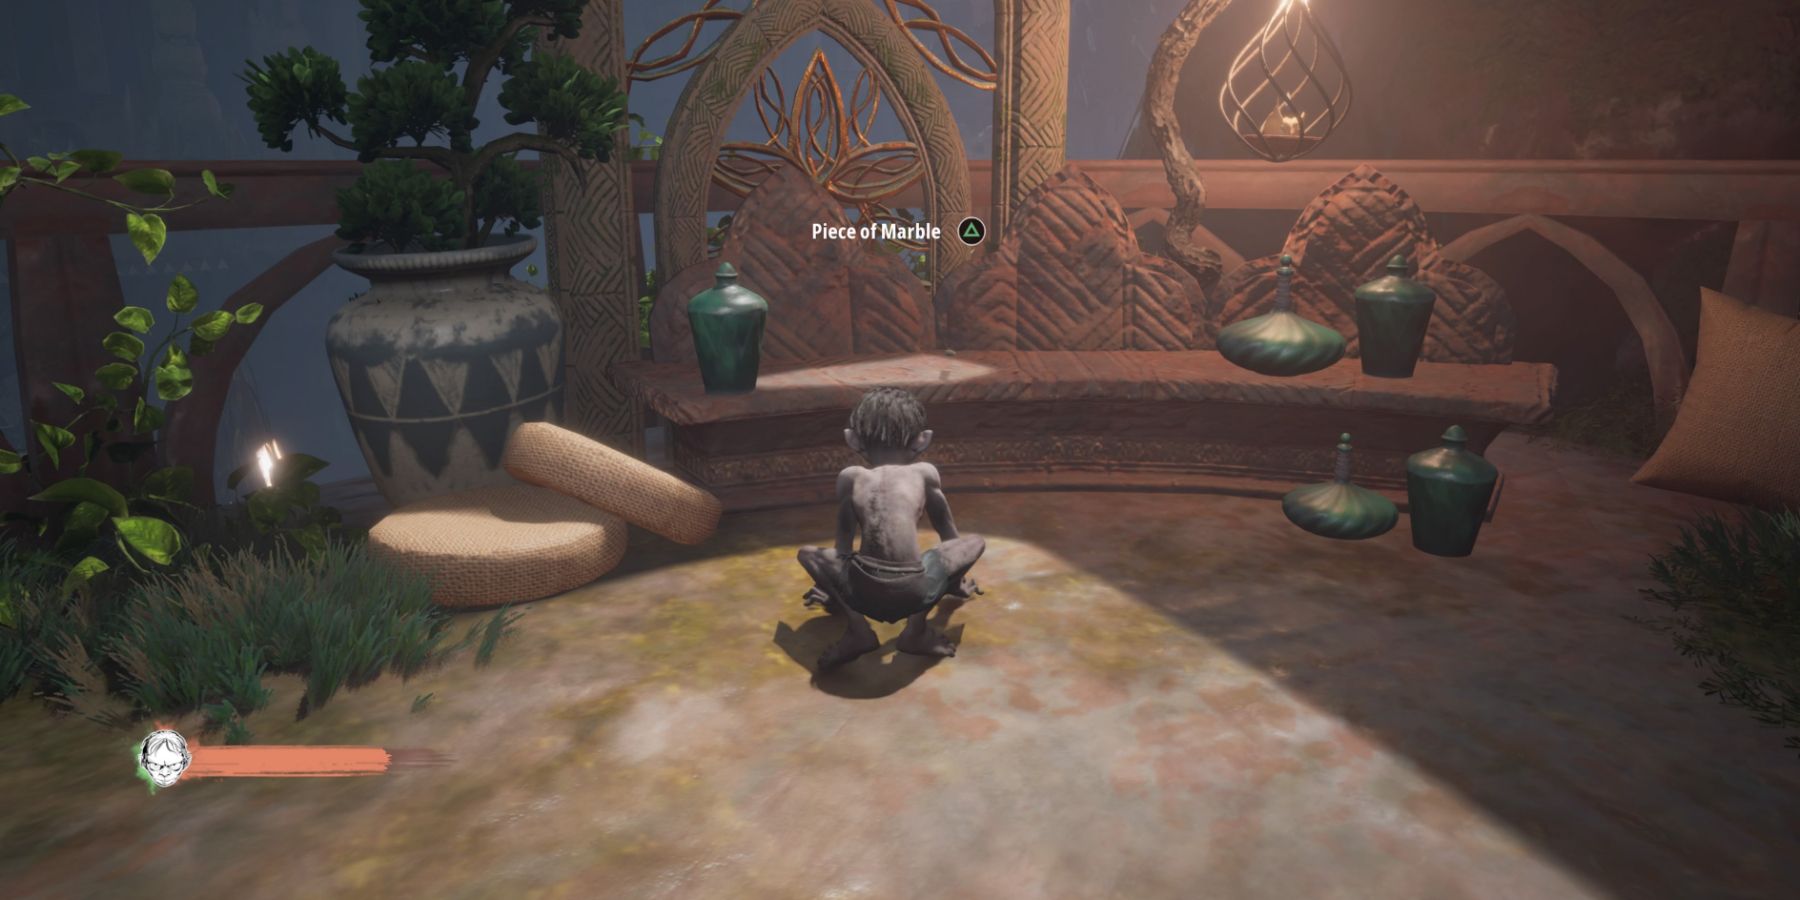
Upon beginning the climb up the first tower and ringing the bell, keep an eye out for the Piece of Marble. Take a left and run up the wall in the corner of the area, using the ledge above to circle around to the left-hand side of the cylindrical tower. Upon dropping down to the platform below, the Piece of Marble can be found resting on the bench to the left.
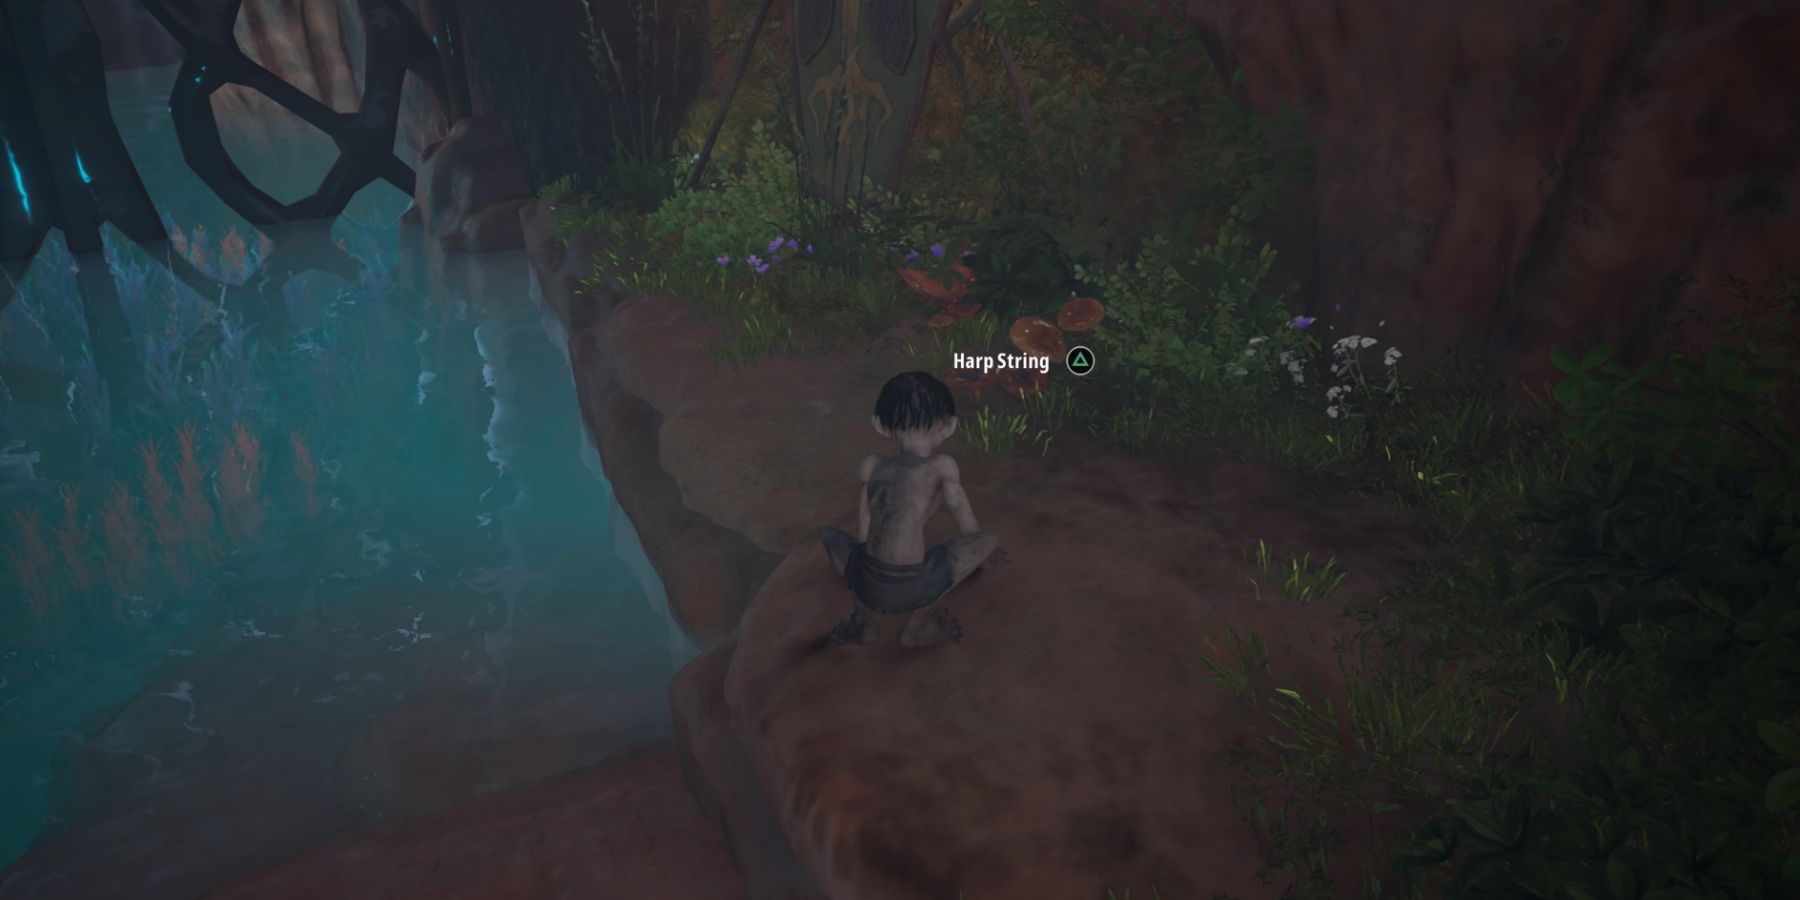
To find the Harp String Collectible, Gollum must ring the bell in the second tower and climb to the top of the large water-filled structure in the center of the area. From there, turn left and proceed into the next area. Keep your eyes peeled for the Harp String Collectible as you explore.
- Harp String
To progress, Gollum must eventually jump over a large pool of water. However, those seeking the Harp String should dive into the water and swim to the right. Gollum can climb onto the platform next to the partially submerged door to find the Harp String. To leave the Queen's Waterfalls, Gollum must first locate the Riddlemaster's shell inside the Riddlemaster's Chambers by opening the door. Two additional Collectibles can be found here.
All Riddlemaster's Chamber Collectibles In The Lord Of The Rings: Gollum
- Splinter
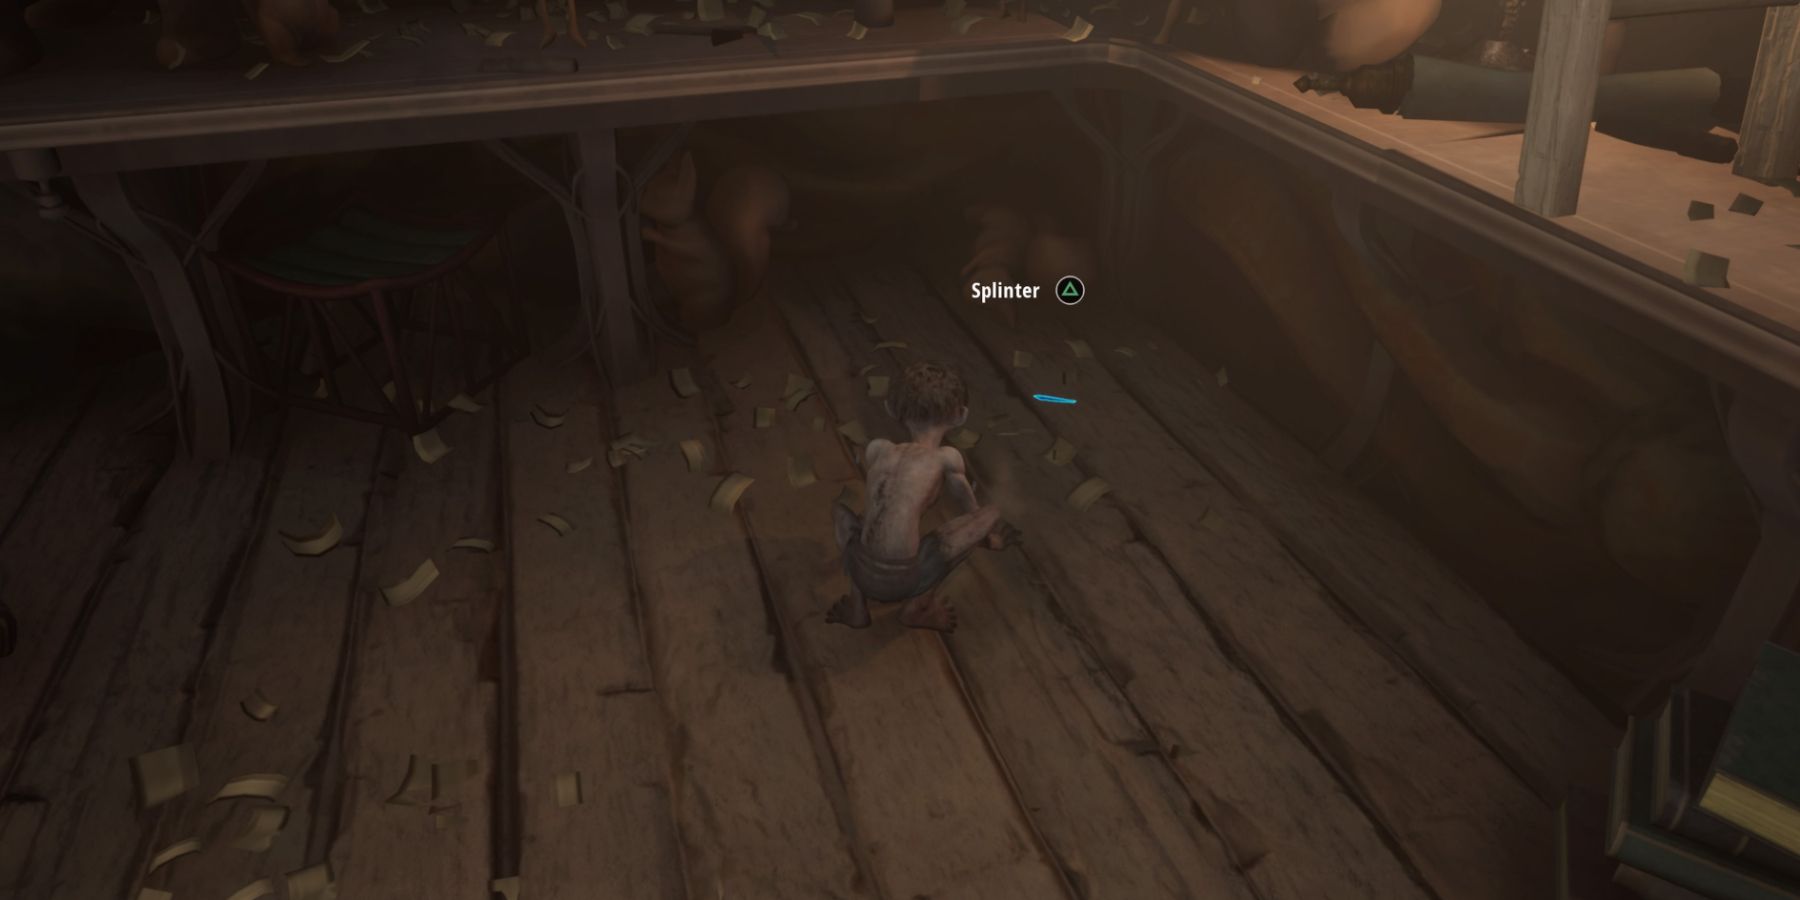
Upon entering the Riddlemaster's chambers, Gollum must proceed through the narrow doorway, ascend the stairs, and take a left turn. Stepping on the wood chips in the corner of the room will cause Gollum to feel a sharp pain from a Splinter, which can be retrieved after speaking briefly with Mell.
- Shiny Button
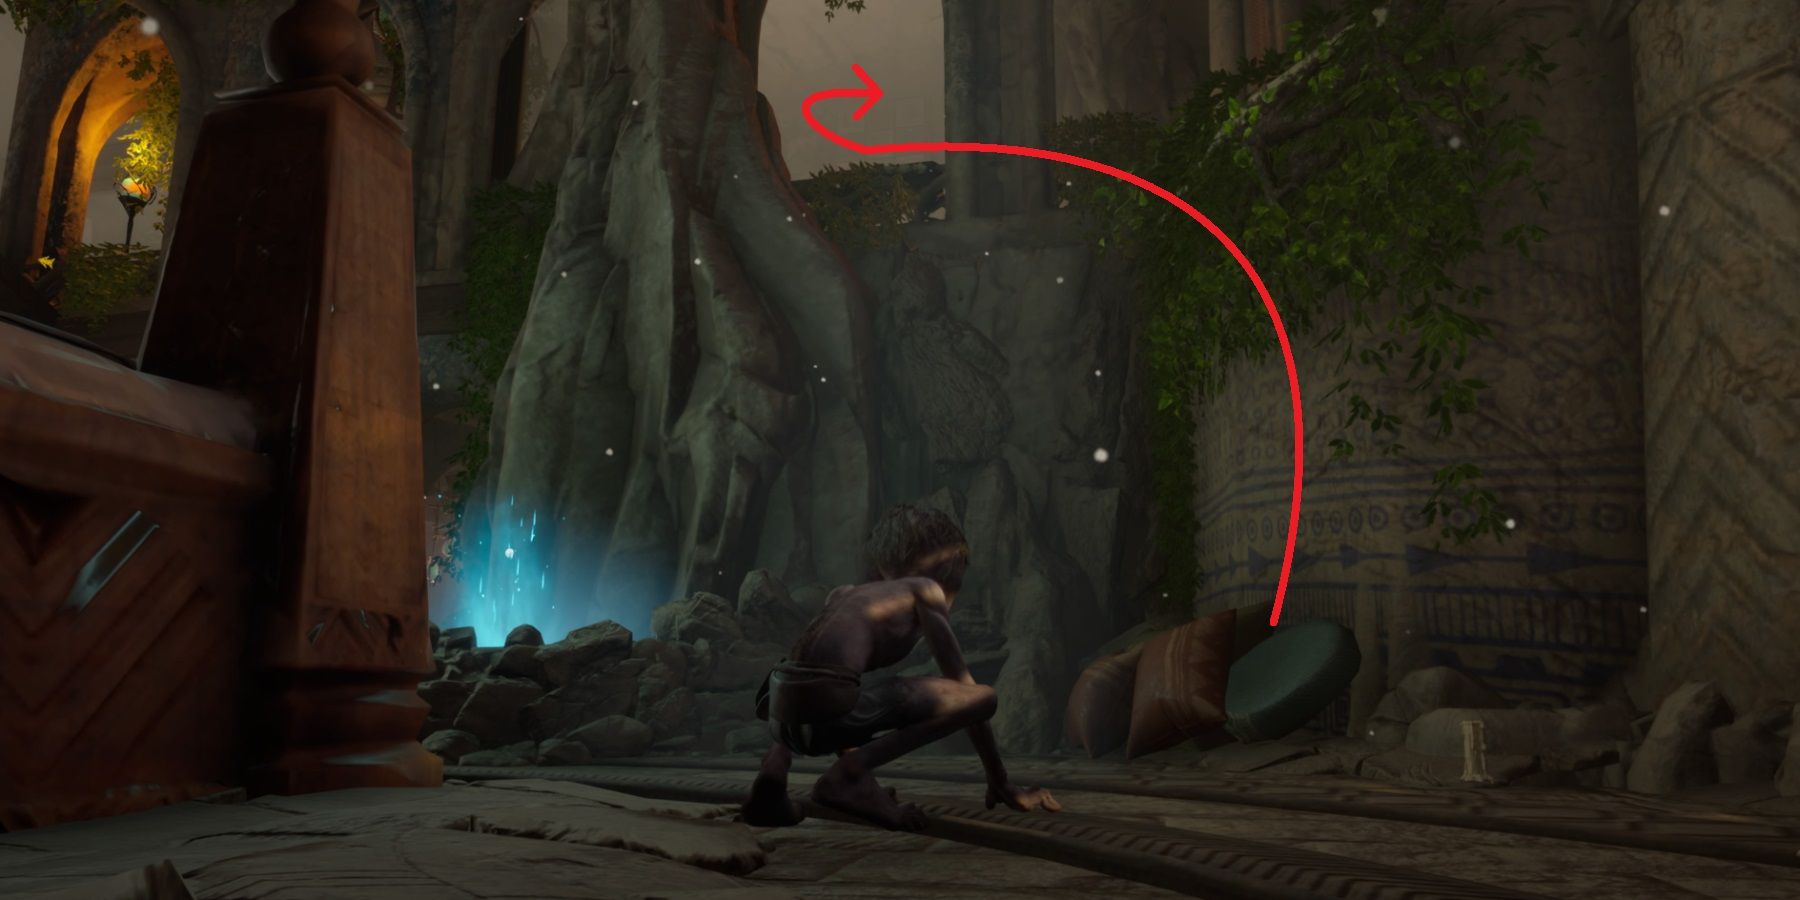
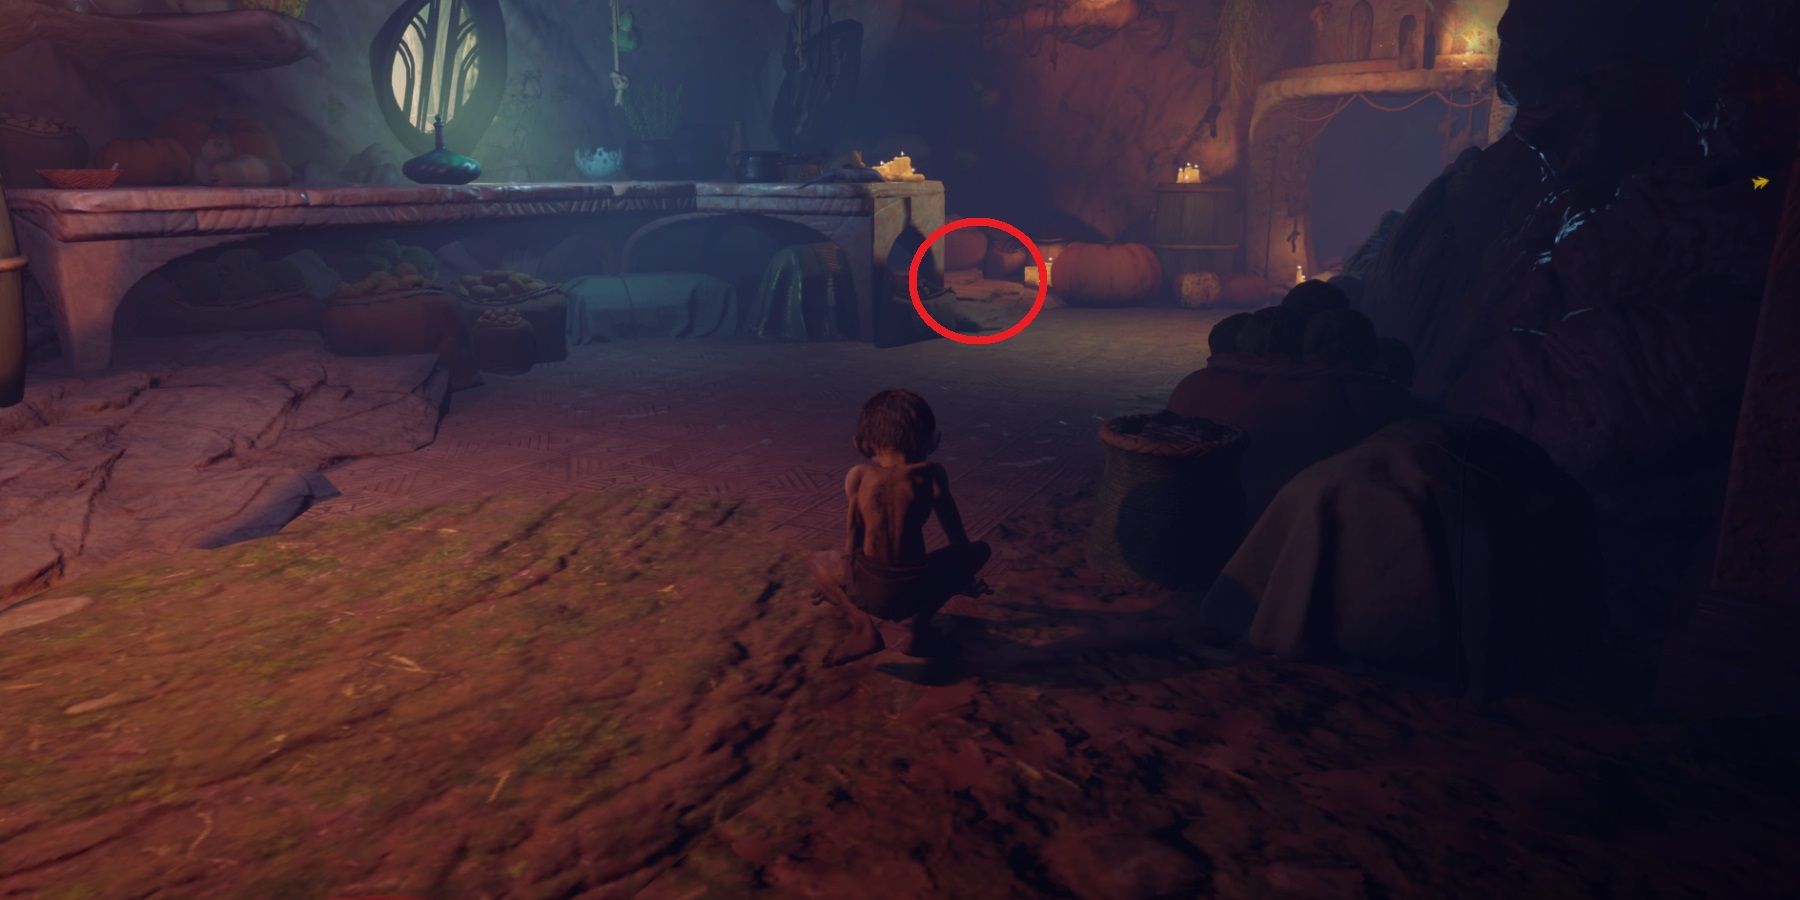
Players can access the room beyond the basin where Gollum converses with Mell by climbing up to the ledge located in the far right-hand corner.
Gollum can access the Shiny Button Collectible by lying next to the yellow pot. Moving on from the Queen's Waterfalls to the King's Chambers, players can uncover two distinct Collectibles. However, Gollum must take advantage of the climbable environments scattered throughout the region to reach each one.
To obtain the Pearl Collectible, Gollum must make his way to the large door at the center of the area and utilize the surrounding rock platforms to ascend higher. Eventually, he must leap past the door he previously encountered and climb up to the next platform. From there, he can jump across the water to reach the triangular platform on the opposite side.
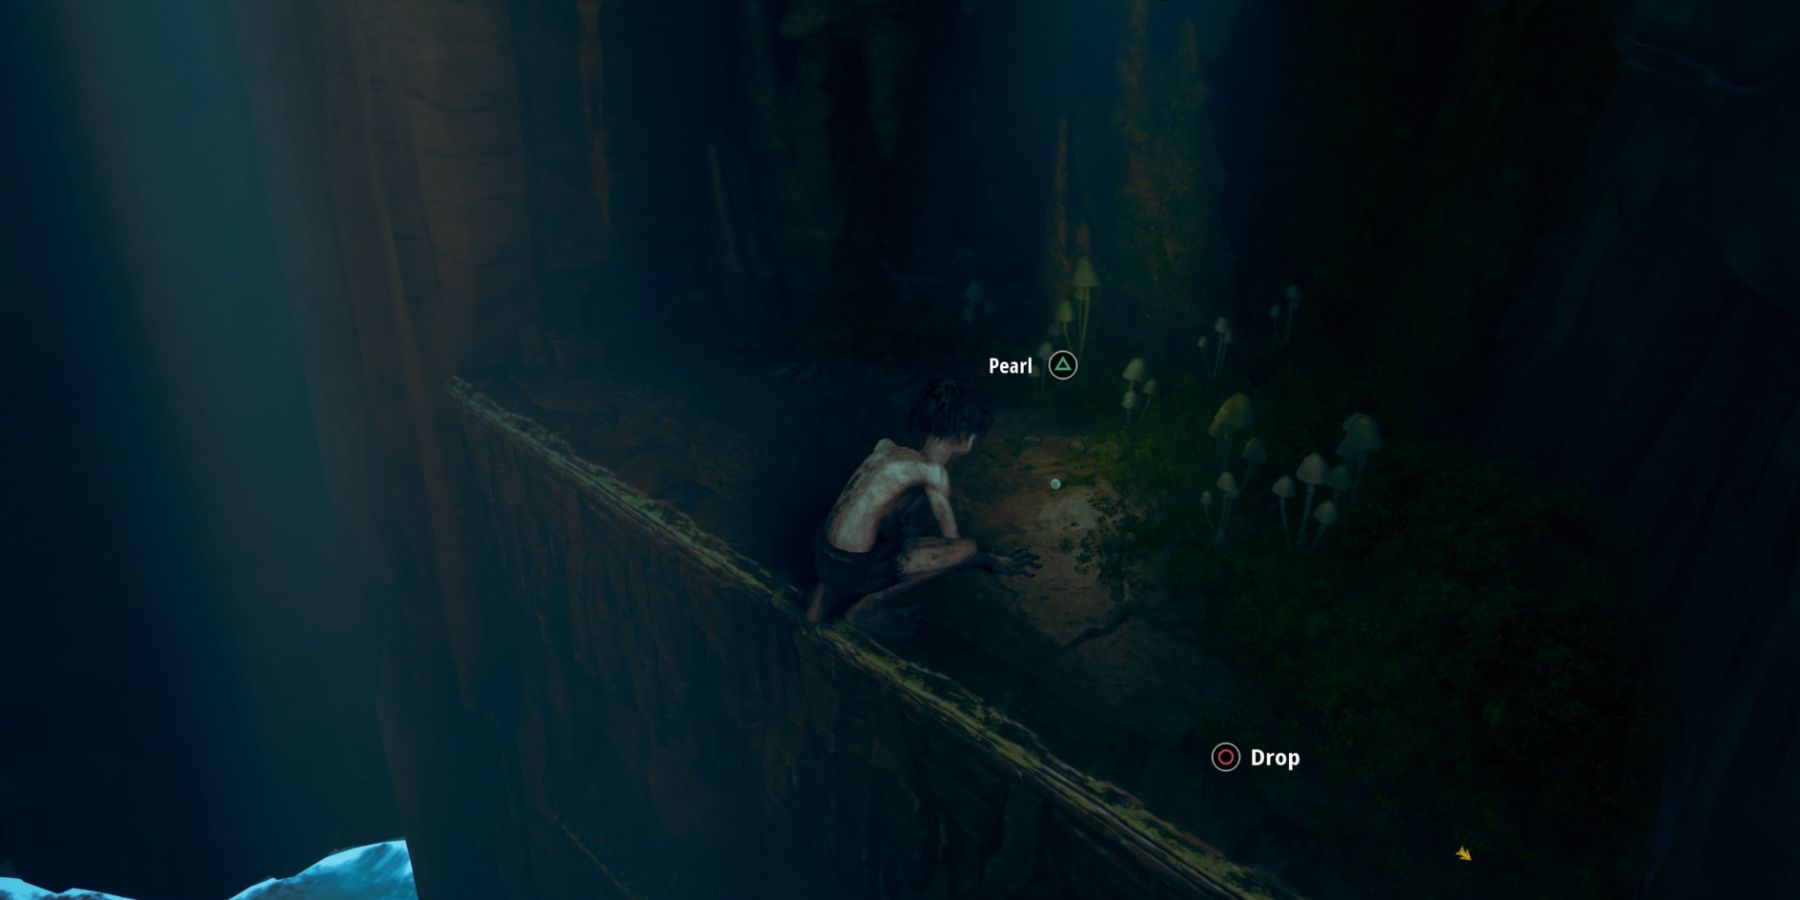
Next, Gollum must drop down to the platforms on the left and swiftly run across the wall on the right to reach the platform above where he first spawned. He can then jump across the water once more to reach a small cove where the Pearl Collectible can be found lying on the ground.
- Badger Claw
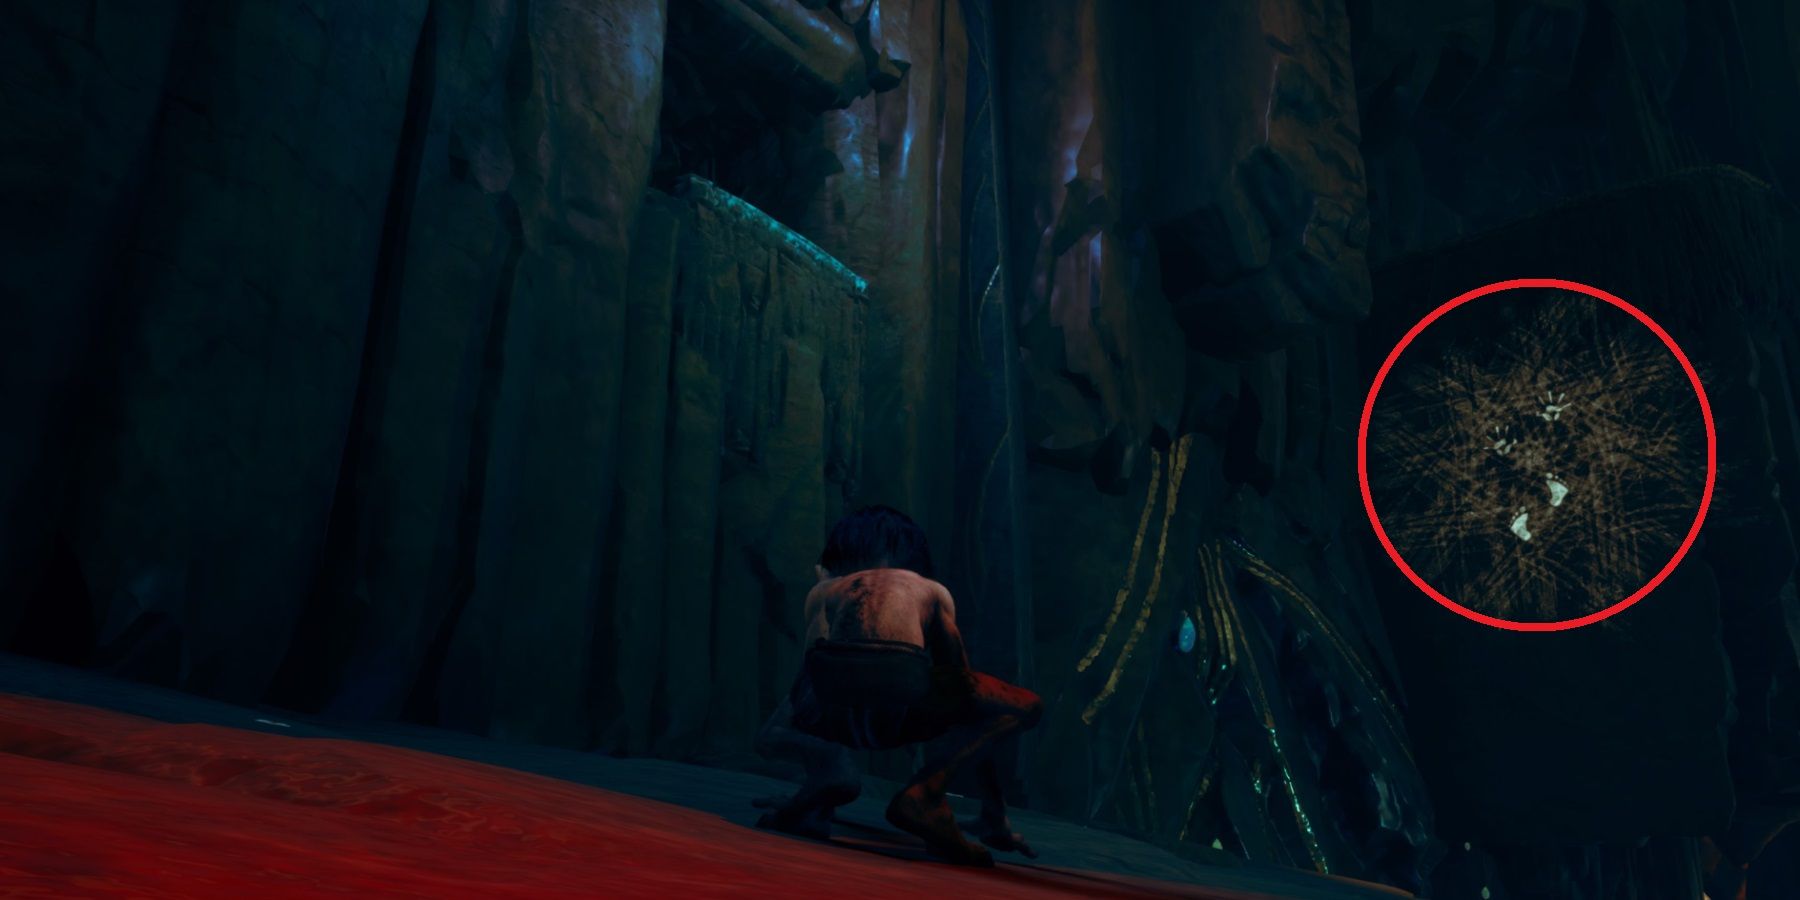
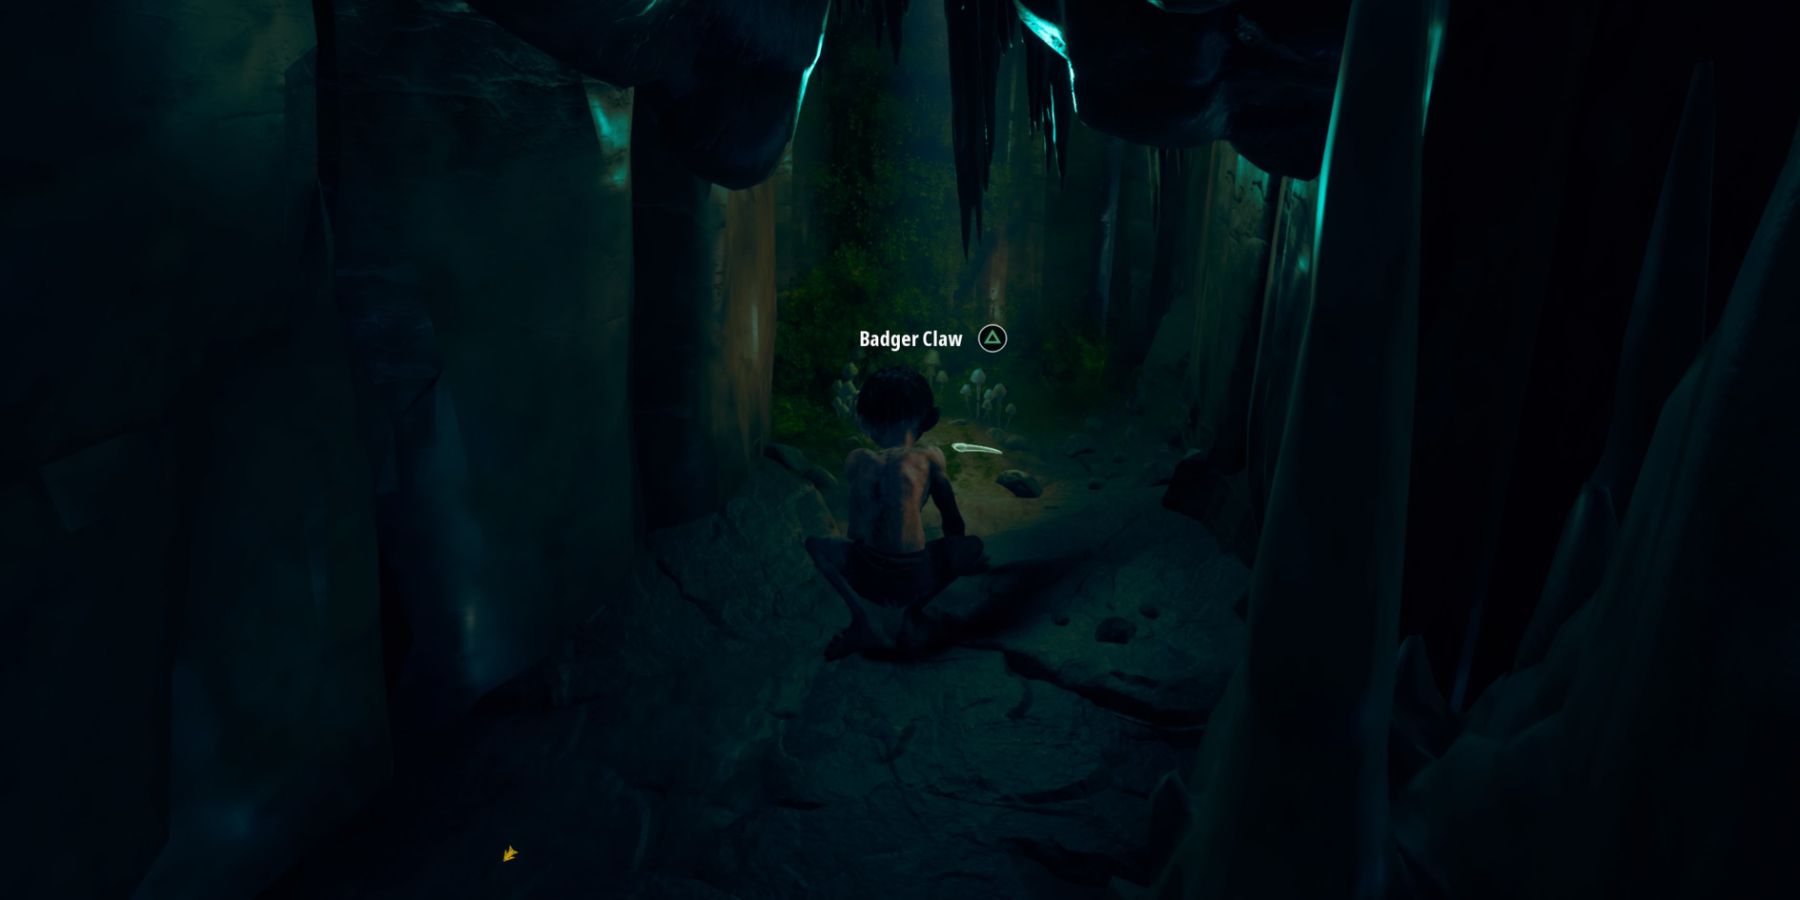
Once he has retrieved the collectible, Gollum must return to the triangular platform and turn right to continue scaling the environment. He must keep climbing until he reaches the platform with the square hole in the wall. Instead of going through it, players should turn to the right and leap towards the glowing hand prints on the wall.
Gollum leaps backwards from the hand prints and grasps onto a hidden ledge, allowing him to jump back once more and reach another ledge that leads to a secret area. Within this area, he can obtain the Badger Claw.
Making his way through the King's Gardens in the hopes of evading the Elves once and for all, Gollum discovers the final two Collectibles of The Lord of the Rings: Gollum's seventh chapter.
Don't forget to use
All King's Garden Collectibles In The Lord Of The Rings: Gollum
,- Twig & Flower
, and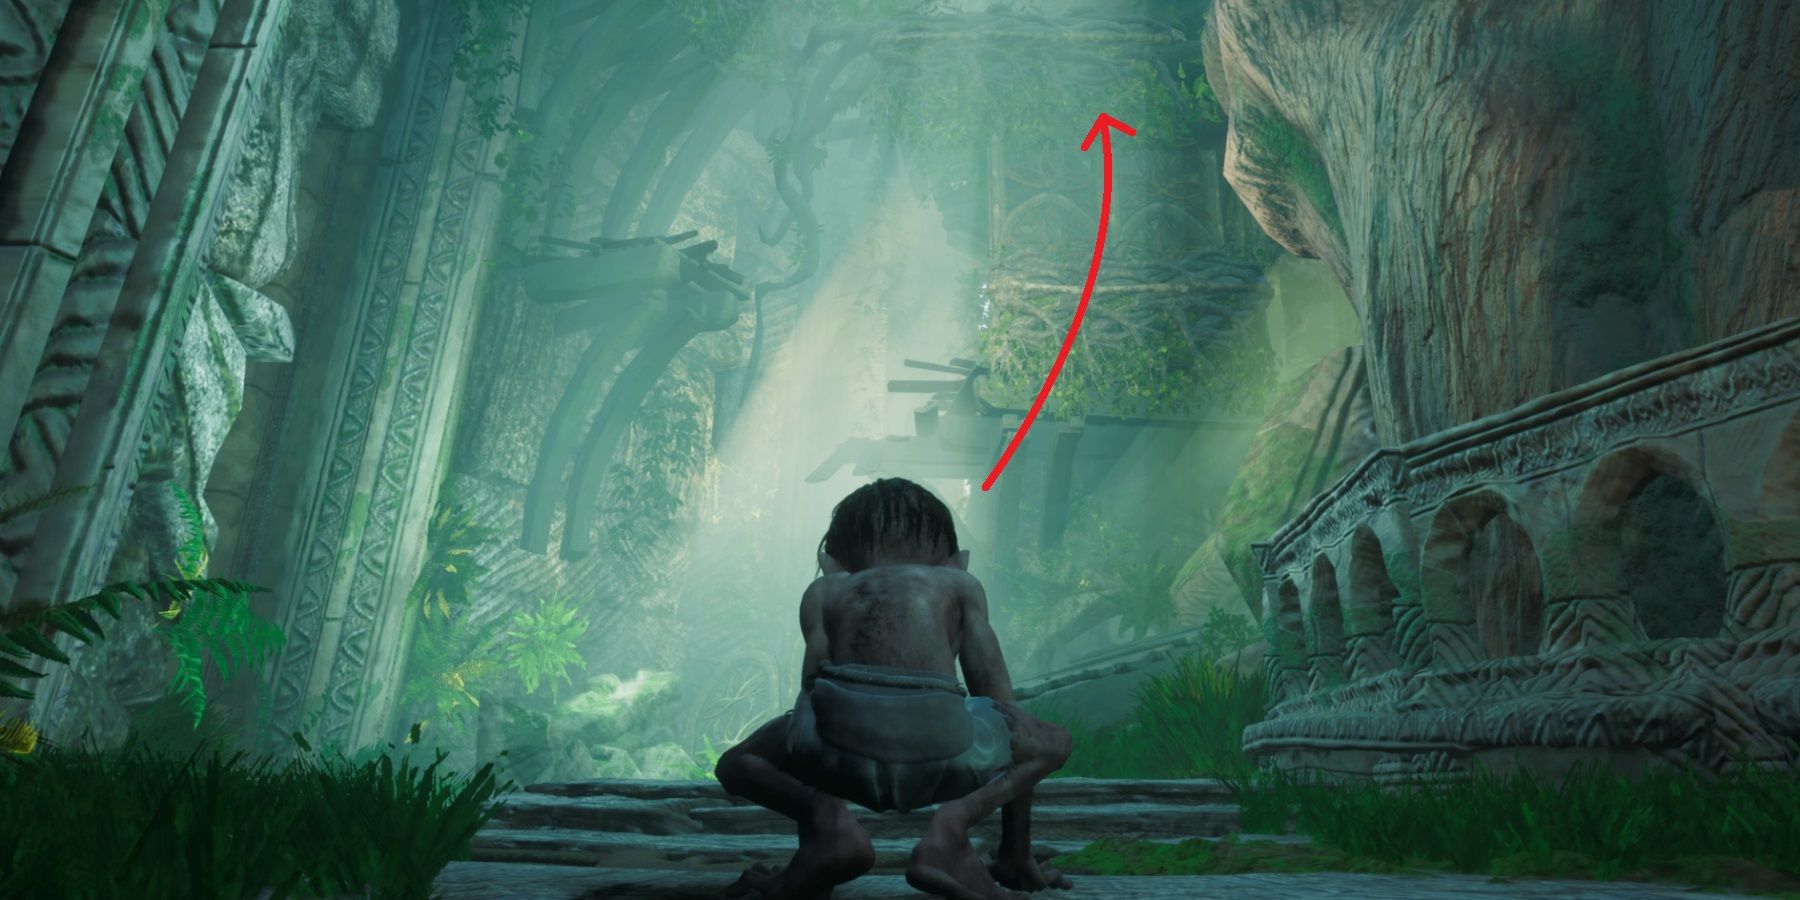
in your output.
After bypassing a large group of Elves and crossing the river, Gollum must scale a towering structure draped in vines to access the next area. Along the way, he'll discover a gaping opening that leads into the tower, which he can ascend to reach the roof. At the tower's pinnacle, the Twig and Flower Collectible awaits, perched beside the precipice that overlooks the prior location.
- Bird Bones
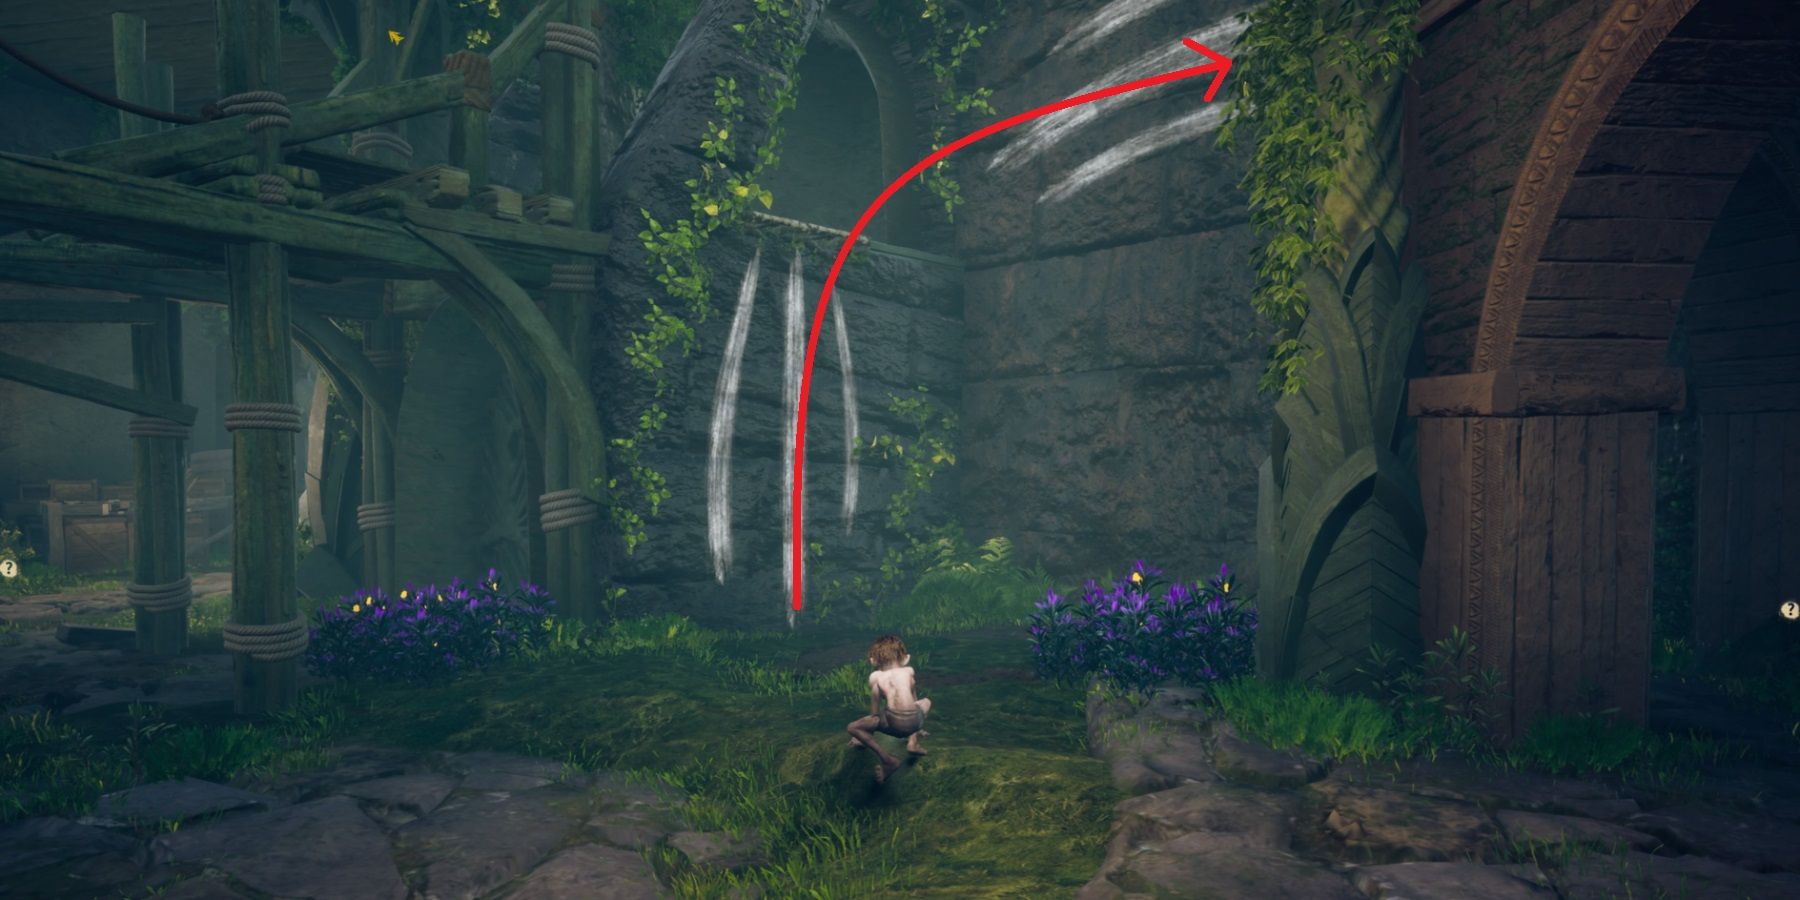
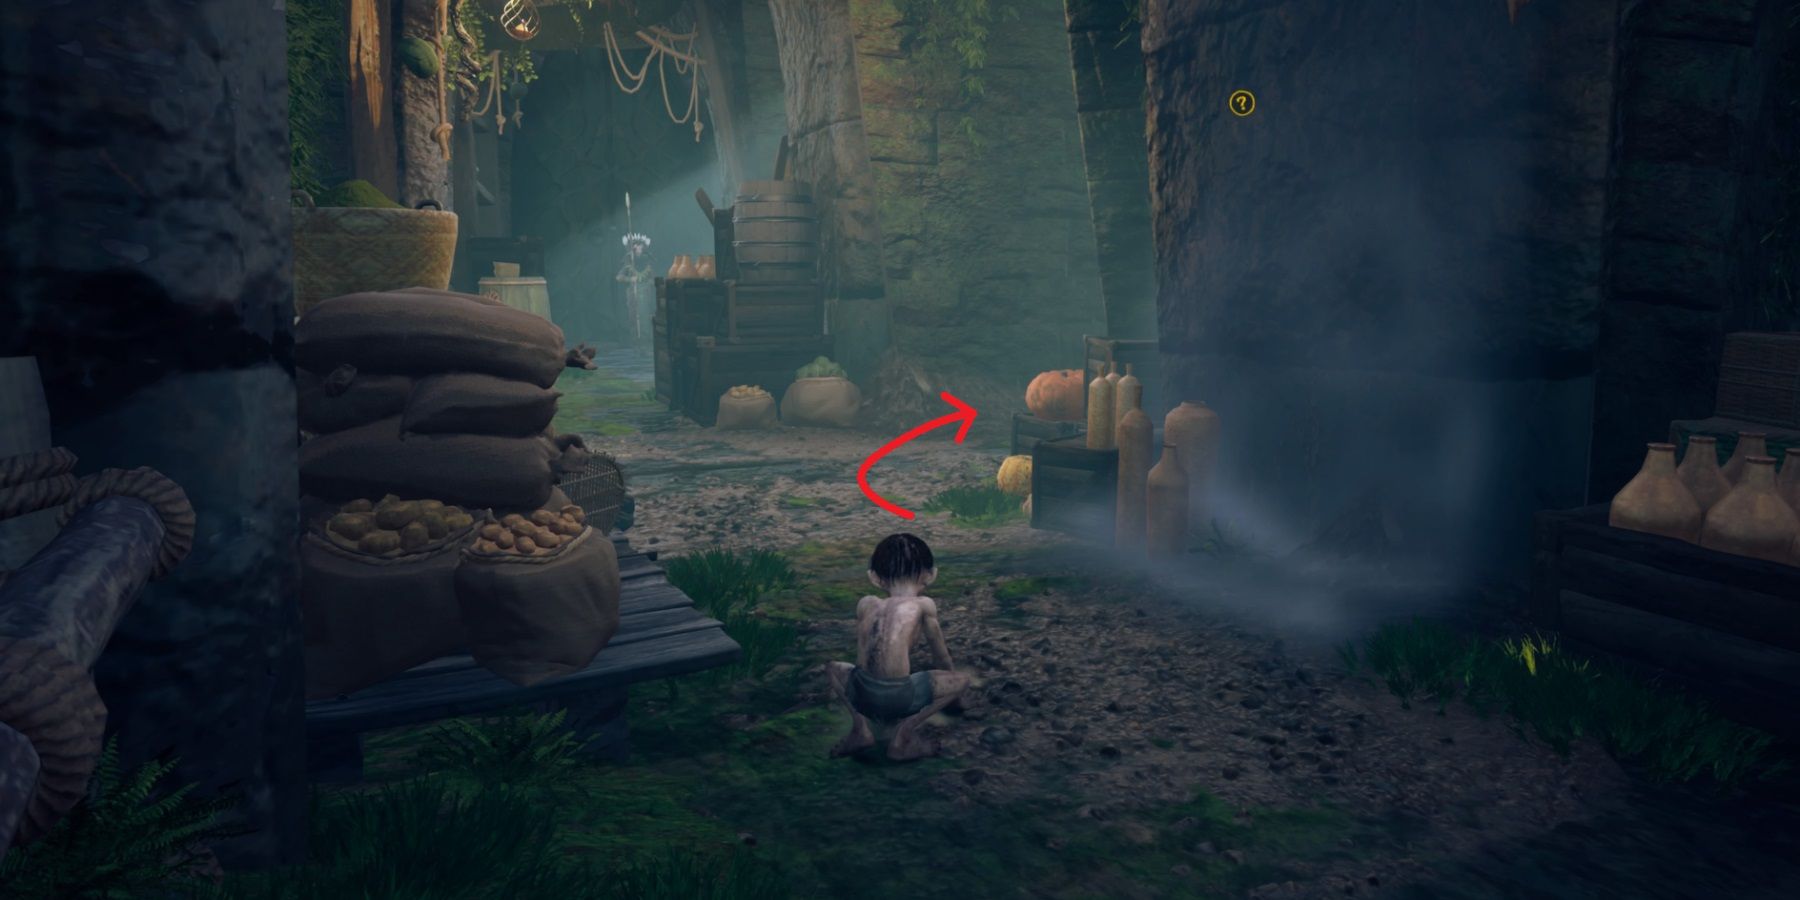
Once Gollum descends from the tower and ambles through the valley with the stone visages, he must stealthily slip past another cluster of Elves to flee. He can scale the wall in the far-right corner and dart above it to enter a fresh region where an Elf patrols. Here, the Bird Bones Collectible lurks, and Gollum can claim it by moving forward along the path, turning right, and walking to the edge. He must then leap to the lower platform to interact with it. Chapter 7's Collectibles are all obtainable after acquiring this one.
The Lord of the Rings: Gollum is available now on PS4, PS5, Xbox One, Xbox Series X/S, and PC, with a Nintendo Switch release planned for later this year.