Uncover the Secrets of Zelda's Ring Ruins: A Complete Walkthrough
Uncover the secrets of The Legend of Zelda: Tears of the Kingdom's Secret of the Ring Ruins main quest with our comprehensive walkthrough From investigating the slab to crossing Thunderhead Isles, we've got you covered
The Secret of the Ring Ruins is a primary quest in The Legend of Zelda: Tears of the Kingdom that can be initiated after receiving the Find the Fifth Sage quest. To start this quest, you need to speak with Paya and Tauro at the coordinates 1816, -0951, 0113 in Kakariko Village. This quest comprises of multiple objectives, and this complete walkthrough will assist players who may get stuck while working through these objectives.
It is important to note that players must have access to TotK's Camera ability and 10 Heart Containers to complete Secret of the Ring Ruins. Although both of these requirements are easy to fulfill, players should still confirm that they have met these prerequisites before attempting to address this main quest.
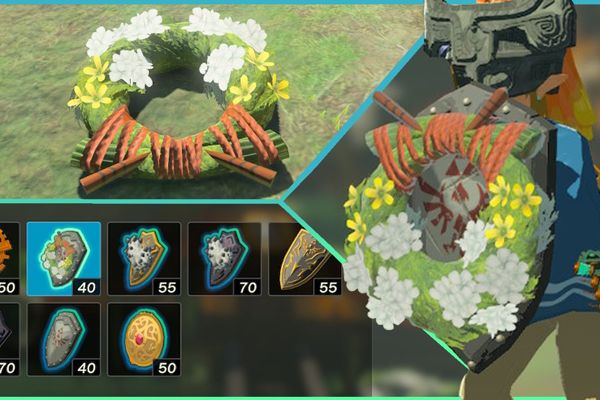
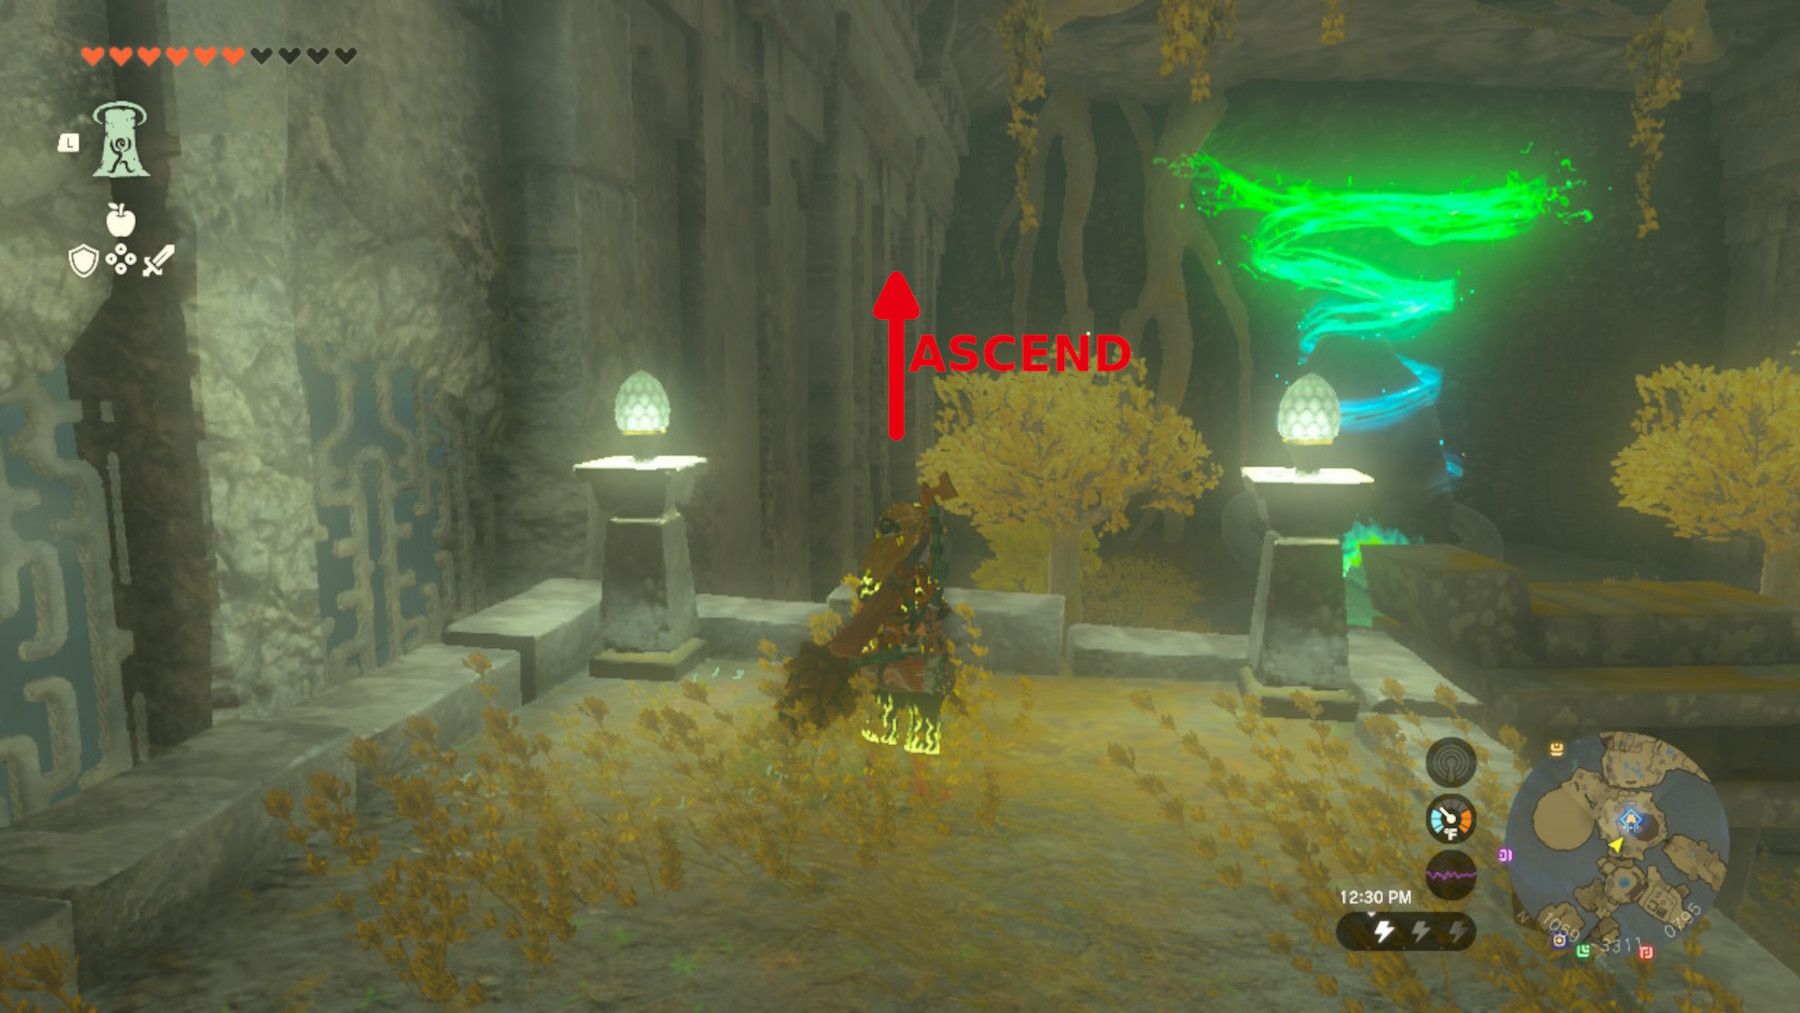
The first objective of this quest is to enter the site and investigate the slab. Two images are available for reference.

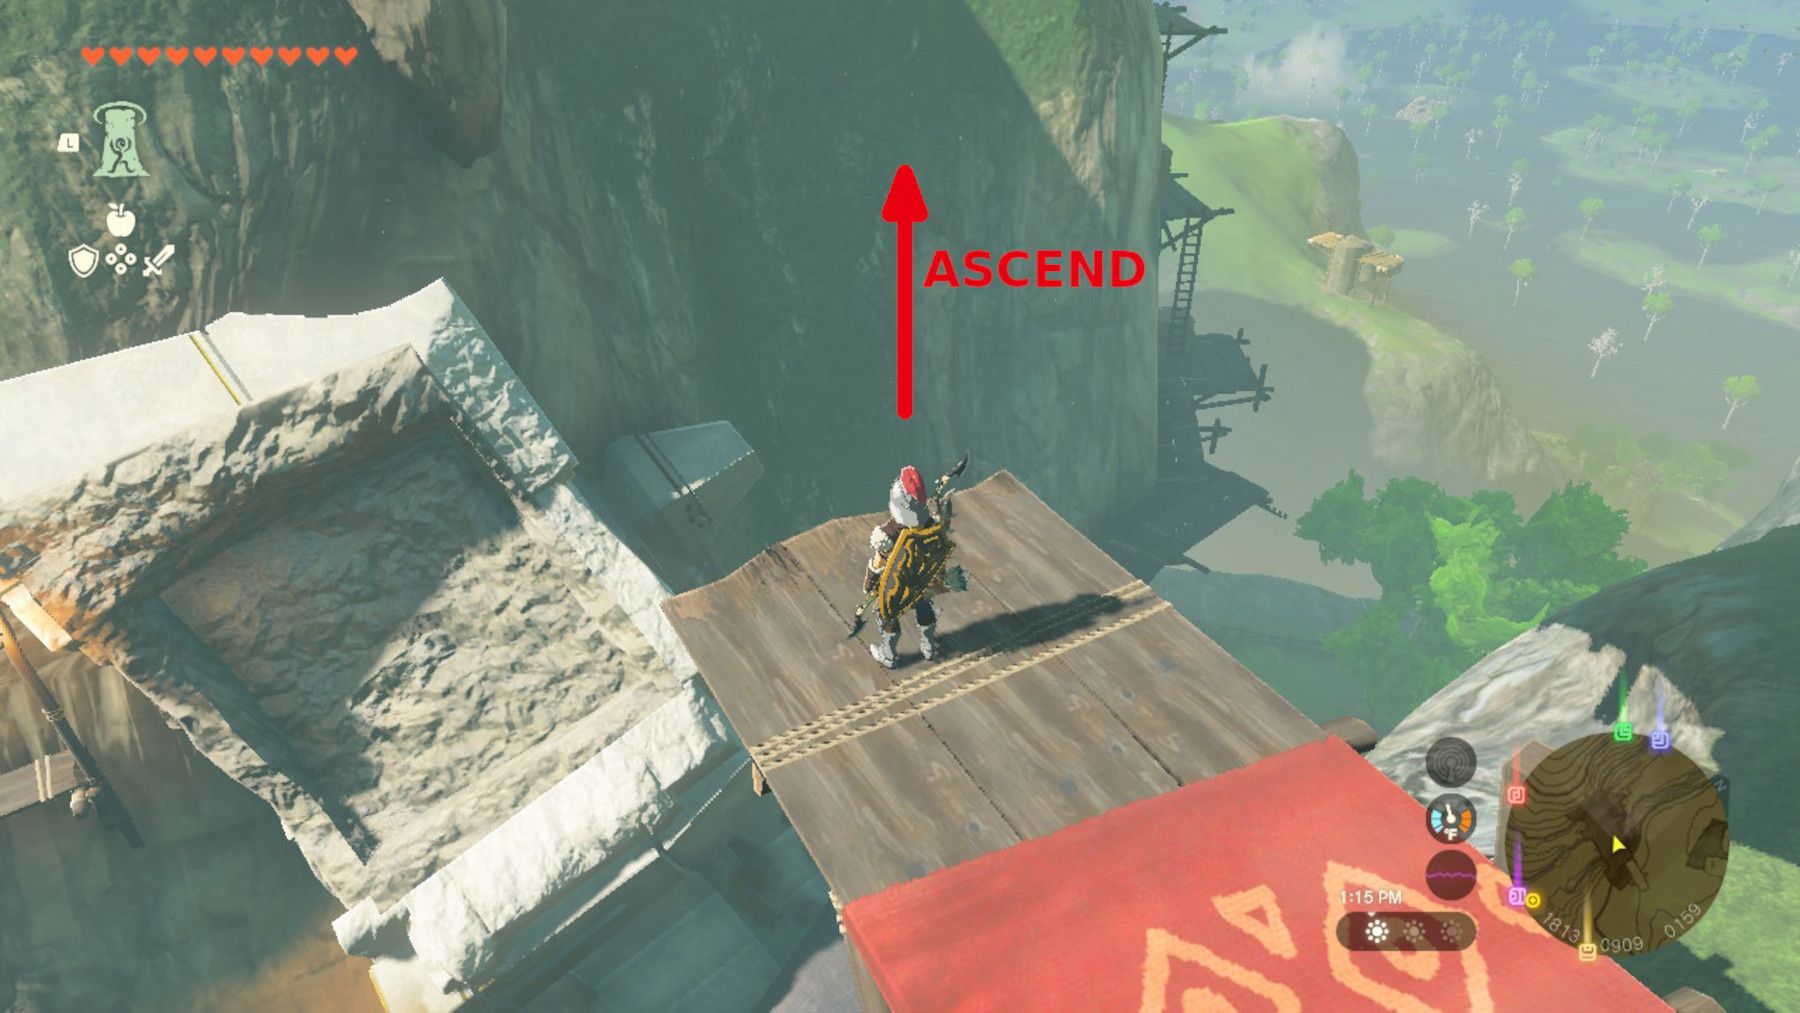
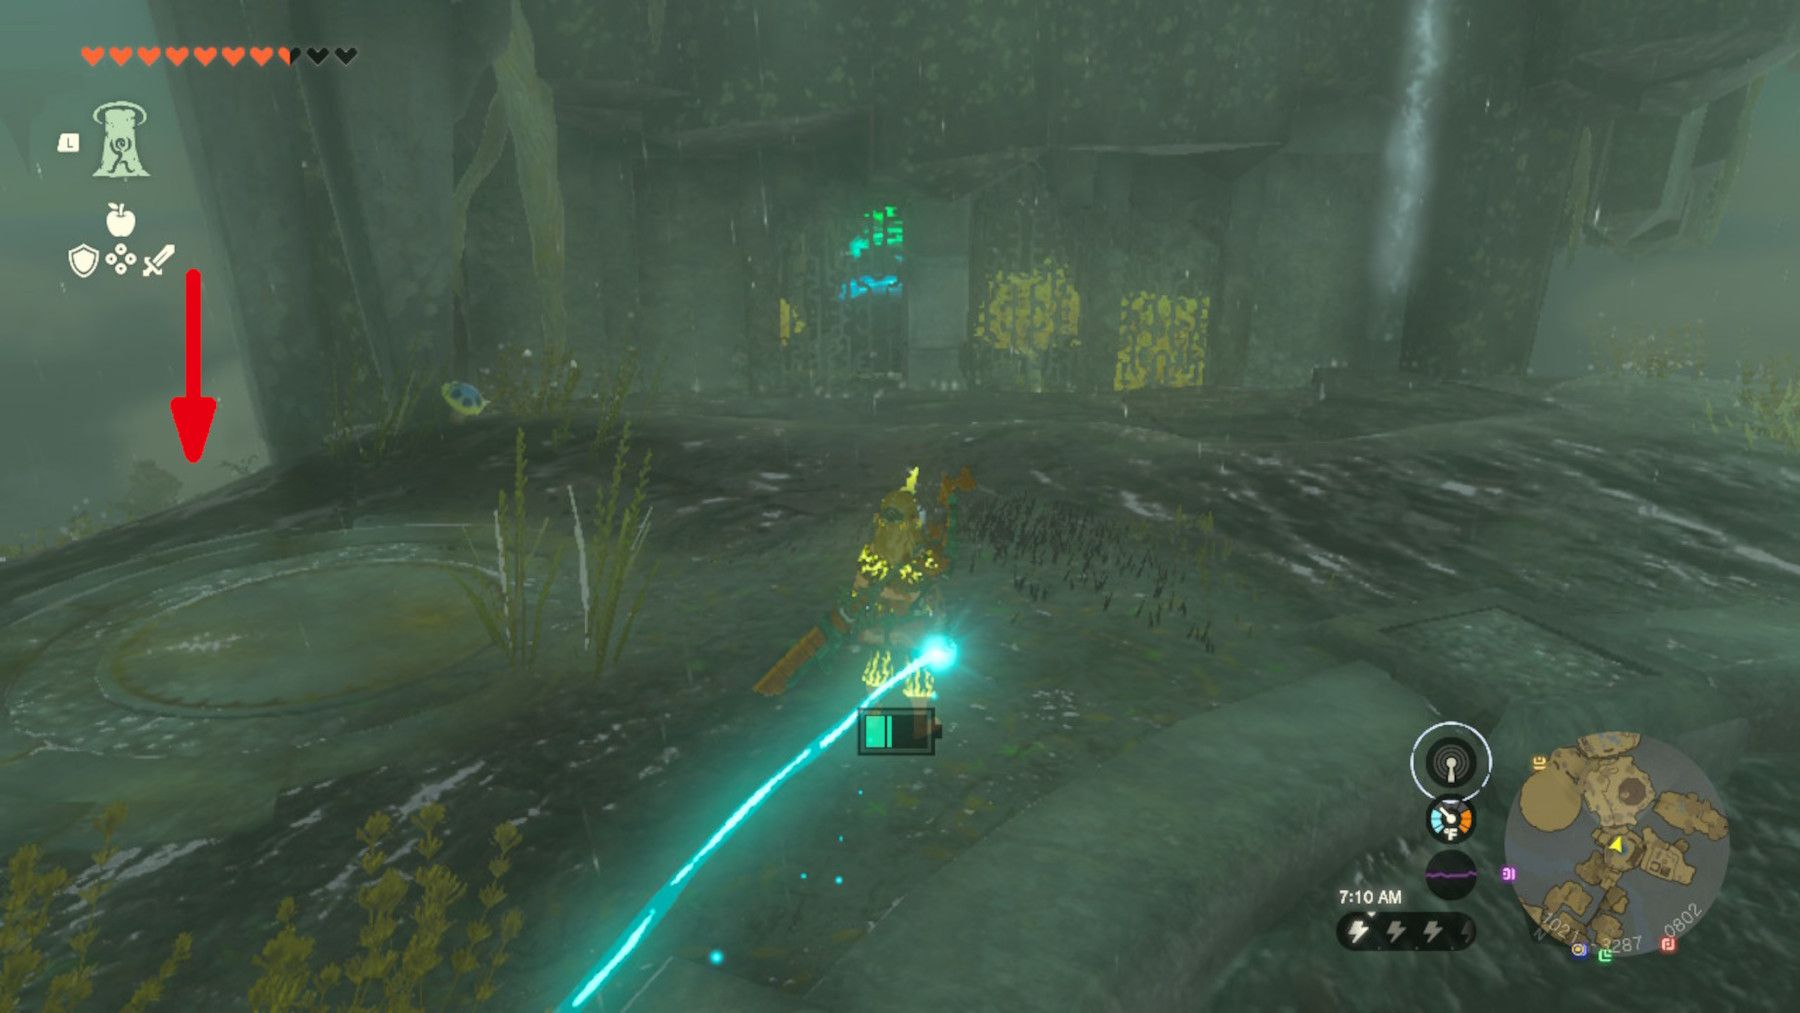
The first step towards completing this task is to reach the Ring Ruins that are floating above Paya and Tauro. To gain access, fans need to climb the wooden scaffolding and position themselves directly beneath the ruins (1813, -0909, 0159). Using TotK's Ascend ability will allow them to enter the ruins easily.
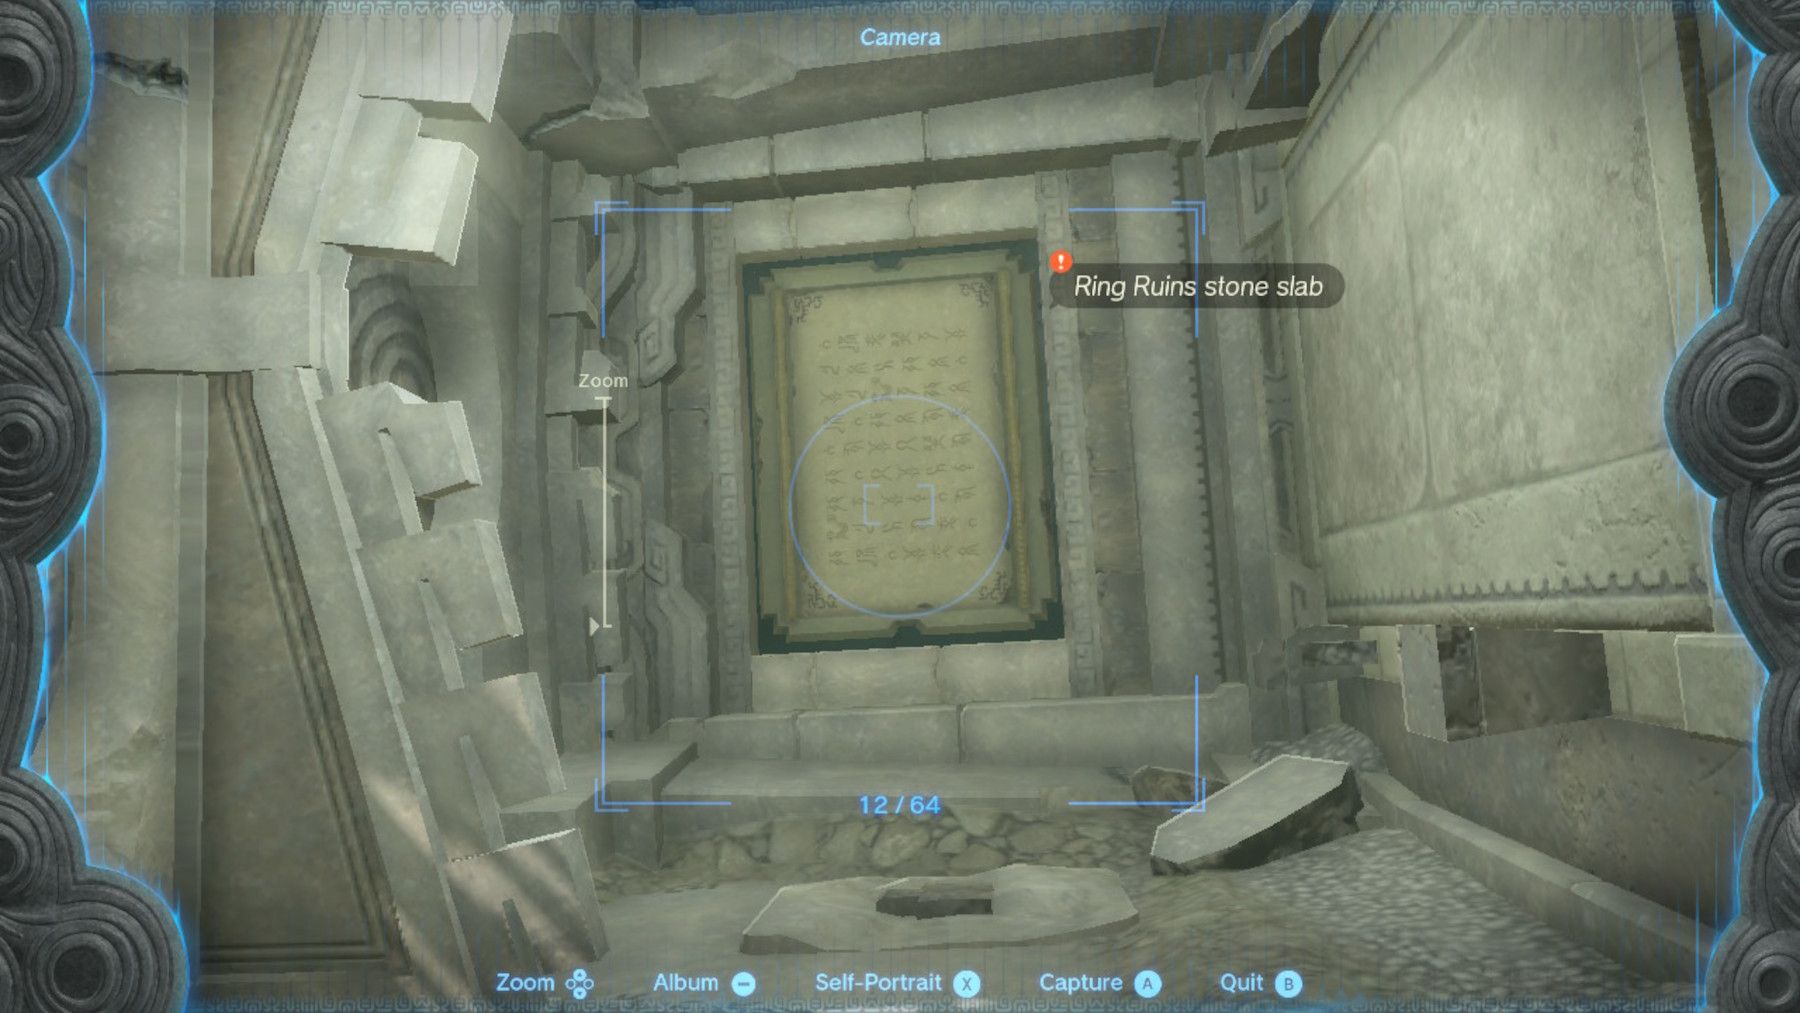
Once inside the Ring Ruins, players will come across an intricately etched stone slab that is embedded into the wall. To complete this task, fans need to take a photograph of the slab using the Camera ability. Once the photograph is taken, players should make their way back to Paya and Tauro to submit the task.
To Popla Foothills Skyview Tower.
After viewing the photograph of the Ring Ruins stone slab, Tauro and Calip will guide players to the Popla Foothills Skyview Tower, located at 0602, -2118, 0098 to the southwest of Kakariko Village. Once there, players will need to speak with Calip to receive their next objective. This objective is to locate Tauro at Dracozu Lake, southeast of the Popla Foothills Skyview Tower. Upon arrival, players should enter the pillar-shaped ruin at 0973, -2533, 0008 and speak with Tauro to proceed.
.
This puzzle involves deciphering a two-part riddle that is presented through a mural that Tauro reads aloud during a conversation. To progress, players must successfully solve both parts of the riddle. The first part requires the player to locate and equip three pieces of Charged Armor, collectively known as the Electric Garb. These pieces can be found in nearby chests.
:
Charged Shirt: Climb the stairs located on either side of the Dracozu Lake mural. Charged Trousers: Utilize a Bomb Flower to demolish the cracked rocks at 0983, -2691, 0008 and gain entry into the small room. Charged Headdress: Use a sharp weapon to cut through the vines at 0969, -2801, 0007 and enter the small room. Offer a Zonai Charge to the Altar at the Tail.
With the Charged Armor equipped, players can reach the end of the Dracozu River and locate a small room at 0691, -2745, 0013. In this room, there is an altar against the back wall where fans can place a Zonai Charge. To place the charge, players need to select Zonai Charge from the Inventory's Materials tab and choose Hold. Then, they can press B to return to the game and place the circle on the altar. Finally, pressing A will drop the Zonai Charge onto the altar.
Players can now aim for the newly discovered Sky Island hovering above the Dracozu River. To access it, simply interact with the circle located inside TotK's Popla Foothills Skyview Tower and use it as a launchpad to glide towards the northwestern tip. Don't forget to use Tulin's ability to make the journey easier.
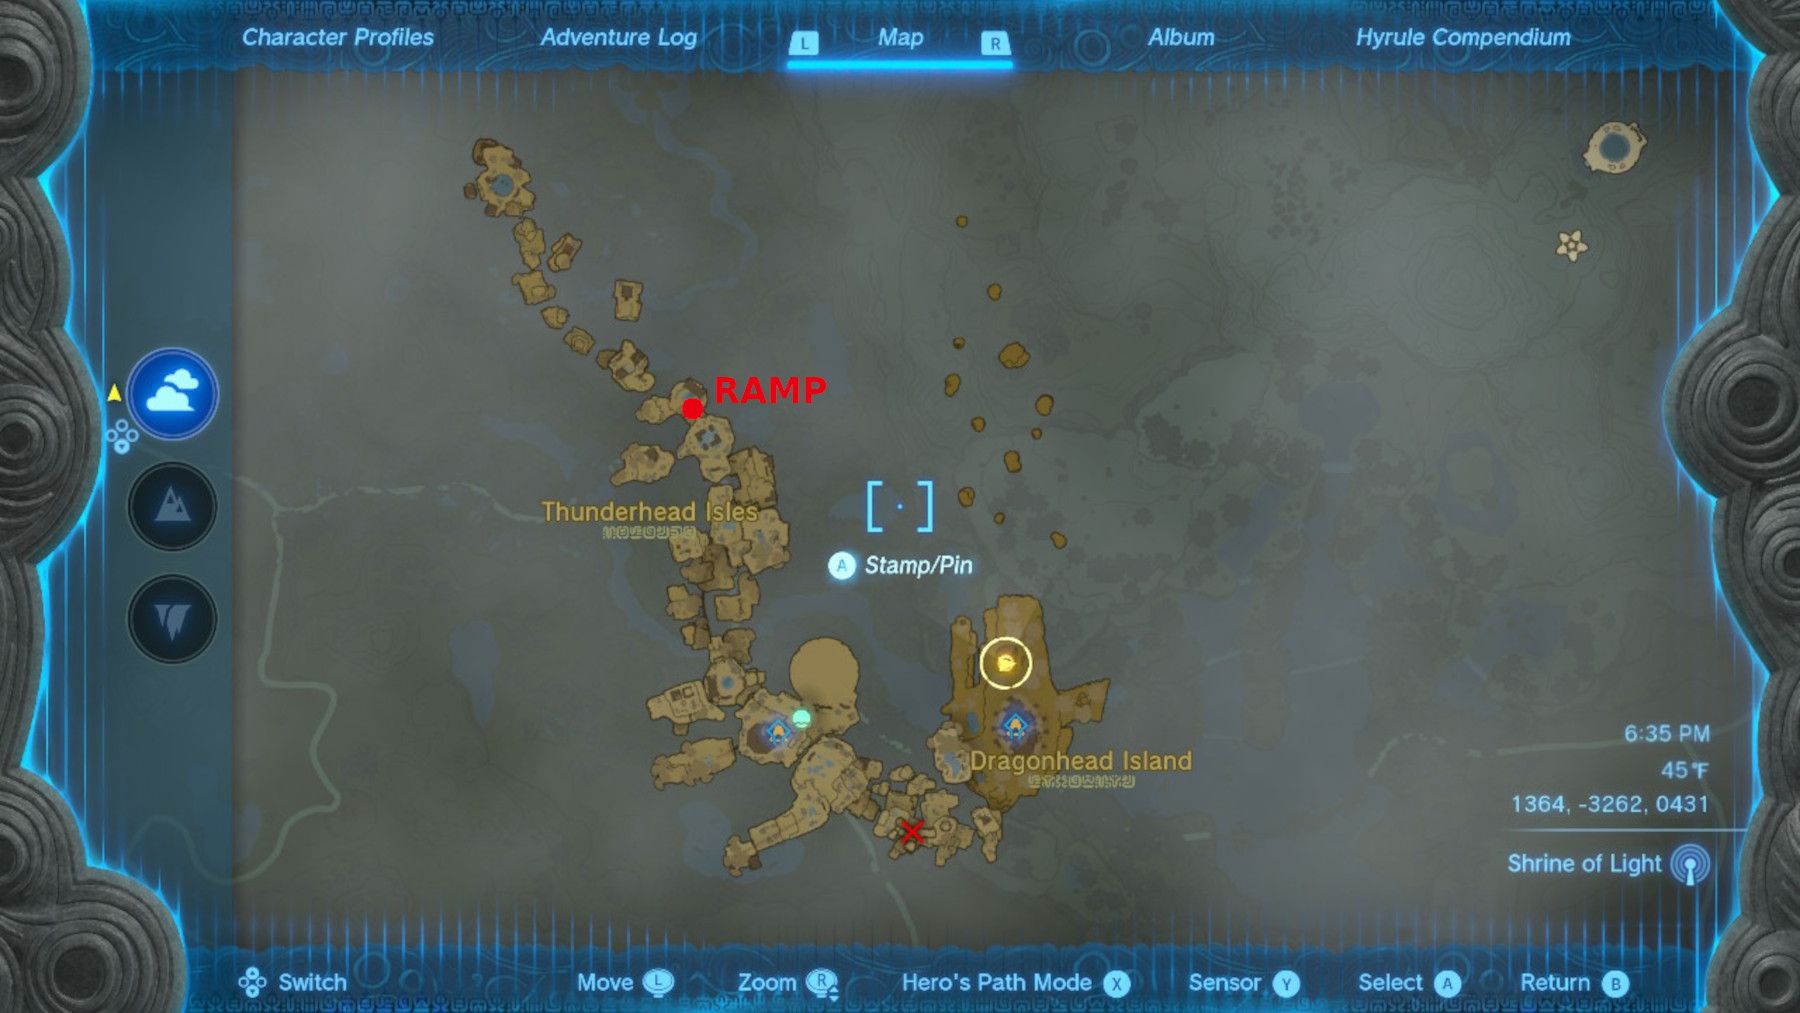
It's time for Tears of the Kingdom gamers to make their way across the Thunderhead Isles, with the ultimate destination being the southeast corner. There are various routes to take, but fans should consider this path:
2 Images
End.
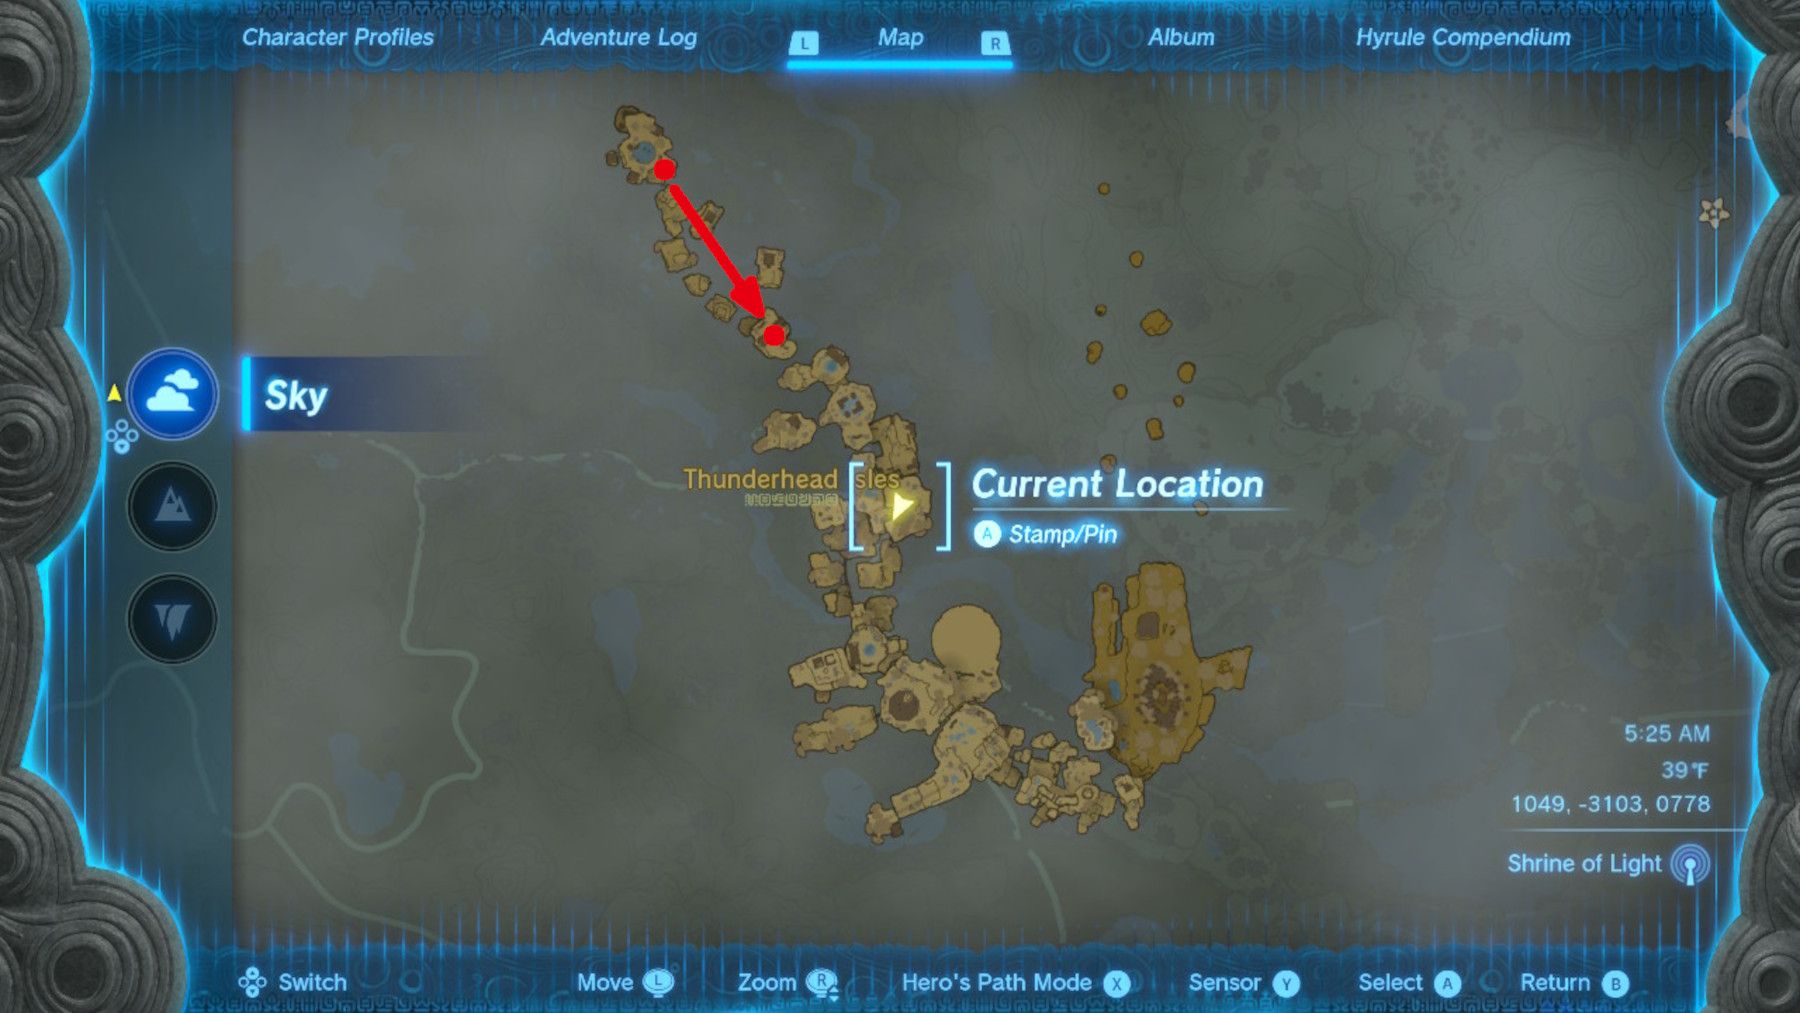
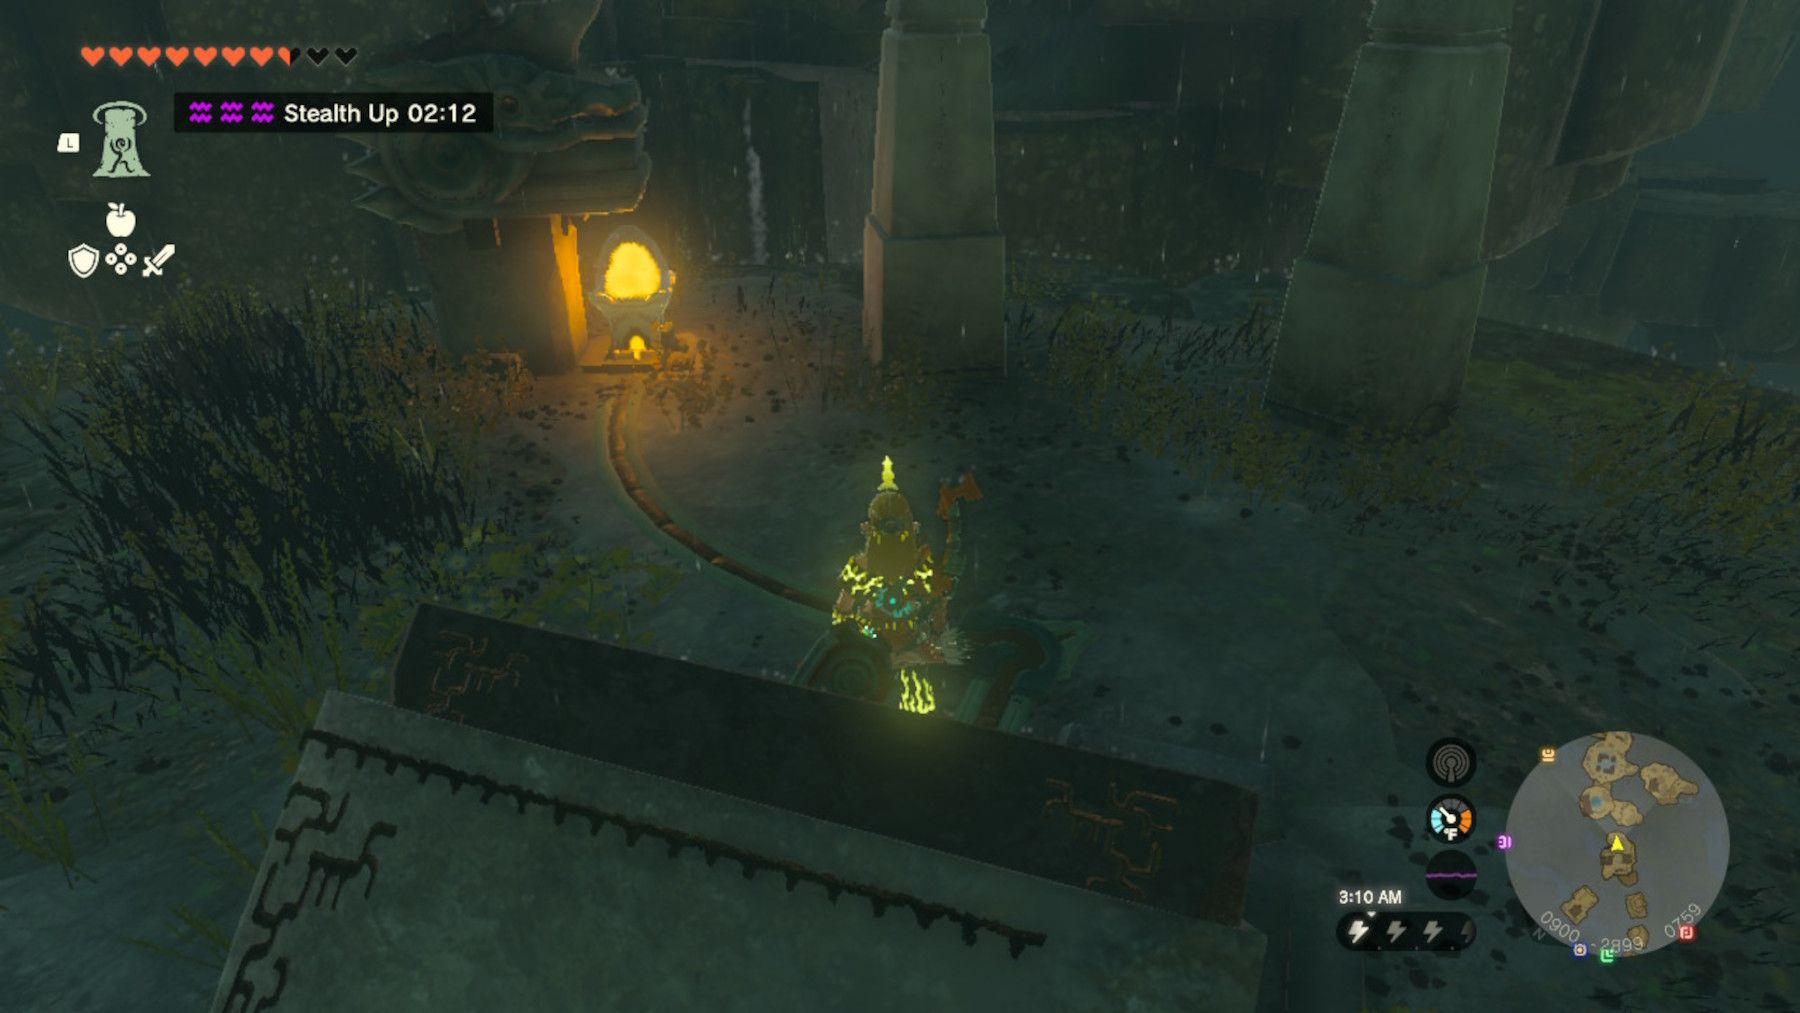
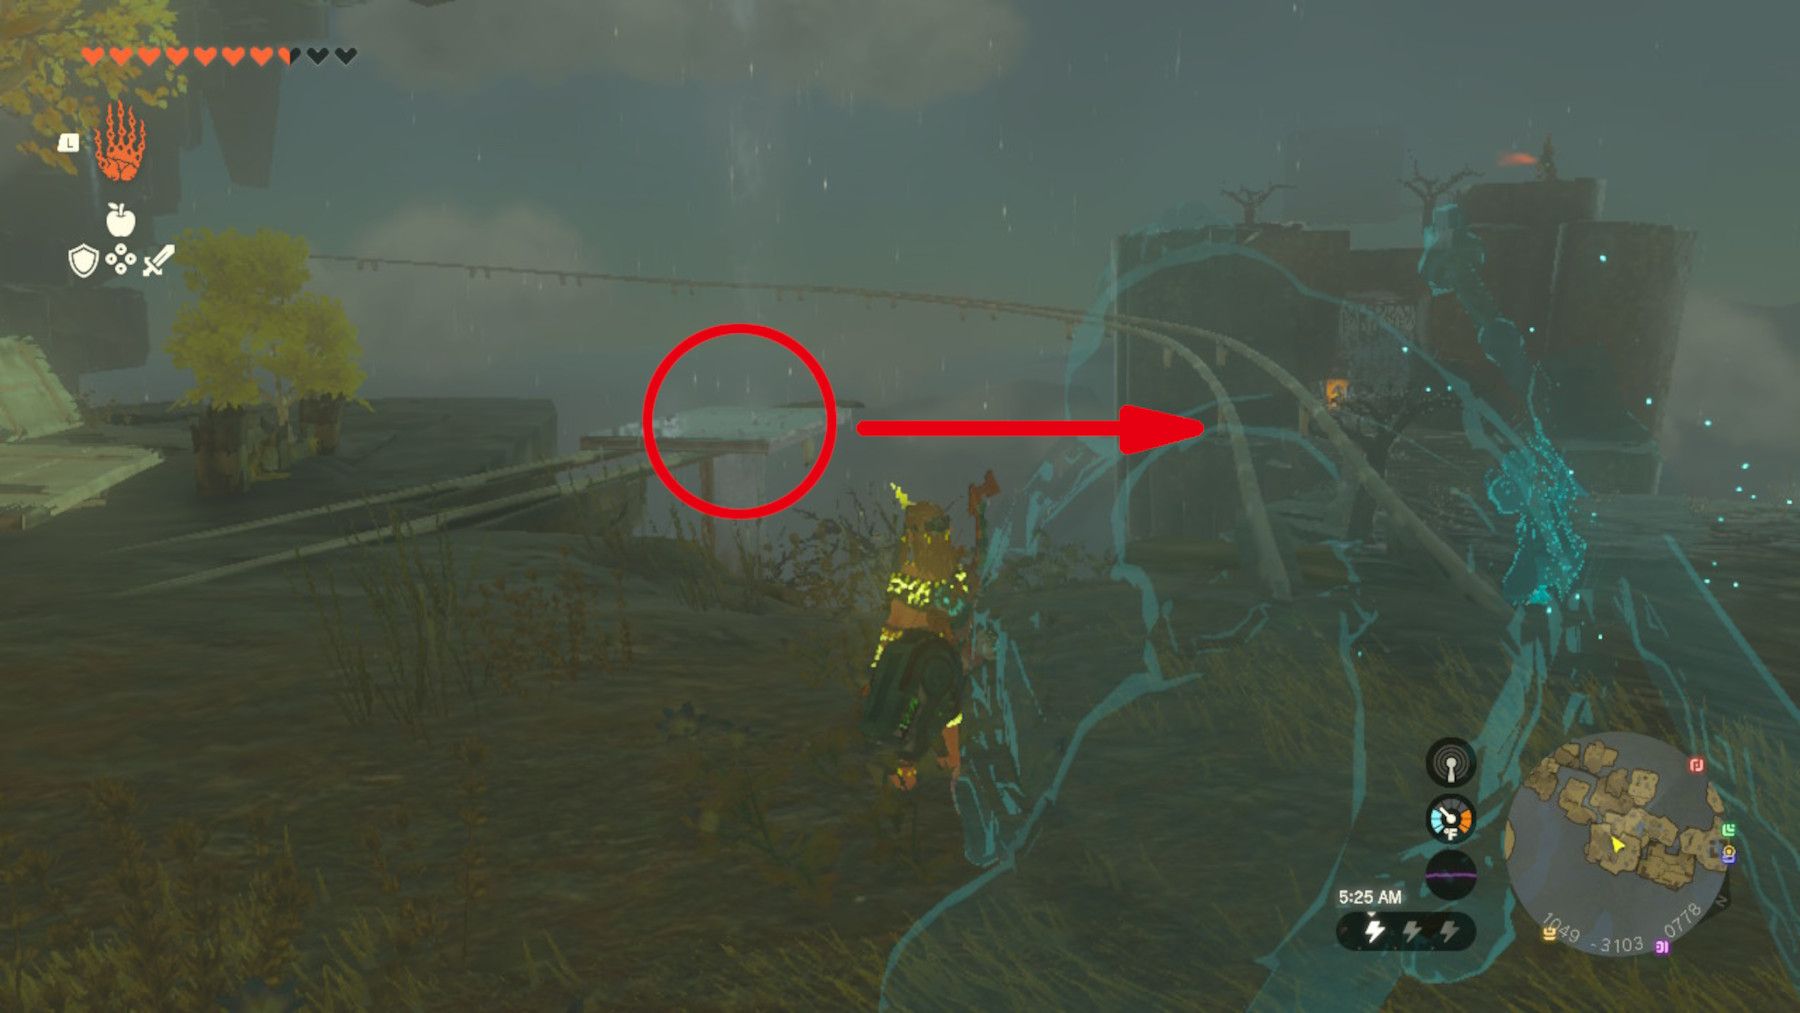
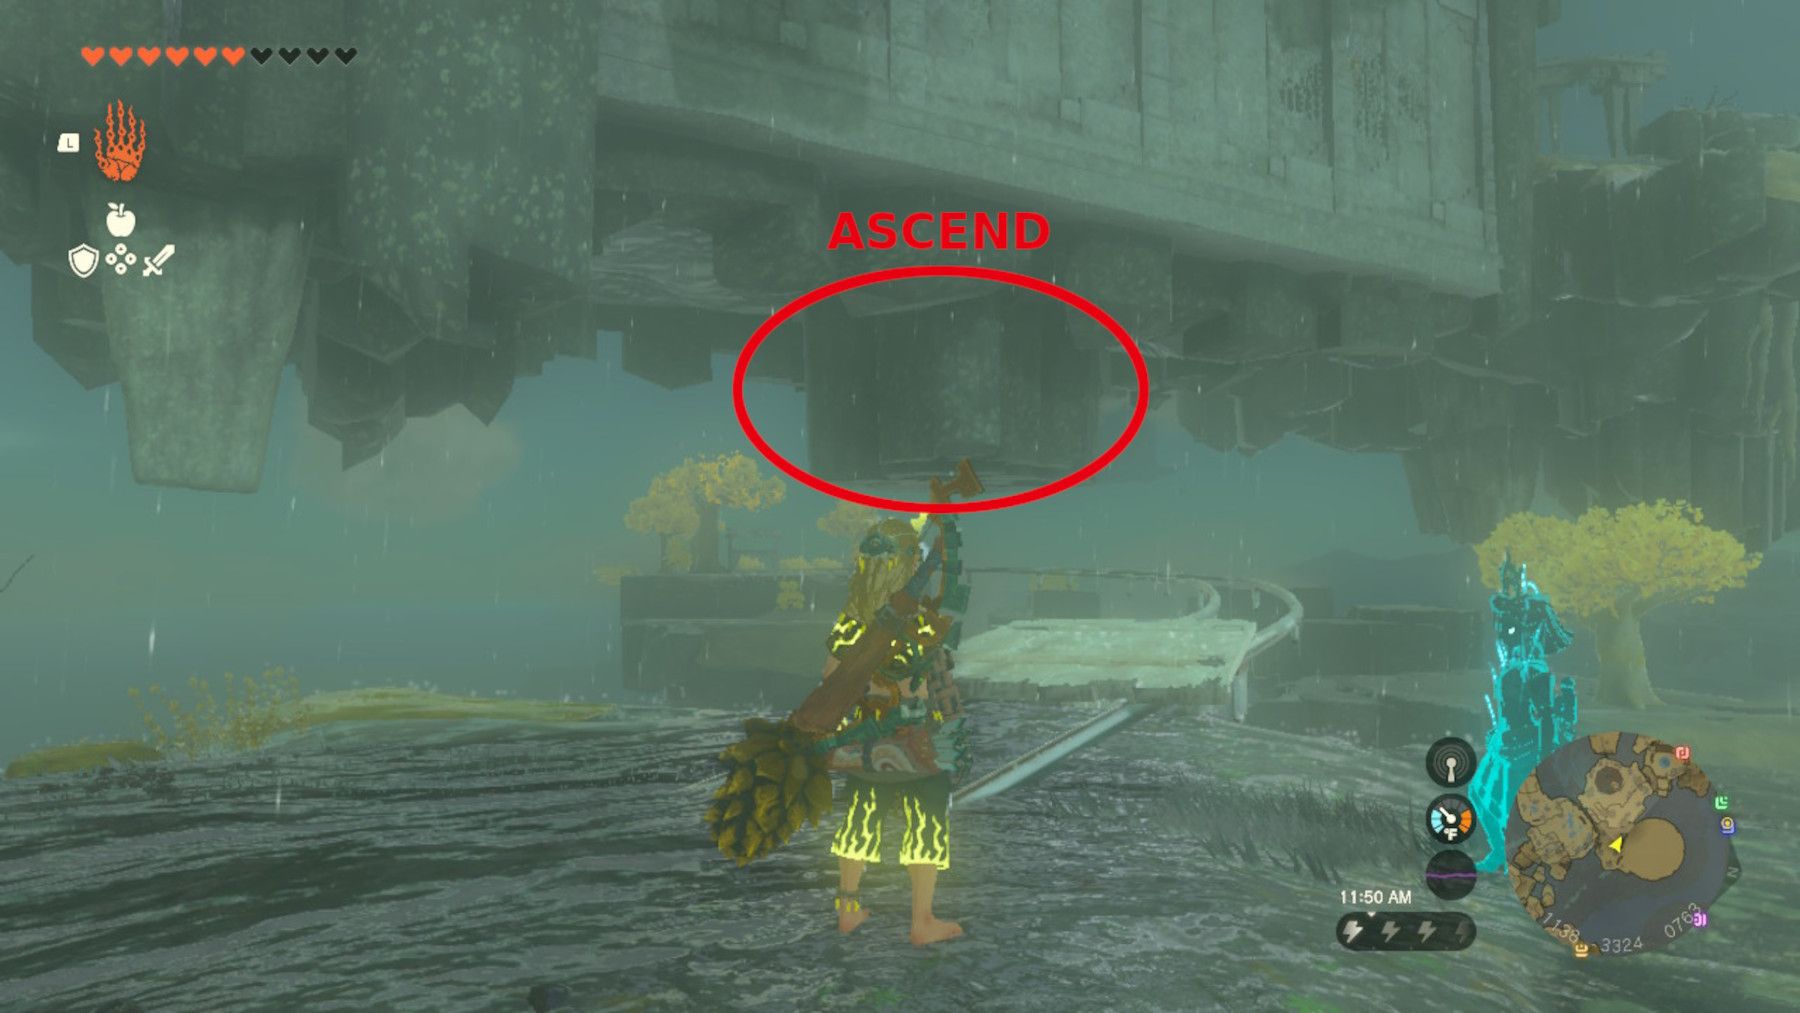
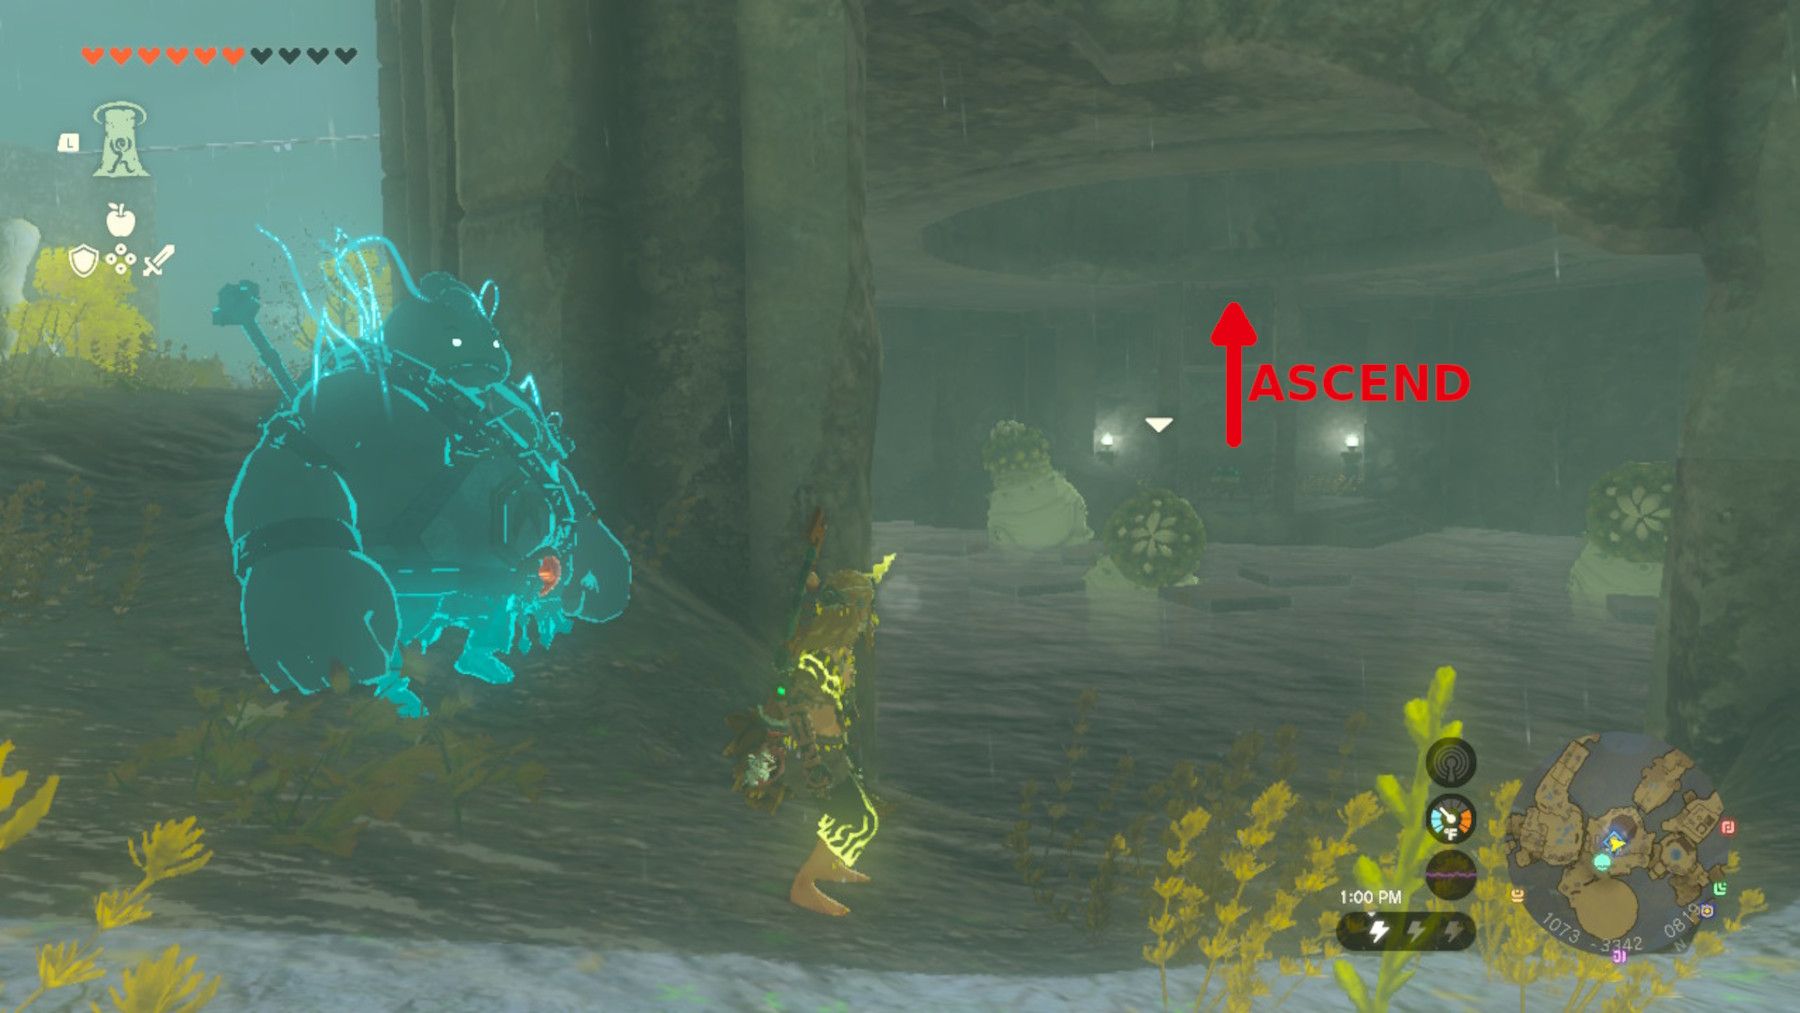
Starting from the island located at the northwest corner (0721, -2616, 0744), glide towards the south side until you reach the island with three lamps (0876, -2875, 0645). Once there, stand at the center and activate your Ascend ability to reach the platform above. Follow the path until you reach the angled launchpad at 0899, -2899, 0759 and wait for the lightning to strike the nearby dragon head.
You will find two images to guide you through the process:
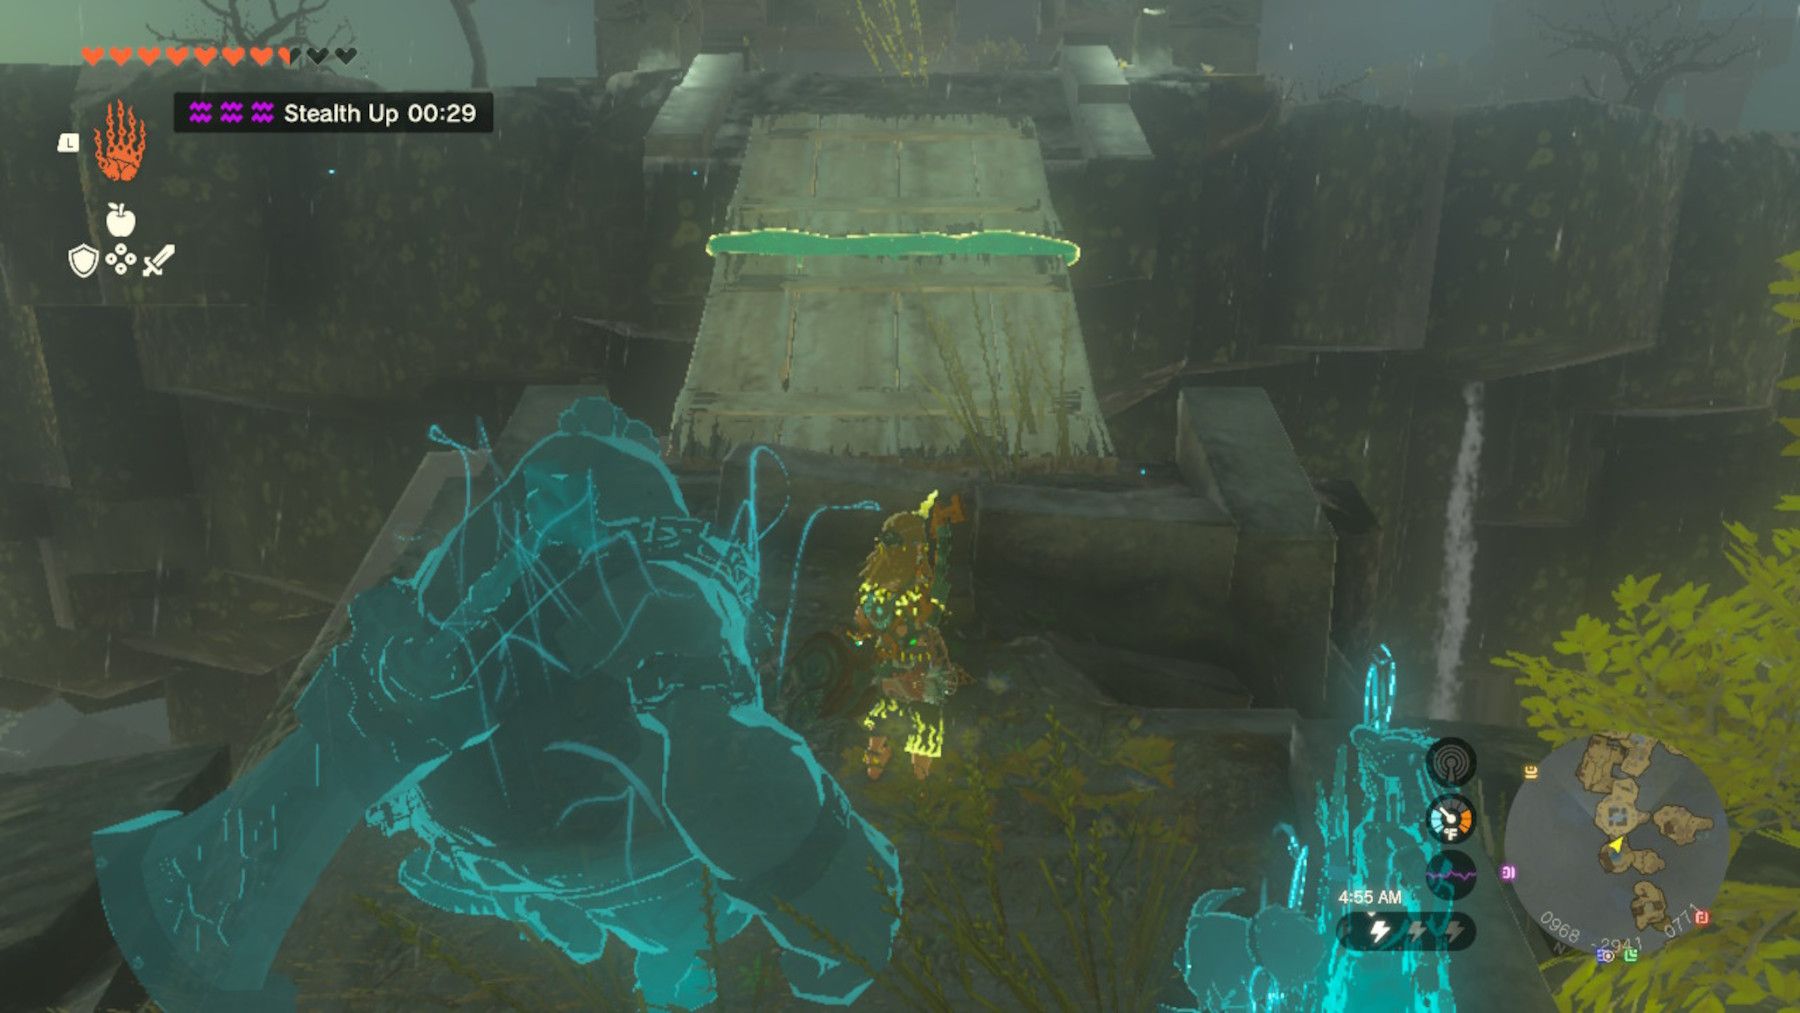
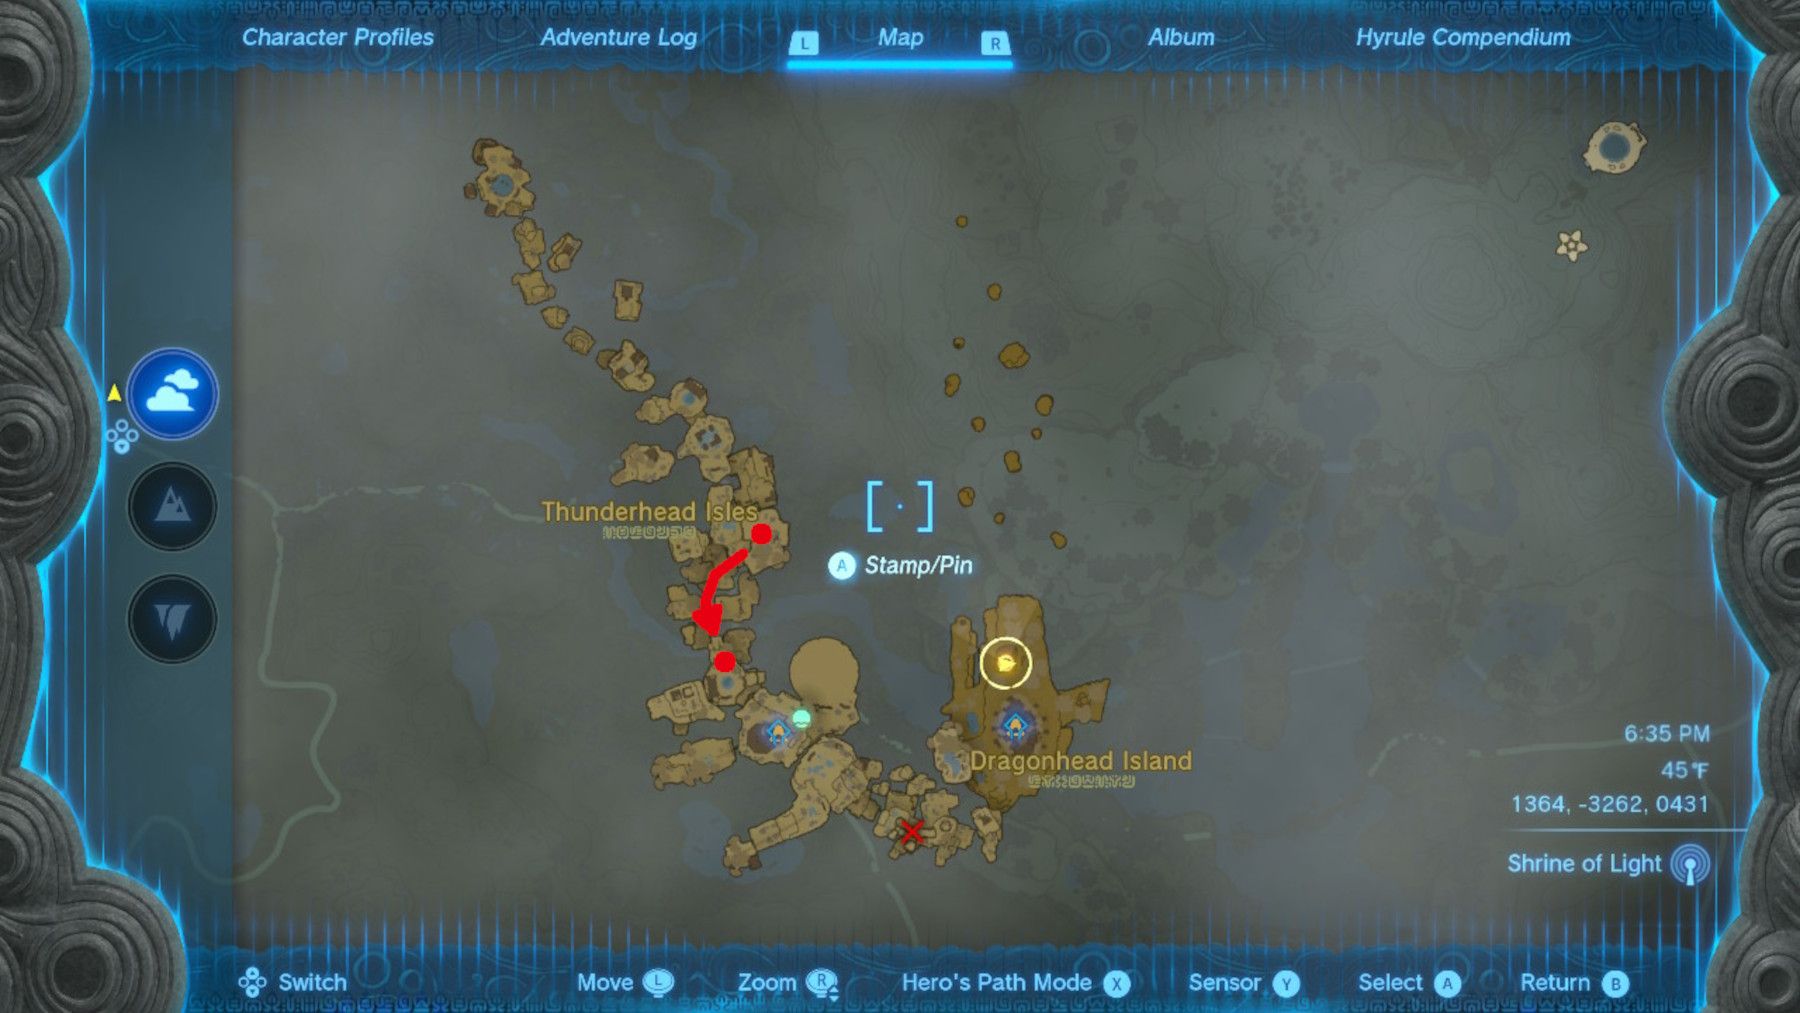
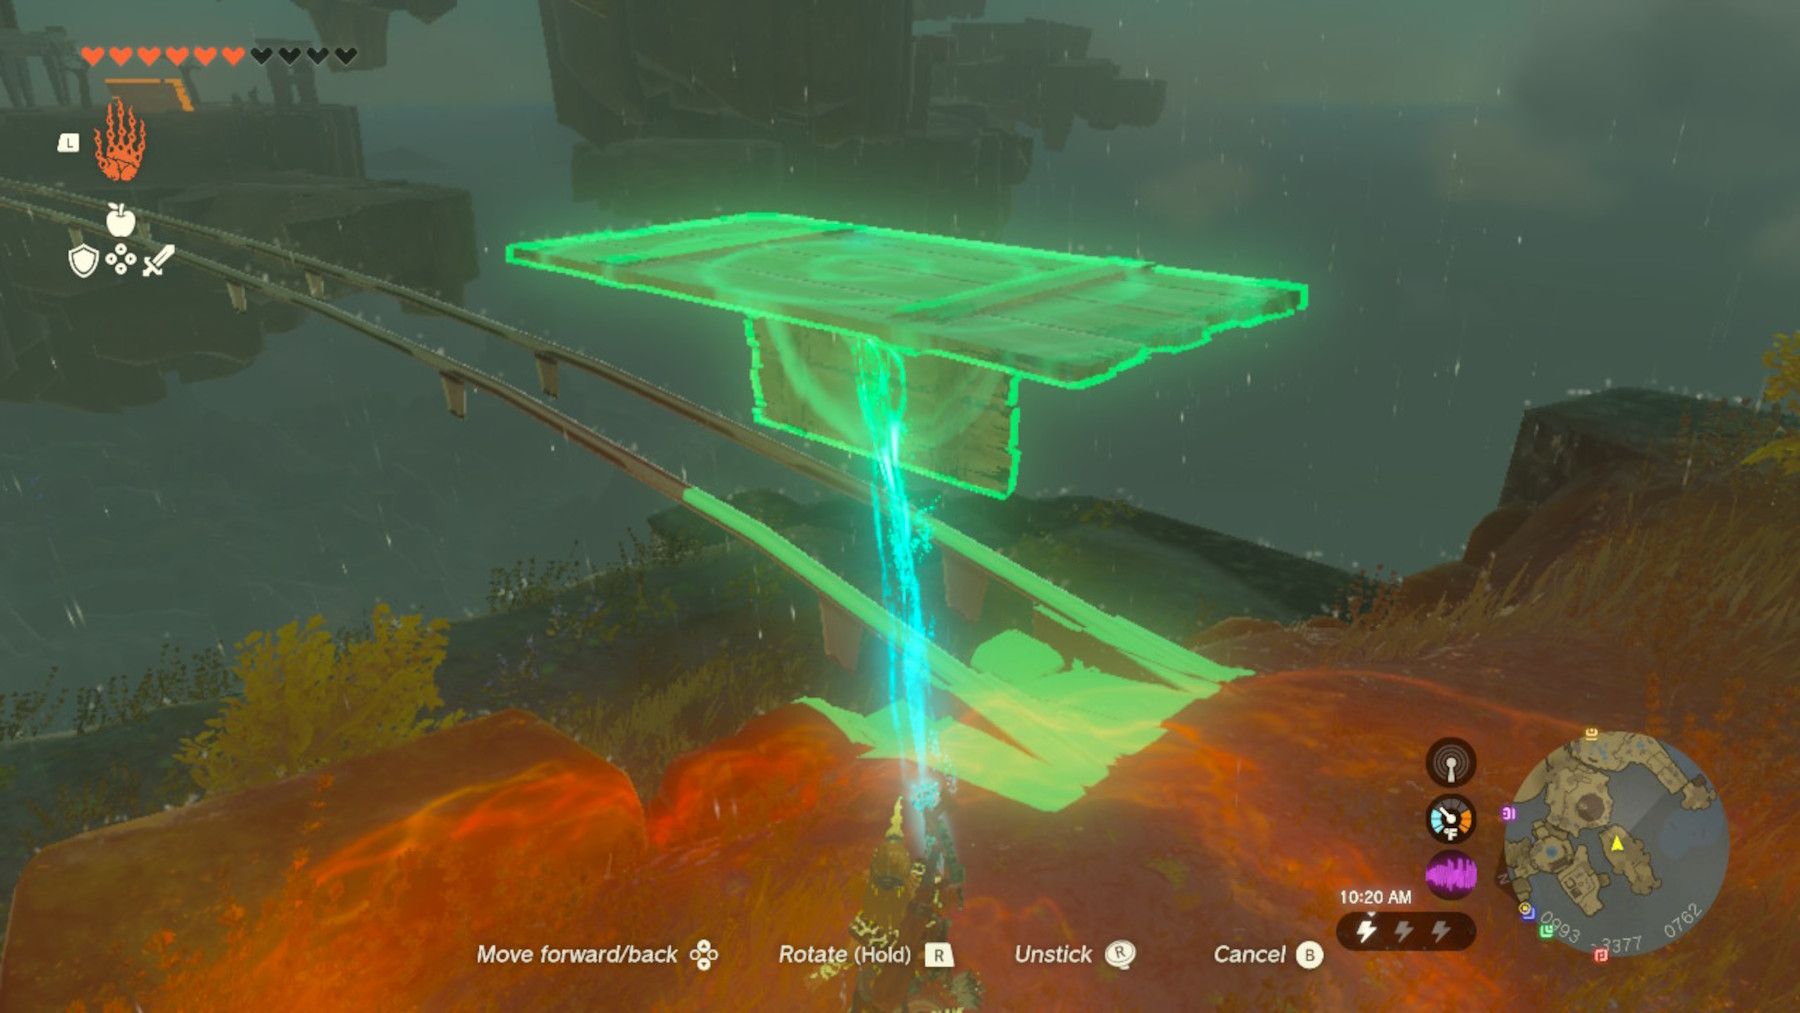
Next, follow the path until you reach the broken ramp located at 0967, -2939, 0770. Use TotK's Ultrahand ability to bridge the gap with the nearby wood platforms.
4 Images
Close
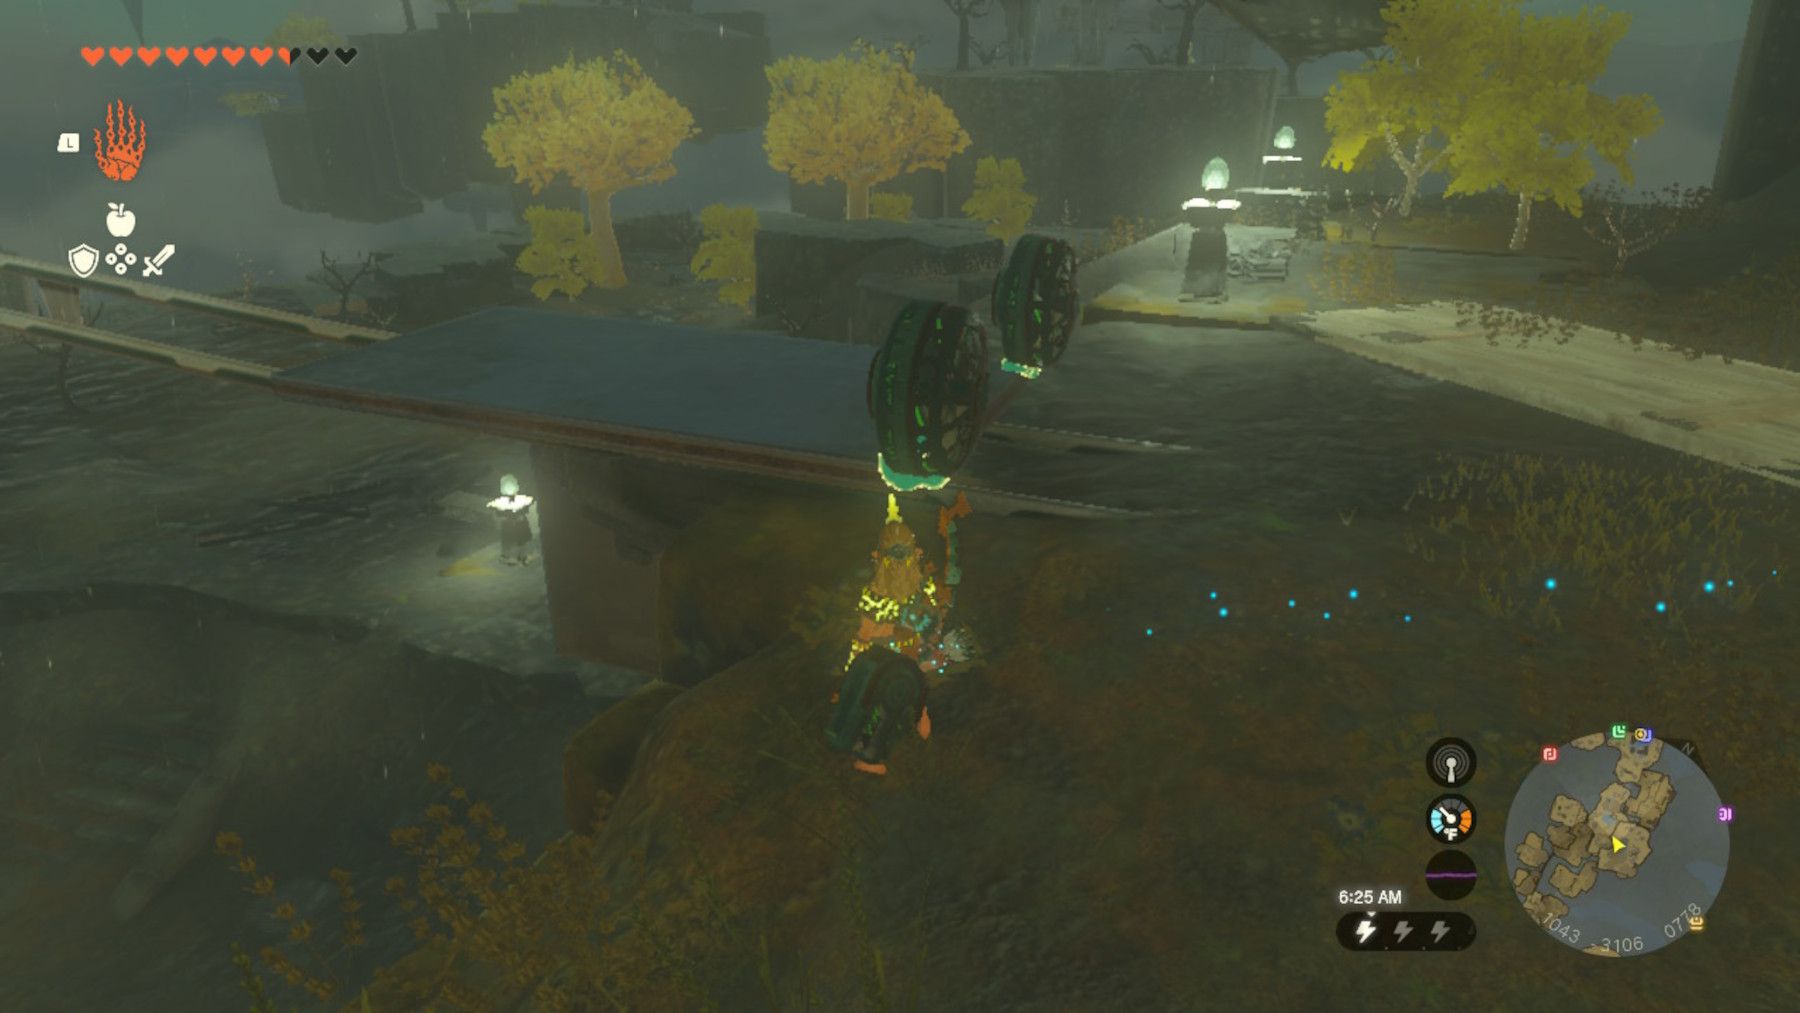
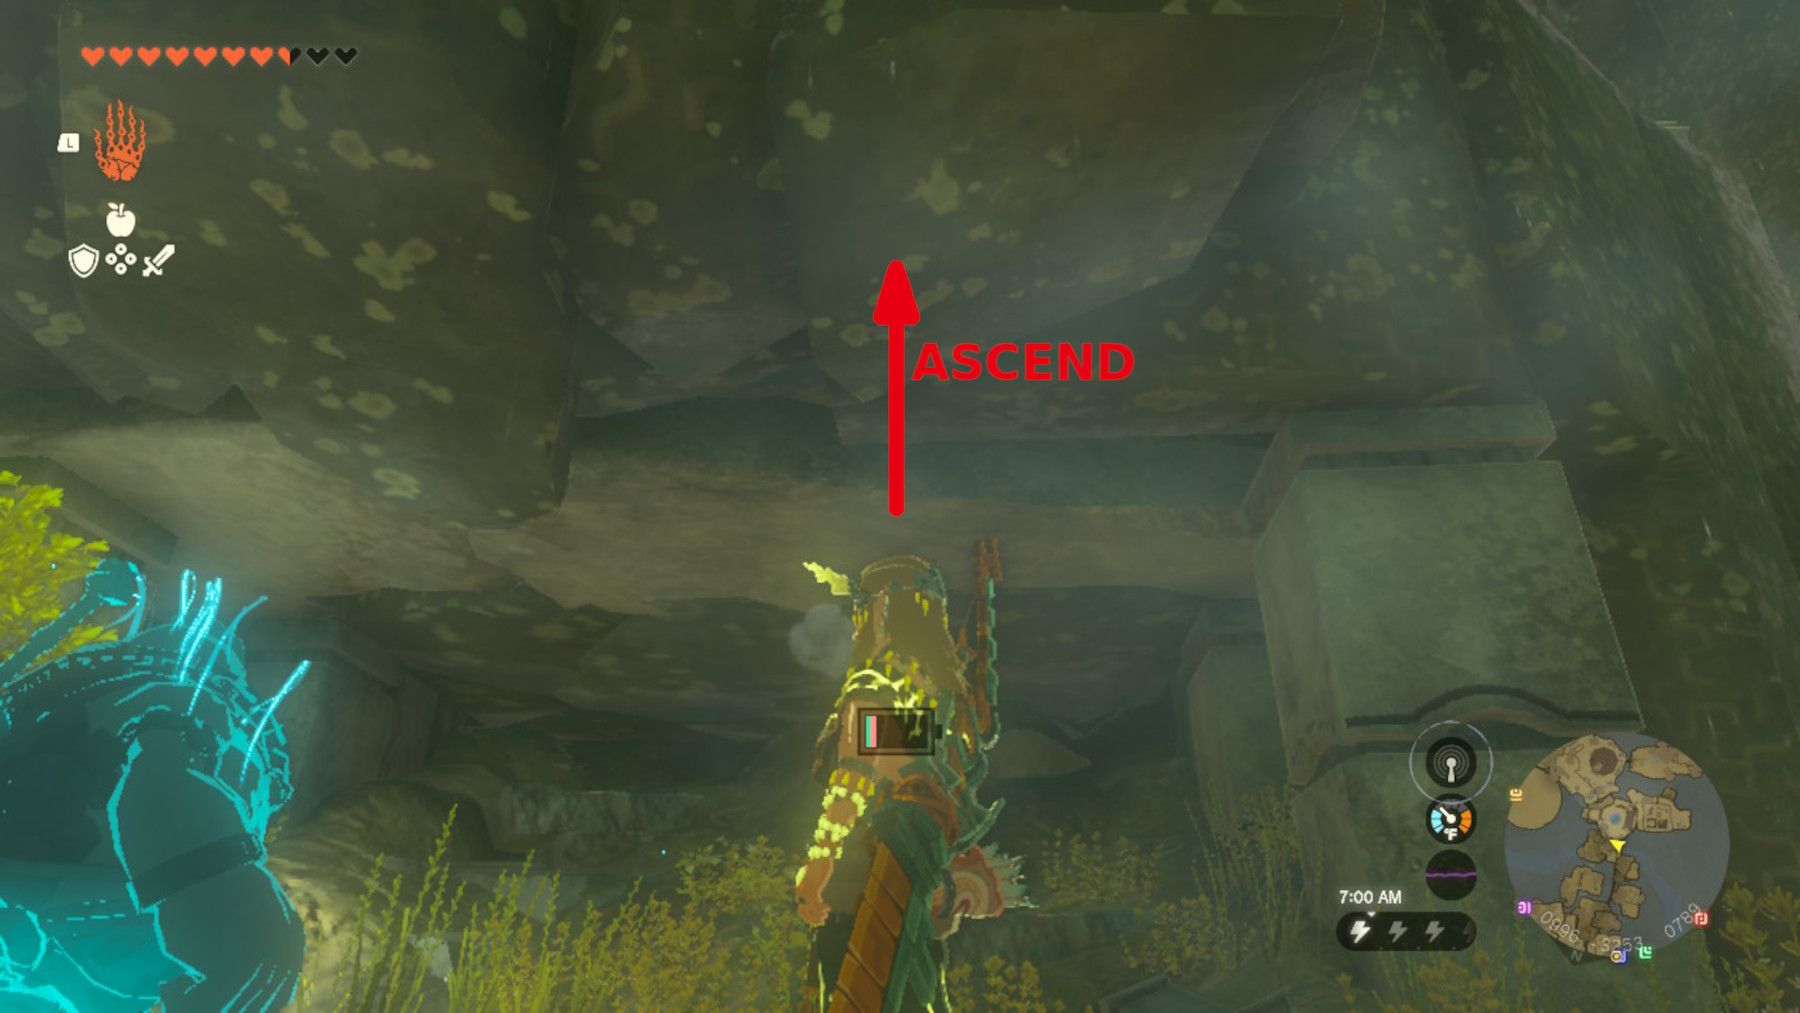
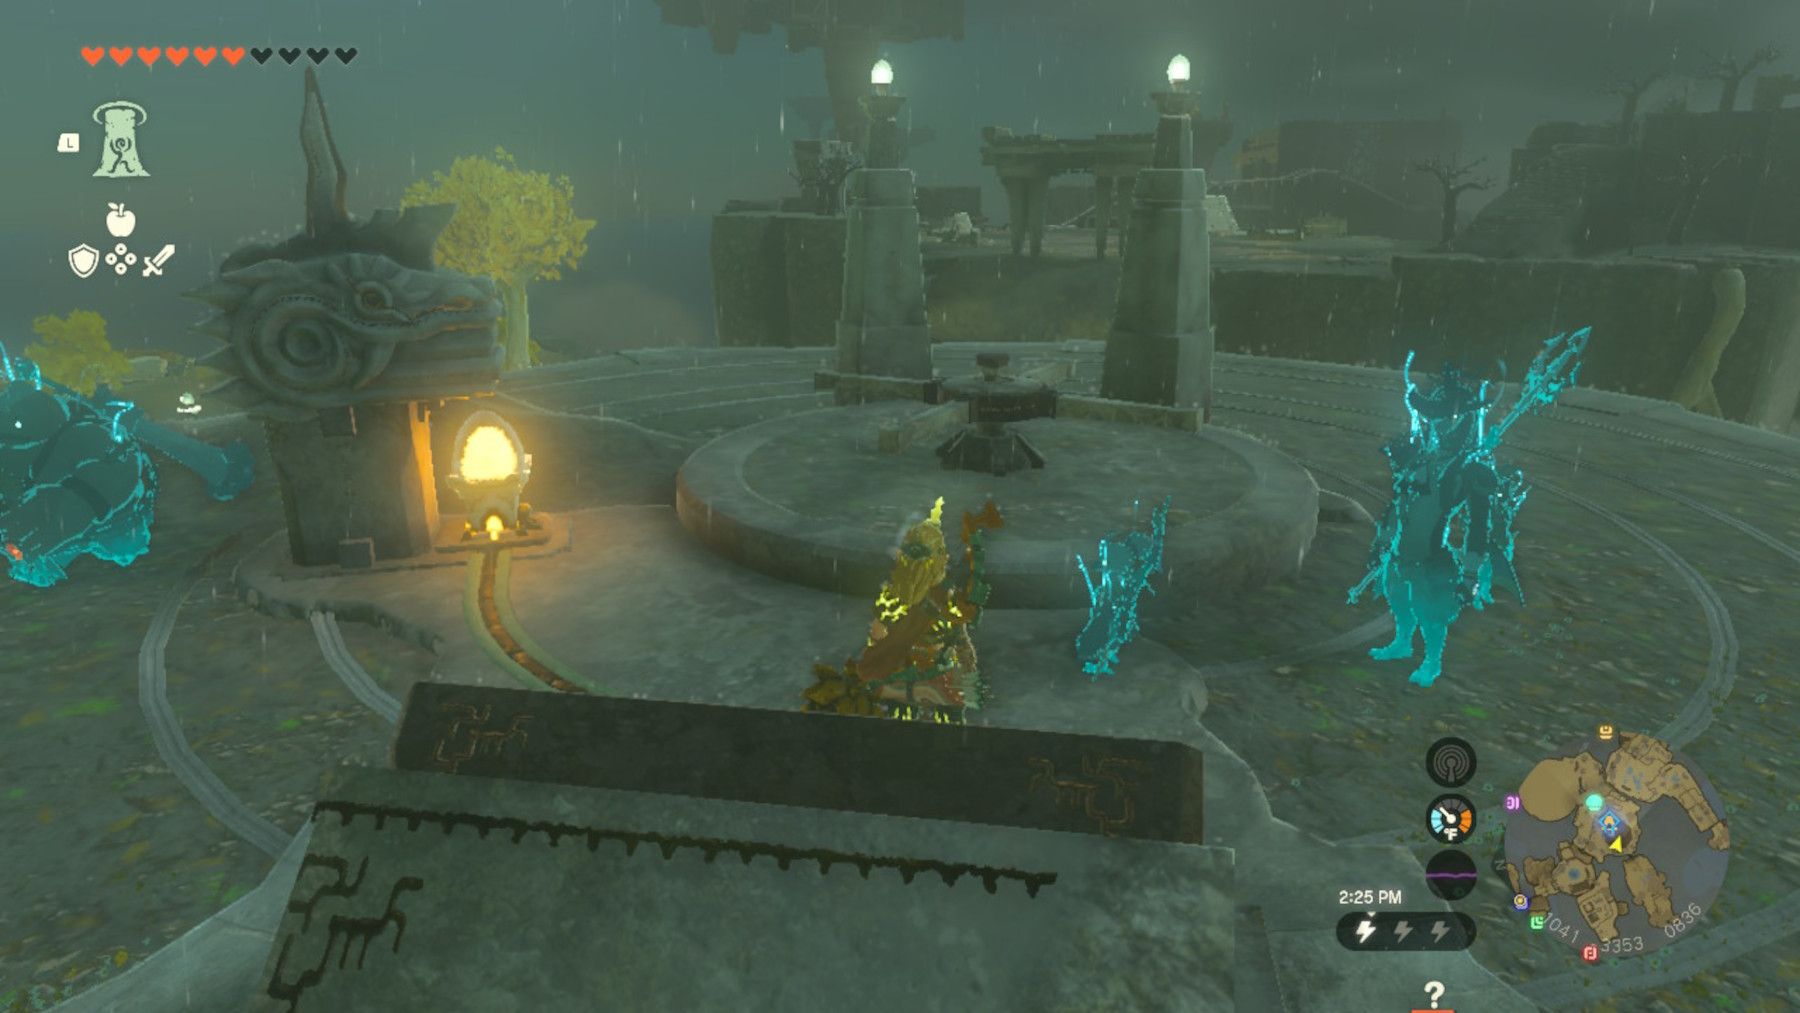
To reach the rails, head towards the coordinates 1048, -3097, 0779. Once you arrive, shift the T-shaped metal platform from the left rail to the right rail. Attach the fans and take a ride. Proceed forward until you are situated underneath the ledge and begin your ascent.
Here are four images to assist you:
Approach the enclosed Shrine and head towards the rails that are located downwards and to the left. You can glide to reach there easily. Once you reach the rails, place the t-shaped wood platform on them, attach the fans and ride it. You need to use the Ascend button halfway through the ride in order to reach the Joku-usin Shrine successfully.
3 Images
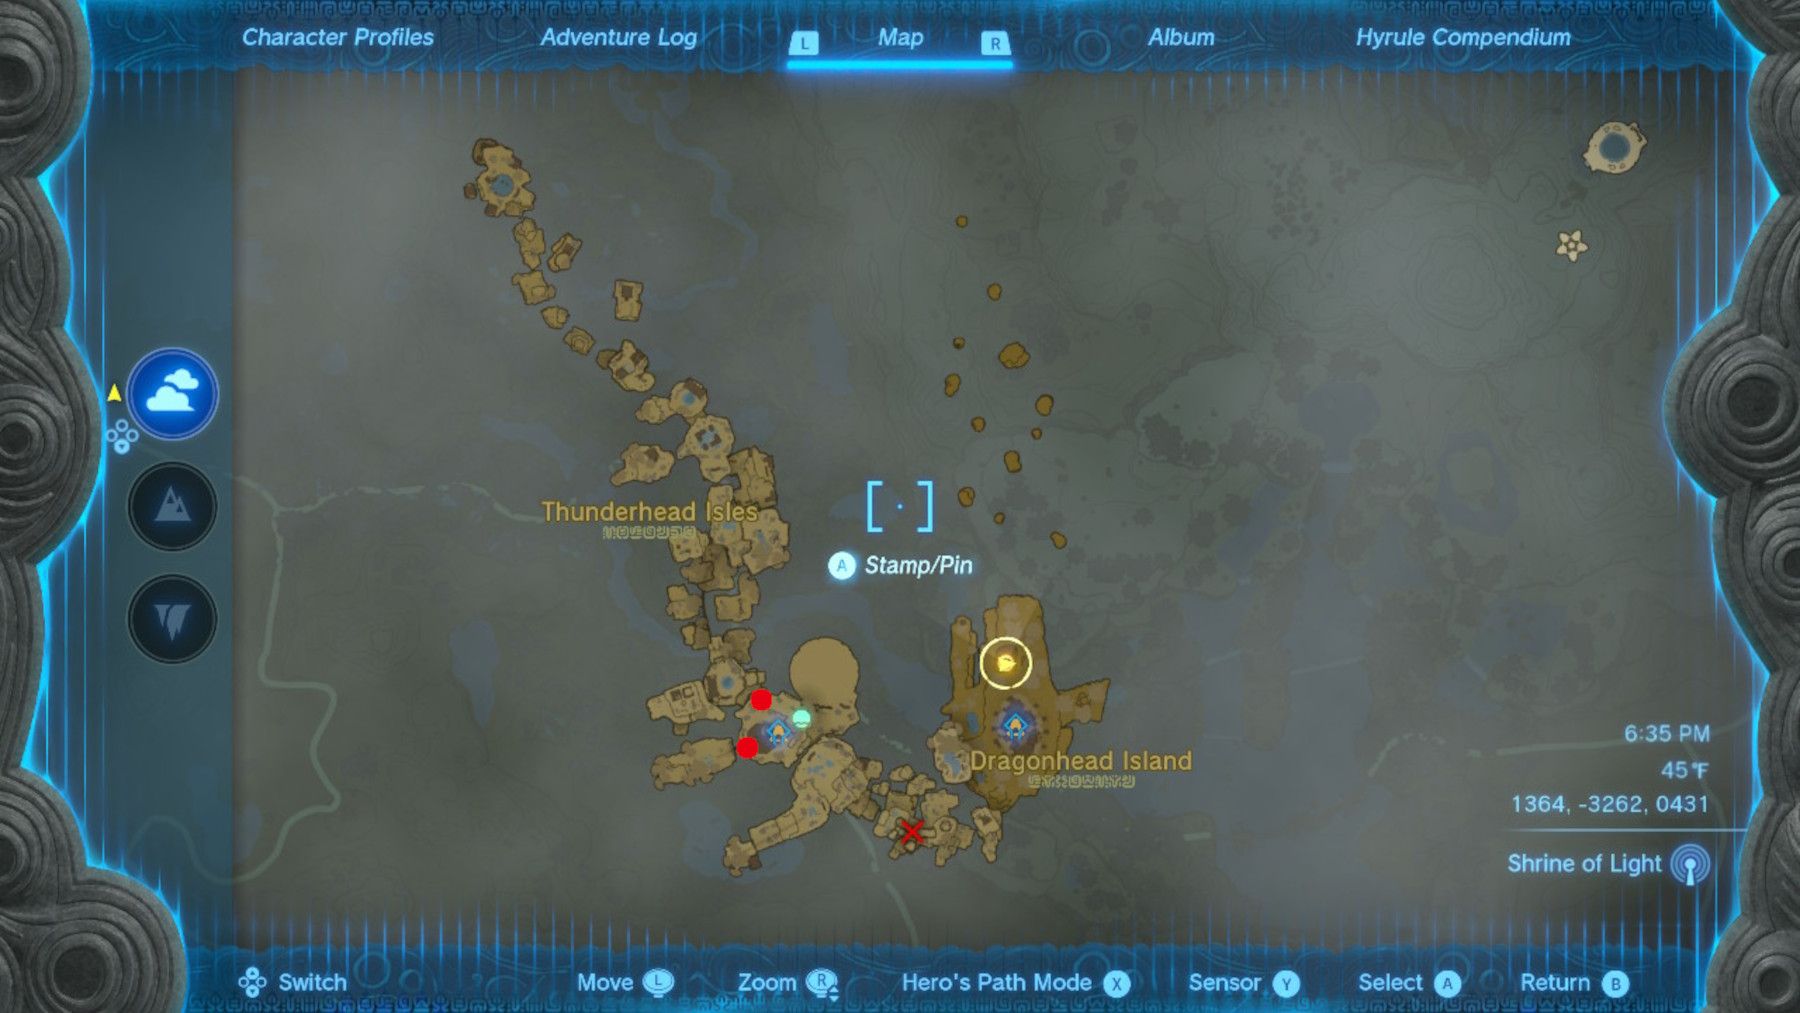
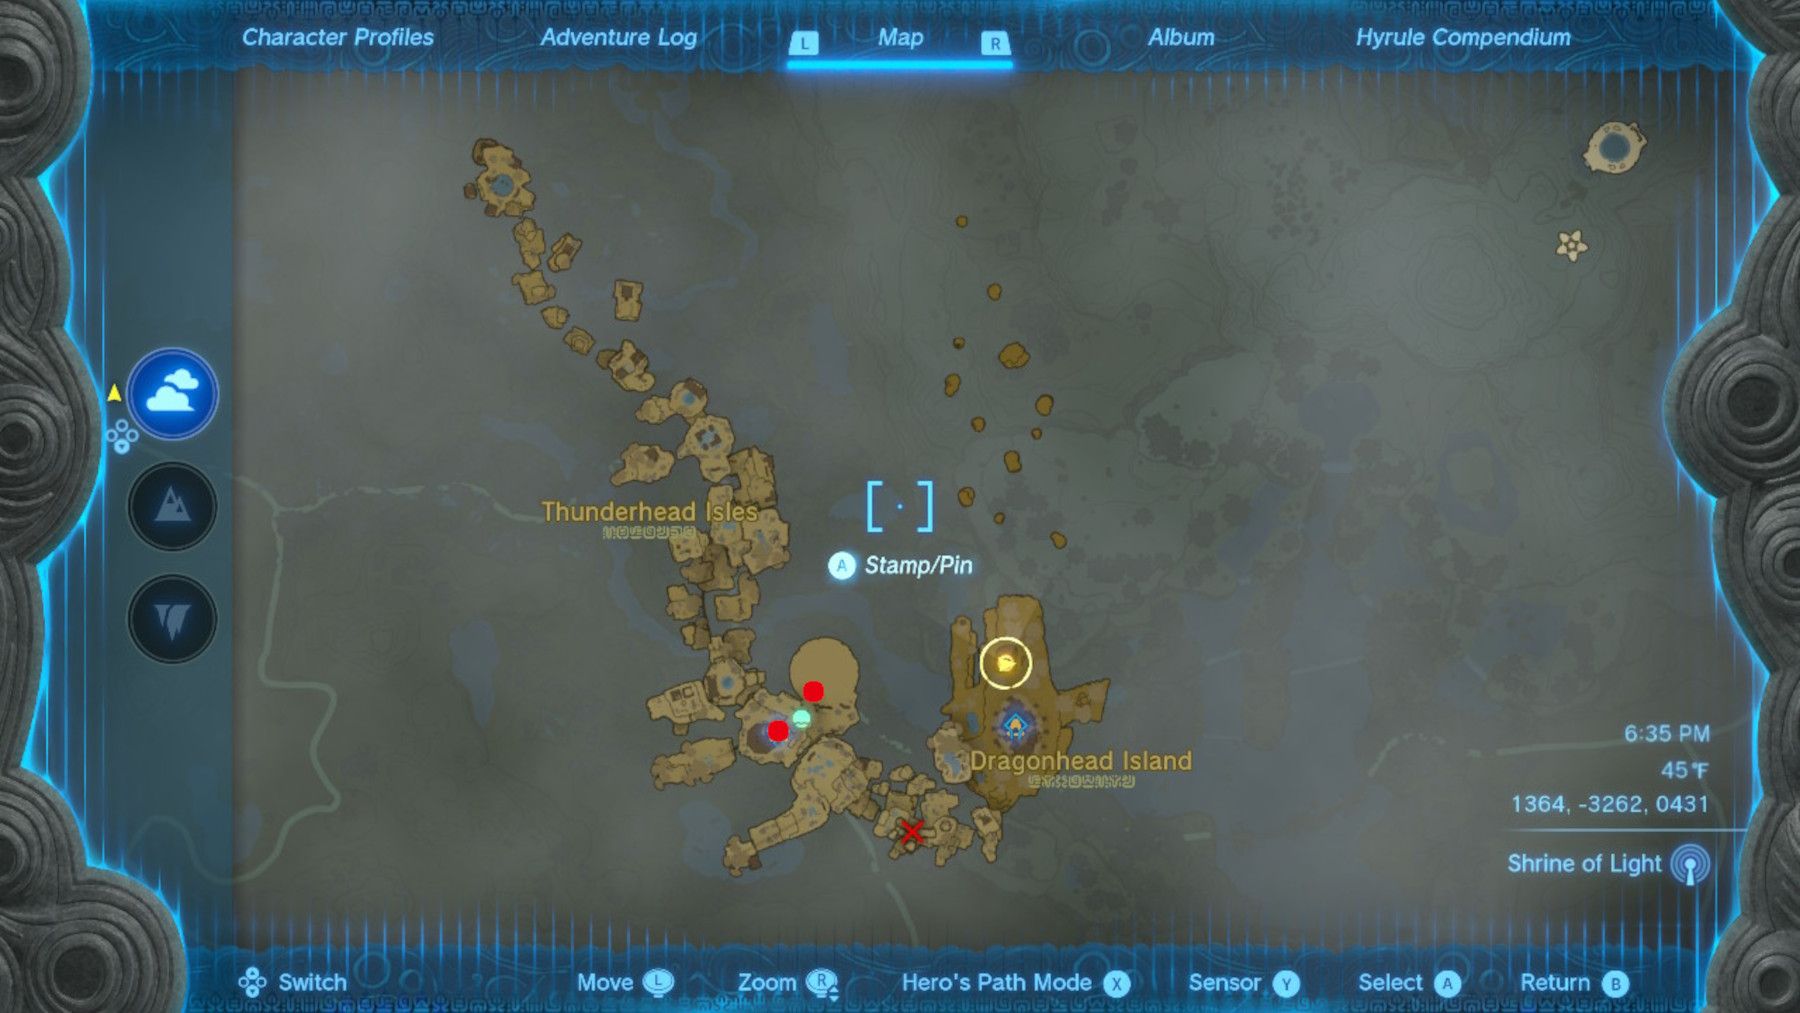
Climb up the ramps until you reach the coordinates 1059, -3311, 0795, and then ascend further. Follow the path until you come across a building that has three Like Likes inside (located at 1065, -3346, 0820). Stand near the chest that is against the back wall and then ascend again.
There are also three images available for reference:


Players should rotate the crank on top of the building in a clockwise direction as far as possible before standing on the angled launchpad. They should wait for lightning to hit the nearby dragon head before gliding southeast using Tulin's ability. This will lead them to a small island located at 1285, -3428, 0792. Once they have reached the island, they should glide down to the Shrine below.
Upon reaching Dragonhead Island, players should equip a sharp weapon to cut through the vines to the north of the Joku-u Shrine. This will give them access to a room with a large door. Before attempting to open the door, players should ensure that they have at least 10 filled hearts. They can then hold down the interact button to open the door and interact with the Zonai Relic inside to trigger a short cutscene and complete the Secret of the Ring Ruins main quest.
The Legend of Zelda: Tears of the Kingdom is now available for the Nintendo Switch.