The Ultimate Baldur's Gate 3: Sorcerous Sundries Masterclass
Discover the enchanting world of Sorcerous Sundries, the ultimate destination for wizards in Baldur's Gate Embark on a captivating journey through its chambers, from renowned wizards to the secrets of Ramazith's Tower Unveil the power of level 9 spells and explore various types of magic Beware the Genie's Lamp, it holds the key to your escape Immerse yourself in this mystical haven!
Quick Links
Ground LevelLorroakan and the Nightsong
The Secrets of Ramazith's Tower
The Sorcerous Vault and Gale's Quest
If Gale is a member of the party in Baldur's Gate 3, he will repeatedly express his desire to visit Sorcerous Sundries in Baldur's Gate. This shop boasts the finest assortment of tomes and magical scrolls in the area, surpassing even those found at Candlekeep. In addition to Gale's personal quest, the shop is also frequented by the wizard who commissioned an adventuring party to locate the Nightsong.
Ground Level
Searching Sorcerous Sundries: The Ultimate Guide to Wealth, Power, and Magic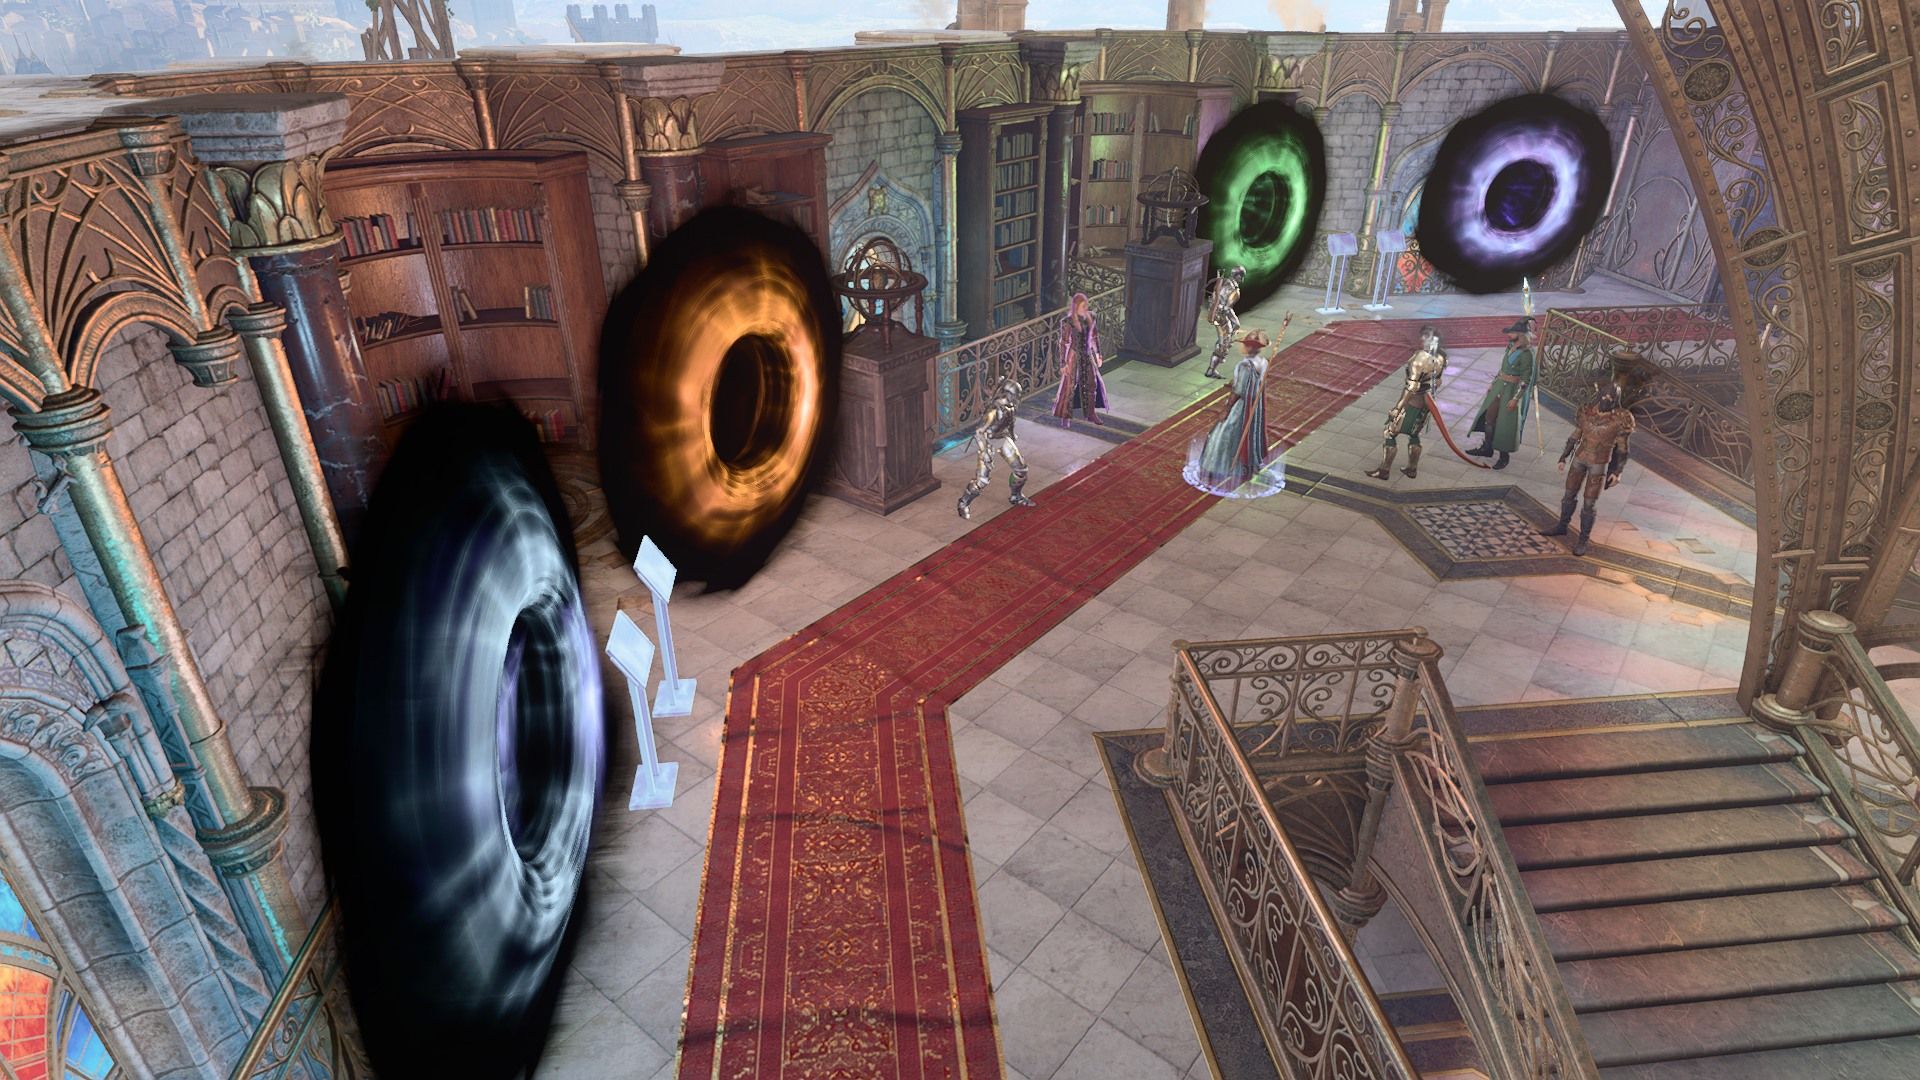
If the tiefling Wizard Rolan managed to survive Acts 1 and 2, players will come across him at the counter of Sorcerous Sundries. Rolan, now apprenticed under the master of the tower, Lorroakan, appears to have conflicting emotions regarding their relationship. Players can interact with him to purchase a wide range of magical items and spell scrolls. In case Rolan did not survive, an illusion of Lorroakan will be present in his place.
There is a second merchant named Tolna Tome-Monger situated at the rear of the shop. Players have the option to interact with her in order to progress Gale's quest and acquire knowledge about The Annals of Karsus, which contains the information Gale seeks. However, Tolna refuses to sell the Annals or any of the other three rare books in the tower's vaults. By successfully passing a DC 18 Deception, Intimidation, or Persuasion check, players can gain information about a portal to the vaults in Tolna's office. However, she will decline to grant permission for the party to enter.
Tolna's office is located on the next floor above, to the left of the stairs. The door is securely locked, resistant to destruction, and even if players manage to open it, an animated armor positioned at the top of the stairs will actively obstruct the party from trespassing. A skilled, invisible Rogue has the ability to pick the lock and gain access, but it is advisable for players to refrain from doing so at this time. Later on, the party will have a more convenient means of entering the vault.
The second floor of Sorcerous Sundries houses a projection of Lorroakan, where players can find the coveted Nightsong. However, Lorroakan is not interested in those who are oblivious to its essence. To separate the worthy from the ignorant, Lorroakan presents four portals, each accompanied by a plaque. Entering the wrong portal will transport the active party member back to the entrance of Sorcerous Sundries, depleting their hit points entirely. The correct portal, located on the far left, is marked by a plaque that reveals, "The Nightsong is an everlasting entity, born of divine lineage."
The other thing players can find on the second floor of Sorcerous Sundries is a projection of Lorroakan. Lorroakan wants to obtain the Nightsong, but he doesn't want to waste his time with anyone who doesn't even know what it is. As such, the projection opens four portals with a plaque in front of each one. If players choose the wrong portal, it'll teleport the active party member to the entrance of Sorcerous Sundries and drop their hit points to zero. The correct portal is the furthest to the left, the one with the plaque that says, "The Nightsong is an immortal being, the child of a deity."
Lorroakan and the Nightsong
The quest "Find the Nightsong," initiated in Act 1, reaches its climax within Ramazith's Tower. This towering structure, overseen by Lorroakan, the current proprietor of Sorcerous Sundries, looms over the cityscape of Baldur's Gate. Naturally, the outcome of this quest hinges greatly on the choices players made in their interactions with Nightsong during Act 2.
Lorroakan is determined to replicate Ketheric Thorm's success in achieving immortality through the capture of Nightsong. If players successfully killed Nightsong in Act 2, informing Lorroakan of this unfortunate outcome will bring the quest to a close. Conversely, if Nightsong is alive and present in the party camp, the speaker has the option to deceive Lorroakan by claiming her demise.
However, this action does not resolve the quest entirely, as players still have the opportunity to inform Nightsong about Lorroakan. Upon learning of his involvement, Nightsong will express a desire to confront the wizard personally. It is important to note that players cannot access the camp directly from Ramazith's Tower; instead, it is accessible through the portal in Sorcerous Sundries on the opposite side.
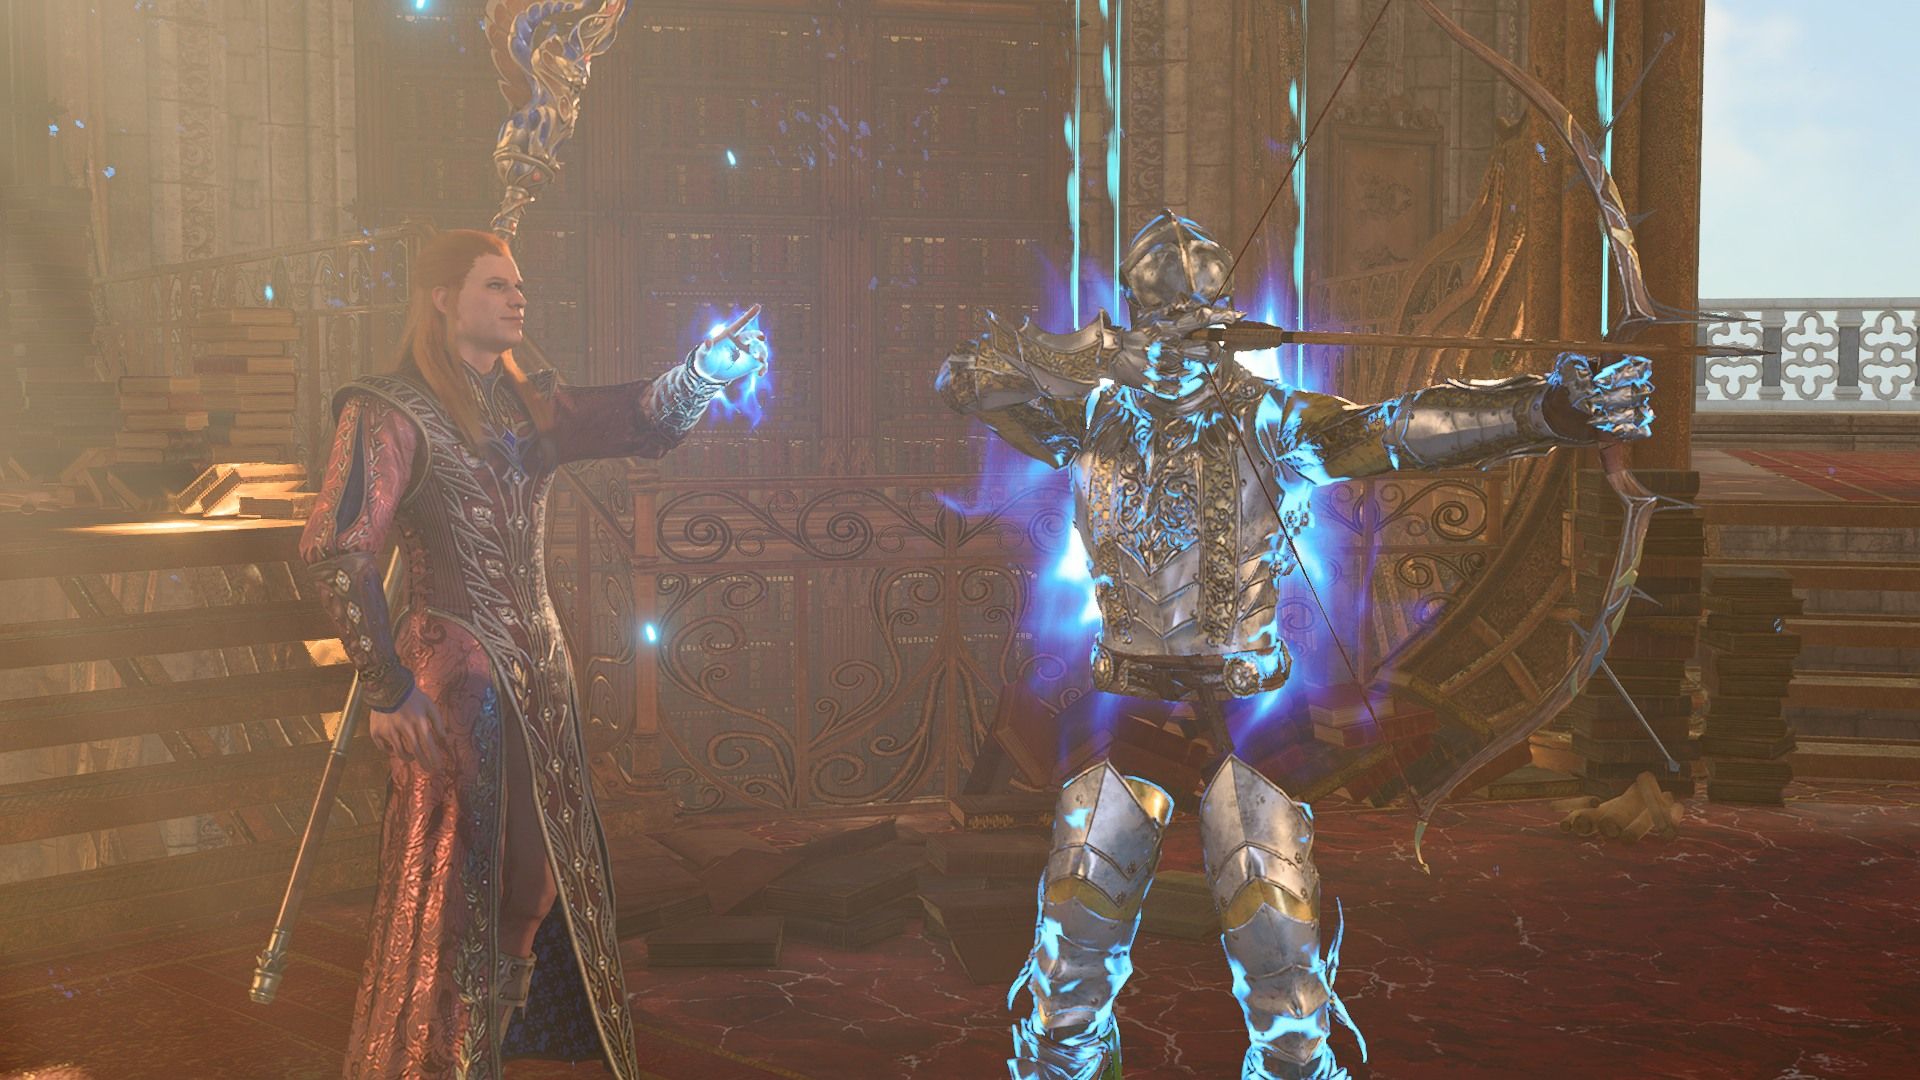
If players unite Nightsong and Lorroakan, the wizard will request the party's assistance in restraining her. The party can choose to accept his proposition or aid Nightsong in eliminating Lorroakan. Rolan, if alive, will also be present and will consistently support the party.
Defeating Nightsong is significantly less challenging compared to defeating Lorroakan. The aasimar operates on her own, whereas Lorroakan is supported by four elemental myrmadons, an animated armor, and his assistant at level 1. If the party aligns with Lorroakan, he will generously reward them with 5000 gold pieces and become an ally for the "Gather Your Allies" quest.
If the party chooses to align themselves with Nightsong, they will forfeit the monetary reward but gain unrestricted access to the top floor of the tower. It is advisable to thoroughly search all open shelves and display cases for valuable scrolls, potions, and gems. Additionally, Lorroakan's body offers the opportunity to obtain the powerful Shelter of Athkatla and Despair of Athkatla magical equipment. Furthermore, should Rolan survive the ensuing battle, he will assume control over the tower and become a valuable ally to the party, replacing Lorroakan. This outcome is deemed the most favorable as it ensures the ongoing support of Nightsong.
The Secrets of Ramazith's Tower
Several of the balconies in Ramazith's Tower are noticeably damaged, indicating that Baldur's Gate 3 requires players to make daring jumps from these spots. This pattern continues in this specific region as well. Instead of using the portal to descend to the ground level, players have the option to leap from the balcony to the floor below, leading to a previously unexplored area. To safely reach this new zone, the party can employ Feather Fall for a smooth descent.
The party will encounter multiple gas traps on this floor, though they are currently inactive. Additionally, there are numerous chests and display cases containing an assortment of gems, potions, and scrolls. No NPCs are present on this floor, allowing players to freely collect any items they desire, regardless of whether Lorroakan or Rolan is in control of the tower.
Furthermore, players may spot two magic items safeguarded by magic barriers one level below. Unlike the accessible balcony outside, the party cannot simply jump down to access them due to an invisible force field encompassing the central opening of the tower. Instead, they must interact with the four arcane buttons located on the outer ring. Let's discuss their functions:
Security | Summons four Arcane Cannons that attack the party. They have Medium Toughness but are weak to Lightning damage. |
|---|---|
Cleanup | Activates the gas traps, creating permanent pockets of Cloudkill throughout the area. |
Vaults | Teleports the person who interacts with the button (not the party) to the Sorcerous Vault. |
Lower | Teleports the whole party to the lower floor with the two magic barriers. |
In addition to the obstacles, there lies a chest on the lower level containing the elusive Sorcerous Sundries Mystery Door Key, as well as a trapped display case preserving the Heavy Iron Key. To unlock the enchanted barriers, the party must interact with each lever individually, requiring the active member to successfully complete an Arcana check with a difficulty class of 20.
The two barriers safeguard some of the most valuable equipment available to Wizards and Sorcerers in the entire game. The first item is the Markoheshkir staff, which provides a +1 bonus to spell attack rolls and save DCs, grants the wielder a free spell slot of any level, and allows them to cast the unique spell Kereska's Favor. This spell enables the wielder to select a common damage type and grants resistance to that damage until their next long rest, while also dealing bonus damage of that type on weapon attacks.
The second item is the Robe of the Weave, which also grants a +1 bonus to spell attack rolls and save DCs. Additionally, it enhances the wearer's Armor Class by +2 and restores 1d6 hit points whenever they successfully save against a spell. Even Bards or Clerics would find great utility in utilizing these items.
Once players have obtained all desired items and achievements in this level, they should press the designated "Upper" button to ascend to the floor above. Although navigating back to Lorroakan's level may pose a challenge, players can conveniently utilize the Vault button to further delve into the tower.
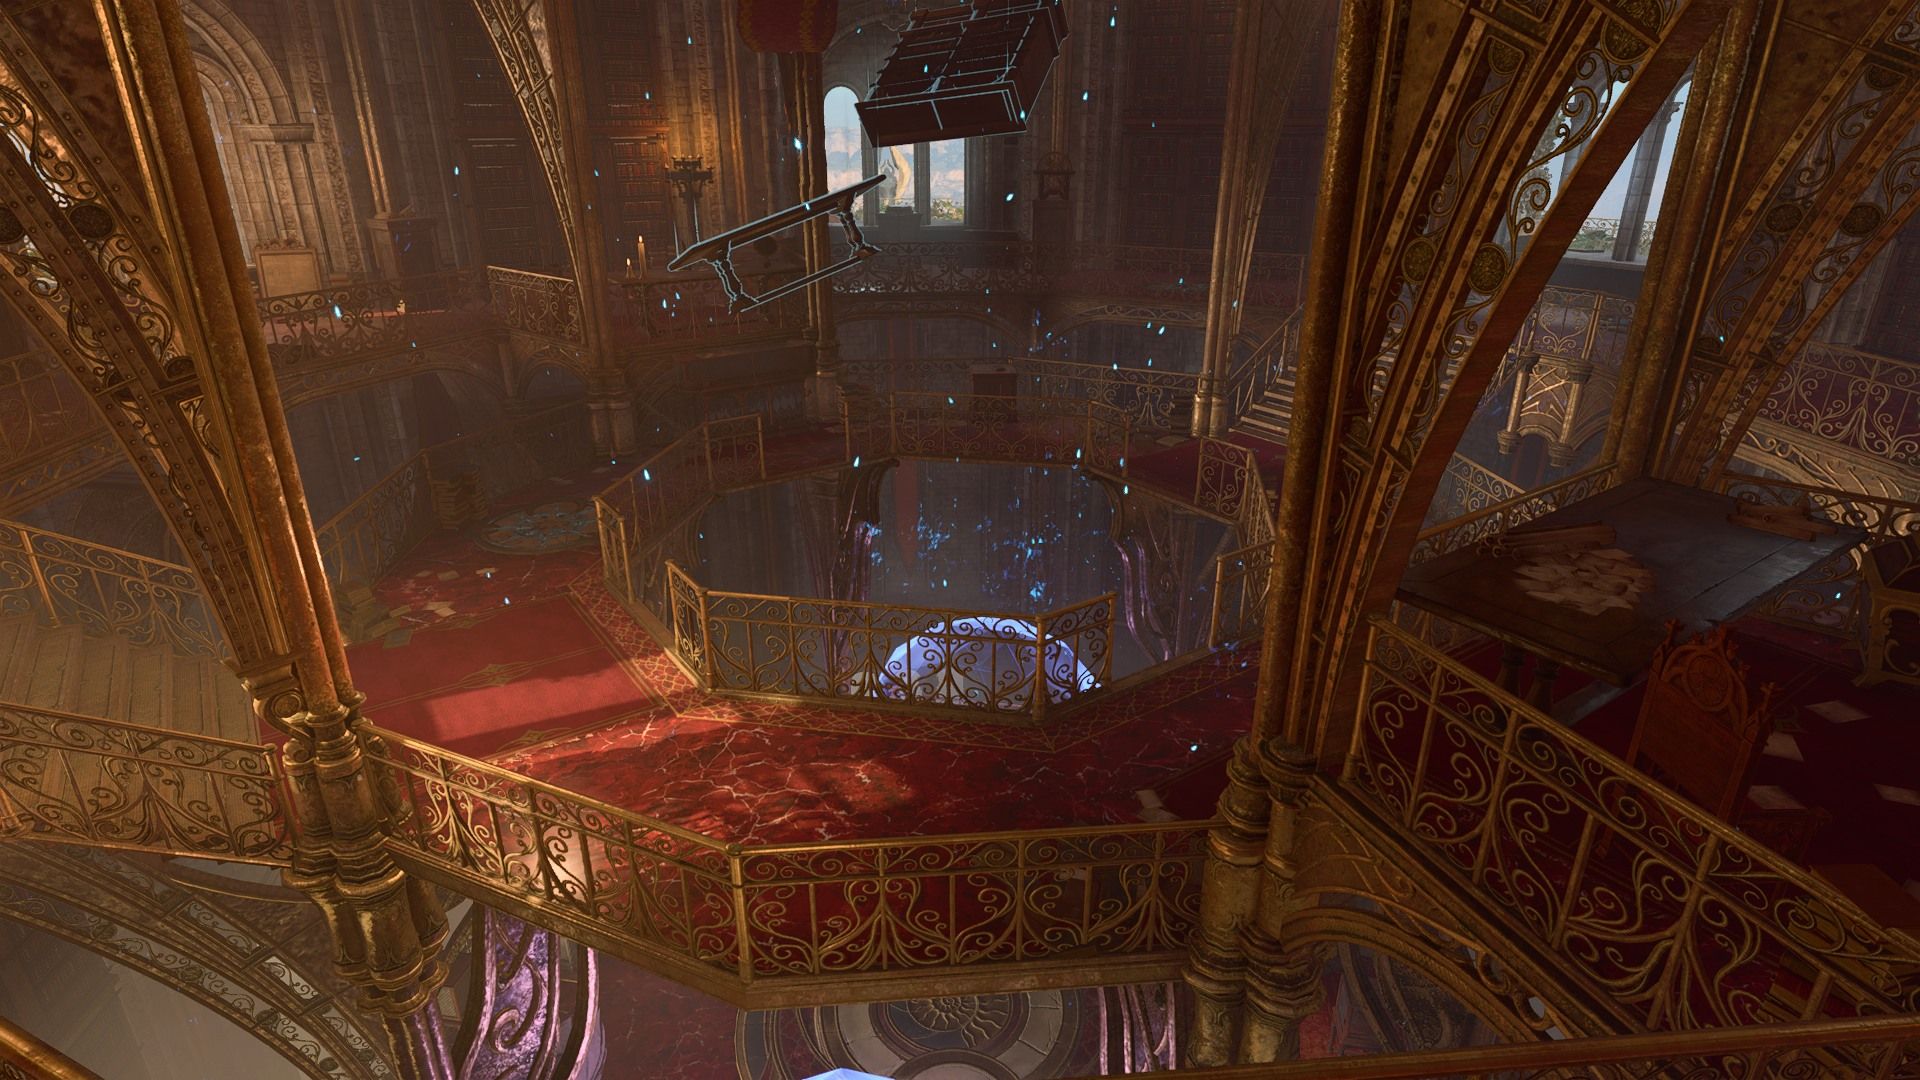
The Sorcerous Vault and Gale's Quest

Party members are transported by the teleporter in Ramazith's Tower to a circular red room within the Sorcerous Vault area. Ensure a thorough search of the vault is conducted, as valuable items can be found within every metal crate, scroll shelf, and display case. Of particular significance is the glass display case, which contains one of the four rare books titled "The Red Knight's Final Stratagem." Reading this book grants the party a unique scroll known as "Artistry of War." Gale or any other Wizard in the party can add this spell, a level 5 incantation that inflicts 2d6+6 Force damage to a maximum of six targets, to their arsenal.
Players should not only read but also collect every rare book. Each book has a value of 1333 gold pieces, and its benefits can only be obtained once.
To exit the room, players do not need to jump across the empty void or to access the gilded chests on the sides. Similar to Ramazith's Tower, a force field protects the open sections of the floor, allowing party members to freely walk wherever they choose.
Outside the room, there is a stone walkway that leads to a bricked-up archway. To open the archway, pull the lever located to the right of it. Before doing so, players have the option to unlock two large chests to obtain potions and alchemy ingredients. Additionally, there is an illusion on the wall behind the east chest, which the party can walk through to discover a hidden room containing a peculiar lamp. It is advised to refrain from touching the lamp at this time. Before making a decision regarding the lamp, save the game and read the section below about it.
Passing through the stone archway leads to the central portal room, which provides access to the vault. This portal connects to Tolna's office and serves as the exit from this area. If the party entered through this portal, they can open a secret door from the other side by pressing a button located on the north side of the room. If they did not enter through the portal, it is recommended to take a moment to visit the office and retrieve the Basement Chest Key. As long as her door remains closed, the party will not face any consequences for trespassing or stealing. Once the party returns to the vault, it is important to thoroughly check every container and shelf before proceeding.
South of the portal room lies another walkway, accompanied by a pair of chests and a concealed room. Behind an illusory wall, concealed behind the west chest, rests the room. Inside, one will find two shelves, a gilded chest, a collection of Lorroakan's writings, and the book titled "Caution Before the Seelie." Immersing oneself in the words of this book yields the Scroll of Bestial Communion. This scroll, when cast by a skilled wizard, manifests as the spell "Sights of the Seelie: Summon Deva," a potent ability to summon a celestial being, akin to the Planar Ally spell commonly used by clerics.
The southern door remains inaccessible without the Sorcerous Sundries Mystery Door Key. Once obtained, it allows entrance to a unique vault puzzle. The objective is to unlock the side doors and gain access to the final two rare books housed within the vault. Each chamber within the vault holds its own distinct naming theme, intricate connections, and a variety of traps to navigate.
Chamber 1: Famous Wizards
This is the chamber the party starts in. The traps are circular marble plates in front of each door.
Ramazith is the door that leads back to the rest of the vault area.
The Elminster door is locked, unpickable, and indestructible.
The Karsus door has the same properties as the Elminster door.
The Silverhand door goes to Chamber 2.
Chamber 2: Schools of Magic
The traps in this room are rectangular marble plates between the central pillar and each door.
Transmutation goes to Chamber 1.
Illusion goes to Chamber 1.
Evocation goes to Chamber 3.
Abjuration goes to Chamber 4.
Chamber 3: Level 9 Wizard Spells
The trap activation plate is located on the central pillar within this chamber. Once every party member steps off the plate, the trap will be triggered. This, in turn, activates four gargoyle heads on the walls that start launching ice projectiles into the room. To deactivate the trap, it is necessary for the party member standing on the plate to separate from the rest of the group. Subsequently, each gargoyle head should be approached by someone in order to disarm them. Disarming the gargoyle heads requires a relatively low DC of 10, which means that anyone equipped with a trap disarm kit can handle the task.
Invulnerability goes to Chamber 1.
Foresight goes to Chamber 1.
Gate goes to Chamber 2.
Wish goes to a room with a lever, and pulling this lever opens the Elminster vault. Be careful, because this room also has traps in it.
Chamber 4: Types of Magic
The trap in this chamber is identical to the one in Chamber 3. The only difference is that the gargoyles shoot fire projectiles instead of ice.
Wild goes to Chamber 1.
Demon goes to Chamber 1.
Shadow goes to Chamber 2.
Silver goes to a room with a lever that unlocks the Karsus vault.
The Elminster vault consists of two small chests, two large chests that are invisible, and the Tharchiate Codex. By perusing this book, the party gains the ability to safely utilize the Necromancy of Thay tome discovered in Act 1. Additionally, it bestows the curse known as Tharchiate Withering upon the reader, causing their Constitution score to decrease by 5. The spell Remove Curse can be used to terminate this effect and substitute it with Tharchiate Vigor, which grants the reader 20 temporary hit points after each Long Rest.
Within the Karsus Vault, you will find several magic weapons with a +1 enhancement, two invisible chests, four shelves filled with scrolls, the Scroll of Dethrone, and The Annals of Karsus. Reading The Annals will reward the party with a secondary Scroll of Dethrone, another level 5 spell that inflicts 10d6+20 Necrotic damage on a single target, or half if they successfully save against Constitution.
The Annals of Karsus, the book Gale seeks, will surely capture his immediate attention should he be present. With this invaluable information, Gale will have the means to restore the Crown of Karsus, although his actions thereafter remain uncertain.
How to Escape the Genie's Lamp
With all four rare books in hand, there's just one thing left to do in the Sorcerous Vault: touch the Peculiar Lamp.
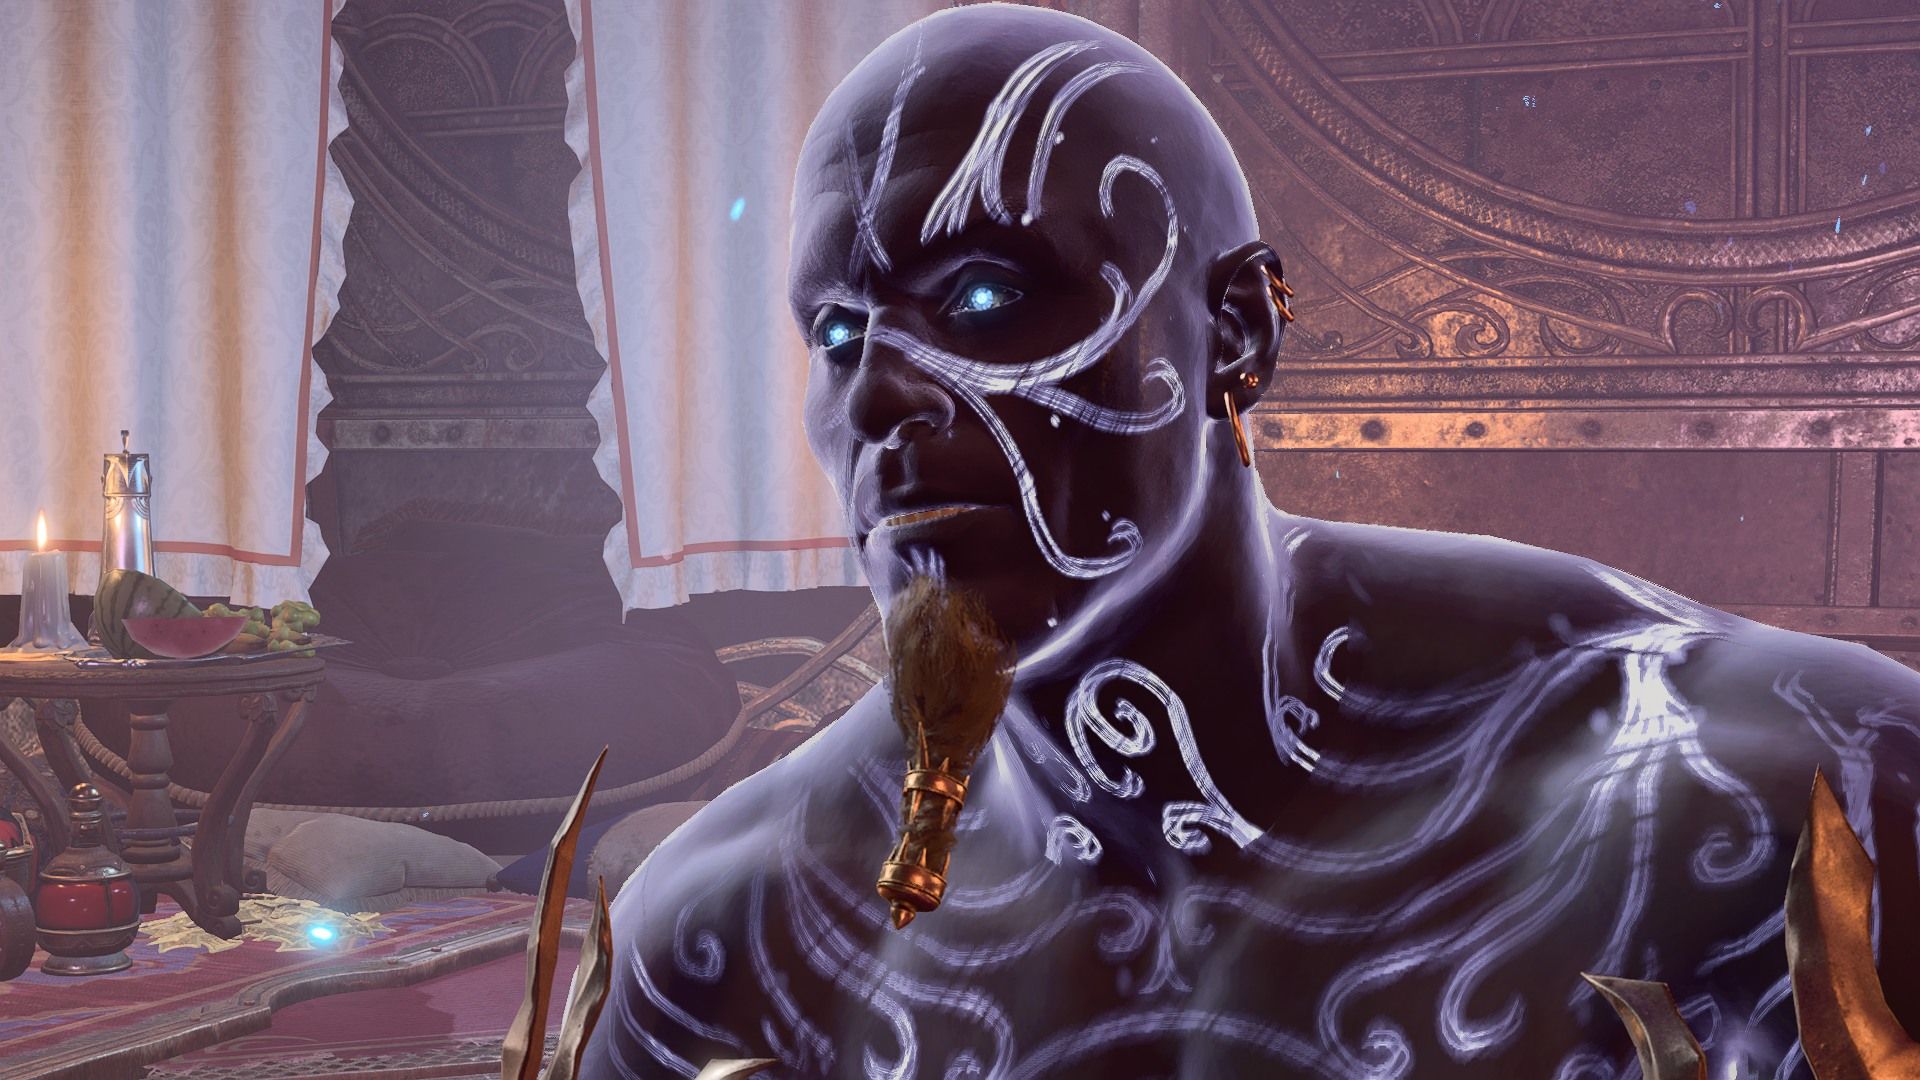
Any party member who touches the magic lamp will be instantly transported to a unique space known as the boudoir within the lamp. Here, they will encounter a djinni named Yafeu who expresses gratitude for their release. Subsequently, Yafeu will materialize in the party's vicinity, explaining that the only means of liberating an individual from the lamp is by touching it and taking their place. The players have the choice to engage in combat with Yafeu, demand 1,000 gold as recompense for the lost companion, or release the djinni without any demands. However, regardless of their decision, the players cannot persuade Yafeu to touch the lamp again.
Nevertheless, players may still harbor a desire to enter the lamp. The lamp's boudoir is replete with nourishment and valuable potions, which can only be obtained through the act of confining someone within. It is worth noting that neither summoned creatures nor Magic Hand spells can interact with the lamp, hence trapping an individual is the sole means of acquiring these potions.
Fortunately, there's a way to trap a party member without getting anyone stuck inside forever. It's a matter of exploiting Withers and his hirelings.
Go up to Tolna's office, then go to camp.
Dismiss at least one party member.
Talk to Withers and pay 100 gold for a hireling. Any hireling will work.
Head back to Tolna's office, make your way back to the Sorcerous Vault, and have any character engage with the Peculiar Lamp. Additionally, if desired, request payment from Yafeu as he departs. While this may not be favored by most party members, there are no negative consequences. Instruct the party member within the lamp to collect all potions, scrolls, and other valuable items.
Have the hireling touch the lamp and go inside.
Bring the rest of the party back to Tolna's office and return to camp.
Talk to Withers and dismiss the hireling.
Players can still re-hire the trapped hireling, but their items and levels will be reset. There's no other cost to sacrificing a hireling to the lamp.
Baldur's Gate 3 is available now on macOS and PC, and it's coming to PS5 on September 6.