
Simple Methods to Modify the Administrator Username in Windows 11
Easily modify the Windows administrator name in Windows 11 with these 4 methods: using the Settings App, Control Panel, Netplwiz Command, or Command Prompt
Some Noticeable Information
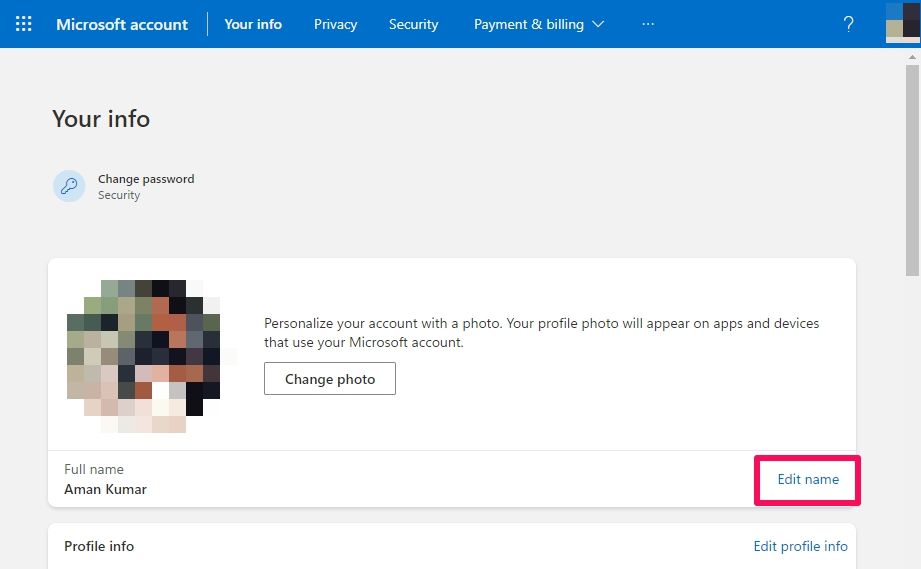
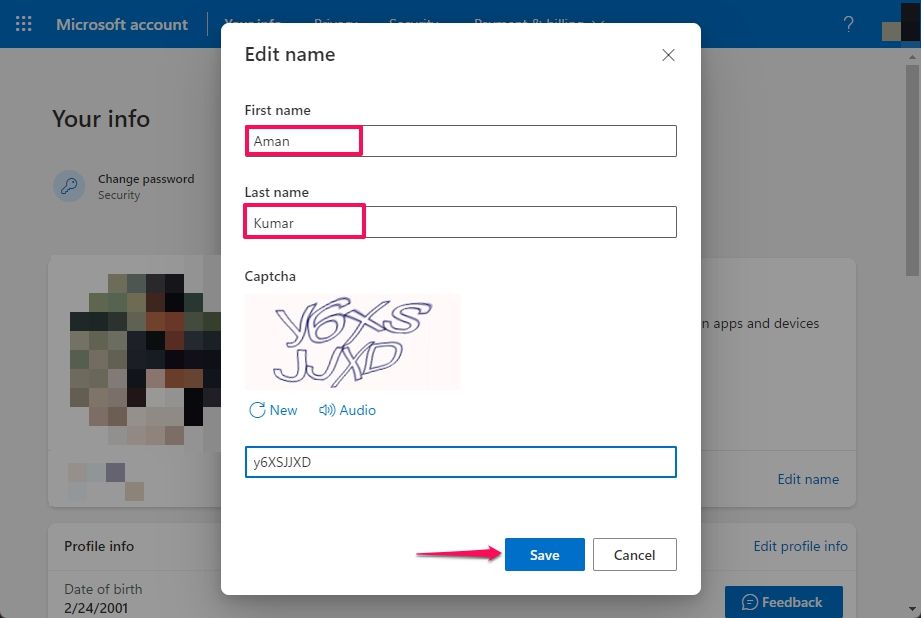
To modify your administrator name while utilizing a Microsoft account, access the Settings application and go to Accounts > Your info > Accounts. Afterwards, on the Microsoft account page, select the "Your info" option located in the top bar and then choose "Edit name". Input your first and last name before clicking "Save".
To modify the administrator name in a local account on Windows 11, simply follow these steps:
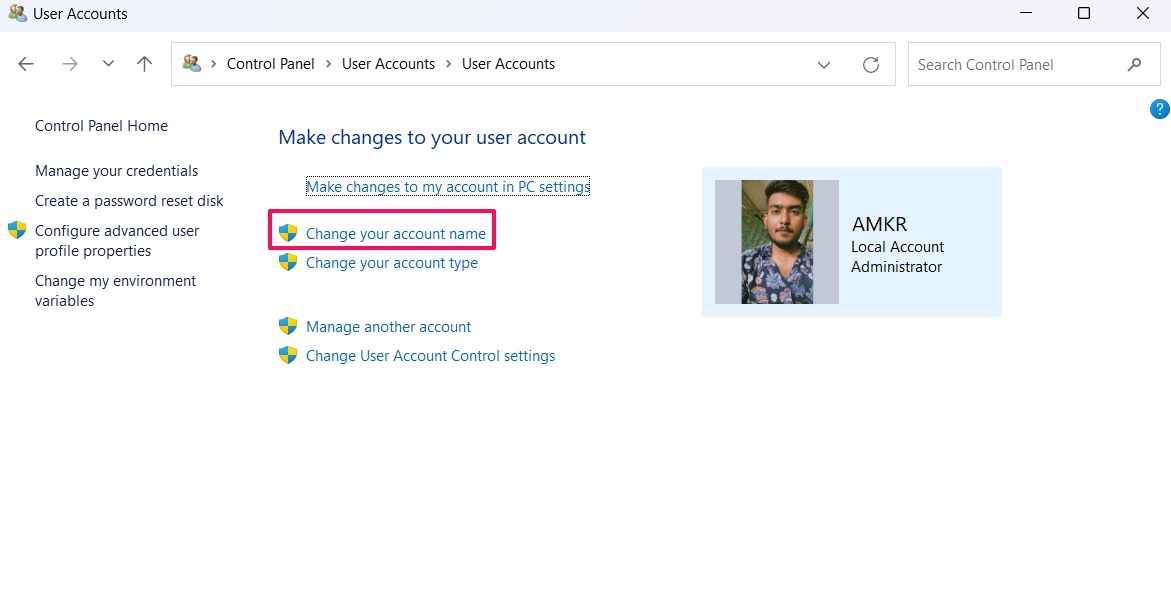
1. Open Control Panel and navigate to User Accounts.
2. Access the "Change your account name" option under User Accounts.
3. Enter the desired new name in the designated field.
4. Save the changes by clicking the "Change Name" button.
If you didn't select a distinctive administrator name during the initial computer setup and would like to incorporate a personal touch now, Windows provides convenient methods for altering the administrator name.
1. Change the Administrator Name Using the Settings App
If you are using a Microsoft account instead of a local account, you have the option to modify your name by accessing the link in the Accounts window of the Settings application. To proceed, press Windows+i to launch the Settings app. After that, navigate to Accounts > Your info > Accounts.
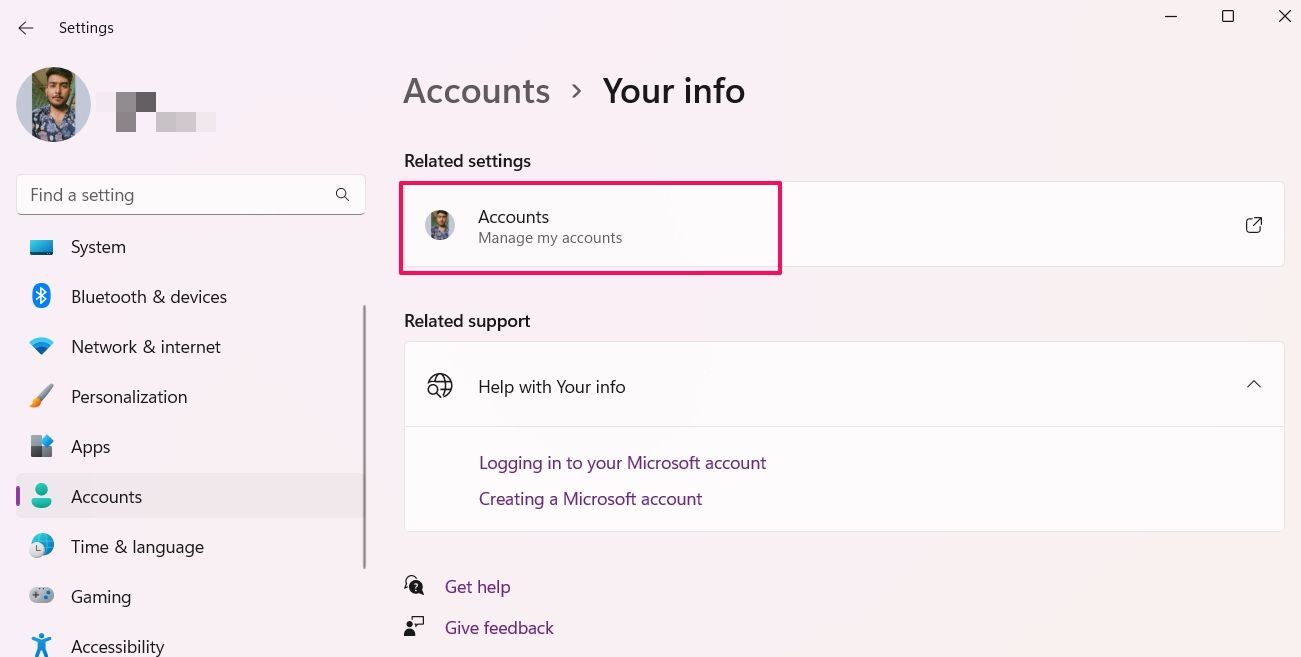
On the Microsoft account page that opens, click "Your info" in the top bar. Then, click "Edit name" under your profile picture.
Enter your first and last name, complete the CAPTCHA to confirm that you're a real person, and click "Save".
That's it! The administrator name of your computer is now changed.
2. Change the Administrator Name Using the Control Panel
If you are logged in with a Microsoft account, you can utilize the Settings app method. However, if you are using a local account, you will need to employ an alternative method to change the admin account name.
To accomplish this task via the Control Panel, follow these steps:
1. Open the Start menu and type "Control Panel" in the search field, then press Enter.
2. In the Control Panel, adjust the "View by" setting to "Category".
3. Navigate to User Accounts, then to User Accounts again.
4. Locate the option to modify your account name.
Type the new name in the "New account name" field and click "Change Name".
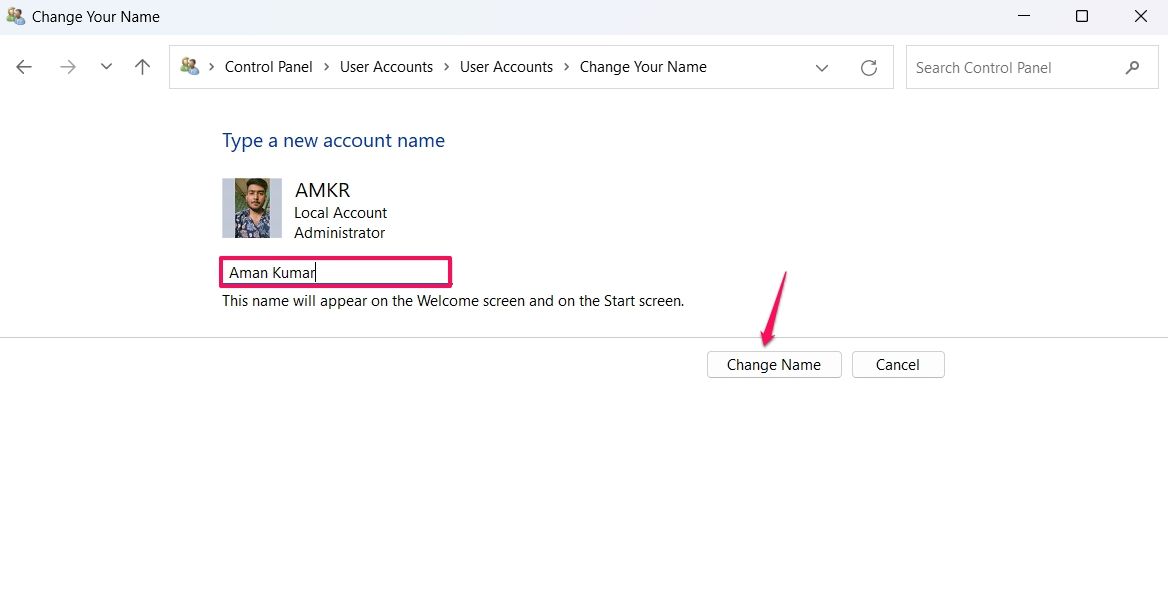
You'll see the new name appear on the welcome screen and the Start menu.
3. Change the Administrator Name Using the Netplwiz Command
To manage user accounts on your PC, you can utilize the Windows command called Netplwiz. This command enables you to effortlessly add, remove, or modify user accounts. Additionally, you can also employ the netplwiz command to change the administrator name by following these steps: Press the Windows+R key simultaneously to access the Run tool, then input "netplwiz" in the search field and press Enter.

In the User Accounts window that appears, select your account and click "Properties".

Type the name in the "Full name" field and then click "Apply" and "OK".
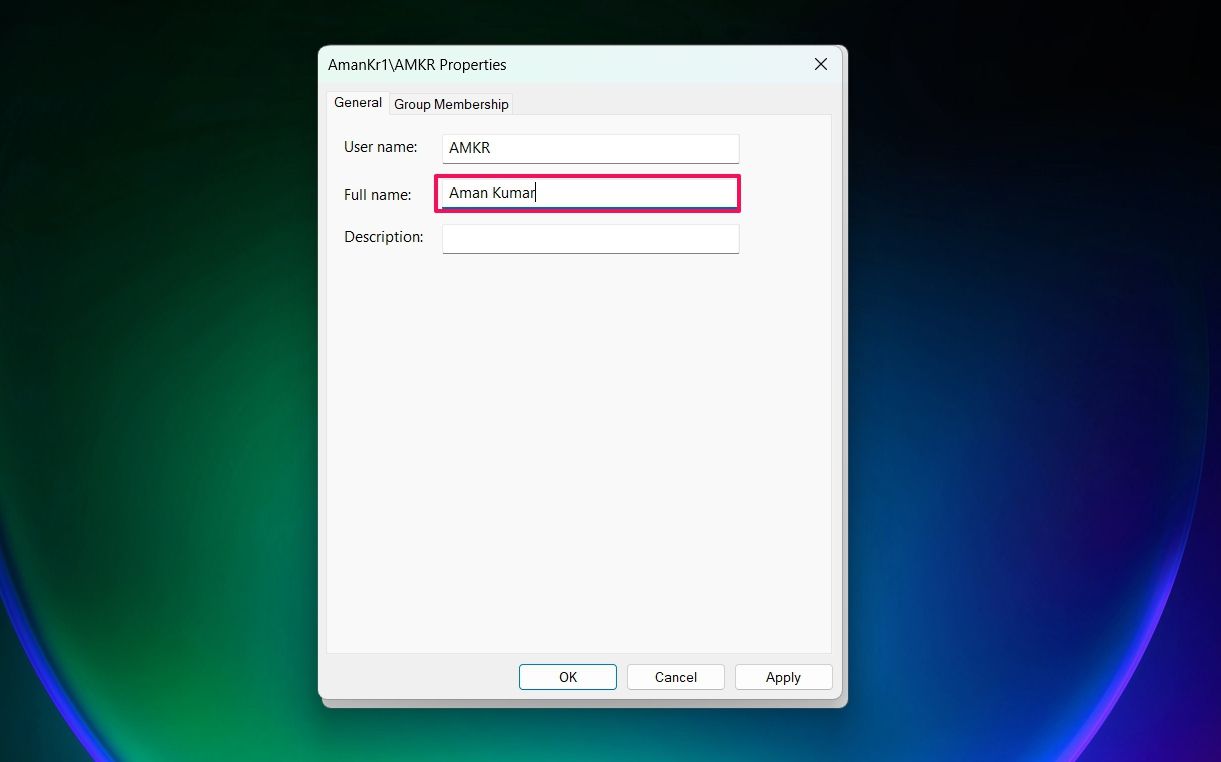
Then, you'll have to sign out and sign back in for the changes to take effect.
4. Change the Administrator Name Using Command Prompt
If you are more comfortable using Command Prompt, you can use the wmic command to change the administrator name in Windows 11.
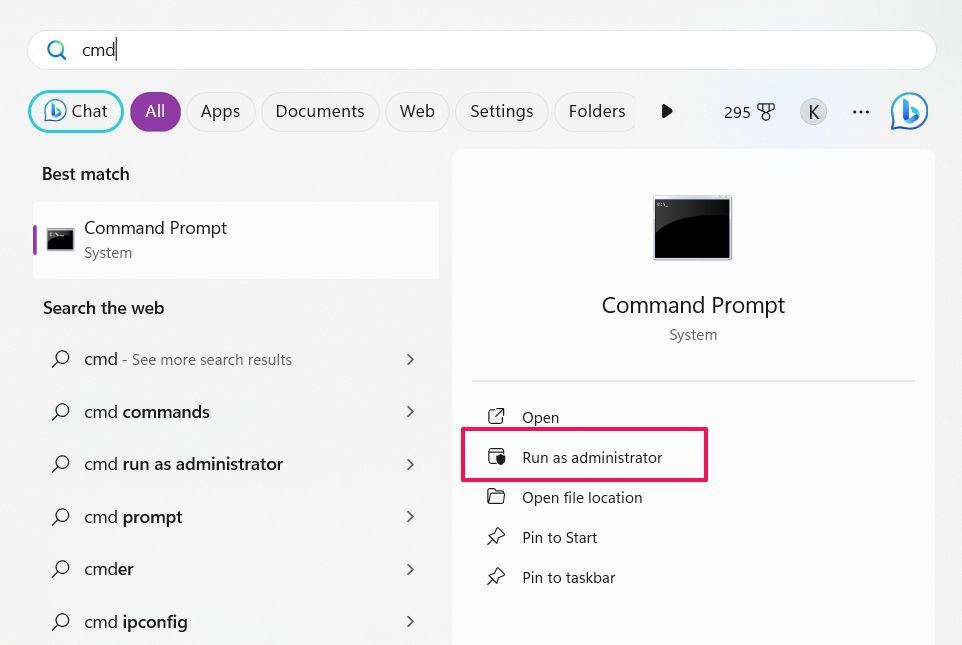
To commence, open Command Prompt with elevated privileges. The most expedient approach to access the Command Prompt as an administrator is to search for it in the Start menu and opt for the "Run as administrator" alternative.
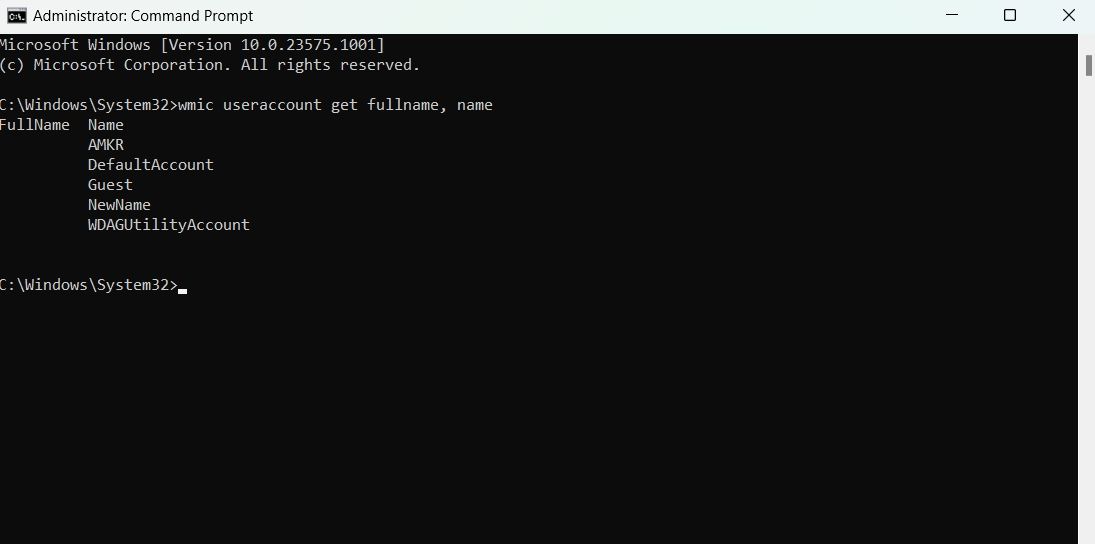
In the elevated Command Prompt window, type the following command and press Enter. This will display all the accounts on your computer.
wmic useraccount get fullname, name
Then, type the following command and hit Enter. Make sure to replace "New Name" with the name you want to give to the administrator account.
wmic useraccount where name="Administrator" set name="New Name"
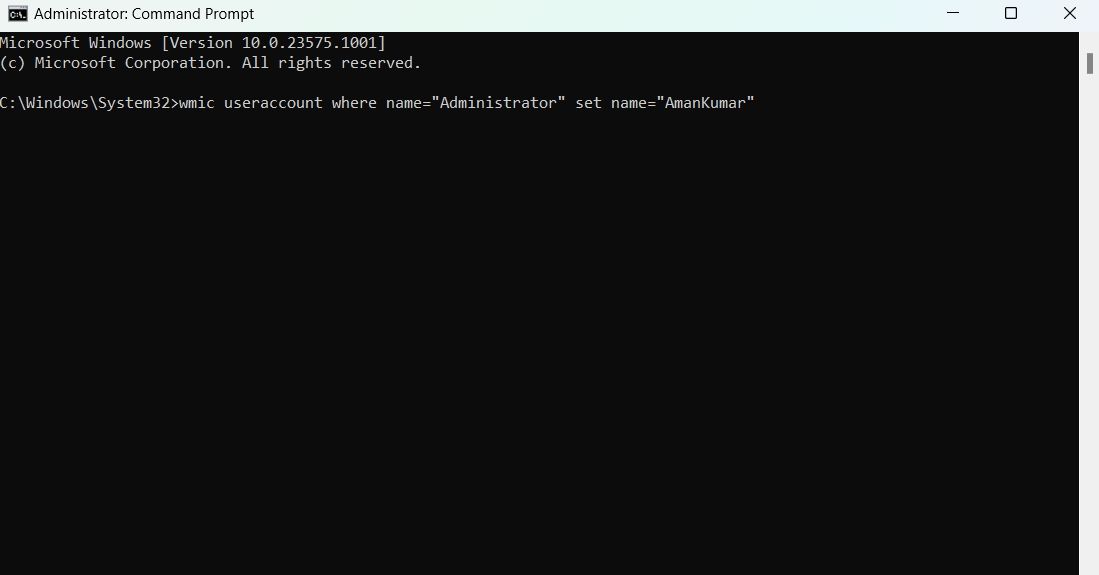
After executing the command successfully, a message stating "Method execution successful" will confirm the change in administrator account name. Feel free to change the account name as many times as needed without any concerns about making mistakes or changing your mind.
Editor's P/S
As a Gen Z netizen, I find it relatively easy to modify the administrator username in Windows 11. The steps are straightforward and the process is quick and efficient. I appreciate the fact that there are multiple methods available, as this gives me the flexibility to choose the one that works best for me. Overall, I think this is a great feature that allows users to personalize their Windows 11 experience.
However, I do have one concern about this feature. If someone were to gain access to my computer, they could easily change the administrator username and gain control of my account. This is a potential security risk that I think Microsoft should address in future updates. Perhaps they could add a feature that requires users to enter their password before changing the administrator username. This would make it more difficult for unauthorized users to make changes to my account.


