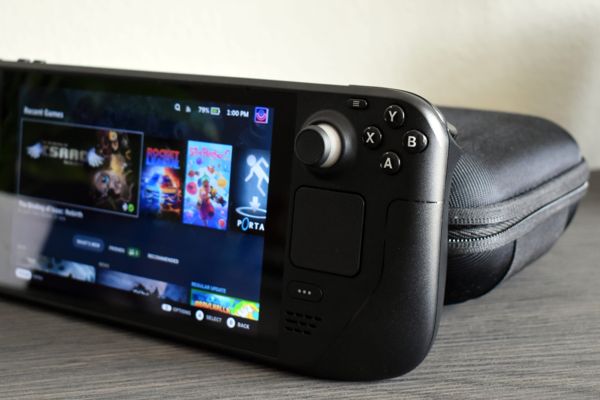
Revive Your Steam Deck: Simple Steps to Reinstall SteamOS
Learn how to reinstall SteamOS on your Steam Deck when encountering issues or switching back from Windows Follow these 5 simple steps to restore your device to its original state and get back to gaming in no time
To reinstall SteamOS on your Steam Deck:
Download the SteamOS Recovery Image.
Write the SteamOS Recovery ISO to a USB drive with Rufus or Balena Etcher.
Boot into SteamOS Recovery.
To restore SteamOS on your Steam Deck, you can opt for a reinstallation process if you encounter any SteamOS-related issues, such as unresponsiveness or failure to boot. Additionally, reinstalling SteamOS is also useful when switching back from Windows to SteamOS. Here's what you need to do.
What You’ll Need for a Steam Deck Recovery
To start the process, you will need a 16GB (or larger) USB thumb drive or microSD card to serve as a bootable drive. Keep in mind that the capacity of the bootable drive should be at least 16GB, as the SteamOS recovery image requires more than 8GB of space.
Make sure to back up any important data before using your USB drive or SD card with the Steam Deck, as all existing content will be deleted during the installation process.
If you have a USB-C thumb drive or microSD card, you can connect it directly to the Steam Deck. If not, you can use a USB dock or a USB-A to USB-C adapter.
While a mouse can be used during installation, it is not necessary as the touch screen can be used with just a few clicks or taps.
To download the recovery image for your Steam Deck, head over to Valve's Steam Deck Recovery Instructions page. Under the "Steam Deck Recovery Instructions" section, you'll find the recovery image link in the first step. Simply click on it to download the SteamOS recovery image.
After downloading the SteamOS recovery image archive, the next step is to extract it using an unzipping tool of your choice such as WinRAR or 7-Zip. Once the image has been successfully unzipped, proceed to the next step.

- Step 2: Create SteamOS Recovery ISO With Rufus or Balena Etcher
To create a bootable drive, you can use Rufus or other recommended tools such as Balena Etcher for MacOS or Linux. For the purpose of this guide, we will only be covering the process using Rufus.
Once you enter Rufus, select your USB flash or microSD card as your Device.
Under the “Boot Selection” menu, pick “Disk or ISO Image,” and then click on the “Select” button and locate your SteamOS recovery image file.

Next, press the “Start” button.
Click the "OK" button when Rufus warns you that all data on your storage drive will be deleted during the bootable drive creation process. Wait for the process to finish, which typically takes 15-20 minutes based on your storage drive's speed.
After creating a bootable drive, safely remove the USB flash or microSD and power off your Steam Deck. To access the "Boot Manager" menu, press and hold the Volume Down button while pressing the Power button. Release both buttons when you hear the sound and select your storage drive as the boot device. It's important to note that the "Boot Manager" menu may display three options, including an option with "SteamOS" in its name. Avoid selecting this option as it can cause an endless install loop.

After selecting the appropriate boot image option, which should be your storage drive without SteamOS in its name, you will need to wait for SteamOS recovery to boot. It is important to note that if your USB stick is slow, this process can take several hours. If nothing happens after 30-40 minutes, it may be wise to consider getting a faster USB flash or microSD card and creating a new bootable drive. During our testing, we found that the Steam recovery environment took approximately 10-15 minutes to boot. Once the SteamOS recovery environment is fully loaded, you will be presented with a default SteamOS desktop featuring four icons, as shown below.
The current SteamOS recovery image on Valve's website appears to be outdated and incompatible with the latest controller drivers. This means that the controller elements, such as the analog sticks and touchpads, won't function and you'll need to use the touchscreen. However, if you have a USB dock, you can use a mouse as an alternative. If you wish to perform a clean installation that will erase all your data, simply tap the "Reimage Steam Deck" icon. Alternatively, if you want to keep your files and settings while installing SteamOS, select the "Reinstall Steam OS" icon. Don't forget to use placeholder

when adding images.
Valve advises that selecting the "Reinstall SteamOS" option will attempt to reinstall SteamOS on your Steam Deck while preserving your games and personal content. However, this is not a guarantee that your games and settings will still be available after restoring the operating system. If you experience major issues with your SteamOS installation, we suggest performing a clean install instead. Nevertheless, you can first try the "Reinstall Steam OS" option to see if it resolves the issue. If not, choose the "Reimage Steam Deck" icon on the desktop to perform a clean install. In case you can access the SteamOS desktop mode, it's advisable to back up your Steam Deck before reinstalling the OS. For more information, you can check our guide on how to back up your Steam Deck.
After tapping on the appropriate icon, one or two windows will appear and eventually you will be presented with a dialog box. Simply click on the "Proceed" button to continue.

Once the reimaging process is complete, a second dialog box will appear prompting you to click on the "Proceed" button again. Wait patiently for your Steam Deck to reboot, which may take some time. Our reboot process took approximately 35-40 minutes, but depending on the speed of your boot drive, your experience may vary. If you are using a newer and faster drive, your wait time will likely be shorter.
- Step 5: Go Through the SteamOS Setup Process
After the SteamOS successfully reboots, you will be prompted with the language selection window. This is the same window that you encountered when you initially powered on your Steam Deck. Simply follow the setup process once again to complete the restoration of SteamOS. It's as easy as that!
If you're looking to maximize the potential of your Deck, take some time to discover how to optimize it for a longer battery life.