Maximize Game Performance: 8 Windows 11 Tweaks
Get the ultimate gaming experience on your PC with these 8 Windows 11 settings tweaks From enabling Game Mode to disabling Nagle's Algorithm, these tips will help you achieve better gaming performance and take your gameplay to the next level
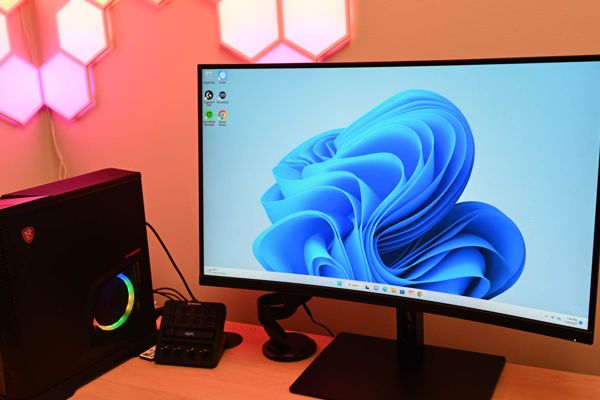
Windows 11 has introduced a new feature called Game Mode that can significantly improve your gaming experience on PC. With this mode enabled, your system will make several background changes to optimize game performance, such as disabling automatic driver installations and restart notifications. While gaming on PC may require some in-game settings experimentation, utilizing these Windows 11 settings tweaks can help you get the most out of your gaming experience.
1. Activate Game Mode
To activate Game Mode, simply navigate to the Gaming option within your Settings app and locate the Game Mode toggle switch. Though it may not significantly boost your in-game frame rate, enabling this feature can enhance stability and prevent sudden performance drops caused by other tasks running in the background. It's a simple and effective way to begin optimizing your PC for gaming.

2. Auto HDR
If you're looking to enhance the visual quality of your PC games, Auto HDR may be the solution you need. Many games rely on Standard Dynamic Range (SDR) to display video content, resulting in a lack of color definition and washed-out visuals. Auto HDR automatically upscales compatible SDR games to High Dynamic Range (HDR), providing a significant visual boost.
However, not all Windows 11 users are able to access Auto HDR. To determine if your system is compatible, navigate to Settings > System > Display. If you're using multiple displays, select the appropriate one and click "Use HDR." If Auto HDR is available, you'll be prompted to enable it.
3. Enhanced Pointer Precision
Enhanced Pointer Precision, also known as Mouse Acceleration, is a Windows feature that aims to improve the accuracy of mouse pointer movements. However, most games also have a mouse acceleration system, and having both enabled can lead to conflicts and reduce in-game accuracy.
Disabling the Windows feature for mouse acceleration is a simpler solution compared to disabling it for each individual game. Furthermore, turning off enhanced pointer precision can also aid in adapting to new games as it allows for a consistent pointer movement ratio (1:1) instead of a variable accelerated ratio. To access the mouse settings panel, simply type "Mouse Properties" in Windows Search and select the Pointer Options tab. From there, uncheck the "Advanced Pointer Precision" option.

.
4. Switch the Power Plan to High Performance
Improving your gaming performance can be as simple as changing the power plan on your PC. By switching to the High Performance plan, your computer will prioritize performance features over saving energy. While this may not be ideal for laptops using battery power, it's rarely a problem for desktop gaming rigs.
Thankfully, Windows 11 makes it easy to adjust your power settings directly from the settings app. Simply navigate to System > Power > Power & Battery to make the necessary changes.

If you feel that the high-performance mode is not providing significant improvement and you are comfortable with making modifications in Command Prompt, you can consider using the Ultimate Performance plan.
5. Specify GPU Priority
When it comes to playing graphically-intensive games, it's crucial to make sure that they utilize your most powerful GPU. However, it's not always a given that your expensive graphics card will be the one that's being utilized.
Thankfully, with the new Windows 11 operating system, you have the ability to specify which GPU your games use. Simply open up the Settings app, navigate to System > Display > Graphics, and find the game you want to adjust in the software list. From there, select it and click on "Options." Here, you can choose a default GPU for that specific game to use. Repeat this process for any other games you want to adjust, and then restart your computer to ensure that the changes take effect.

6. Turn on Hardware-Accelerated GPU Scheduling
GPU hardware scheduling is a technique that can transfer some of the workload handled by your computer's CPU to the GPU. By doing so, it can reduce the burden on the processor and result in improved gaming performance. This can be especially beneficial if you have a capable graphics card, but your CPU is outdated or mid-tier.
To activate GPU scheduling, open the Settings app and go to Gaming > Game Mode > Graphics. Then, click on "Change default graphics settings" and toggle on the feature. If you cannot find this option, it means that your hardware is not compatible.
If you've already enabled Game Mode and haven't seen any performance improvements, or it's actually made things worse, it may be worth pausing automatic Windows updates separately.
7. Pause Windows Update
One can easily access the option to pause updates by navigating to Settings > Windows Update. It is highly recommended to keep Windows 11 up-to-date when not engaged in gaming activities. This is not only important for maintaining system stability and security, but also for the potential performance enhancements that may be included in the updates. Nevertheless, there are ways to permanently disable Windows updates from running in the background.

8. Disable Nagle’s Algorithm
Nagle's Algorithm may be unfamiliar to even the most seasoned computer users. Essentially, it's a method used by TCP/IP networks to bundle data into larger chunks, thereby reducing the number of data packets that need to be transmitted. While this process generally optimizes network efficiency, it can lead to lag when handling data-heavy tasks such as online gaming. Luckily, you can disable Nagle's Algorithm on your network. Simply navigate to Command Prompt on your Windows 11 PC, type "ipconfig," and make note of the "IPv4 Address" for your Wireless LAN Adapter. With this information in hand, you can proceed to disable Nagle's Algorithm.
.
To open the Registry Editor, search for “regedit” and click the relevant result. Then, navigate to HKEY_LOCAL_MACHINE\SYSTEM\CurrentControlSet\services\Tcpip\Parameters\Interfaces.
Select each entry in the Interfaces directory and search for the string value containing the IPv4 address you previously noted. The value is usually named IPAddress or DhcpIPAddress. When you locate the string value, right-click on any empty space in the key and select New > DWORD (32-bit) Value. Name the value "TcpAckFrequency," then double-click on it and set the value data to 1. Create a second DWORD (32-bit) Value named "TCPNoDelay" and set the value data to 1 as well. {{iframe_placeholder_1}}


