Maximize Battery Life for AirPods Pro: 10 Proven Tips
Maximize your AirPods or AirPods Pro battery life with these 7 easy tips From proper storage to cleaning, and making sure to enable optimized charging, this guide will help you get the most out of your wireless earbuds Plus, learn how to check your battery life and troubleshoot any issues Don't settle for subpar performance - follow these tips for optimal listening time
Putting your AirPods back in the case whenever you’re not using them can help improve their battery life. Even if you're only taking them out of your ears for a short period of time, leaving them in the case could give you an additional hour of listening time. As long as the case has charge, your AirPods will charge whenever you store them away.
When Automatic Ear Detection is activated, your AirPods should consume less battery once removed from your ears. However, this feature does not always work as intended.
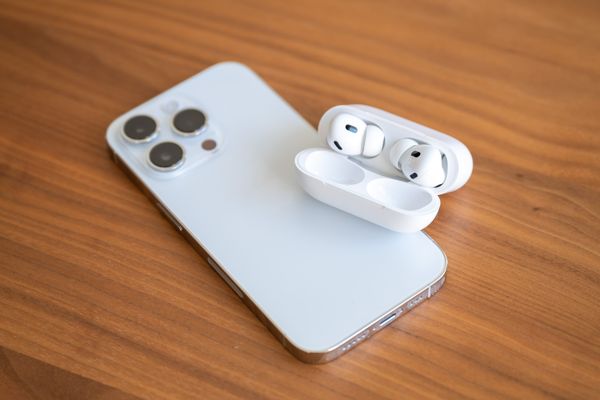
Clean Your AirPods Sensors and Case
Your AirPods are equipped with sensors that detect when they are being used. Once taken out of your ears, they are programmed to disconnect and enter standby mode, thereby conserving power when they are not in use and outside of their charging case.
To keep your AirPods functioning properly, it's important to regularly clean them with a soft cloth, cotton swabs, and isopropyl alcohol. Pay close attention to the sensors and sound canal, and don't forget to give the case a thorough cleaning, especially in the areas where the AirPods charging contacts are located.
Listen With Just One AirPod
Using a single AirPod not only conserves battery life, but also allows you to remain aware of your surroundings while still enjoying your favorite tunes. Plus, by alternating between AirPods, you can ensure that you always have a fully charged pair at the ready.
Using "Single AirPod mode" is ideal for certain purposes such as answering phone calls or listening to podcasts. However, it is not as suitable for music playback and does not support spatial audio formats like Dolby Atmos. Additionally, it can be a convenient feature if you discover that both your AirPods and case are out of charge. Simply plug them in for a quick charge, then use one AirPod while the other charges. It's advisable to alternate their usage if you frequently rely on this feature to prevent one bud's battery life from degrading faster than the other. Keep your music, podcasts, and conversations going seamlessly with this useful feature.
Noise Cancellation and Transparency Use More Power
The AirPods Pro are equipped with two advanced modes that utilize the microphones located on the outside of the earbuds. With just a simple squeeze and hold of a single AirPod Pro, you can seamlessly switch between Active Noise Cancellation (ANC) and Transparency mode, which will be signaled by a familiar chime.
The ANC feature is specifically designed to eliminate any background noise, and it delivers incredible results. On the other hand, Transparency mode works by amplifying the sounds in your surroundings, which means you can communicate with someone without having to remove your AirPods Pro. This mode is also ideal for outdoor activities like running, where you need to be aware of your surroundings.
To conserve your AirPods Pro battery, you can disable noise control features when you're unable to charge them. On your iPhone or iPad, access Control Center and long-tap the Volume slider. When "Noise Control" appears, tap it and then select "Off" from the options at the bottom of the screen. On a Mac, go to Control Center in the top-right corner and click on "Sound". Select your AirPods Pro and then choose "Off" to turn off noise control.


Find My May Add to Background Drain
Several online sources have shared anecdotal evidence indicating that Apple’s Find My service could potentially lead to excessive battery drain for AirPods. A few users have claimed that disabling the feature helped resolve serious battery drain issues, particularly when the AirPods were not in use and sitting idle in their case. If you’re experiencing similar problems, it might be worth experimenting with turning off this feature to see if it makes a difference.
However, it is important to note that disabling Find My feature may have consequences. This feature allows you to track the location of your AirPods using the Find My app on your Apple device or online at iCloud.com. In case you misplace your AirPods, this feature can help you locate them by showing their last known location. Additionally, if your AirPods are lost, you can use the feature to play a sound to help you locate them. It is also worth noting that newer AirPods Pro models have a speaker on the case that can also aid in locating them. If you still want to disable Find My to reduce battery drain, you can do so by connecting your AirPods to your Apple device and visiting the Bluetooth settings. Simply tap or click on the “i” next to your AirPods to do so.

On a Mac, click “AirPods [Pro] Settings” as well. Now you can disable the “Find My network” toggle to remove your AirPods from the Find My network.
Make Sure Optimized Charging is Enabled
Enabling optimized charging for your AirPods is crucial to ensure the longevity of its battery life. This feature allows your AirPods to refrain from charging to 100% until the time you typically use them. Storing lithium-based batteries at full charge for extended periods can lead to premature aging of the cells. By learning from your routine, optimized charging ensures that your AirPods remain at 80% or less for most of the night. This feature is not limited to AirPods alone, as Apple has also extended it to iPhones, iPads, and MacBooks.

To ensure your AirPods battery life is optimized, connect them to your iPhone or iPad and head to Settings > Bluetooth. Tap the “i” next to your AirPods and enable “Optimized Battery Charging”. Unfortunately, this option is not available on macOS. If you encounter issues such as abnormal battery drain or incorrect settings, consider resetting your AirPods to factory settings. Simply place both earbuds in the case and press and hold the button on the back for 15 seconds until you see the LED flash amber and then white.
Battery Problems? Try a Factory Reset
To customize your AirPods experience, you can easily configure the settings such as shortcuts, default behaviors, and other preferences by accessing the "i" button next to your AirPods in Bluetooth settings on your iPhone, iPad, or Mac.
Checking your AirPods' battery life is as simple as holding them near your Mac and opening the case. For AirPods Max users, you can view the current charge status by taking them out of their smart case near your iPhone.
How to Check AirPods Battery Life
To check the battery status of your AirPods, there are a few options available. Firstly, you can try using Siri to ask for the battery level. Alternatively, you can add a battery widget to your iPhone or iPad home screen to view the status of all your connected devices. If those options don't work, you can also find the battery status listed in the Bluetooth settings by tapping on the "i" next to your AirPods.
To simplify your life, Automatic Ear Detection feature is available but it requires an always-on sensor to identify if your AirPods have been removed or not. We suggest keeping the feature enabled as it automatically puts your AirPods into a sleep mode when you take them out of your ears.

In case your AirPods remain connected even after taking them out or placing them inside the case, you can disable the feature by going to (System) Settings > Bluetooth menu and selecting the “i” next to your AirPods. Additionally, ensure that the sensor is clean.


