Master AirPods Pro Controls and Features
Discover the full potential of your AirPods Pro with easy-to-use controls, features, and gestures Control volume and playback, summon Siri, and remove background noise with active noise cancellation Hear the world around you with transparency mode, find your lost AirPods, and charge quickly and wirelessly Sync once and use everywhere, connect to regular Bluetooth sources, and listen to spatial audio Share audio with other AirPods users, test ear tip fit, and make your AirPods Pro even better
Apple's AirPods Pro offer a multitude of features that make them a top-of-the-line in-ear bud option. Whether you have the first or second-generation model, you have the ability to control what you're listening to and utilize gestures to enhance your experience.
If you're the proud owner of the second-generation AirPods Pro (which were released in late 2022), you can easily control the volume with a simple swipe of the touch-sensitive stem. To do so, place your thumb on the stem of the AirPod and use your index finger to swipe up or down to adjust the volume.
While this may require some practice to perfect, it saves you the hassle of having to take out your iPhone to adjust the volume. Additionally, if you have an Apple Watch, you can also control the volume and playback of your iPhone using the Now Playing app.
Use Touch Controls to Control Playback
The AirPods Pro, whether first or second-generation, utilize force touch gestures to manage playback and other functions. These gestures involve squeezing the AirPods, with various controls accessible through multiple squeezes. The following controls are available for playback:
- One squeeze: Play or pause media, answer an incoming call, or hang up a call in progress.
- Two squeezes: Skip forward to the next track.
With Siri, your AirPods Pro can do more than you might think. Summoning the voice assistant is easy – simply say “Hey Siri” if you’ve enabled the feature under Settings > Siri & Search while wearing your AirPods Pro. From there, you can control a variety of functions without ever needing to touch your phone. And if you need to skip backward, just give the AirPods Pro a quick triple tap. Toggling Noise Control is just as easy – simply squeeze and hold.
To customize your AirPods Pro settings and access Siri with ease, you can change the shortcut by heading to your Bluetooth settings. Once there, select the “i” next to your AirPods Pro and scroll down to the “Press and Hold AirPods” section. From there, you can choose which AirPod you’d like to customize for Siri and Noise Control. With Siri, you can make use of a range of features, such as selecting specific tracks or albums, playing podcasts, hearing your messages and emails, getting directions, and more. Additionally, the Active Noise Cancellation (ANC) feature is incredibly useful, allowing you to enjoy your music without any interference from background noise - perfect for noisy environments.
Use Active Noise Cancellation to Remove Background Noise
To easily switch between Active Noise Cancellation (ANC) and Transparency mode on your AirPods Pro, simply squeeze and hold the stem. Alternatively, you can access these controls by long-pressing the Volume slider in Control Center on your iPhone or iPad. On a Mac, navigate to Control Center then Sound, and select your AirPods Pro. Customizing Noise Control is also possible through AirPods Settings. Head to Bluetooth settings, tap the “i” next to your AirPods Pro, and select the AirPod you want to customize under the “Press and Hold AirPods” section.
When you need to stay aware of your surroundings, Transparency mode is the perfect solution. By allowing more outside noise to filter in, you can keep your AirPods Pro in your ears and still stay alert. Simply pause your music or podcast with a single squeeze for optimal effectiveness. To switch between modes, use the default squeeze-and-hold gesture or customize the behavior in your AirPods Pro settings. You can even control Noise Control settings with a Shortcuts widget. And if you ever misplace your AirPods, no need to panic - simply use Apple's Find My network to locate them. Make sure to keep Find My integration on for peace of mind.
The features available on your AirPods Pro depend on the generation you have. With the second-generation, you can use the speaker on the case and the in-case support to find your AirPods. First-generation AirPods Pro will remember the last location you stored them. Both generations come with earbud location capabilities.
To access these features, simply open Find My on your device, select your AirPods Pro from the Devices list, and click on the "i" next to them. You can then use the "Play Sound" button to play audio on either the case or individual AirPods.

Charge Quickly and Wirelessly
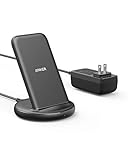
AirPods Pro earbuds are designed for quick charging within their case. In just five minutes, you can recover up to an hour of talk or listening time, as long as the case has a charge. With a fully charged case, you can enjoy up to 24 hours (first-generation) to 30 hours (second-generation) of listening time, thanks to multiple charges. The case can be charged using a standard Apple Lightning charger or a quality Qi-certified wireless charger. Additionally, the second-generation AirPods Pro come with the MagSafe charging case, which enables you to wirelessly charge your AirPods using Apple's magnetic wireless charger for iPhone.
Once synced to your Apple ID, your AirPods Pro will automatically sync with your other devices using iCloud. They should also smoothly switch between devices as you use them. So, whether you're switching from your iPhone to your iPad, your AirPods should effortlessly follow suit without any interruption from you.
Sync Once, Use Everywhere

If you prefer certain devices to automatically switch to your AirPods while others don't, you have the option to turn off automatic switching. In case you encounter any issues with automatic switching, refer to our troubleshooting guide for helpful tips.
Connect to Regular Bluetooth Audio Sources
Moreover, you can use your AirPods as regular wireless earbuds with any Bluetooth-enabled device. However, they will remain linked to your Apple ID and cannot be connected to another Apple device. You can easily switch back to your iPhone, iPad, or any other Apple device whenever you want.
Place your AirPods Pro into the open case and hold down the button on the back of the case for a few seconds. Once the LED indicator begins to blink white, your AirPods are now ready to be paired. Simply navigate to your device's Bluetooth menu and connect your AirPods to begin using them. This method can be used to pair your AirPods with a variety of devices, including a Nintendo Switch or Android phone.
Spatial audio is a standout feature of AirPods Pro, offering a simulated surround setup that provides an immersive listening experience. With support for spatial audio sources like Dolby Atmos on Apple Music, you can enjoy a more dynamic listening experience with head tracking. However, the impact of spatial audio can vary depending on personal preferences and the type of music being played. While some may find it less claustrophobic and fatiguing, others might prefer the conventional stereo mix. In addition, spatial audio is also compatible with video streaming apps like Netflix. To enable spatial audio, simply swipe down from the top-right corner of your iPhone or iPad screen, long-press the Volume slider, and select the “Spatial Audio” control located at the bottom-right corner to choose between head-tracking, fixed position, and off.
To enhance your listening experience with AirPods, you can customize your spatial audio settings by going to Settings > Bluetooth on your iPhone or iPad. By tapping the “i” next to your AirPods and selecting “Personalized Spatial Audio” in the “Spatial Audio” section, you can tailor the audio to your ears. Additionally, AirPods Pro and other Apple headphones, including Beats models, can be used with the Share Audio feature on iPhone and iPad. To activate this feature, simply access Control Center on the source device, tap the “Now Playing” box, and select the AirPlay Audio icon.
To share audio, simply tap on the "Share Audio..." option and bring your paired AirPods Pro or iPhone within range. Once paired, each set of headphones or earbuds will have its own volume controls, allowing for independent listening levels. Additionally, you have the option to enable Siri to announce notifications while wearing your AirPods, which can be customized under the Settings menu for both notifications and phone calls.
Test AirPods Pro Ear Tip Fit
To ensure the best possible noise-cancelling experience and prevent AirPods Pro from falling out, it's important to find the right fit for your ear canal. If the ear tips are too large, they can be uncomfortable, and if they're too small, they may not provide sufficient isolation.
To test your fit, go to Settings > Bluetooth and tap the "i" next to your AirPods. Then, wear both AirPods Pro and use the "Test Ear Tip Fit" setting. The test will indicate if the tips are too small, but you'll need to determine for yourself if they're too big based on comfort.
Remember, finding the perfect fit is key to enjoying the full benefits of your AirPods Pro.