
Easy Steps to Turn Off the Touchpad in Windows 11
Prevent unwanted cursor movement on your Windows 11 device by disabling the touchpad Easily turn it off using various methods or automatically disable it when connecting an external mouse Learn how to enable the touchpad without a mouse as well
Some Noticeable Information
You can quickly disable the touchpad by pressing its dedicated key in combination with the Fn key.
To disable the touchpad on a device without a dedicated key, you have several options: the Settings app, Control Panel, Device Manager, or Registry Editor.
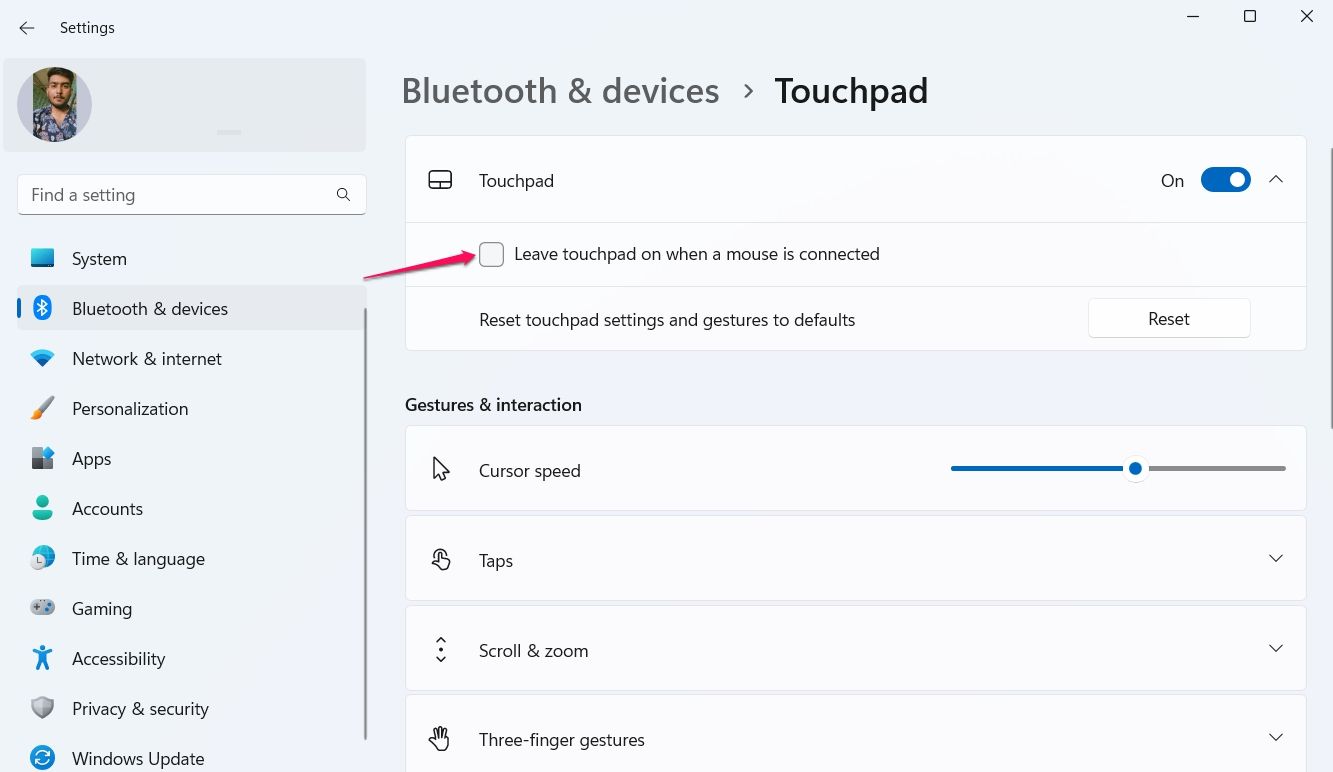
Alternatively, you can set up Windows to automatically deactivate the touchpad when an external mouse is connected. Access the Settings app, navigate to Bluetooth & devices > Touchpad, and select the "Touchpad" dropdown menu. From there, uncheck the "Leave touchpad on when a mouse is connected" checkbox.
How to Turn Off Your Windows 11 Touchpad
Ways to Disable the Touchpad on a Windows 11 Laptop
To enhance precision and ergonomic experience, it is advisable to use an external mouse alongside the diverse touchpad gestures provided by Windows. In order to prevent any compatibility concerns, unintentional clicks, or cursor movements, it is necessary to disable the built-in touchpad. The following outlines five methods to disable the touchpad on Windows 11.
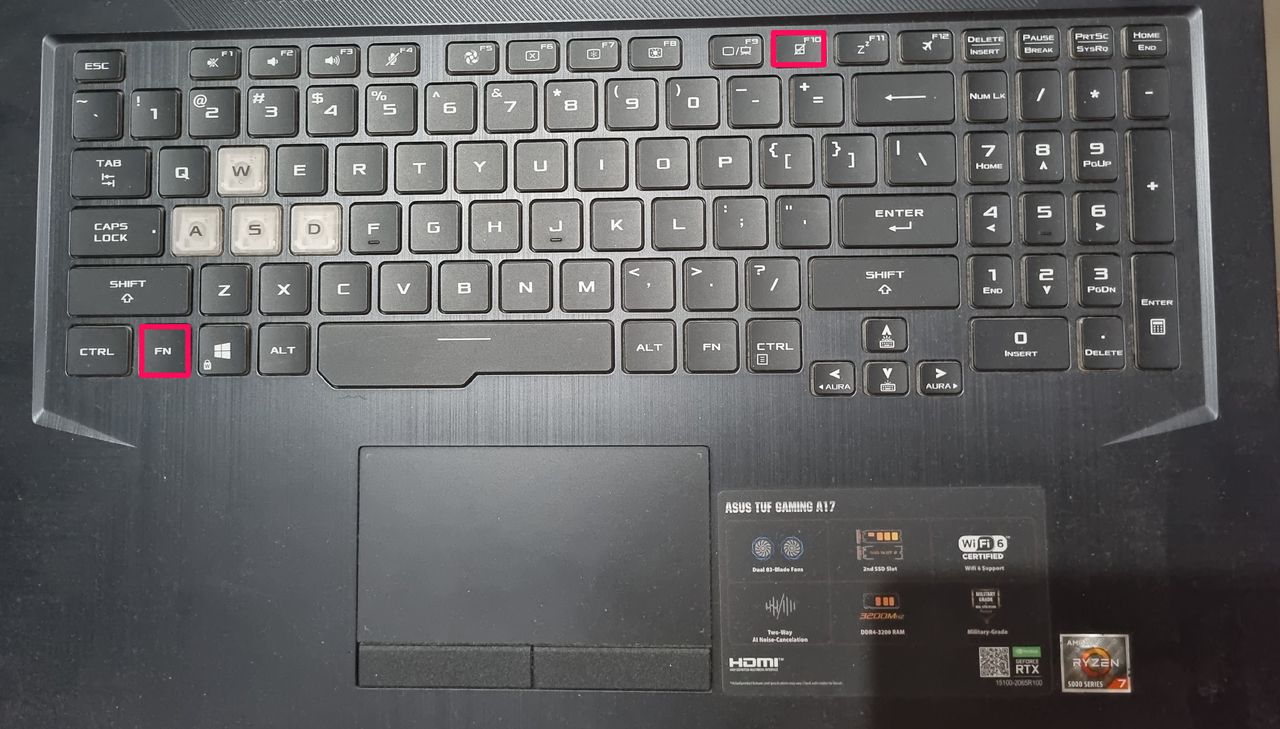
1. Disable the Touchpad By Pressing Its Dedicated Key
The quickest way to turn off your Windows 11 touchpad is to press its dedicated key. Many laptop manufacturers provide a dedicated function key to manage your touchpad.
Simply press the key in combination with the Fn key to disable your touchpad. The specific key may vary depending on the manufacturer, but typically it will have a touchpad logo on it. If you are uncertain, please refer to your device manual.
Aman Kumar
After disabling the touchpad, you will see a confirmation message on your screen saying, "TouchPad is disabled."
To enable the touchpad, press that function key again with the Fn key.
2. Disable the Touchpad Using the Settings App
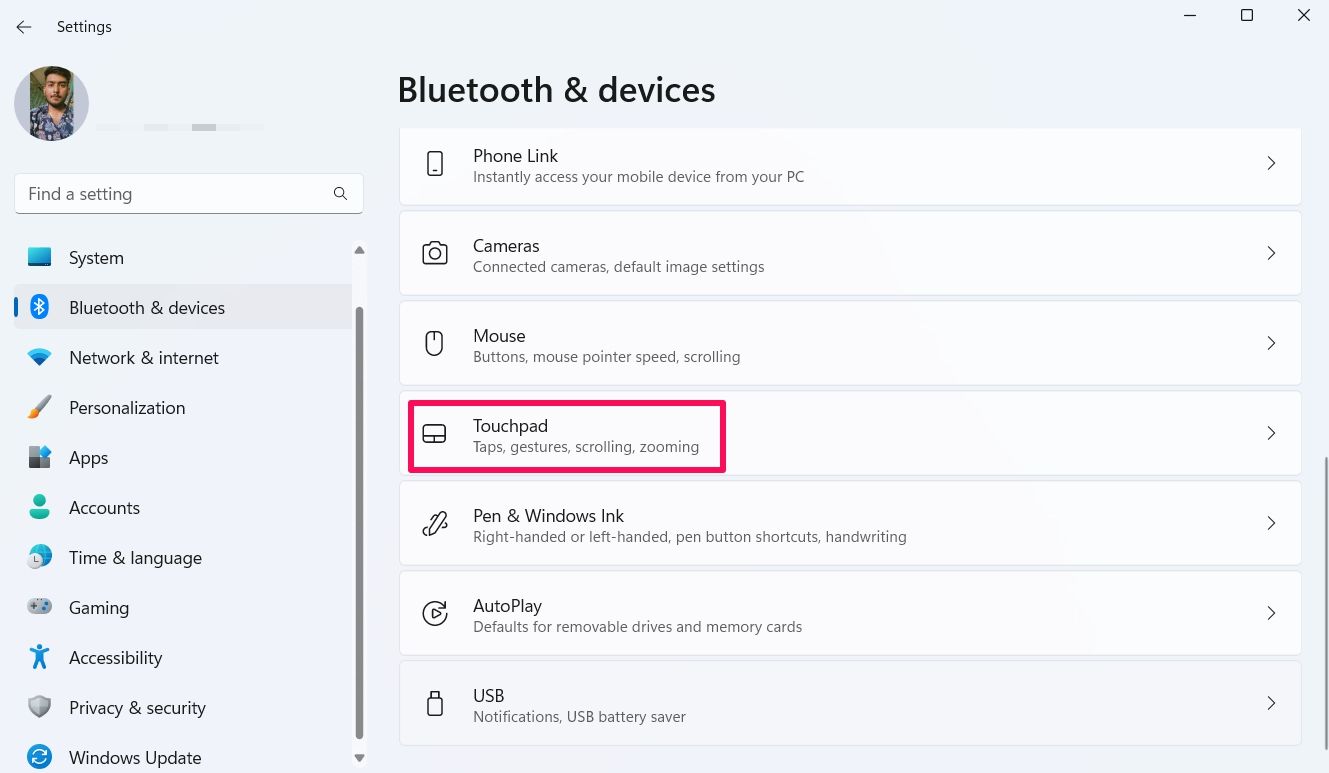
If your device lacks a specific key for deactivating the touchpad, you can make use of the Windows Settings app. To initiate the Settings app, press Windows+i, navigate to the left sidebar and select "Bluetooth & devices," then click on "Touchpad" located in the right pane.
On this screen, turn off the toggle next to "Touchpad".
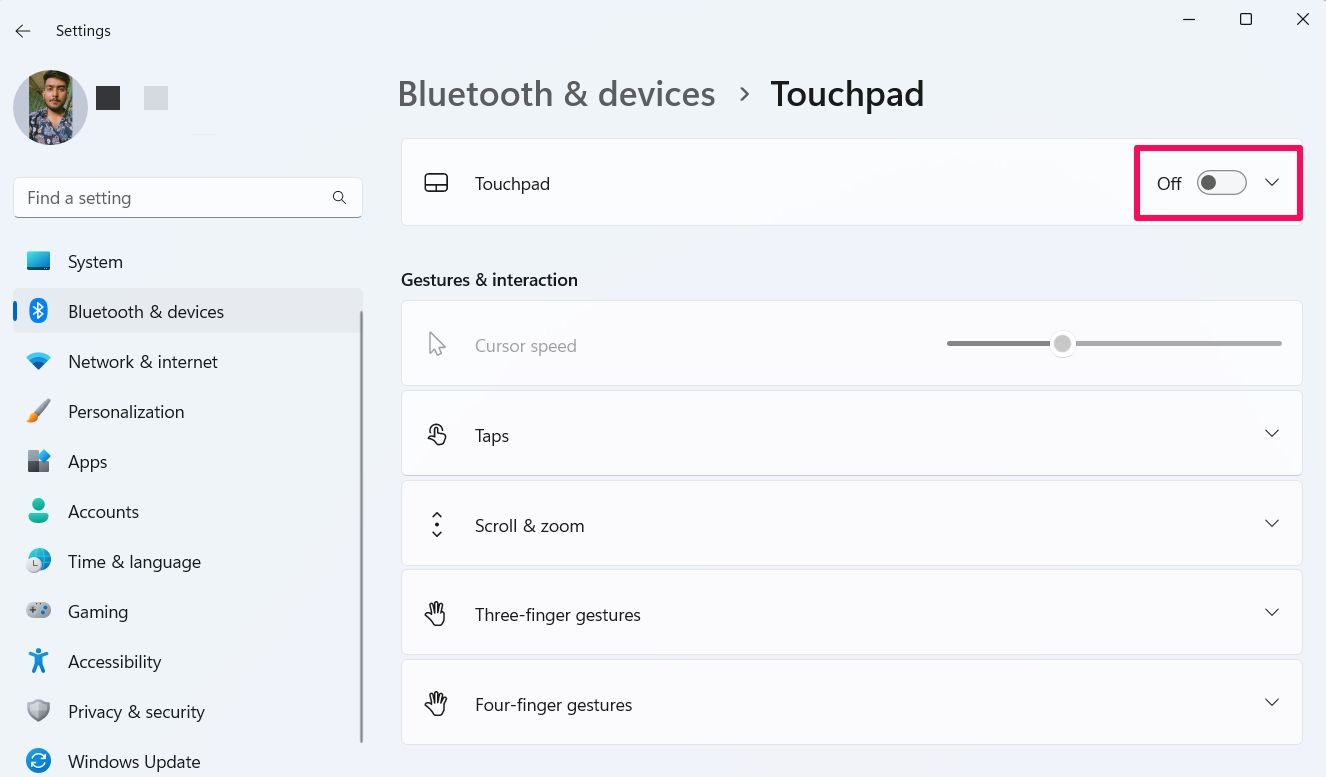
You'll now see that the touchpad has stopped working. To enable the touchpad again in the future, simply turn on the "Touchpad" toggle.
3. Disable the Touchpad Using the Control Panel
Despite Microsoft's gradual transition of Control Panel options to the Settings app, there are still several Windows settings that can be controlled through the Control Panel, including the ability to disable your touchpad.
Open the Start menu and type "Control Panel" in the search bar, then hit Enter. Click "Hardware and Sound" in the Control Panel and then "Mouse".

In the Mouse Properties window, switch to the "Hardware" tab. Select your touchpad in the Devices section and then click "Properties".
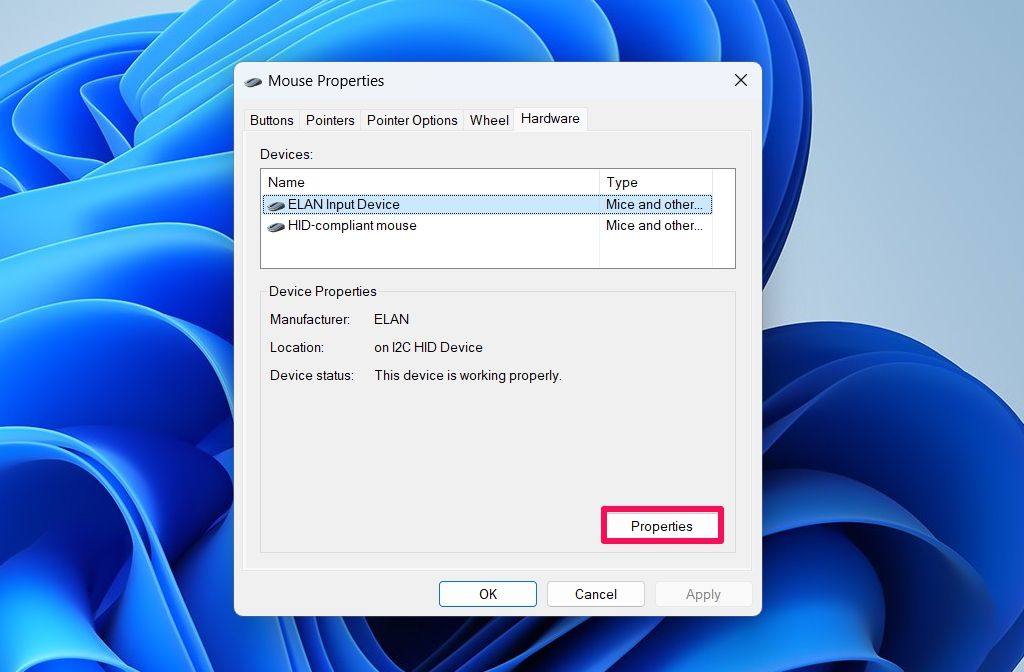
Click the "Change settings" option in the General tab.
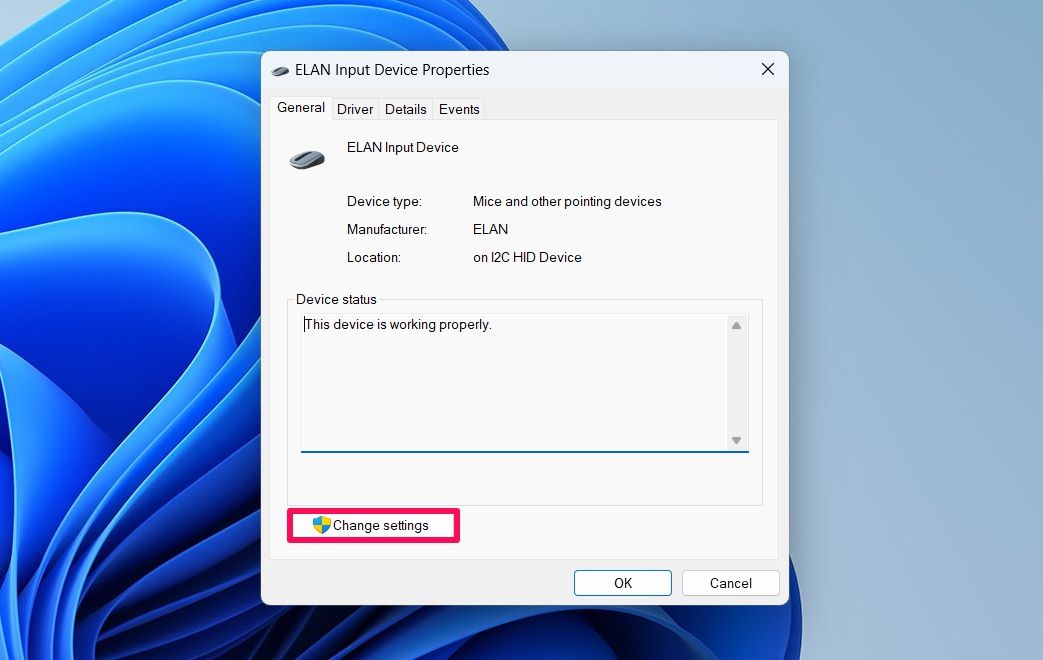
Switch to the "Driver" tab and click "Disable Device". Click "Yes" in the confirmation box that pops up.
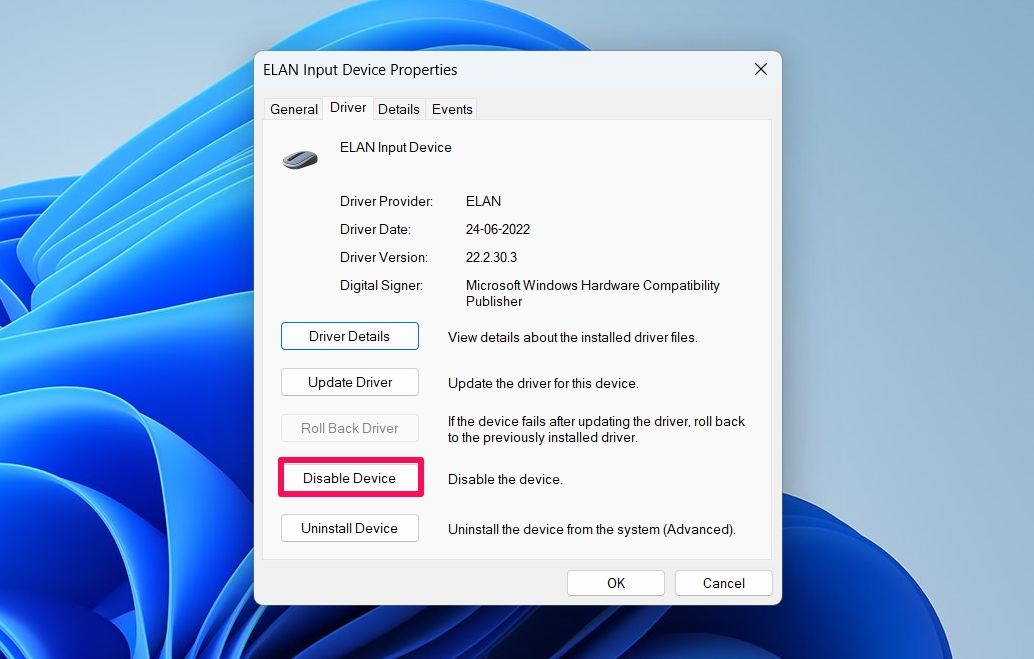
Once you have completed these steps, your touchpad will be disabled.
4. Disable the Touchpad Using the Device Manager
The Device Manager serves as the central hub for updating drivers, resolving hardware problems, and overseeing connected devices, such as your touchpad. To disable the touchpad through the Device Manager, simply press Windows+X and opt for "Device Manager" from the provided menu.

Double-click the "Mice and other pointing devices" node. Then, right-click your touchpad and select "Disable device". Click "Yes" to confirm.
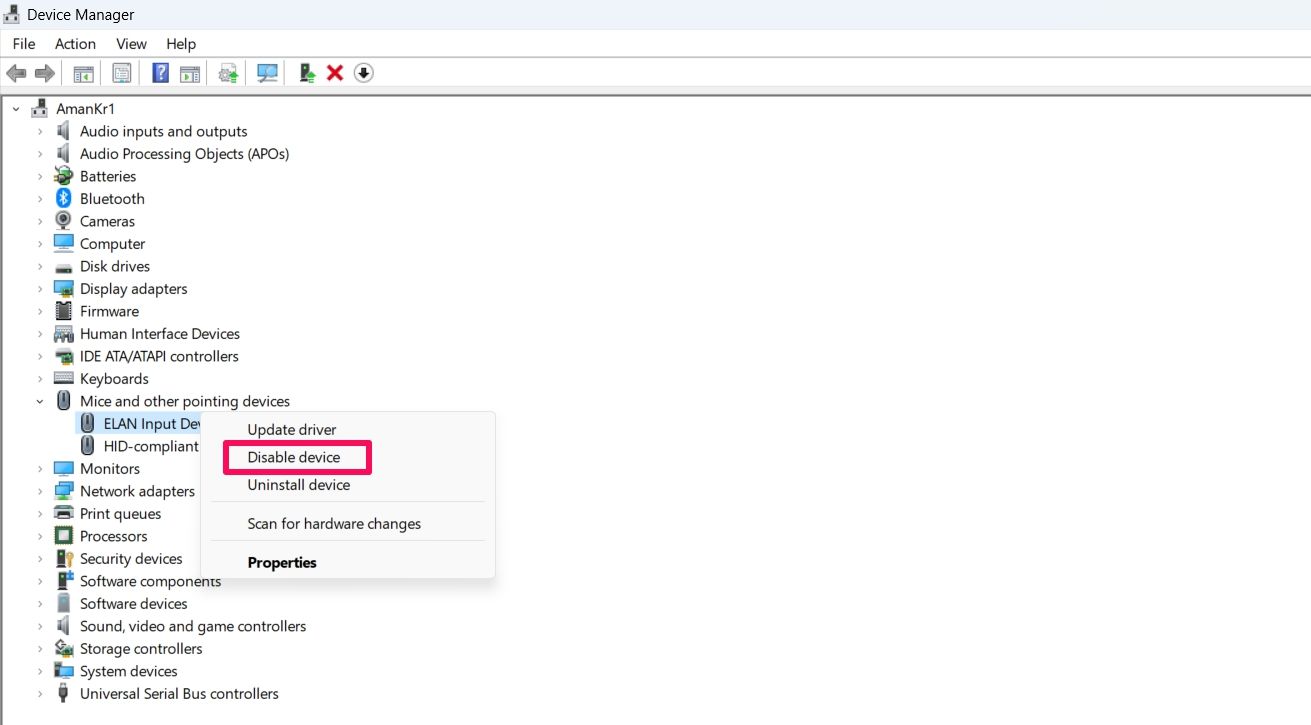
Your touchpad will now be disabled, and you can start using your external mouse or trackpad.
5. Disable the Touchpad Using the Registry Editor
For avid Windows users familiar with the workings of the Windows registry, disabling the touchpad can be achieved using the Registry Editor.
Prior to following the steps below, it is essential to backup the registry and create a restore point. This precaution guarantees the safety of your data and system settings in case any issues arise during the registry editing process.
To access the desired location, follow these steps:
1. Open the Start menu.
2. Type "regedit" into the search field.
3. Press the Enter key.
4. In the Registry Editor, navigate to the following location:
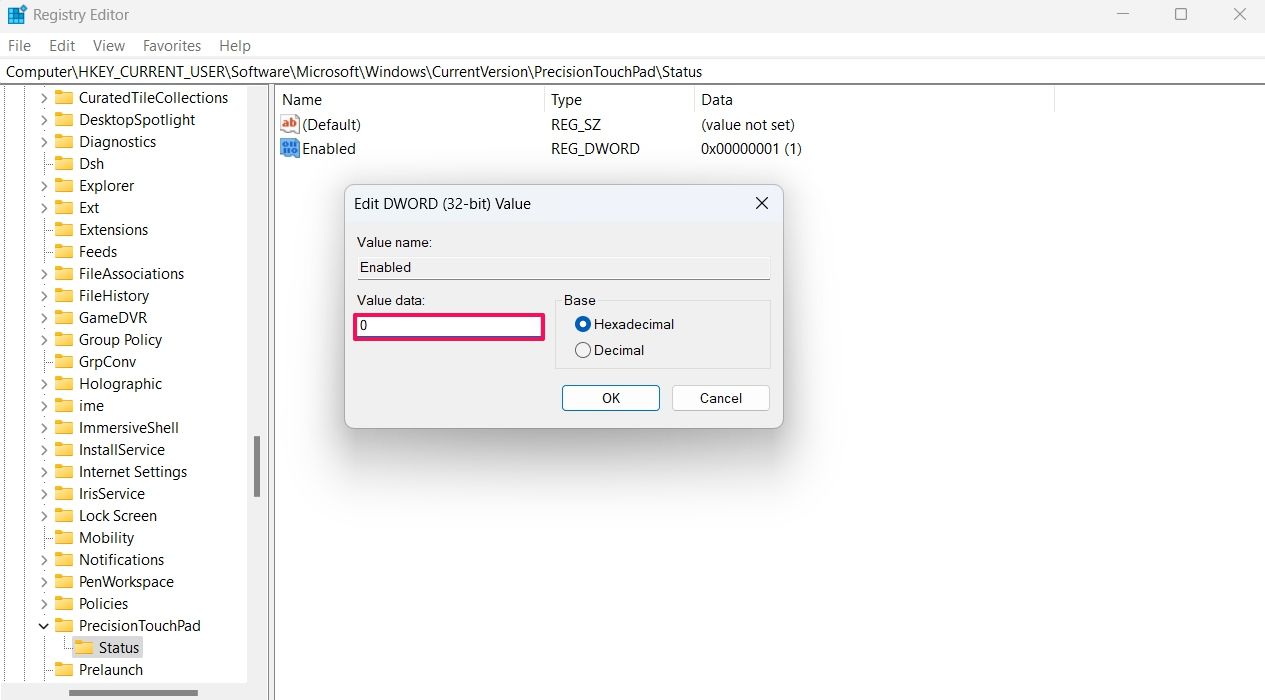
Computer\HKEY_CURRENT_USER\Software\Microsoft\Windows\CurrentVersion\PrecisionTouchPad\Status
Double-click the "Enabled" value in the right pane. In the Value data field, type "0" to turn off the touchpad. Then, click "OK" to save your changes.
After that, restart your computer for the changes to take effect. To reverse this, change the value back to "1".
How to Automatically Disable the Touchpad When an External Mouse Is Connected
To avoid the hassle of manually disabling the touchpad every time you connect an external mouse, you can set up your computer to automatically turn it off. All you need to do is open the Settings app, go to Bluetooth & devices > Touchpad, click the drop-down icon next to "Touchpad", and uncheck the "Leave touchpad on when a mouse is connected" option.
That's it! Windows will now automatically disable the built-in touchpad whenever you connect an external mouse or trackpad to your computer.
How to Enable the Touchpad Without a Mouse
If you find yourself in a predicament where you have unintentionally deactivated your touchpad and lack a mouse to reactivate it, you have the option of utilizing your keyboard to enable the touchpad.
To do this, press the Windows key to open the Start menu, type "Turn the touchpad on or off" in the search field, and press Enter.
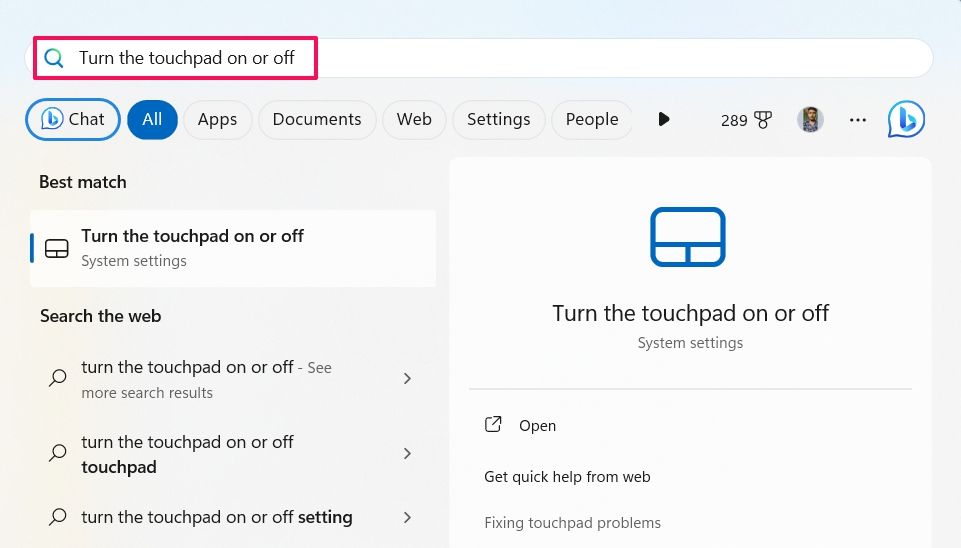
Continue pressing the Tab key until you locate the touchpad toggle. Afterward, activate the touchpad by pressing the Space key.
Once the touchpad is deactivated, you can effortlessly operate your computer with an external mouse, eliminating any unintended clicks.
Editor's P/S
As a Gen Z netizen, I have grown up with technology and am very familiar with using touchpads on laptops. I find that touchpads can be very convenient for tasks such as scrolling through web pages or zooming in on images. However, I also find that touchpads can be annoying when I am trying to type, as I often accidentally brush against the touchpad and move the cursor. For this reason, I often disable the touchpad when I am using an external mouse.
The article provides several easy steps to turn off the touchpad in Windows 11. I think that these steps are very helpful, as they allow users to quickly and easily disable the touchpad when they need to. I also appreciate that the article provides multiple methods for disabling the touchpad, as this gives users the option to choose the method that they are most comfortable with.


