
Step-by-Step Guide: Adding a Line in Google Docs
Learn how to effortlessly insert horizontal and vertical lines in Google Docs Discover two intuitive methods for adding horizontal lines, including using the menu bar option and paragraph styles Additionally, explore two simple techniques for inserting vertical lines, such as utilizing the drawing tool and columns
Some Noticeable Information
To add a horizontal line in your document, from Google Docs' menu bar, select Insert > Horizontal Line.
To add a vertical line, go to the Docs' menu bar and select Insert > Drawing > New. From there, choose the "Line" option, hold down Shift while drawing a vertical line, and finally select "Save and Close" in the top-right corner. Adding both horizontal and vertical lines to separate sections or create columns in your Google Docs document is a simple process with various methods available. Let us demonstrate how to add these lines to your docs.
Add a Horizontal Line in a Google Docs Document
There are two ways to add a horizontal line (from left to right) in your Google Docs document: either utilize an option from the menu bar in Docs, or modify your paragraph styles to include a line after each paragraph.
Here’s how to use both methods.
1. Use the Menu Bar Option
To effortlessly insert a horizontal line in Google Docs, select the dedicated menu option. This action will prompt Docs to swiftly incorporate a line into your document, completing the task efficiently.
To utilize this feature, commence by accessing your document on Google Docs. Next, position the text cursor at the desired location where the line should be inserted.
Next, from Google Docs’ menu bar, select Insert > Horizontal Line.
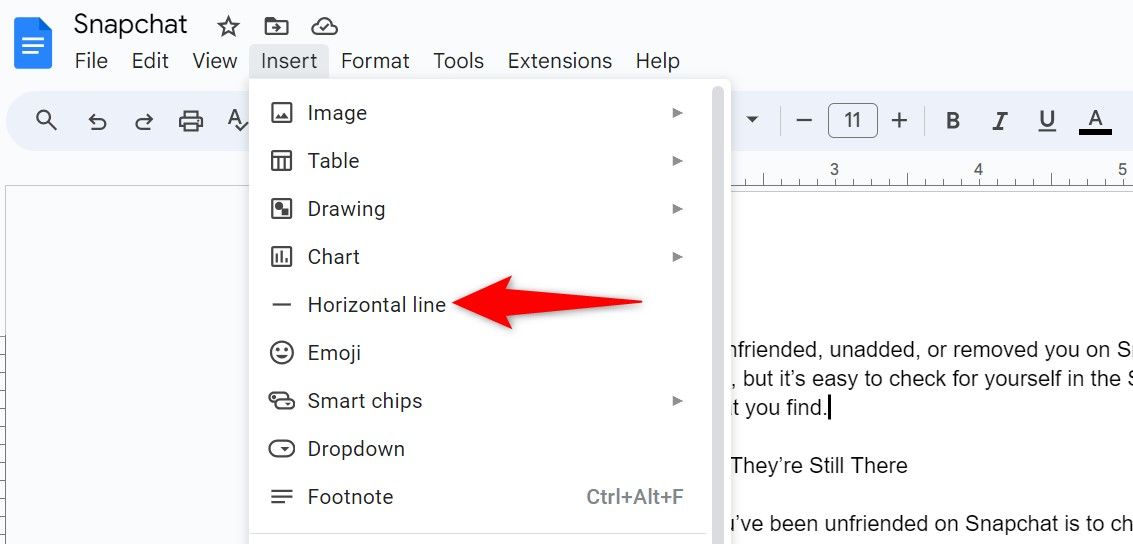
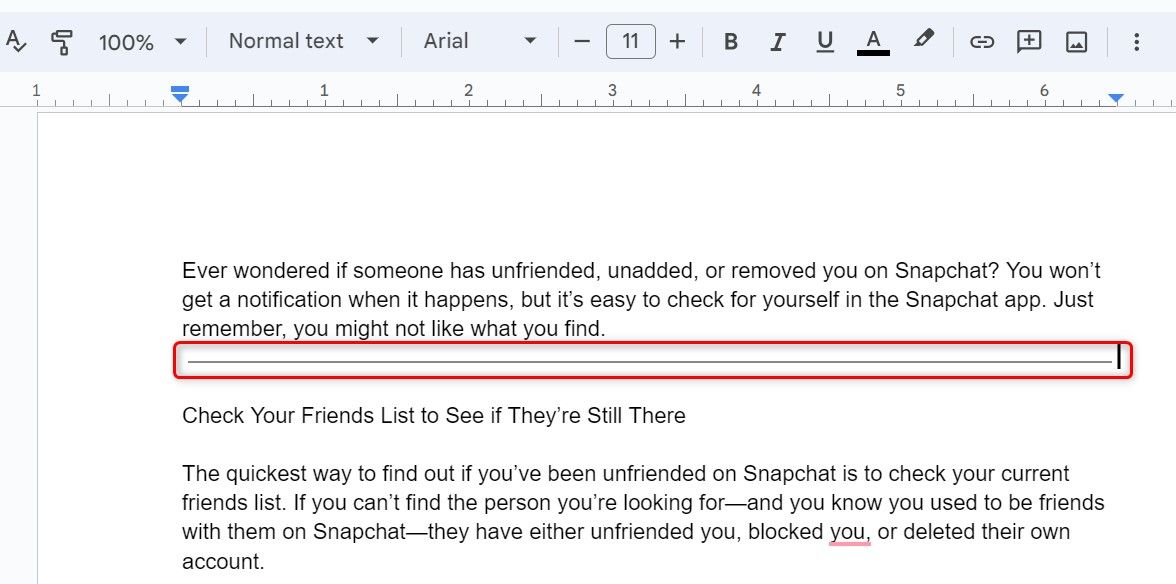
As soon as you click that option, Docs adds a horizontal line.
If you add any content above the line, the line will automatically shift down, so you don’t have to adjust it manually.
If you’d like to remove the line, double-click it and press the Delete key.
2. Use Paragraph Styles
Another way to add a horizontal line in Google Docs is by using paragraph styles. Here, you customize your paragraph’s style, making it display a line.
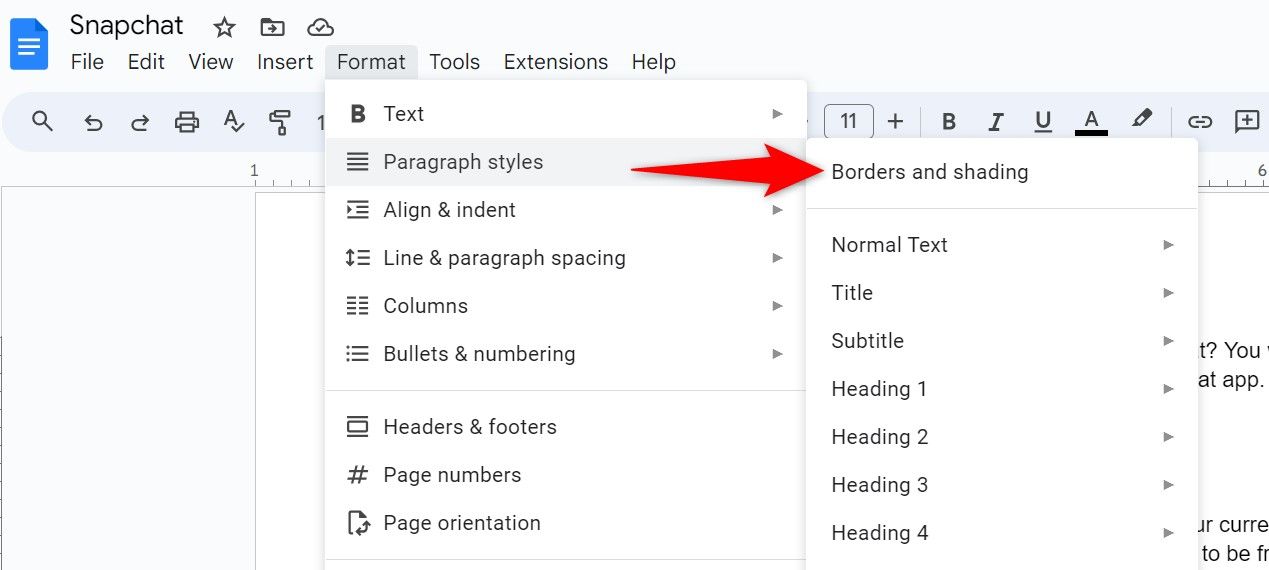
To do that, when your Google Docs document is open, select Format > Paragraph Styles > Borders and Shading from the menu bar.
On the "Borders and Shading" window, select the position, width, dash, and other options for your line. Then, choose "Apply" to add the line to your document.
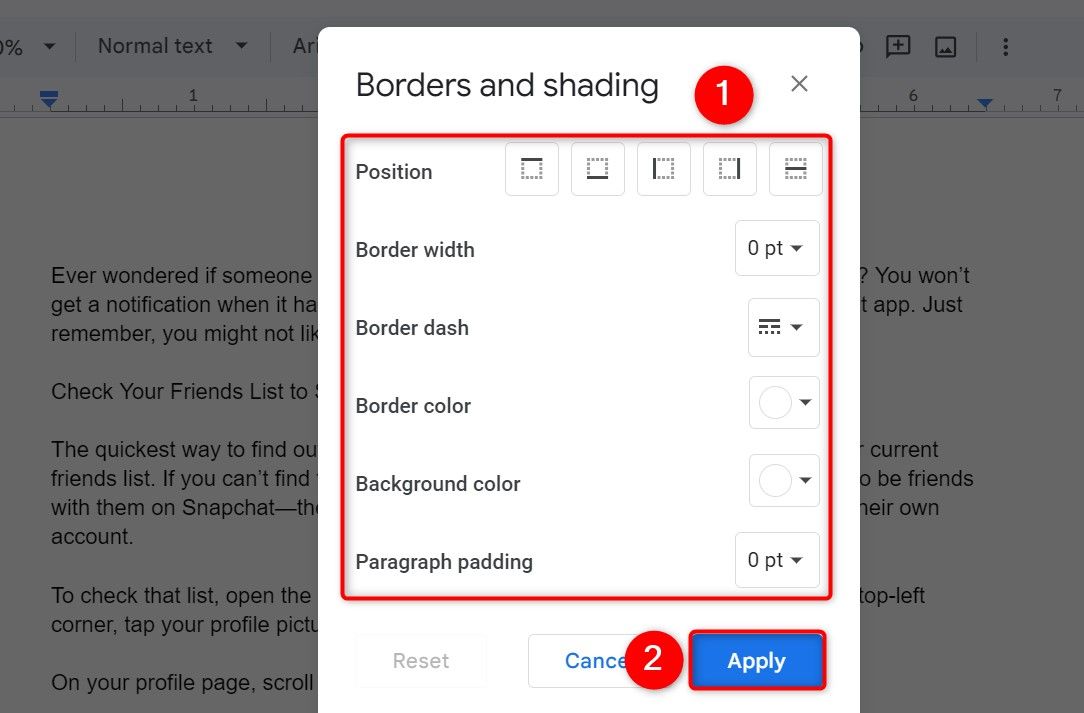
You now have your customized line in your document.
Add a Vertical Line in a Google Docs Document
To insert a vertical line (from top to bottom) in your Google Docs document, you can opt for either of two options. One is to utilize Docs' drawing tool to draw a line and include it in your document. The other option is to create columns that feature a line between your text sections.
Here's a step-by-step guide on how to employ both approaches.
1. Use the Drawing Tool
An easy way to add a vertical line in your document is to use Google Docs' drawing tool. Here, you draw the kind of line you want in your document and then insert that line.
To start, launch your Google Docs document, and from the menu bar, select Insert > Drawing > New.

Select the "Line" option from the tools list at the top of the "Drawing" window. While holding down the Shift key on your keyboard, draw a vertical line on the canvas to ensure its straightness. Once you have completed your desired line, click "Save and Close" located in the top-right corner of the open window.
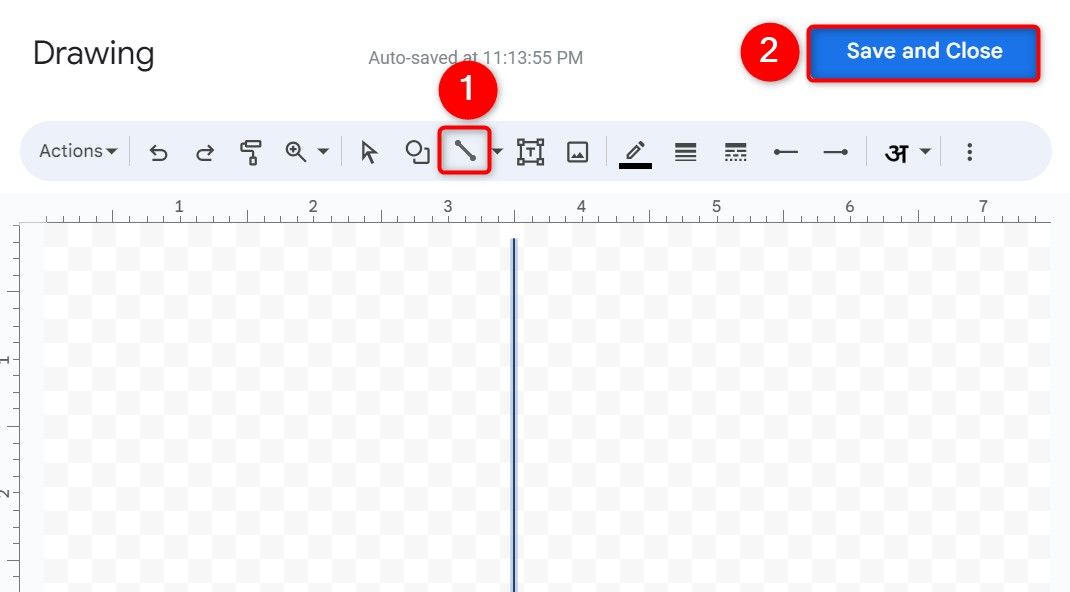
Google Docs adds your drawn line to your document. You can change the line’s position and place it anywhere you want by clicking and dragging it.

2. Use Columns
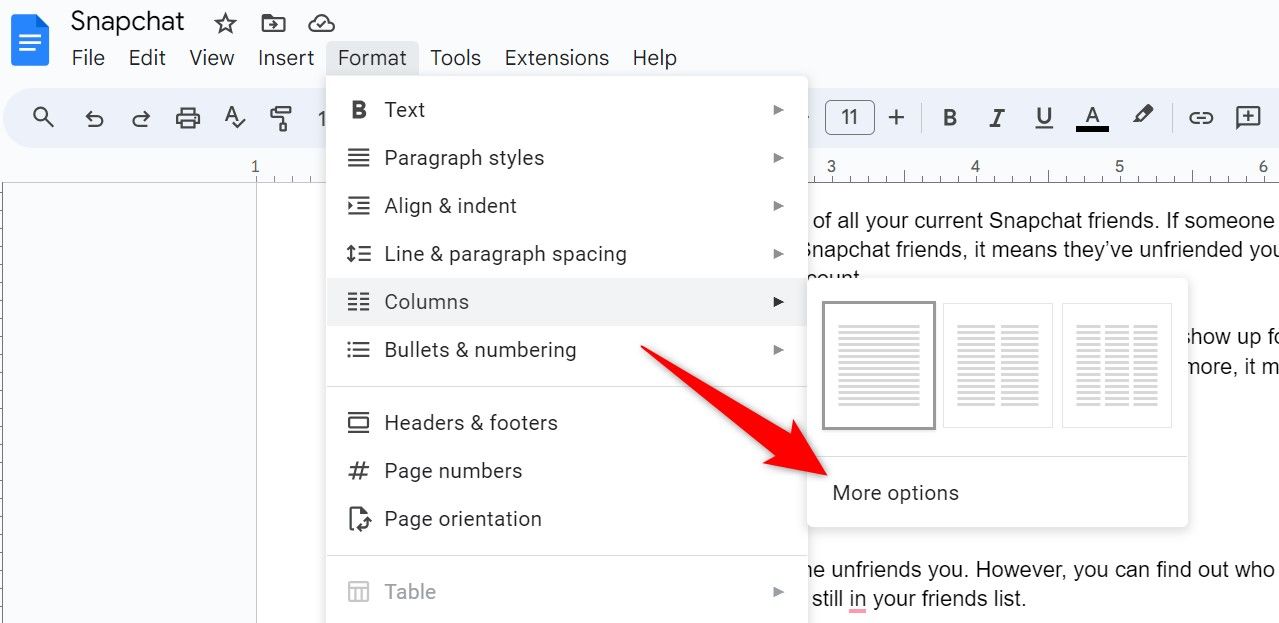
To add a vertical line in Google Docs, you can utilize the columns feature. Simply divide your text into multiple columns, and a line will automatically separate them. To access this feature, click on Format in the menu bar of Google Docs, then select Columns, followed by More Options.
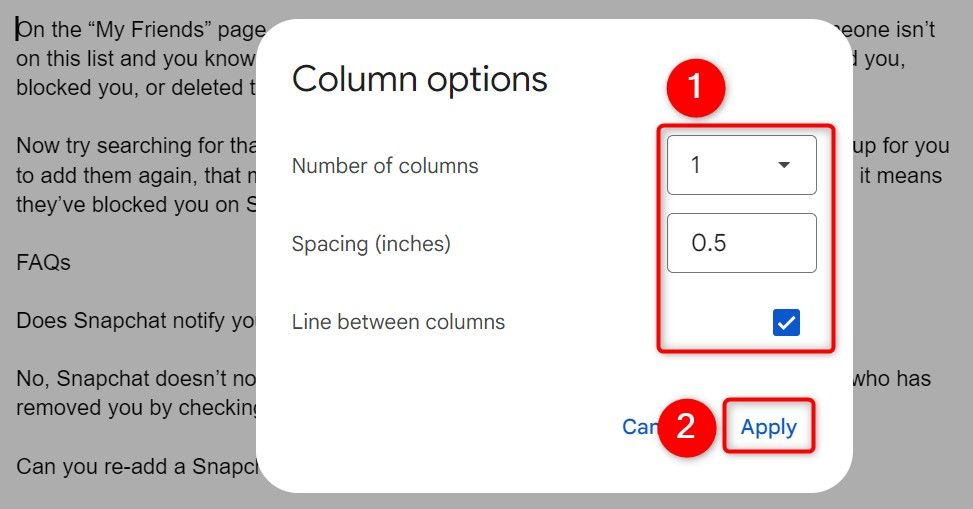
To set the number of columns in your document, go to the "Column Options" window. In the "Number of Columns" box, select the desired number. If you choose two columns, a vertical line will be added. The "Spacing (Inches)" field allows you to specify the spacing between the columns.
Make sure to checkmark the "Line Between Columns" option, as this is the option that adds a vertical line in your document. Then, choose "Apply."
You now have a vertical line in your document, separating your text columns.
And that’s how you insert two kinds of lines in your Google Docs documents.
Editor's P/S
As a Gen Z fan, I appreciate the clear and concise step-by-step instructions provided in this article. The article effectively outlines two methods for adding horizontal lines and two methods for adding vertical lines in Google Docs, making it easy for users to follow and implement.
The screenshots included in the article are also helpful, as they provide visual aids that complement the written instructions. Overall, I find this article to be a valuable resource for anyone who wants to learn how to add lines in Google Docs.


