Maximizing Your Mac: Run Windows seamlessly
Learn how to run Windows on your Mac, whether you have an M-series chip or an older Intel-based Mac Discover options for running a Windows virtual machine, including Parallels and VMware, as well as installing Windows natively on your Mac with Boot Camp Enjoy the best of both worlds with excellent performance on your Mac
Running Windows on an Apple Silicon (M1, M2, or similar) chip in a Mac is now possible through a virtual machine, providing nearly native speed. Another option is to use Boot Camp Assistant to install Windows 10 or a custom Windows 11 ISO image on an Intel-based Mac. Despite the switch to ARM-based chips, the performance of Windows on a Mac remains excellent.
Mainstream processors from Intel and AMD utilize x86 processor architecture, which is distinct from the one used by Apple. Until 2020, Apple relied on Intel processors, which meant that their machines could natively support Windows. If you have an older Mac with an Intel processor, you can still install Windows directly.
Thankfully, users with an M1 chip or newer can now use an ARM-based version of Windows 11, aptly named Windows on ARM. While it's not possible to install this version natively, this is no longer a major concern. Windows on ARM can run most 64-bit and 32-bit applications that work on standard versions of Windows, albeit with slight performance issues.
Run Windows in a Virtual Machine on a Mac
However, Apple Silicon Mac owners are currently restricted to installing Windows 11 in a virtual machine (VM). A VM is a program that mimics a computer, allowing you to install another operating system, such as Windows or Linux, within your existing desktop environment.
Running Windows on a Mac may seem like a challenge, especially for Intel users. However, with virtualization, users can easily install the standard x86 version of Windows and run it alongside macOS. The benefits of virtualization include the convenience of not having to reboot each time you want to use Windows, as it can be accessed right from your Mac desktop. If you are looking to run Windows 11 on your Mac, virtualization is the most reliable option, as many VM applications now support the latest Microsoft requirements. So, if you want to seamlessly switch between macOS and Windows 11, using a VM is your safest bet.

Windows on ARM performs seamlessly on modern Apple Silicon Macs, with little to no loss in performance. We've tested a wide range of applications, including older 3D accelerated games that run without any issues. However, DirectX 12 titles are currently not supported. With a multiple-monitor setup, you can even have Windows running on a dedicated monitor that's just as accessible as a standard macOS desktop. Running your virtual machine (VM) in full-screen mode allows you to switch between spaces whenever you need it, while running it in a window is the least appealing option. Running Windows in a VM also means you won't need to sacrifice disk space upfront - your VM will take up more space as your need for it grows. For MacBook owners, running Windows in the background will slightly increase battery drain, but with apps like Parallels Desktop, you'll hardly notice it's running.
Parallels Desktop simplifies the process of installing Windows on ARM on your Mac. Our Parallels Desktop review provides a more comprehensive look at this software.
Begin by downloading Parallels Desktop 18, which offers a free trial, and create a new virtual machine using the wizard or the File > New option. Click on “Get Windows 11 from Microsoft” and let Parallels Desktop handle the download and setup process.
- Option 1: Run a Windows VM in Parallels

Parallels is a high-end application that comes at a premium price, starting at $99 for the most basic version. In order to utilize full Windows functionality, users must also purchase a Windows license. However, the app offers the added benefit of being able to quickly install Linux distributions such as Ubuntu, or even macOS, within a VM environment - making it a great tool for testing.

- Option 2: Run a Virtual Windows Machine With VMware
For those looking to run Windows on their Apple Silicon or Intel Mac, VMware Fusion 13 is also an option. However, compared to Parallels, VMware's solution is still lacking in many features - with DirectX 11 support being limited to Intel machines. On the bright side, VMware Fusion Player is available for personal use free of charge.
To begin using VMware Fusion Player 13 for free, simply sign up for a VMware account and access VMware Customer Connect to download the application. After installation, register the program with the key provided in your account. However, the process of setting up VMware Fusion 13 with Windows 11 on ARM is more complicated compared to Parallels Desktop. You must first download the Windows 11 on ARM Insider Preview .VHDX from Microsoft and then convert it to .VMDK using the free app, qemu, which can be found via Homebrew. Finally, create a custom VM within VMware Fusion using the Windows 11 on ARM preset and use the file you just created as your Virtual Disk to initiate the installation process. Andrew Tsai has a helpful tutorial on YouTube for this setup, but be aware that VMware Fusion requires more manual setup than Parallels Desktop and may not be as user-friendly.

VirtualBox and UTM: Free Virtual Machine Solutions for Apple Silicon Chips
VirtualBox and UTM are two free virtual machine solutions that offer support for Apple Silicon chips. While VirtualBox has recently added this feature in a developer preview, it requires users to configure and install Windows themselves. On the other hand, UTM offers a user-friendly experience with the option to download pre-configured VMs from its Gallery. However, it's important to note that UTM has limited support for 3D acceleration and may not be suitable for running games.
Install Windows on Your Intel Mac with Boot Camp
For those with an older Mac featuring an Intel chip, there's a way to transform it into a standard Windows PC by natively installing the operating system. However, as Apple no longer produces Intel-based machines, purchasing a used Mac is the only option if you're looking for this capability.
- What You Need to Know About Installing Windows Natively on a Mac
By installing Windows natively, you'll experience full-speed performance of Microsoft's operating system. On the other hand, running Windows in a virtual machine means that you'll have to share resources with macOS, which can result in a moderate performance penalty on older machines - a category that Intel Mac models now fall into.
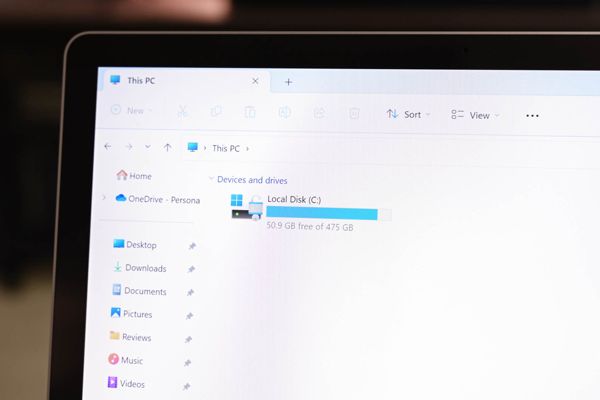
To utilize Windows on a Mac, an Intel CPU is required and the computer must be rebooted while holding the Option key to select Windows from the list of bootable volumes. Once booted, Apple drivers for the Mac's components should automatically install. Installing Windows natively will partition the Mac's boot drive and share space between the two operating systems. It's important to consider available disk space when sacrificing it for Windows and its applications. Possible issues with installing Windows 11 on an Intel Mac may be resolved with a registry hack or creating a custom ISO file, or alternatively, installing Windows 10 which will be supported by Microsoft until October 2025.

Installing Windows using Boot Camp on a Mac has remained a straightforward process for a few years now. To begin, you will need a compatible Mac, an ISO file for the Windows version you want to install (Home, Professional, or a custom Windows 11 disk image that can be legally downloaded from Microsoft's website), an external flash drive, and at least 64GB of free space (128GB is recommended). It's also crucial to back up your Mac with Time Machine before proceeding.
Once you have everything you need, launch Boot Camp Assistant from the Applications > Utilities folder, and follow the on-screen instructions. You will be prompted to find the installation medium and specify a size for the Windows partition. Finally, hit the "Install" button to start the installation process.

After downloading the necessary drivers, Boot Camp Assistant will initiate the installation process which will prompt your Mac to restart. A standard Windows installer will appear, allowing you to choose the “BOOTCAMP” partition for Windows installation. Be sure to avoid connecting to the internet during installation to prevent any hiccups with Wi-Fi drivers. Once installation is complete, reboot your computer and hold Option to select “Windows” from the bootable partitions list. Boot Camp Control Panel should launch and offer to install any missing drivers. Otherwise, you can find it in the system tray at the bottom-right corner of the screen. With all drivers installed, your Mac will function like any other PC.
Why Run Windows on a Mac?
If you find yourself in need of running a piece of software that isn't supported by macOS, Windows can come in handy. Using virtualization or Boot Camp can even allow you to play certain games that Apple no longer supports in their latest macOS releases. However, if running Windows in a virtual machine isn't enough, it may be worth considering purchasing a Windows PC instead of a Mac. Gaming isn't Apple's forte, and although it's possible to play games on a modern M1 or M2 Mac, building a gaming PC or purchasing a console may be a better option if gaming is your main priority.