
Master the Art of Roomba Brush Cleaning with These Proven Techniques
Maintaining optimal performance, regular cleaning of your Roomba's brushes is recommended by iRobot This article provides a simple step-by-step guide, essential tools, and additional tips for keeping your Roomba brushes clean Learn how to effortlessly maintain your Roomba's brushes for efficient cleaning
How do you clean your Roomba’s brushes?
Cleaning Your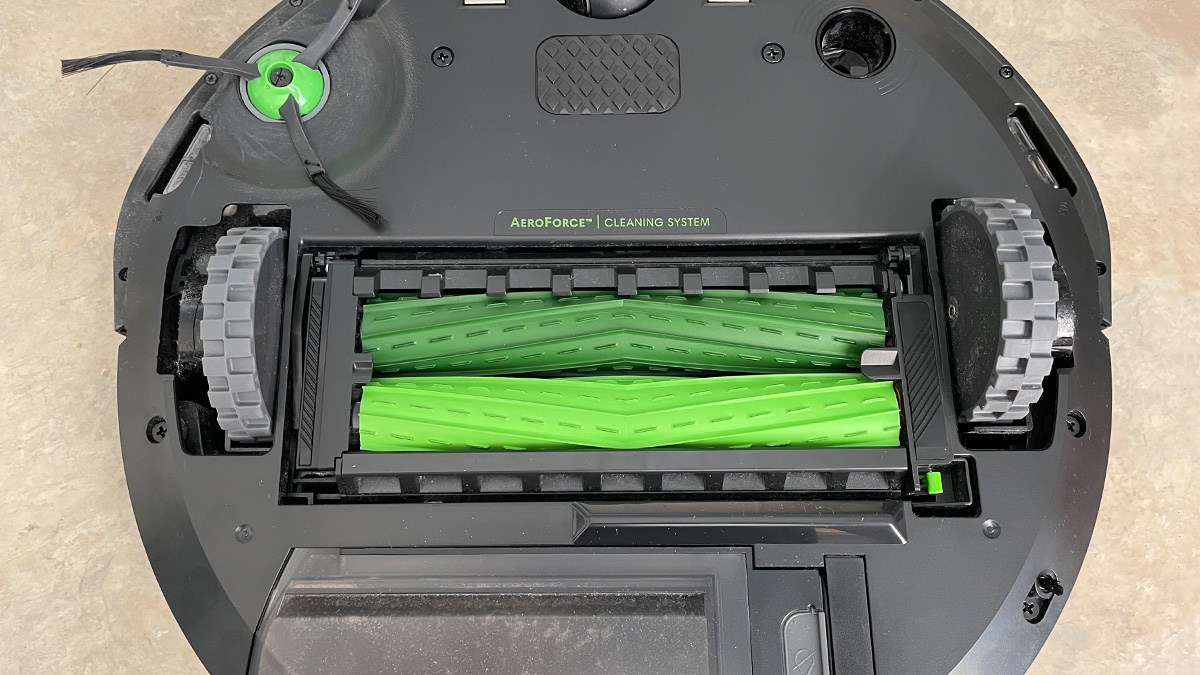 Made Easy
Fortunately, maintaining the primary brush roll and side brush of your Roomba is a quick and hassle-free task. While there may be slight variations in the process depending on your specific Roomba model, the fundamental steps remain consistent across the entire range.
An easy cleaning guide for most Roomba brushes
Understanding Your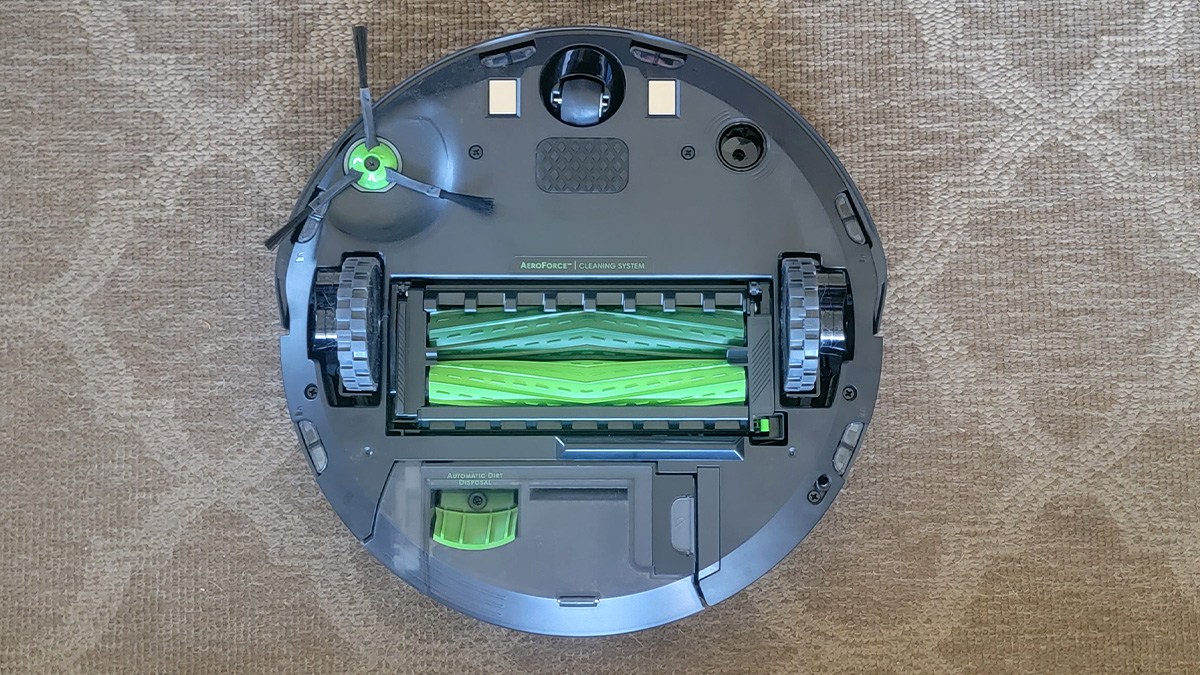 's Brush Components
Every Roomba consists of a primary brush roll and a side brush, both playing vital roles in ensuring efficient cleaning. Although the materials and design of these brushes can differ among models, the majority of steps for routine cleaning remain unchanged.
What you’ll need
Microfiber or cotton clothScrewdriver
Step 1: Turn your Roomba over on a flat surface
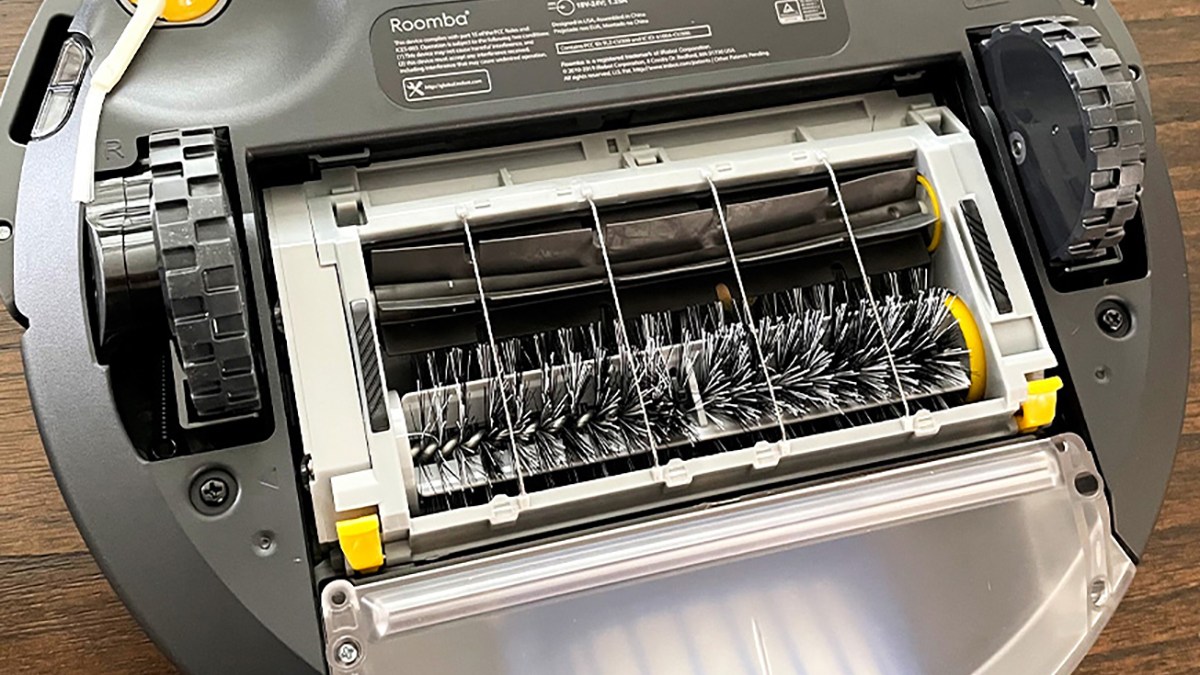
To efficiently remove and clean the brushes on a Roomba, it is advisable to turn the vacuum upside down and position it on a level and secure surface. This will ensure that the vacuum remains stable and immobile while you carry out the task.Step 2: Lift out the brush roll
Identifying the primary brush roll on your Roomba is a breeze as it can be found on the underside of the robot. Although the specific design may vary across different models, all Roombas feature a tab or tabs that you can press to release the brushes. Once they are released, simply lift them out of the robot.Step 3: Clean the brush roll cavity
Once the brush roll is removed, take a moment to inspect the area where it is housed within the robot. If you happen to notice any dirt or debris, you can gently clean it using a microfiber or cotton cloth. However, reaching every nook and cranny can prove challenging, so employing a can of compressed air to blow away any lingering debris is recommended.Step 4: Remove and clean beneath the caps at the ends of the brushes
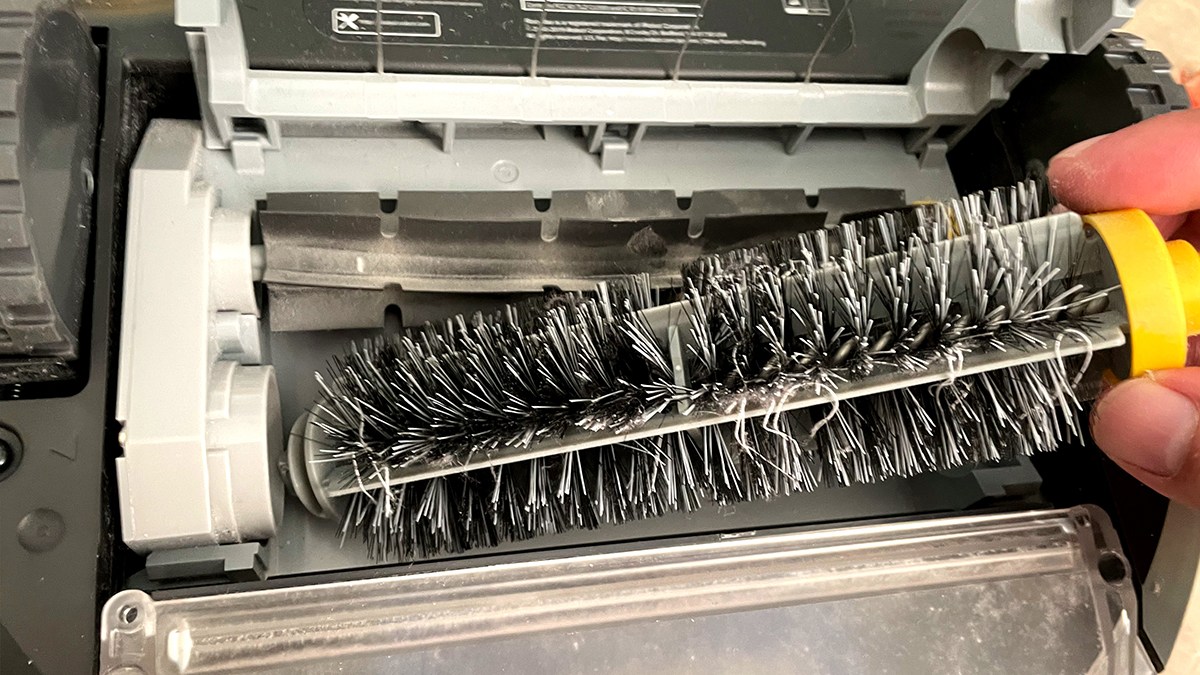
When it comes to the brush roll on your Roomba, regardless of its type, there are caps or bearings located at the ends that you need to address. Gently remove these from the brushes, ensuring you lift them off carefully, and proceed to eliminate any hair or debris that may have become trapped underneath.Step 5: Remove debris from the brushes
Additionally, it is essential to manually clean the brushes themselves as they can accumulate hair and other forms of debris. While you can usually remove the hair by using your fingers, models equipped with bristle brushes may necessitate a bit more effort and attention to detail.Step 6: Reinstall the brush roll
Once you have completed the cleaning of your Roomba's brushes, proceed to replace the caps or bearings on the ends. Reinsert the brushes firmly into the robot, ensuring they are securely in place.Step 7: Unscrew and remove the side brush
The side brush of a Roomba, as its name suggests, is a small round brush situated at the side of the robot. It is held in position with a screw, so employ a small screwdriver to loosen it and carefully remove it from its housing.Step 8: Remove debris from the brush, its post and cavity
Remove any debris from the brush or its post, and inspect the surrounding cavity for any trapped dirt. Gently blow away any remaining particles using compressed air.Step 9: Reinstall the side brush
Reattach the side brush to the robot, ensuring it is securely fastened using the screwdriver.Extra tips for multisurface rubber brushes
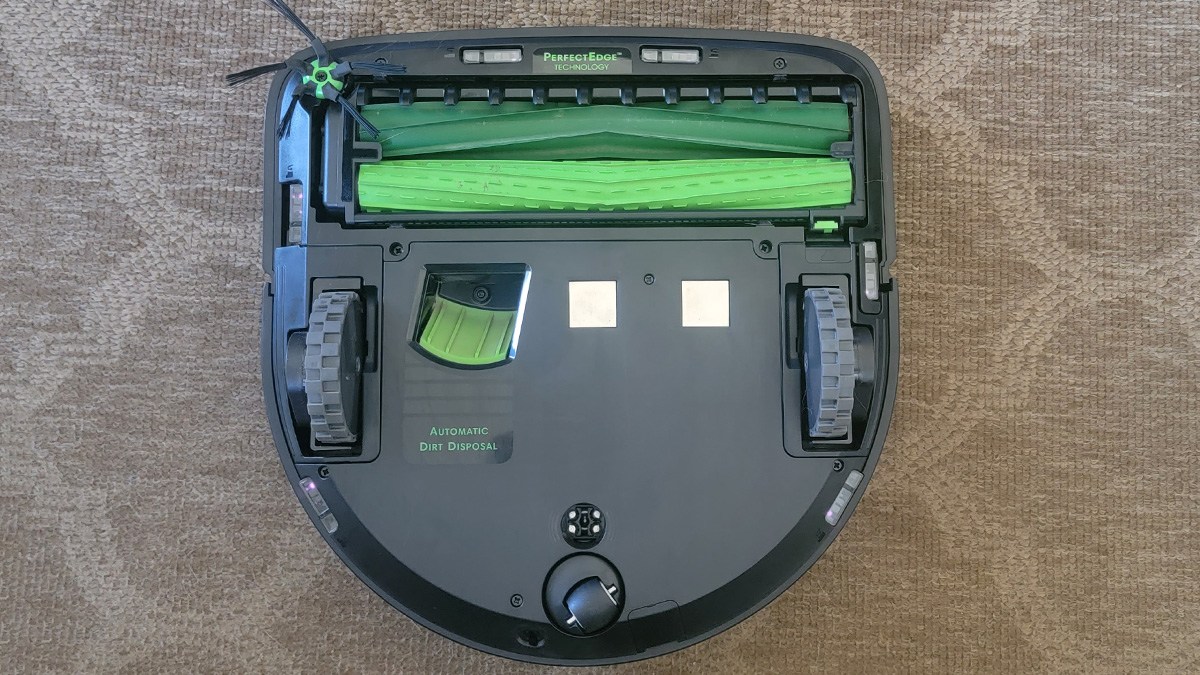 In comparison to traditional bristle brushes, certain Roomba series like 800, 900, e, i, j, and s series utilize rubber brushes. These rubber brushes are specifically designed to prevent hair from becoming tangled around them, making the cleaning process much more convenient. To detach the brushes, simply press the green tab located on the right side and open the frame.
Due to the brushes being less prone to hair tangling, you can easily remove any hair by using your fingers. If you notice any additional dirt or debris on the rubber brushes, it can be wiped away effortlessly with a microfiber or cotton cloth.
Extra tips for side brushes
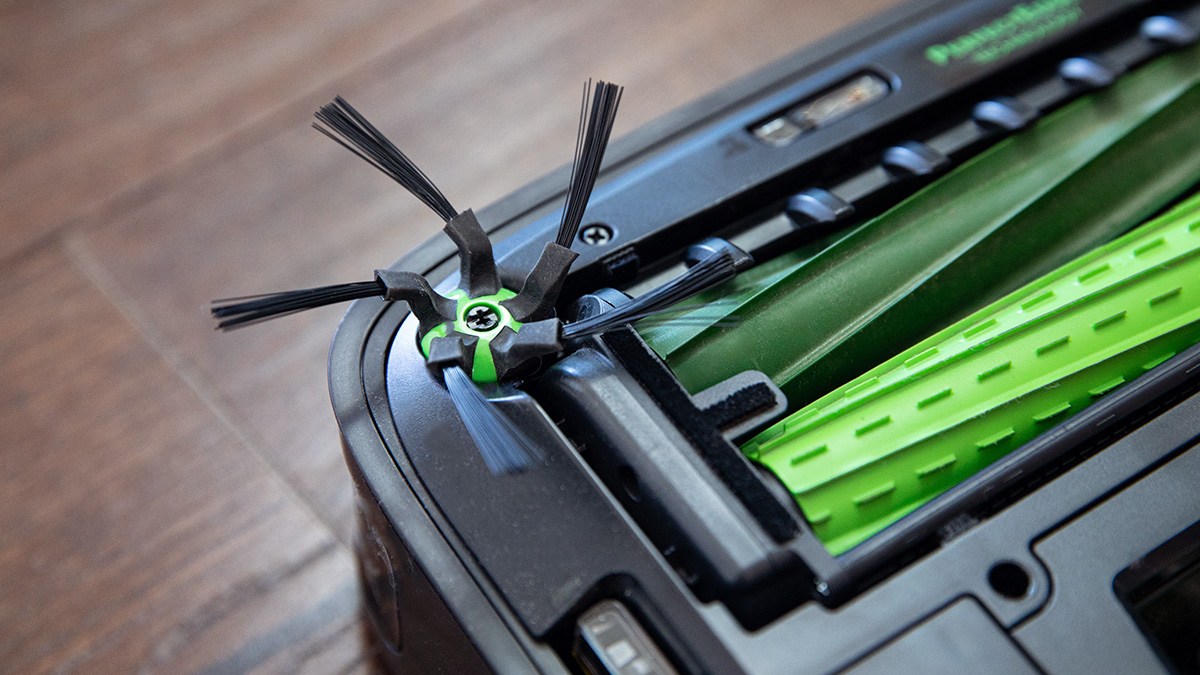 Cleaning the side brushes of your Roomba is usually a simple task. However, in certain situations, you might discover tightly-wound hair around the base of the brushes. If you're unable to remove it with your fingers, carefully use scissors to cut the hair, making it easier to remove.
Fortunately, the actual brush fibers don't typically become entangled with hair. Nevertheless, exercise caution when wiping away dirt as these fibers are more delicate compared to traditional brush bristles.
Extra tips for the 400, 500, 600 and 700 series
 If you own a Roomba equipped with traditional bristle brushes, effectively cleaning them may require a bit more effort. The bristles often become tightly entangled with hair, making it impossible to remove by simply using your fingers.
The approach to effectively eliminating this hair buildup varies depending on the specific model of your Roomba.
For the 400 and 500 series Roombas, a handy cleaning tool is provided specifically to assist in removing hair from the brushes. Simply run the included tool over the bristles to loosen the hair, allowing you to easily pull it out.
On the other hand, for the 600 and 700 series Roombas, the most effective method for eliminating hair from the bristle brushes is by using a pair of scissors. Carefully snip the hair in one or more sections, enabling you to effortlessly remove it. However, caution must be taken to avoid any potential injury to yourself or damage to the bristles.
Roomba brush-cleaning FAQ
Do Roomba brushes need to be replaced?
To maintain the cleanliness of your floors, the hardworking Roomba brushes should be replaced periodically. iRobot recommends replacing the robot's two primary brushes every six to 12 months, and the side brush every three to six months. If you are unsure whether it's time to replace your brushes, simply check the Product Health tab in the iRobot Home app for your Roomba. It will provide you with information on how many more cleaning hours your brushes have left.How often do you need to clean your Roomba brushes?
Keeping your Roomba in optimal condition, iRobot suggests cleaning the two primary brushes on a weekly basis. However, if you have pets, it is recommended to clean them twice a week. As for the side brush, it generally requires monthly cleaning.Can you use your Roomba daily?
You have the option of vacuuming your home daily, even if you don't have children or pets. Daily vacuuming can be particularly beneficial during allergy season when you may want to stay on top of symptoms. Performing daily cleaning should not result in any changes to the battery life or performance of your vacuum. However, it is possible that you may need to clean and replace your brushes and other components more frequently.Keeping Roomba brushes clean
 Cleaning the brushes of your Roomba is a quick and effortless task, especially if you establish a weekly cleaning routine to prevent excessive dirt or hair buildup. Although it may appear insignificant, maintaining your robot's brushes can prolong its longevity and contribute to keeping your floors free of messes.


