Unraveling Starfield's Enigmatic Journey: Insider's Walkthrough
Embark on a mind-bending adventure in Starfield's 'Entangled' quest, where two parallel realities collide Discover how to navigate the Director's Office, reach the Lab, override lockdowns, and make crucial decisions that could alter the course of the universe Unleash your power and unravel the mysteries that lie within
Quick Links
Entangled Walkthrough In StarfieldHow To Reach The Director’s Office In Starfield
How To Get To The Lab In Starfield
How To Override The Lockdown In The Facilities Section
How To Override The Lockdown In The Accelerator Section
How To Override The Lockdown In The Storage Section
Should You Disable Power Interlocks or Switch Universes
Out of all the Main Quests in Starfield, Entangled is undeniably the most spine-chilling. Venturing into the ravaged laboratory of an alternate universe teeming with creepy adversaries is sure to send shivers down your spine.
Entangled Walkthrough In Starfield
: Entangled serves as the culminating quest in Starfield, marking the 17th Main Quest progression. However, it is important to note that this mission is actually the final step of the Final Glimpses Quest. Upon reaching the planetary destination of Hyetta III and intercepting a distress signal, players are tasked with delving into the investigation. It is within the confines of Entangled that all the necessary answers come to light.
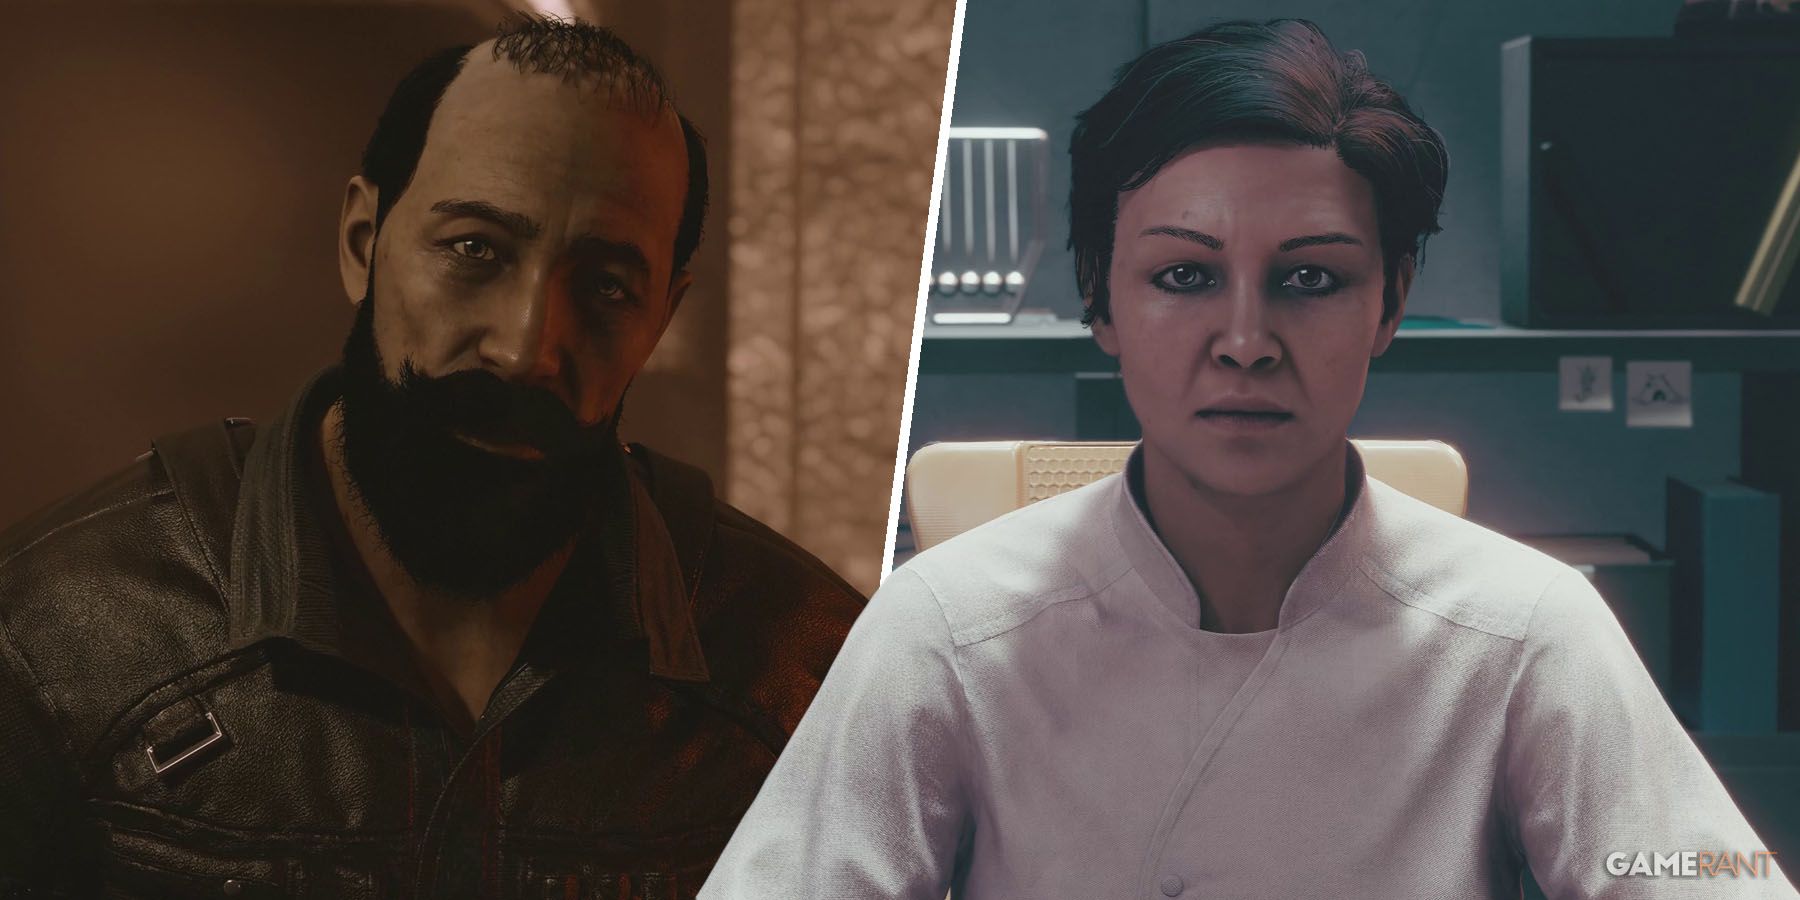
Arriving on Hyetta III, situated adjacent to the Nishina Research Station within the vast expanse of Starfield, ascend the flight of stairs and engage with the intercom system to gain admittance. Cordially ushering players into the inner sanctum, Ethan Hughes, the esteemed Chief of Security, graciously leads the way towards the esteemed Director.
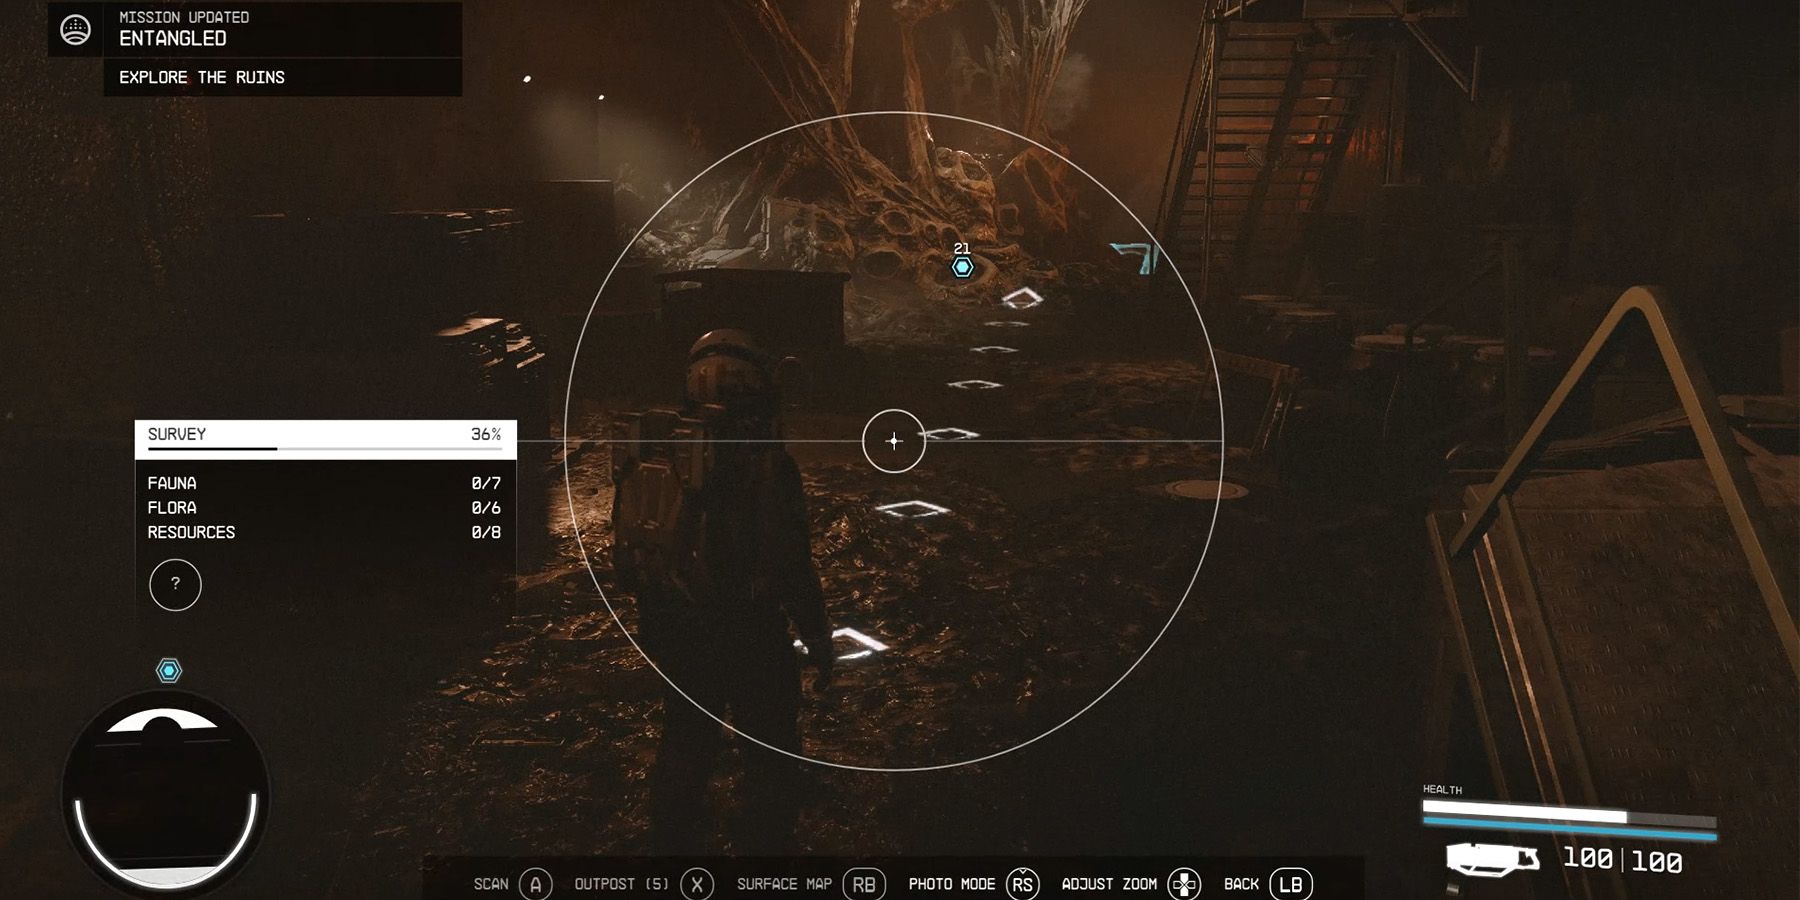
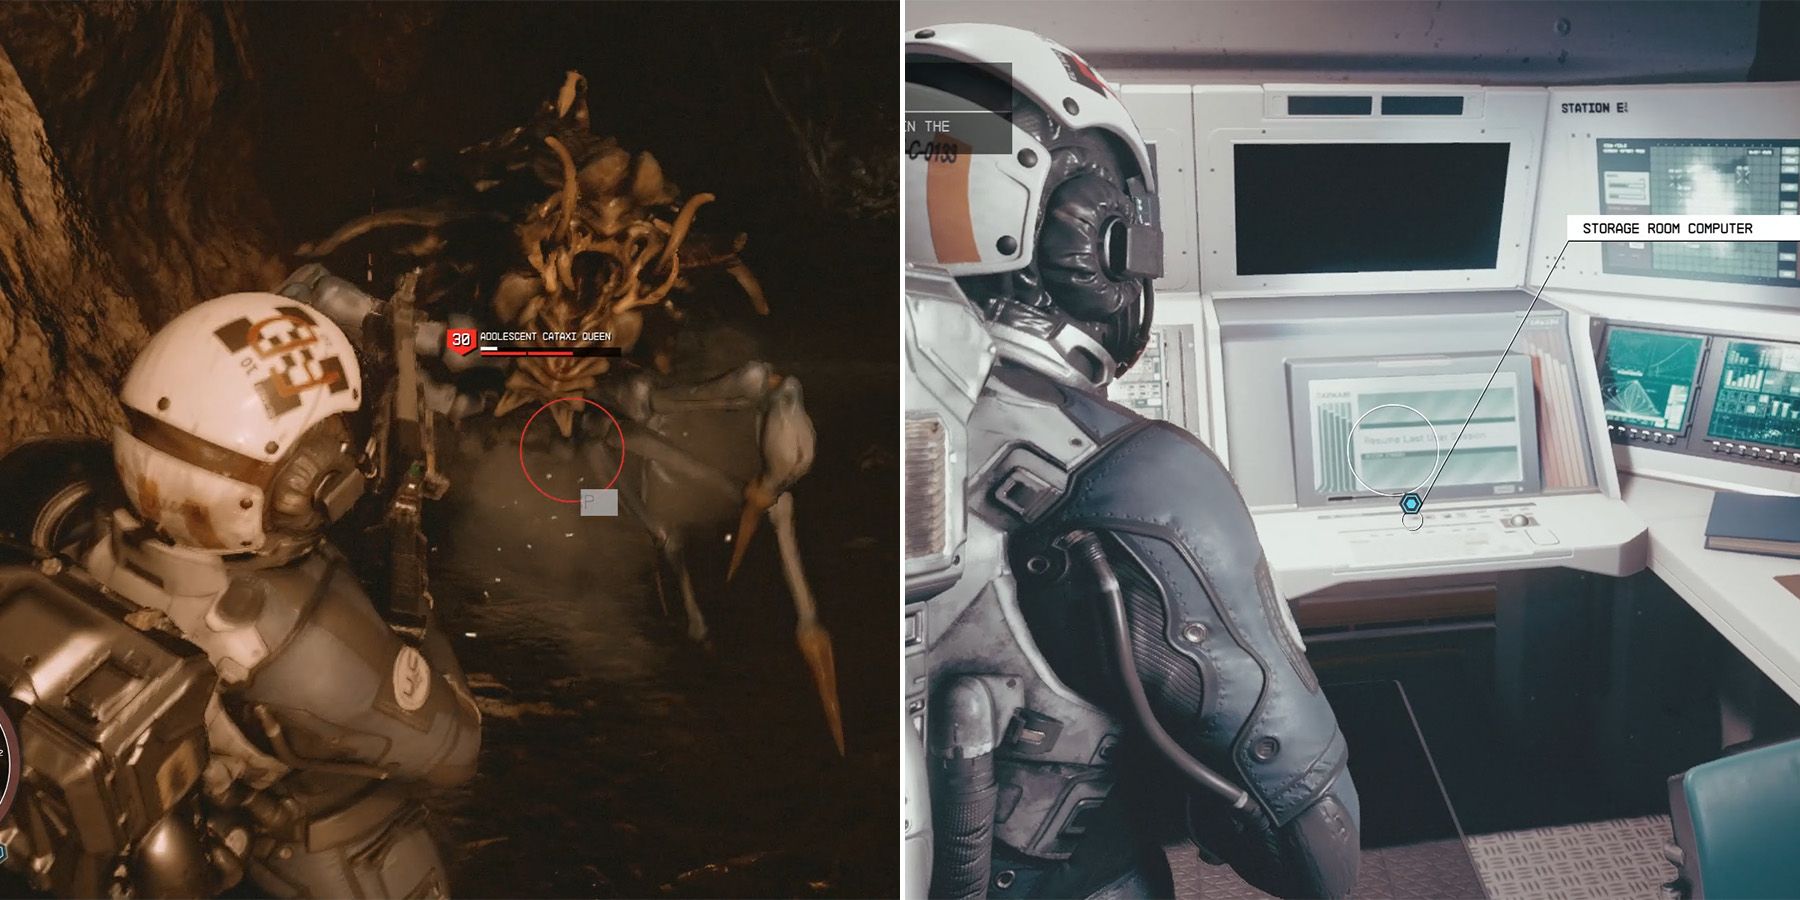
As the players make their way through the Storage Room, a peculiar incident occurs, causing them to be swiftly transported into a realm known as the Ruins. These ancient and enigmatic surroundings are infested with fearsome Cataxi adversaries, adding an element of danger to their journey through the Starfield. After their return, they are urged to converse with Ethan, who, clearly worried, insists on meeting with the Director. However, their respite is short-lived as they are abruptly thrown back into the Ruins once again, except this time, they are accompanied by unexpected companions.
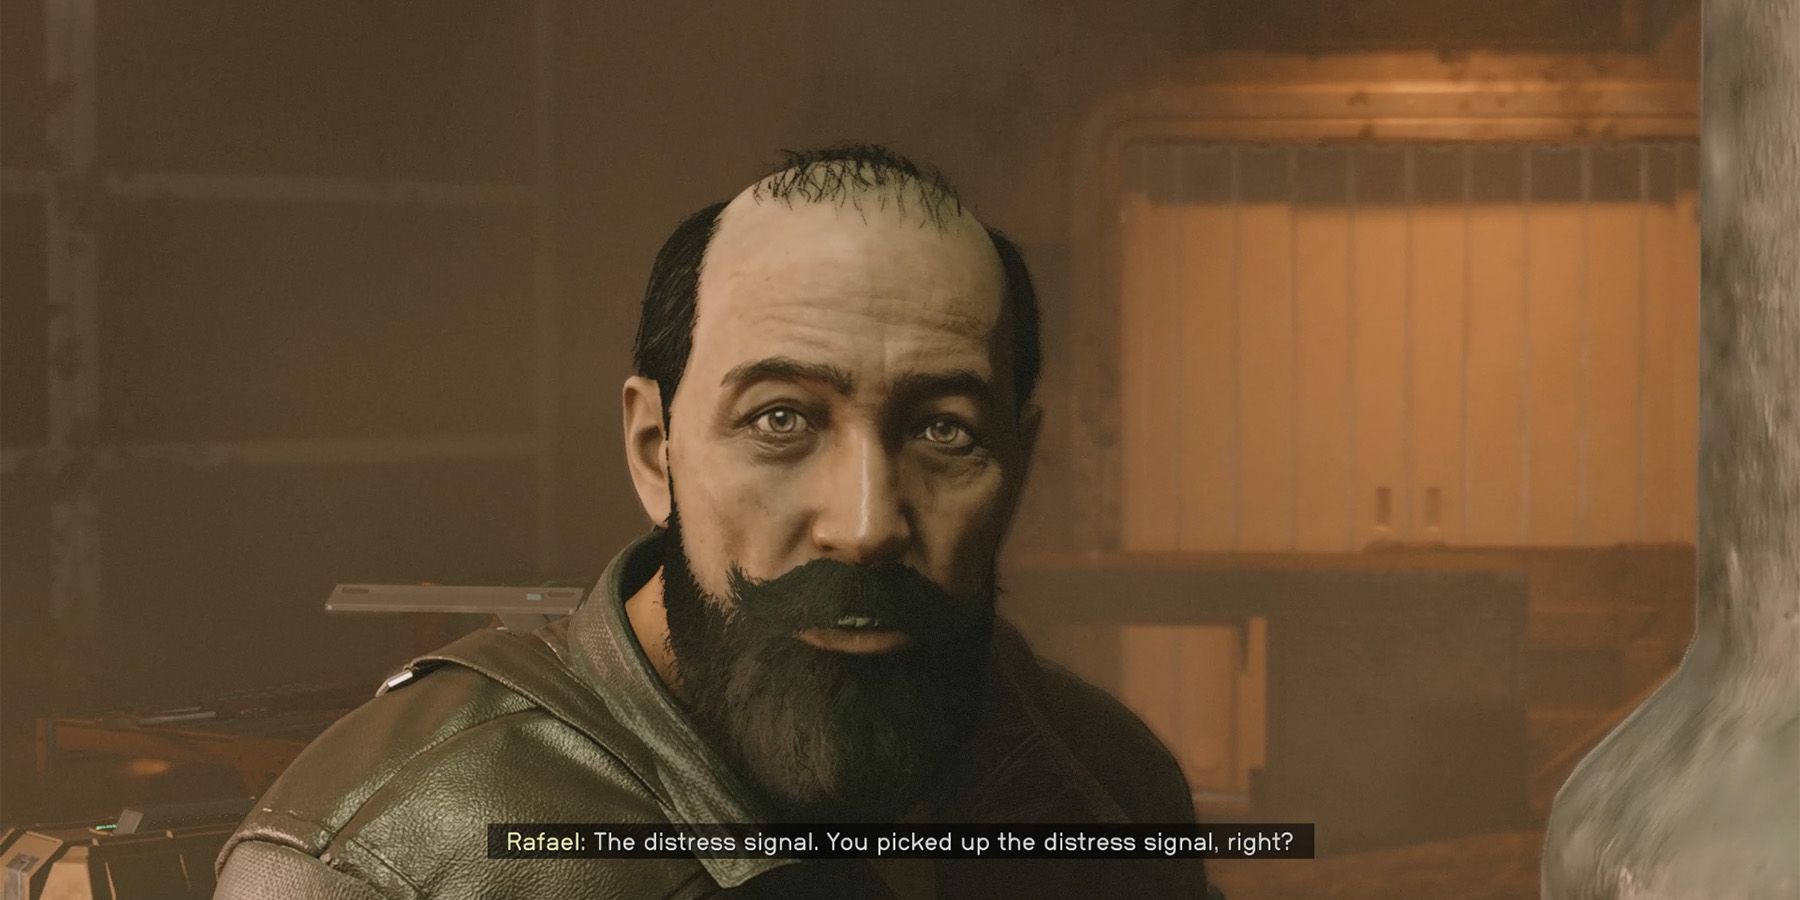
Engage in a conversation with Rafael, who happens to be the sender of the distress signal and the person accountable for the unfortunate accident that took place. Regrettably, the discussion is abruptly interrupted as players are brought back to Ethan, who discloses the whereabouts of the Director's office.
In this Quest, players will continuously bounce between the Ruins and the intact Station, so make sure to stay focused to avoid getting lost between all the warps.
How To Reach The Director’s Office In Starfield
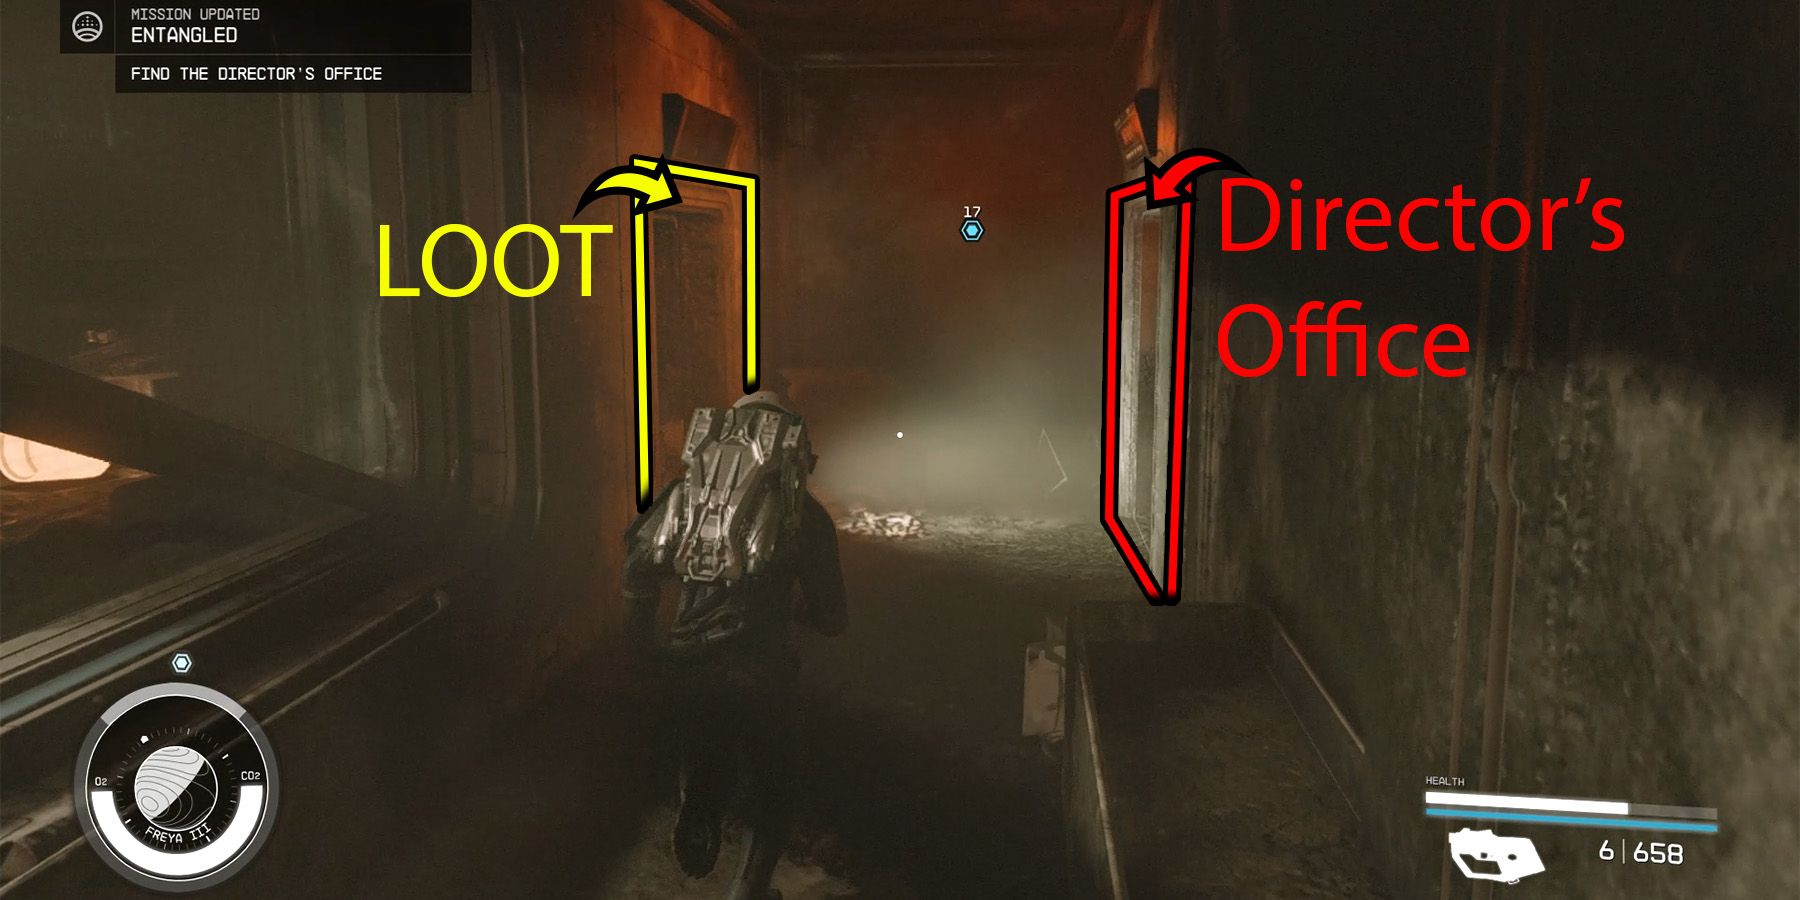
Upon leaving the hallway, individuals will find themselves back in the Ruins. They should proceed by heading towards the left to acquire valuable items and receive healing. Afterward, they should retrace their steps and choose the right path, ascending the stairs that lead to the Director's office. However, before stepping inside, the players will be transported once again to the Research Station. Here, they will have an opportunity to meet Maria and Director Patel, who will provide an explanation of the current situation.
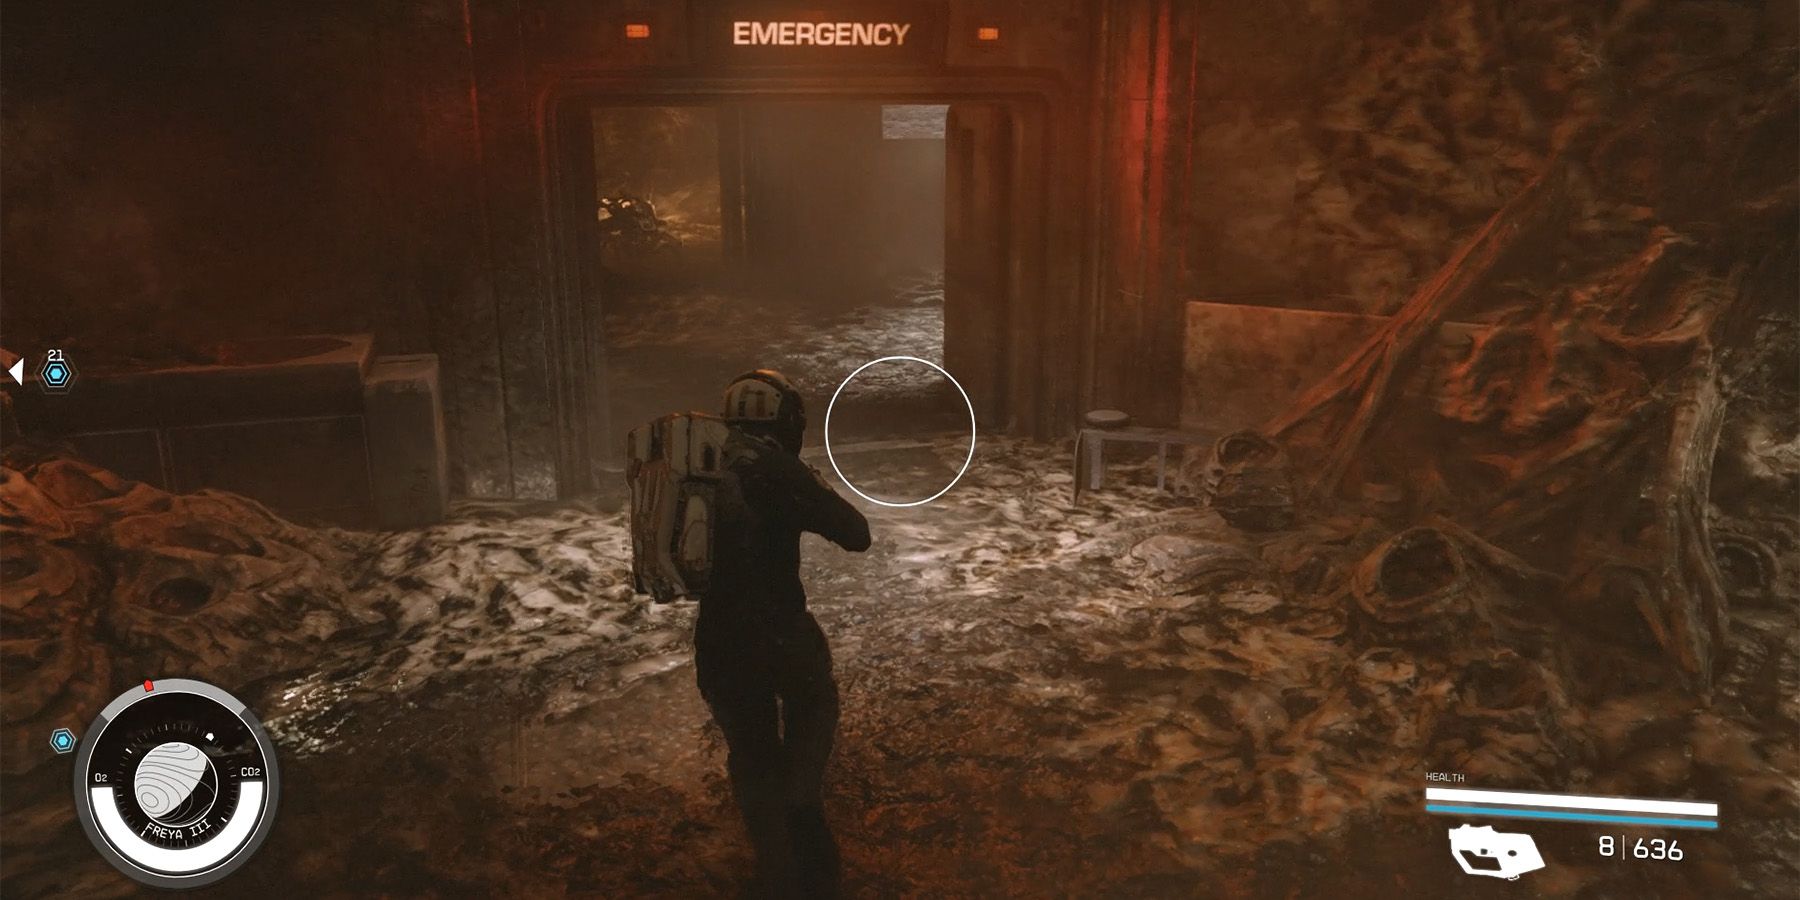
Continue with Maria to the Fabrication Lab, only to be unexpectedly plunged into the Ruins. Quickly pivot and proceed to the right, then make a left turn through the Emergency Door. Navigate along the Quest marker in the enchanting Starfield, eventually reuniting with Rafael, who graciously presents the coveted Nishina Pantry Keycard.
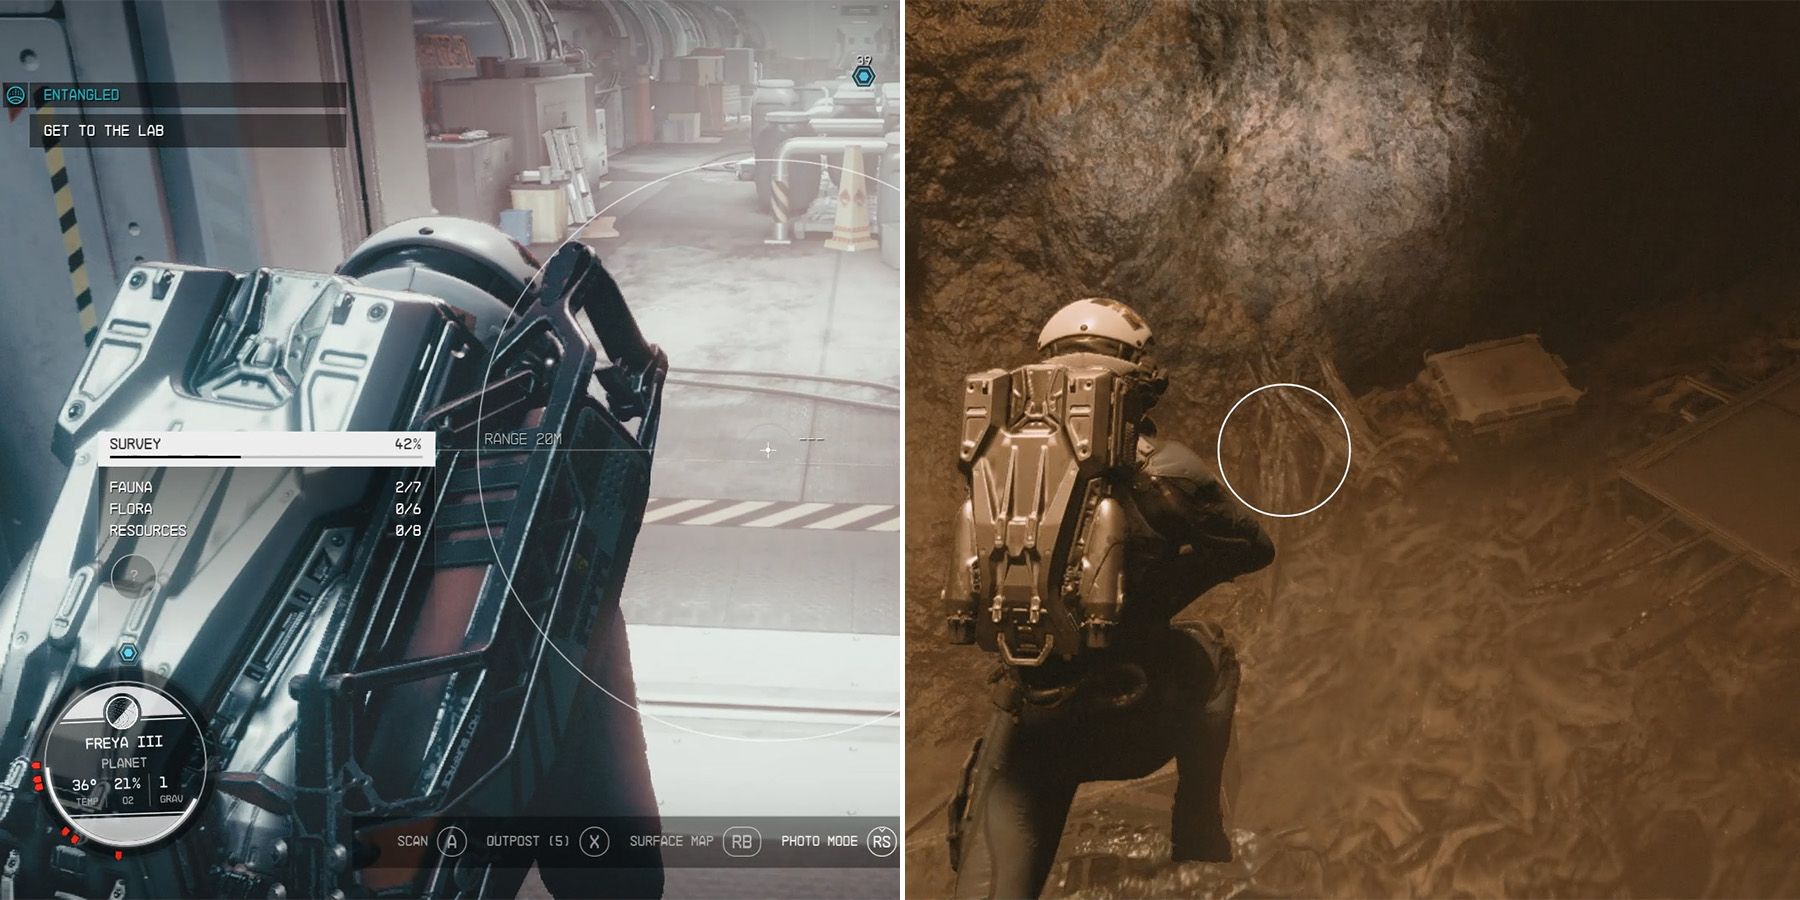
How To Get To The Lab In Starfield
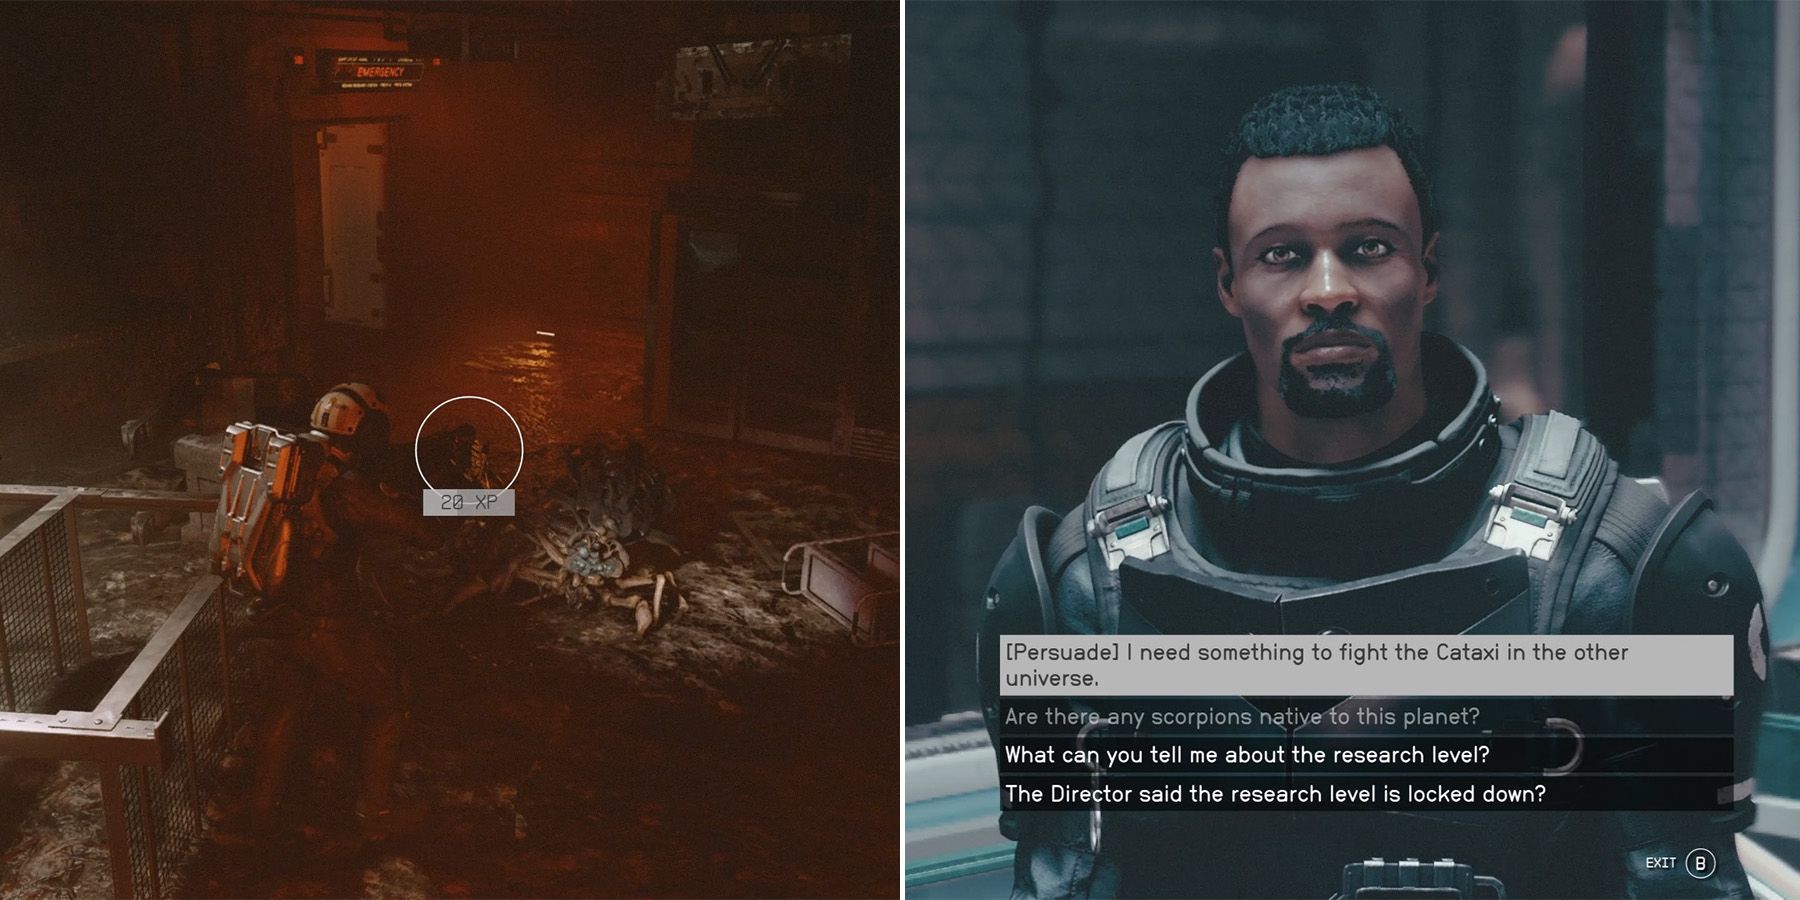
Unlock the Pantry using the key and seamlessly transport into the Station. From there, make your way to the Main Hall to access the Ruins. In order to acquire the Artifact, overcome the mighty Cataxi and engage in conversation with Rafael for further guidance. As you progress, venture towards the demolished office to initiate a warp, unexpectedly crossing paths with Ethan. Seek his wisdom on how to reach the Fabrication Lab and specifically mention the adversaries by selecting the Scorpions option.
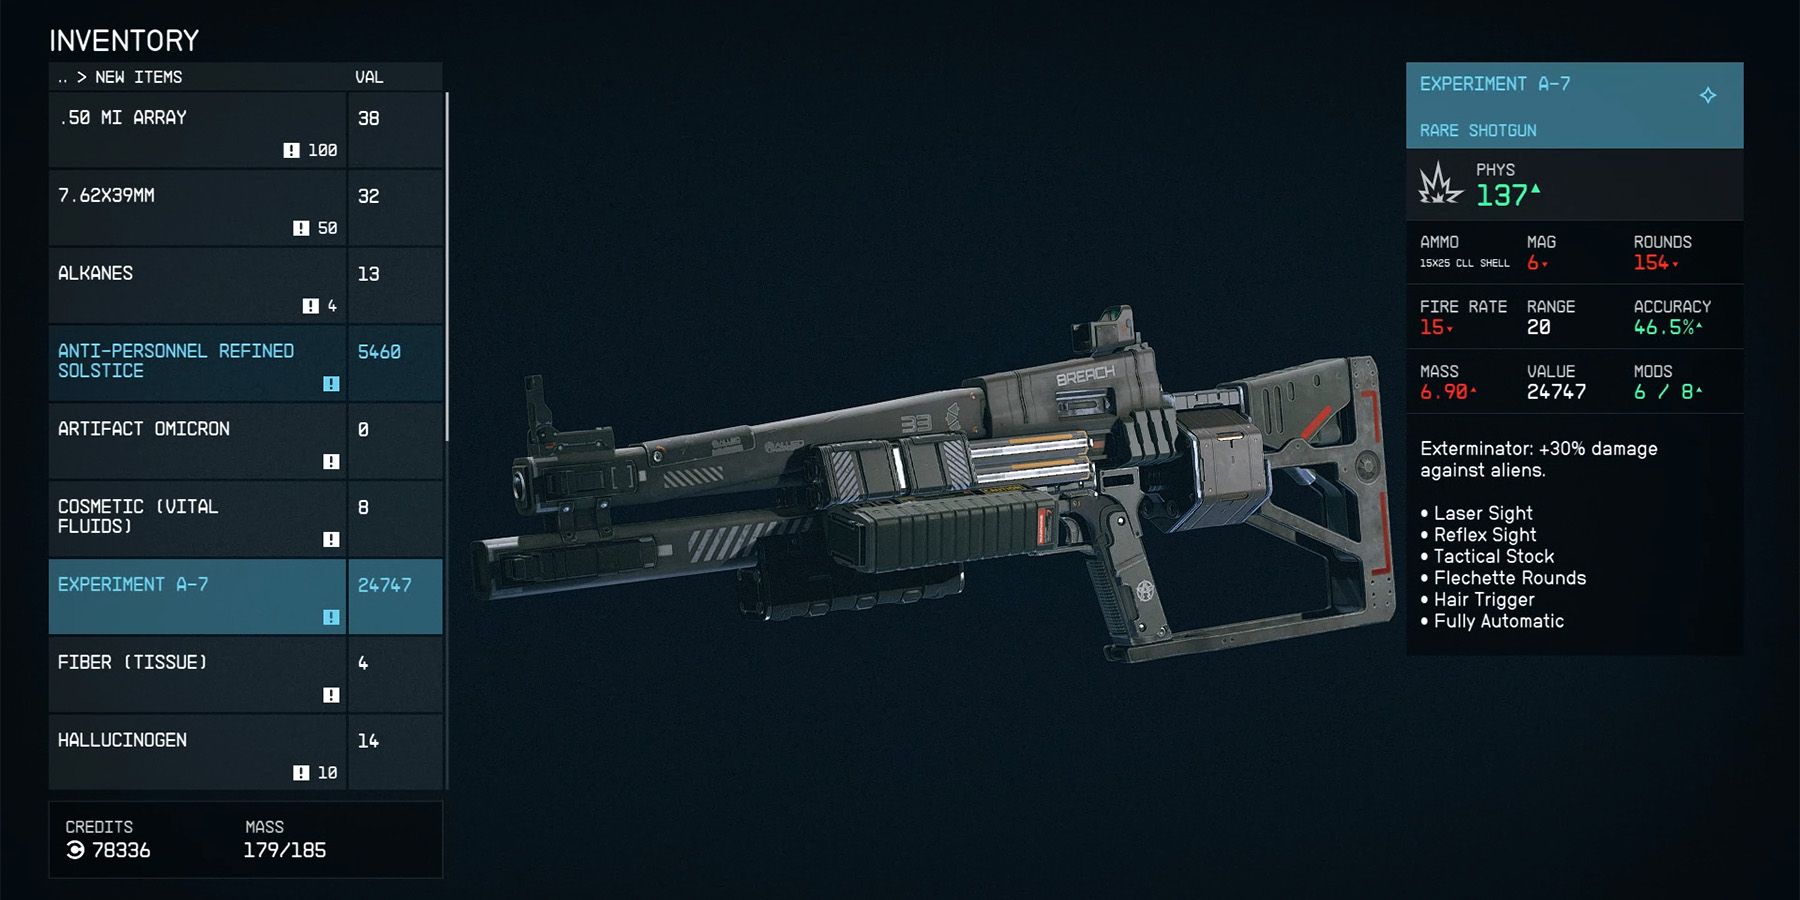
If players manage to Persuade Ethan, he will give them a Rare Shotgun called Experiment A-7, which has a 30% increased damage against Aliens.
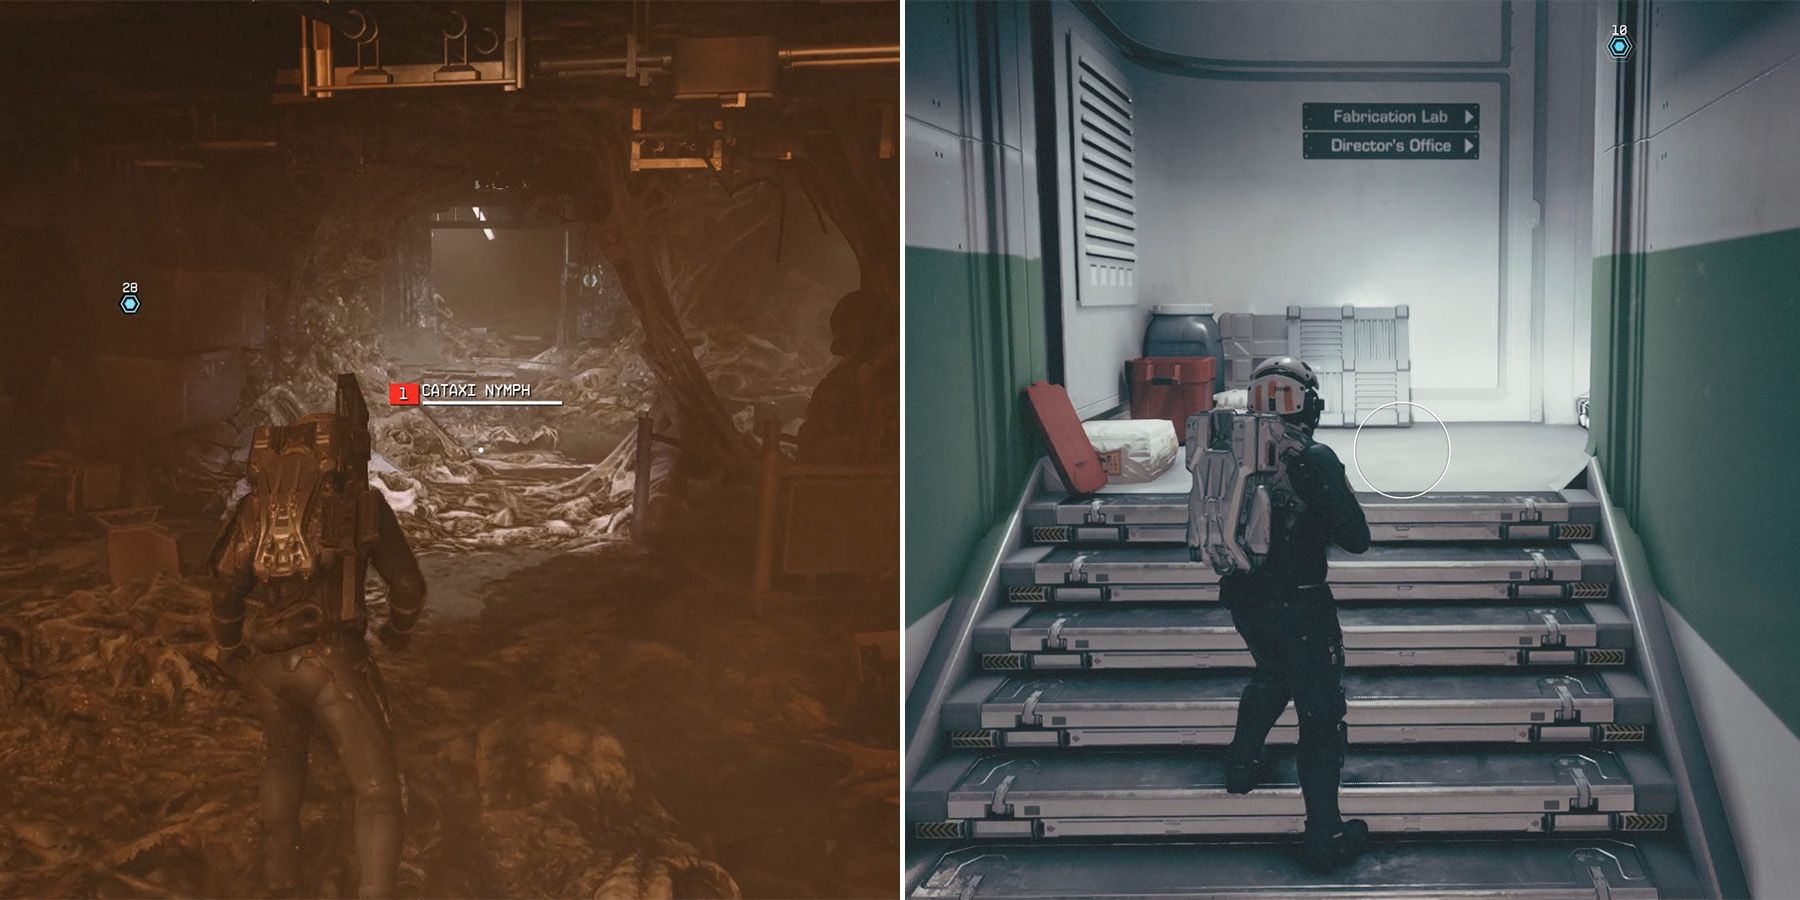
Head out of the office to the Main Hall and journey into the Ruins in Starfield. Engage and eliminate all hostile forces before proceeding through the left doorway. Continue onward until you come across an Emergency Door. Ascend the stairs and find yourself transported back to the Station, adjacent to the Fabrication Lab.
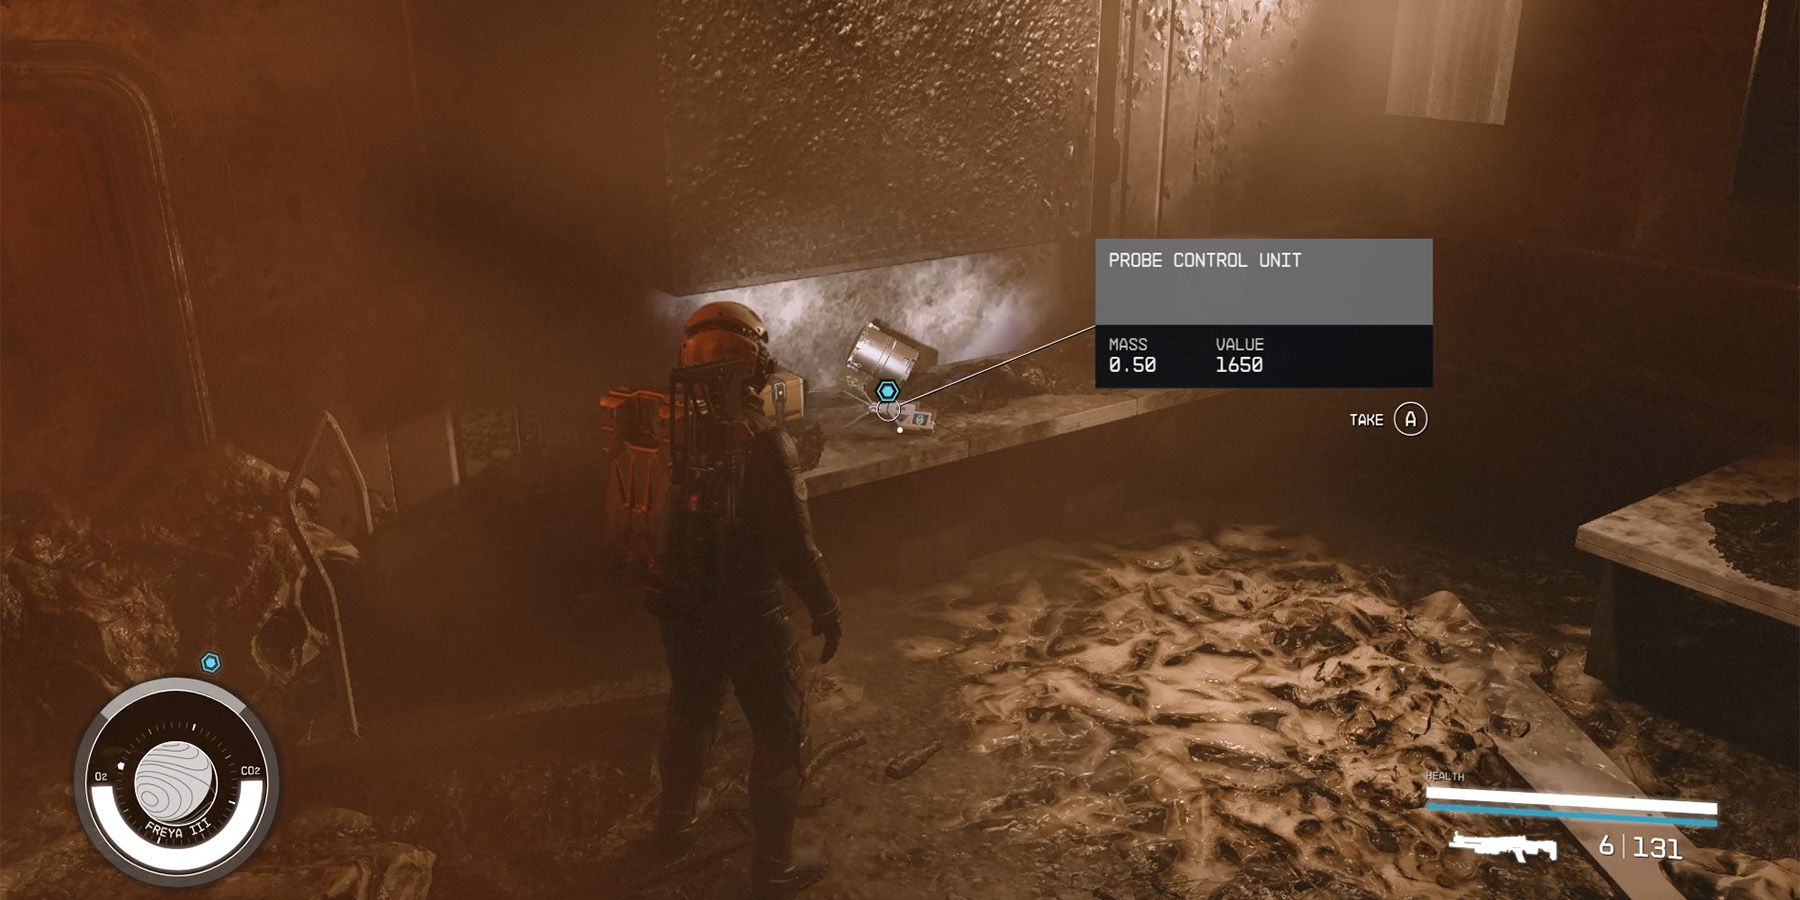
After conducting a brief experiment alongside Maria, players receive a Probe Control Unit, which grants them the ability to freely navigate between the Ruins and the Station by utilizing the numerous Distortions located throughout.
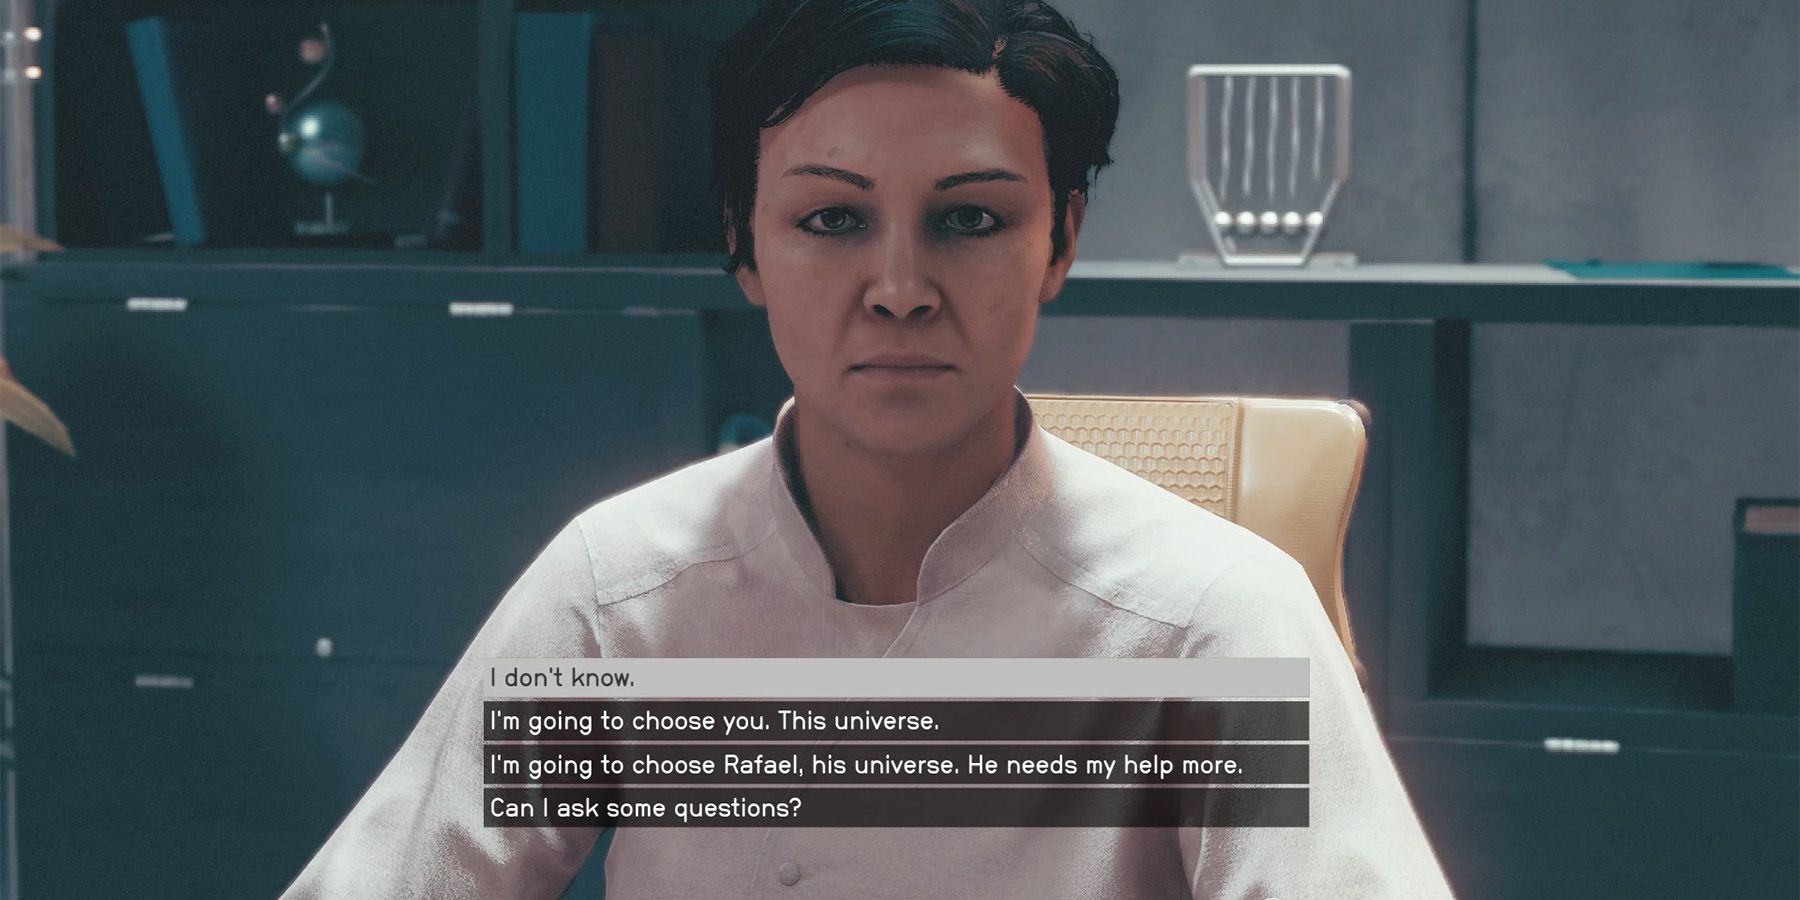
The Director informs the players that a crucial decision needs to be made. However, they do not have to make the decision at this moment. Instead, their actions in the final step will serve as their answer.
Players have the option to undertake the Optional Mission of visiting Dr. Tatiana Barakova. This mission aims to assist players in obtaining additional supplies before returning to the Ruins.
How To Override The Lockdown In The Facilities Section
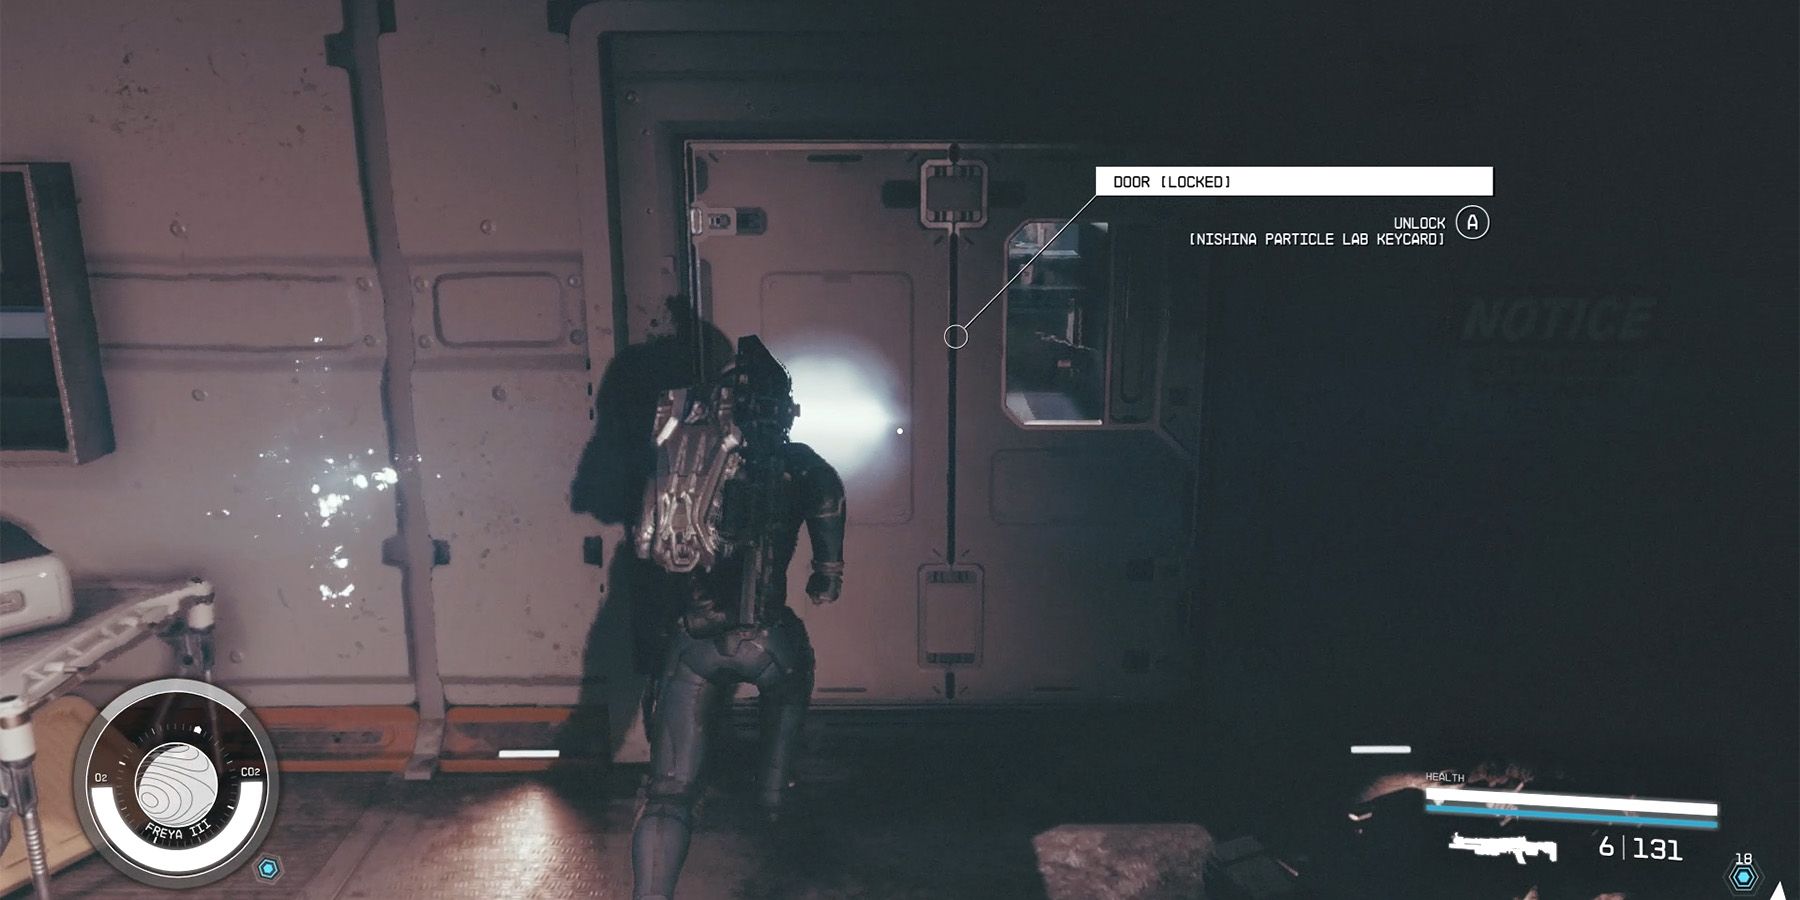
Upon arrival at the Ruins, take the elevator downwards and then interact with the Distortion to return. Track the Quest marker in the Starfield until you come across a locked white door. Utilize the nearby Distortion to reach the Ruins and enter inside to obtain the Nishina Practice Lab Keycard. Continue following the marker, using the available Distortions as necessary, until you venture deeper into the Station.
How To Override The Lockdown In The Accelerator Section
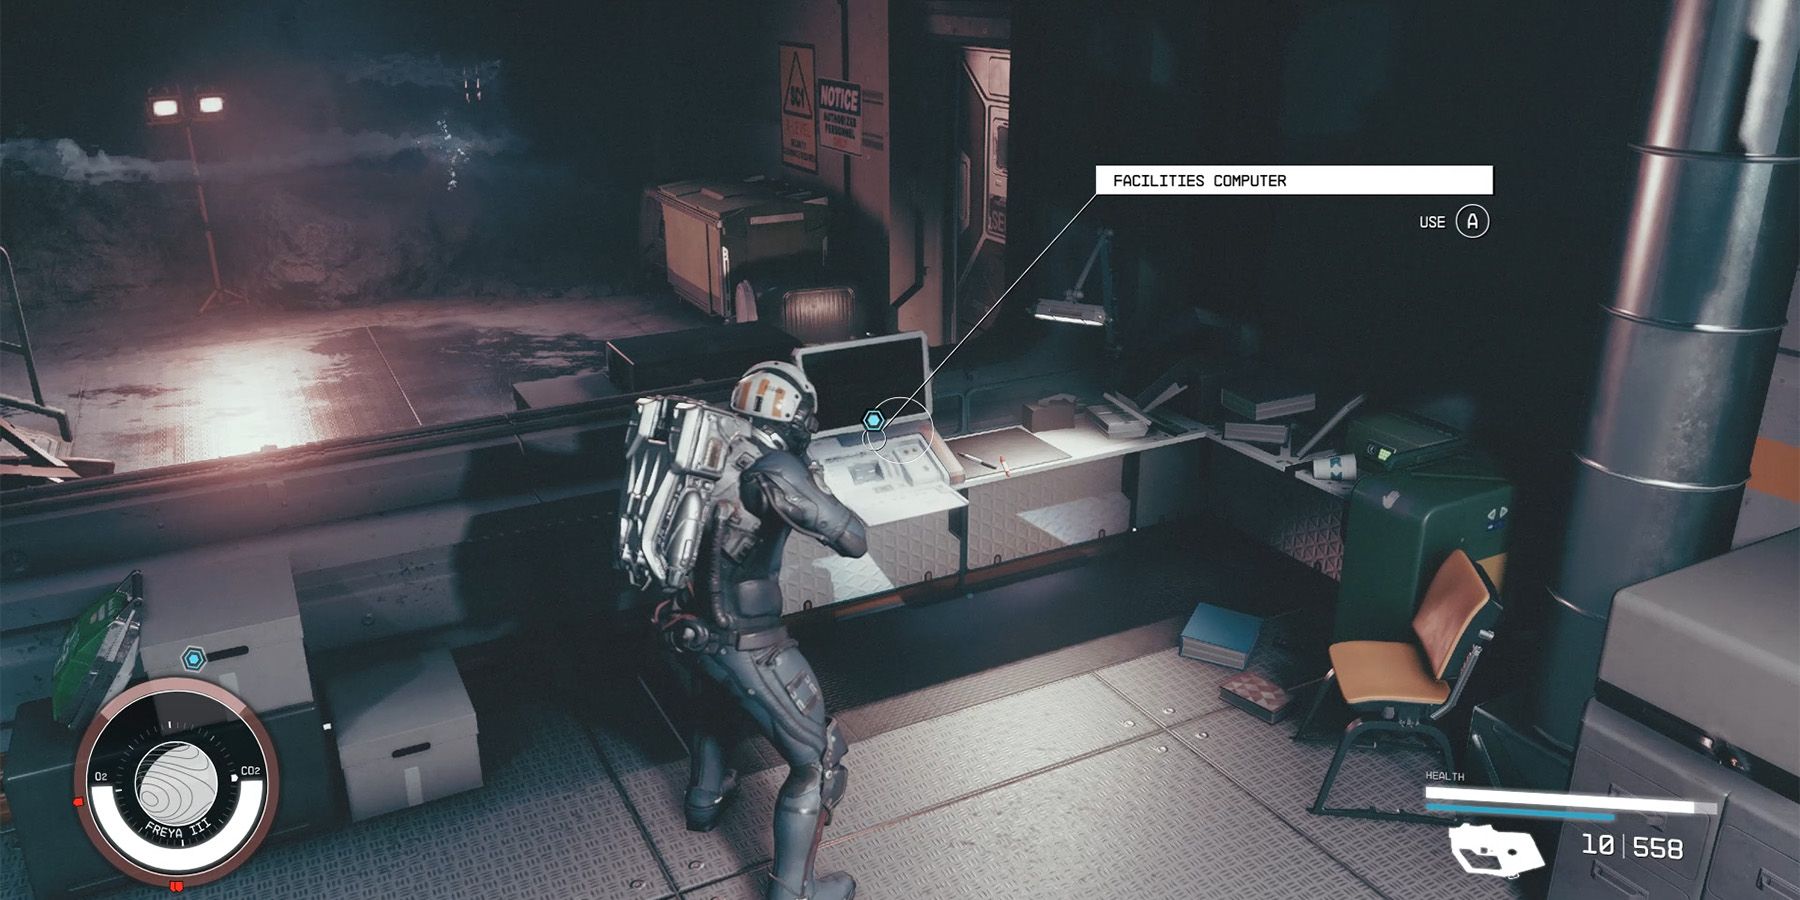
Carefully navigate the slopes and be cautious of encountering hostile Robots and Turrets until reaching the lone accessible room where the Distortion is located. As the damaged computer is ineffectual in the Ruins, proceed back to the regular Station and utilize the computer to Override the Lockdown within the Facilities Section.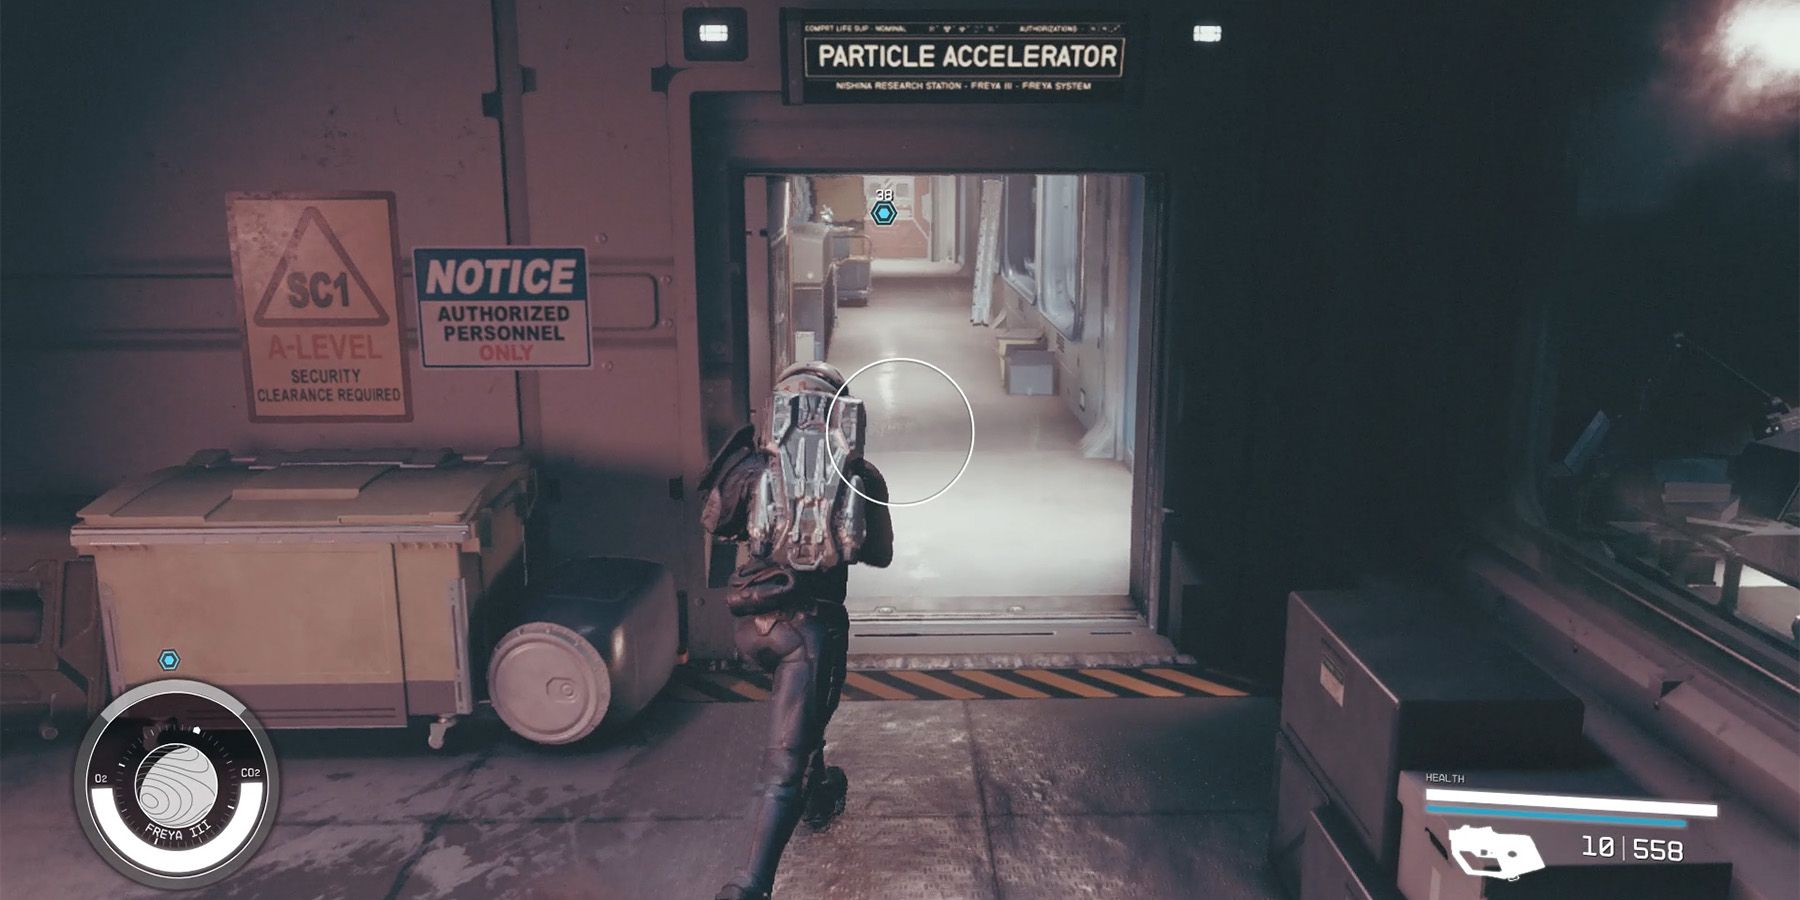
Continue following the Quest marker and proceed through the Particle Accelerator corridor. In order to reach your destination, you will need to utilize two Distortions. The first Distortion will grant you access through the Emergency door from the Ruins, while the second Distortion is necessary for descending the stairs in the Station. Be sure to stock up on Ammo in Starfield, as the next room is teeming with Robots and Turrets.
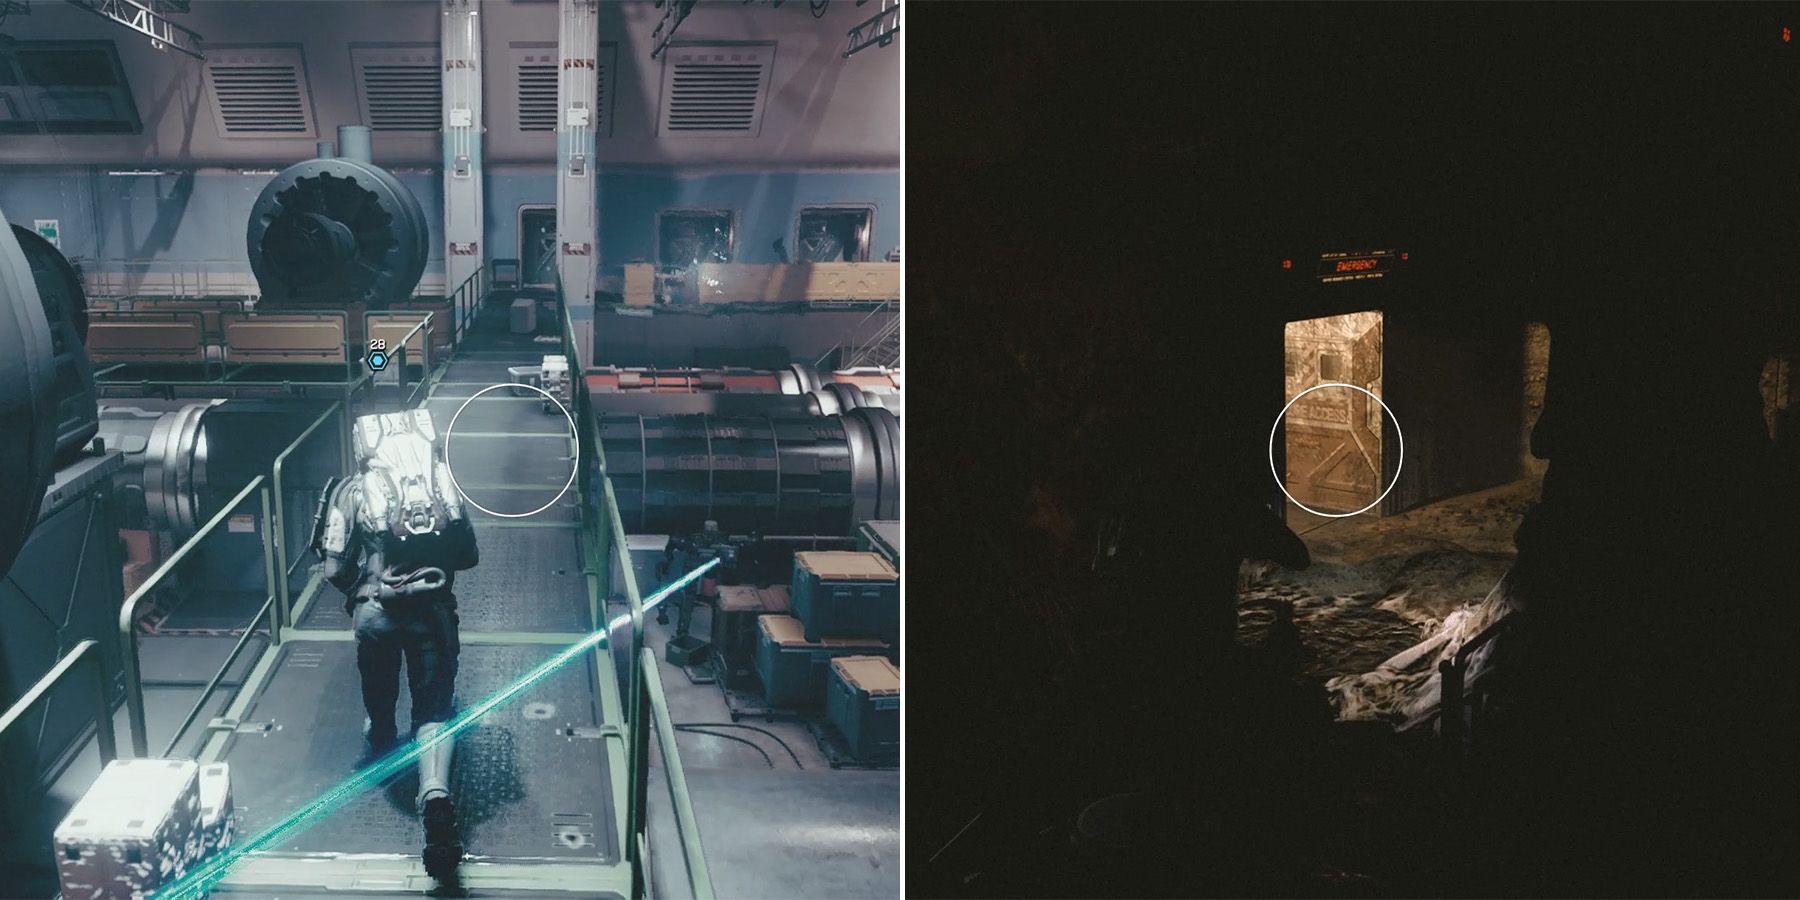
Once you have successfully dealt with your adversaries or made a quick escape, make your way up the stairs and proceed towards the central platform in order to utilize the Distortion. Pass through the Emergency Door and descend by jumping down to acquire the Nishina Utility Closet Keycard. Head back to the Station and ascend the stairs once again to employ another Distortion for your journey to the Ruins.
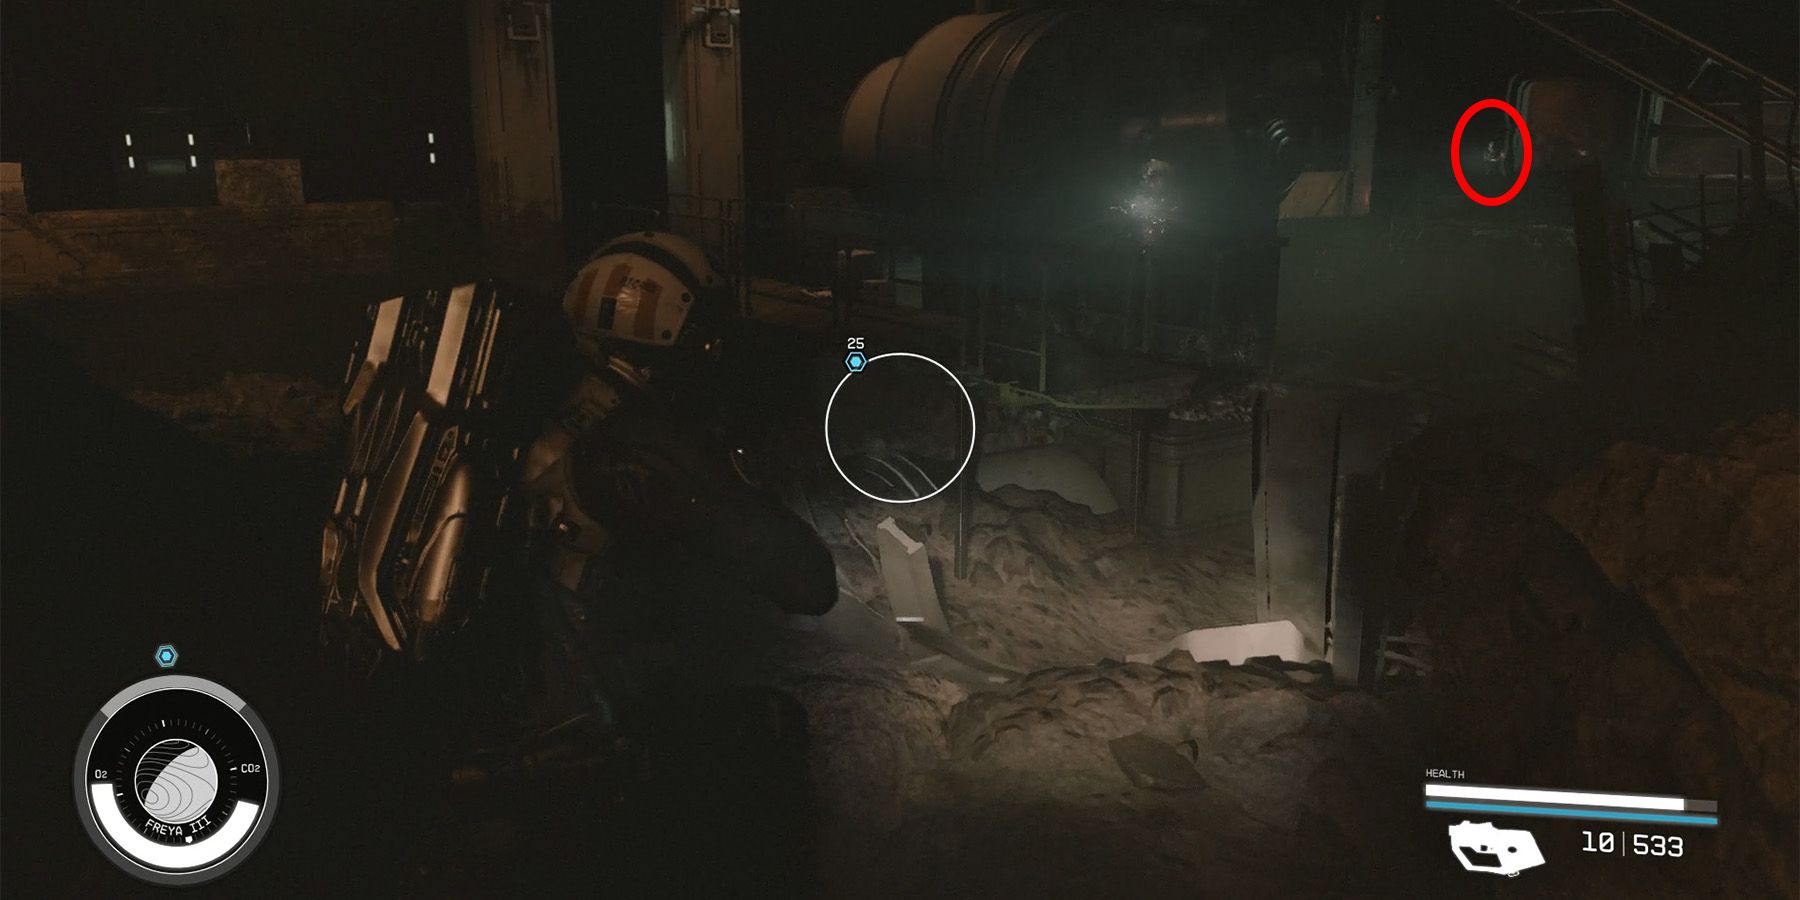
Follow the marker and ignore the Distortion near the railing in favor of using the one across.
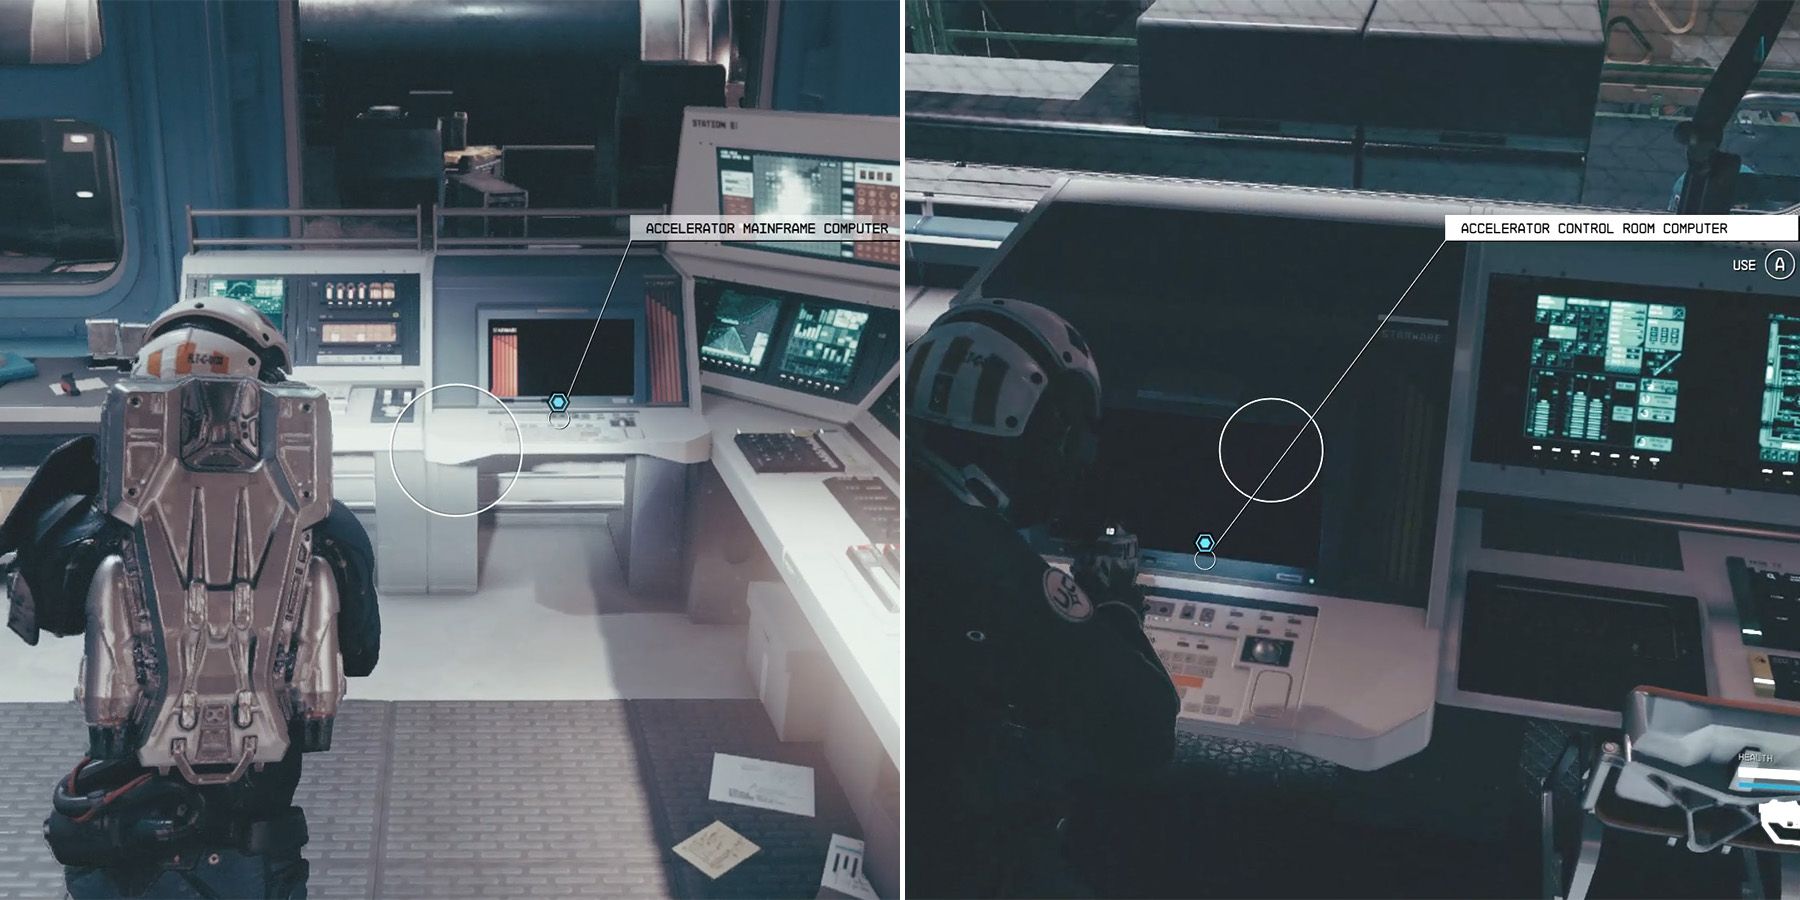
Upon returning to the Station, proceed downstairs and utilize the key to access the Utility Closet. Utilize the Distortion within to journey to the Ruins, then employ another Distortion to make your way back to the Station. Once there, access the Computer and successfully deactivate the security system in the Accelerator Control Room. Finally, make your way back up to the previously secured Emergency Door to override the lockdown within the Accelerator Section.
How To Override The Lockdown In The Storage Section
From the Accelerator Section, proceed towards the Quest marker to access Tunnel Access and utilize the Distortion function within. Enter the cave and ascend the slope at its conclusion. Teleport to the Station and proceed leftward to activate the Distortion located at the room's end.
Move ahead beyond the Cataxi adversaries and ascend another incline. Track the Quest indicator leading to the Distortion, enabling players to operate the computer within the Storage Section and override the Lockdown.
Subsequently, adhere to the indicator and journey towards the Ruins upon encountering a set of stairs. Ascend and pass through two Emergency Doors to access the ultimate region. At this juncture, players are required to make a decision prior to advancing.
Should You Disengage Power Interlocks Or Switch Universes
Upon being given the choice, players must pick carefully which universe they wish to save as each one yields a different ending.
Choices | Consequences |
|---|---|
Disengage the Power Interlocks in the Ruins (Alternative Universe) |
|
Disengage the Power Interlocks in the Station |
|
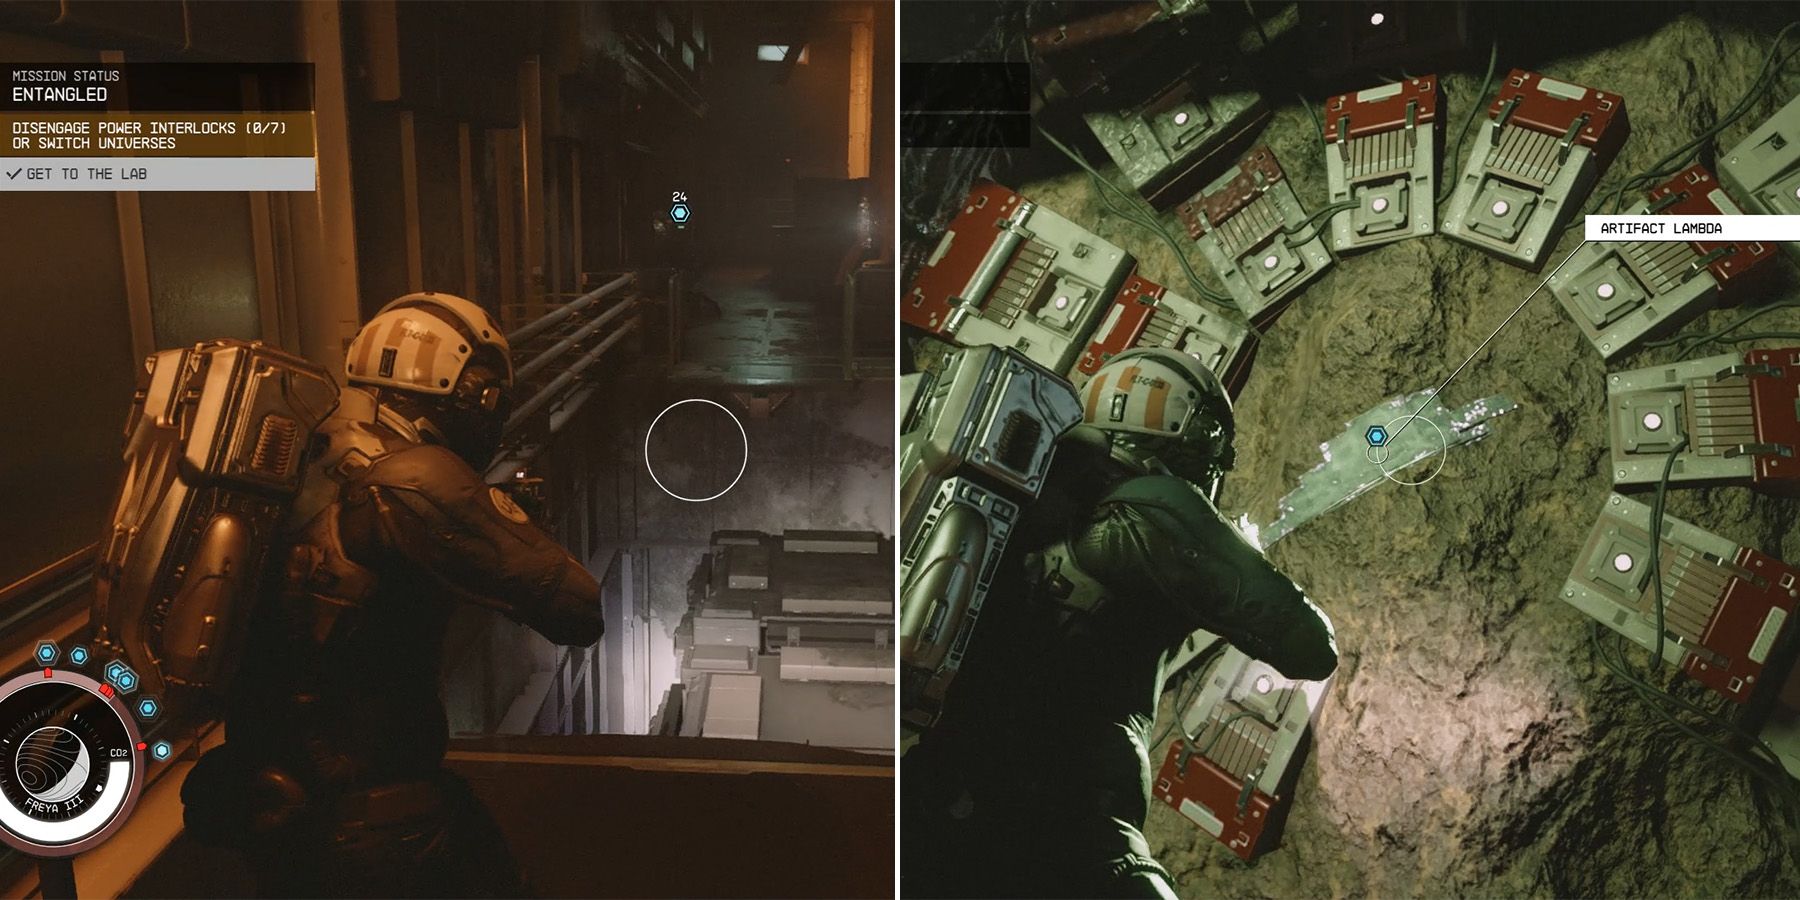
To obtain the Artifact, individuals need to deactivate the seven designated power interlocks located throughout their desired reality. Once completed, the probe must be powered down to acquire the Artifact, thus concluding the Entangled Quest.
Starfield is available now on Xbox Series X/S and PC.