
Unleash the Ultimate Power: Top Endgame Charge Blade Builds in Monster Hunter Rise
Discover the ultimate Charge Blade builds for Monster Hunter Rise's endgame Unleash devastating attacks with Elemental SAED, Condensed Spinning Slash, or Impact SAED Explore mixed armor sets and find the perfect augments in Quiro Armor Crafting Master the complexity of Charge Blades now!
The Charge Blade in Monster Hunter Rise is widely acknowledged as the game's most intricate weapon, as well as the most complex in the entire Monster Hunter series. Its extensive array of mechanics, such as Charging Phials, Overcharging Phials, Charging the Shield, Guard Points, Amped Elemental Discharge, switching between Sword and Axe modes, and the formidable Super Amped Elemental Discharge, often overwhelms players attempting to master its intricacies. This is merely scratching the surface of the game's numerous other intricate mechanics.
Moreover, with the early access release of Monster Hunter Now, which offers a more accessible experience for fans, the Monster Hunter franchise has once again taken center stage in the gaming news cycle. Excitement builds as fans eagerly anticipate the possibility of a sequel like MHW2 on the horizon. So, for those dedicated Charge Blade enthusiasts who have triumphed over the challenges of Monster Hunter Rise and reached the endgame, here are some of the most optimal endgame builds to enhance your gameplay.
Updated October 1st, 2023 by Jacob Buchalter:
Three Primary Charge Blade Builds
While Monster Hunter Now serves as a temporary diversion for MH enthusiasts until the next major release, its appeal will eventually wane. Monster Hunter Rise has remained stagnant in terms of new content for several months, as anticipated, leaving fans anxiously awaiting any updates on the upcoming game's development. Nevertheless, Title Update 5 significantly expanded the content available in MHR, and dedicated players have continued to engage with it during this time. Consequently, for newcomers to Rise or for those who have remained devoted to it, here are some highly effective Charge Blade builds that align with the current state of the game.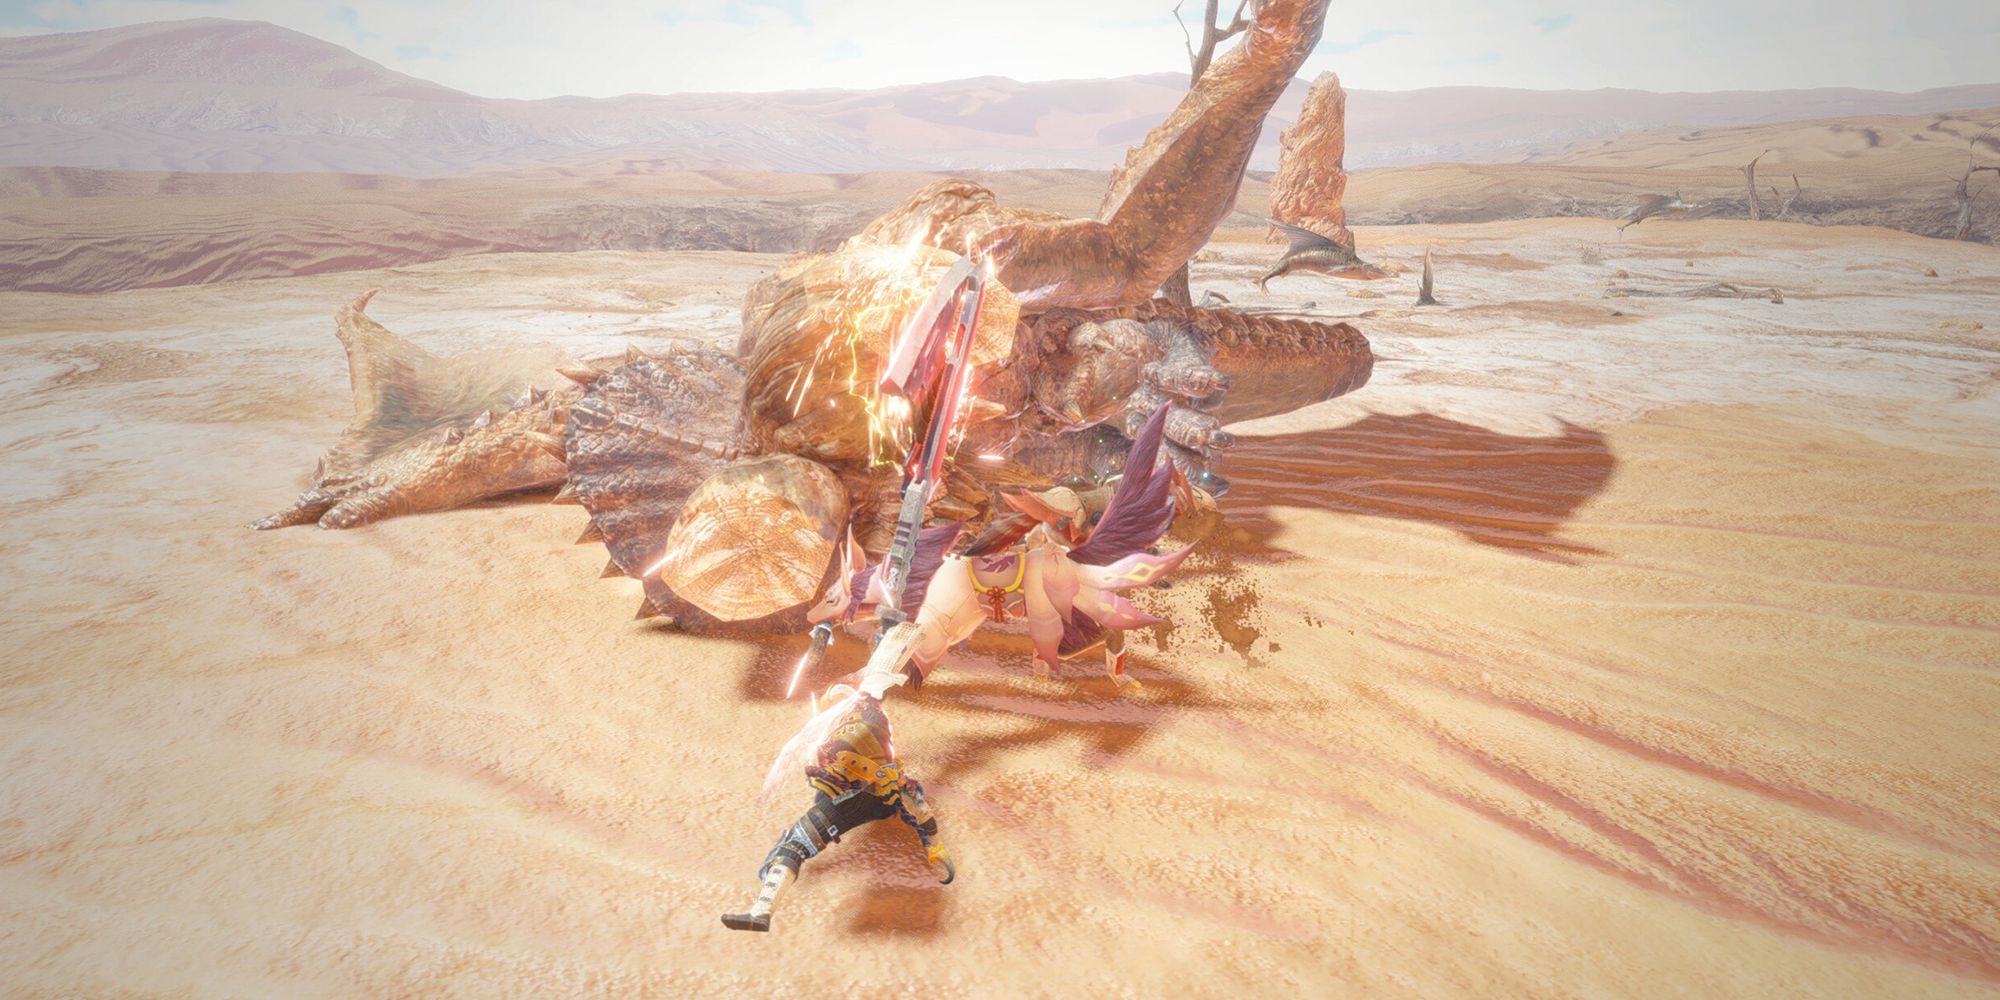
The Charge Blade offers an extensive selection of over 6+ 'meta' endgame builds, ensuring a diverse range of options available. These builds encompass various elemental variants, including Fire, Water, Thunder, Ice, and Dragon, each providing their own unique elements. However, it's important to note that these builds are ultimately slight modifications of the highly effective Elemental SAED build. Alongside two other outstanding builds, these three reign supreme as the top choices for endgame play in the current game state.
Build Name | Build Explanation |
|---|---|
Elemental SAED | This is the most meta build for the Charge Blade in MHR currently, and it's centered around using different Elements and Elemental Weakspots (which vary from monster to monster) to deal as much damage per SAEDs. |
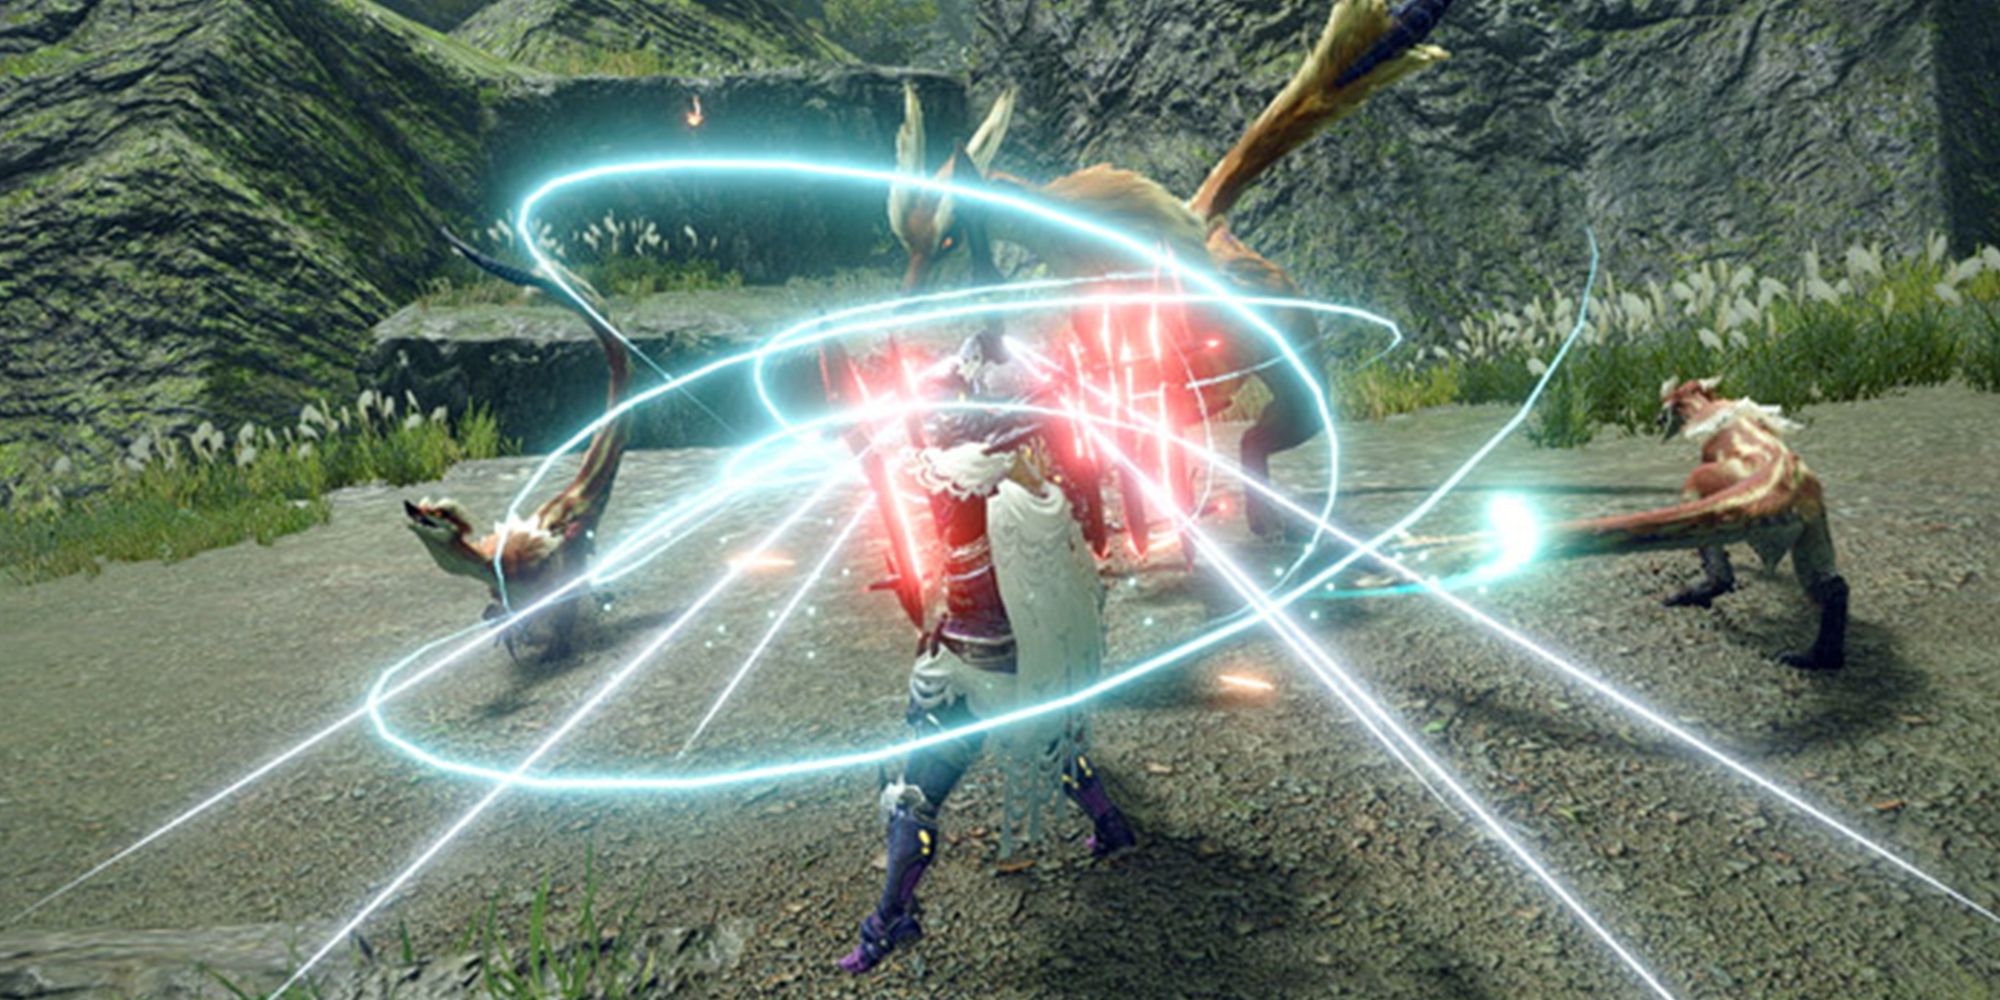
Condensed Spinning Slash | The play style is for people who like the pizza cutter-esque Savage Axe version of the CB's Axe Form. Excels in just about everything the SAED Build doesn't such as crit damage, Status Effect application, and so on. |
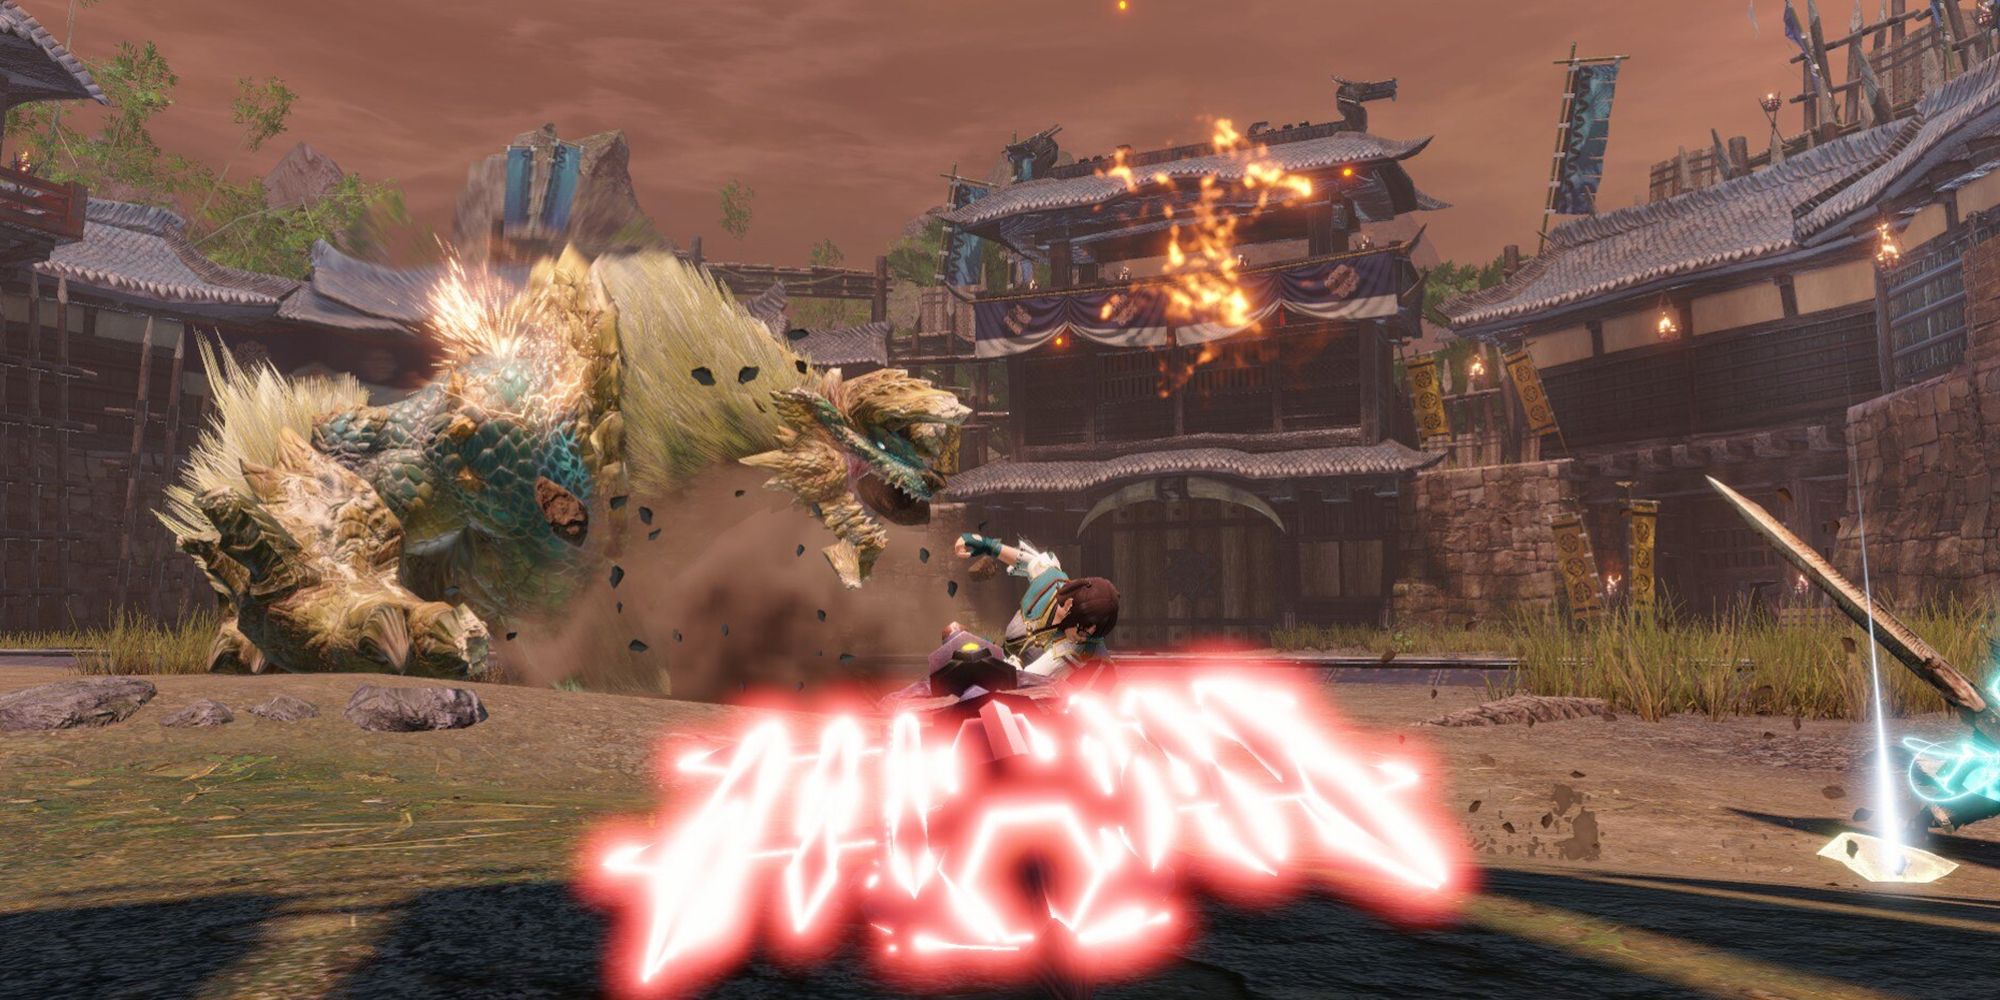
Impact SAED | This would be the standard Charge Blade build in any other MH game and the Elemental Builds would typically be the niche ones. However, Rise (and Sunbreak especially) really changed things up for Elemental CB builds. Still, Impact SAED builds specialize in consistent and reliable damage, have a ton of KO potential with Impact Phials, and players won't need to make a build for each Element, target specific areas (other than the head), or focus Elemental weak spots. |
That being said, these build outlines primarily cater to experienced players who have reached the endgame of MHR and are primarily focused on farming Anomaly Hunts and Anomaly Research Requests. However, in the exceptional scenario where players have successfully completed constructing everything, obtained a remarkable Talisman, and acquired even more impressive Augment rolls, the following Active Skills should be the ultimate goal for each build:
Elemental SAED | Condensed Spinning Slash | Impact SAED |
|---|---|---|
Guard | Guard | Guard |
Guard Up | Guard Up | Guard Up |
Load Shells | Load Shells | Load Shells |
Rapid Morph | Rapid Morph | Rapid Morph |
Flinch Free | Flinch Free | Flinch Free |
Furious | Weakness Exploit | Artillery |
Element Exploit | Critical Boost | Focus |
Resentment | Wirebug Whisperer | Resentment |
Burst | Burst | Resuscitate |
Dereliction | Wind Mantle | Dereliction |
Dragon Conversion | Powder Mantle | Artillery |
Fire/Water/Thunder/Ice/Dragon Resistance | Intrepid Heart | Intrepid Heart |
Fire/Water/Thunder/Ice/Dragon Attack | Spiribird's Call | Dragonheart |
Narwa, Teostra, or Kushala Blessing | Recovery Up | N/A |
Stamina Surge | Stun Resistance | N/A |
Latent Power | Latent Power | N/A |
Attack Boost | Attack Boost | N/A |
Critical Eye | Critical Eye | N/A |
N/A | N/A | N/A |
Charge Blade Priority Skills & Weapon Options
When it comes to these three builds, the priority of Skills that players should focus on will vary depending on their personal preferences and playstyle. Some players may prefer to prioritize Evade Extender over relying too heavily on Guard Points, while others highly value the Defiance Skill (especially considering its prominence in the Title Update 5 armor sets). However, there are several Skills that are generally important in almost every Charge Blade build.
Skill Name | Explanation |
|---|---|
Load Shells | Basically just makes it way easier to charge vials. However, if a player is confident in their Counter Peak Performance timing then they don't necessarily need this. |
Rapid Morph | At Level 3 this Skill makes switching between the CB's Sword and Axe form 30 percent faster, which will have a gigantic impact overall. |
Guard | In the post-endgame content, Guard is almost mandatory for players using Charge Blade to block some attacks and survive or keep their Guard up. |
Guard Up | Same reasoning as Guard, but helps players take less damage from the big attacks they do manage to block. |
Focus | Probably the least mandatory Skill on here given that Title Updates 4 and 5 made keeping the CB charged even easier. Still very handy to have. |
That should cover all the basics, so let's start going over the individual builds players have discovered across Sunbreak's lifespan.
Elemental SAED Skills & Weapons
As for the standard Elemental SAED build, the focus lies on identifying the most effective Skills or Weapon combinations that can maximize Element damage output. With the arrival of Risen Crimson Glow Valstrax in Title Update 4, its armor introduces a skill called Dragon Conversion, which significantly influenced the 'meta' build for this play style. Furthermore, Title Update 5 brought along the Heaven-Sent Skill as part of the Amatsu set, allowing Charge Blade users to deliver even more devastating blows. In order to optimize performance, players should strive to activate the following Skills whenever possible and select the most 'optimal' weapons from the choices listed in
Skill Name | Minimum Levels Equipped | Reasoning | |
|---|---|---|---|
Dragon Conversion | 3/3 | Turns every 4 points of Elemental Resistance into +1 Elemental damage with whatever weapon the player currently has equipped. | |
Fire, Water, Thunder, Ice, & Dragon Resistance | 3/3 | Works in combination with Dragon Conversion to get Elemental damage even higher. | |
Guard | 4/5 | Should probably have at least Guard 4 if not Guard 5. Doing so makes it so most attacks can be Guard Point'ed and players won't have that long recovering animation after blocking. | |
Guard Up | 2/3 | It makes unguardable moves more guardable, players will be getting used to blocking over avoiding attacks and this makes Guarding almost always the safer option anyway. | |
Load Shells | 2/2 | Mandatory on any CB Build since Lvl 2 Load Shells mean players have full vials when they're yellow instead of red. | |
Furious | 3/3 | While equipped player gets extra Defenses on Red Scroll, at Max Rank +30 Defense that gets added into Dragon Conversion for Elemental damage. | |
Element Exploit | 1/3 | Huge boost in Elemental damage and should always be equipped when possible | |
Resentment | 1/3 | Only worth using if running Dereliction as well, is a pretty sizeable buff to all non-Elemental damage. | |
Rapid Morph | 3/3 | Some say it's only necessary for convenience, others say it's mandatory, either way having it reduces all transition animation time from Sword to Axe mode, vice versa, and the AED/SAED animations as well. | |
Burst | 1/3 | CB, even without Spinning Slash, deals a lot of hits in a short span of time, which means Burst is often active. When active it increases both regular and Elemental attacks. | |
Elder Dragon Blessing (Narwa, Teostra, Kushala) | 2/4 & Stormsoul 3/5 | The blessing equipped highly depends on what Element Build that player is currently running. Stormsoul for Thunder, Teostra Blessing for Fire, and Kushala Blessing for both Water and Ice. | |
Shock Absorber | 1/1 | This Skill replaced Flinch Free after Title Update 5 and has since made multiplayer so much more fun overall thanks to friends not being able to interrupt each other's attacks. | |
Heaven-Sent | 3/3 | If possible, try and get either 1 or 3 points in Heaven-Sent, as it just makes hunts overall a bit safer and more streamlined when active. | |
Weapon(s) | |||
Weapon Name | Weapon Element | Weapon Tree | Phial Type |
Crawling Crusher | Fire | Rakna-Kadaki Tree | Element |
Armordraad | Water | Vaik Tree | Element |
Flicker Blizzard Wail | Ice | Auroracanth Tree | Element |
Asylum Pearl | Thunder | Narwa Tree | Element |
Crimson Mechwing | Dragon | Valstrax Tree | Element |
Condensed Spinning Slash Skills & Weapons

As mentioned earlier, players utilizing SAED or CSS builds often rely on various skills. However, CSS builds prioritize Critical Chance, Critical Damage, and overall Attack Damage Skills more than SAED builds. This distinction stems from the fact that Phial Explosions cannot critically hit, making crit-based stats irrelevant for SAED builds. On the other hand, the Savage Axe, known for its chainsaw-like spinning motion, can benefit from critical hits, making it one of the most effective multi-hitting options in the game.
Due to its exceptional multi-hit potential, the Savage Axe is an excellent choice for inflicting Status Effects such as Poison, Paralysis, and Blast in Rise. However, a Raw Damage weapon is equally viable for this playstyle, resulting in massive DPS.
Skill Name | Minimum Levels Equipped | Reasoning | |
|---|---|---|---|
Guard | 4/5 | Should probably have at least Guard 4 if not Guard 5. Doing so makes it so most attacks can be Guard Point'ed and players won't have that long recovering animation after blocking. | |
Guard Up | 2/3 | It makes unguardable moves more guardable, players will be getting used to blocking over avoiding attacks and this makes Guarding almost always the safer option anyway. | |
Load Shells | 2/2 | Mandatory on any CB Build since Lvl 2 Load Shells mean players have full vials when they're yellow instead of red. | |
Rapid Morph | 3/3 | Some say it's only necessary for convenience, others say it's mandatory, either way having it reduces all transition animation time from Sword to Axe mode, vice versa, and the AED/SAED animations as well. | |
Attack Boost | 7/7 | Because Savage Axe hits so often, any flat buffs to Attack damage have massive benefits. | |
Weakness Exploit | 1/3 | As long as players are attacking weak spots often, they'll find themselves critting a lot more with this active. Again, a huge benefit for multi-hitting attacks. | |
Critical Boost | 1/3 | Improves crit damage by 30 to 40 percent at Max Rank, and this build crits quite a lot. | |
Critical Eye | 3/7 | Additional Affinity equals more crits overall. | |
Burst | 1/3 | Leaps and bounds better on this build than the other two since the constant multi-hits from Savage Axe will constantly have this active. | |
Wind Mantle | 1/3 | Regardless of the Switch Skills used, whether it's Ready Stance or Counter Peak Performance, players will be using Silkbind Attacks a lot. So this will keep Wirebug charges active more often. | |
Powder Mantle | 1/3 | Basically adds the Blast status effect to any build, as long as players build up the charge completely without getting hit. There's also no downside for getting hit outside of charge level resetting, despite what the Skill description says. | |
Intrepid Heart | 1/2 | Every 68 hits players get 75 percent damage resistance on the next attack that hits them (if at Rank 2). Plus, that same attack will also ignore damage reactions, which means Savage Axe mode is interrupted less. | |
Shock Absorber | 1/1 | This Skill replaced Flinch Free after Title Update 5 and has since made multiplayer so much more fun overall thanks to friends not being able to interrupt each other's attacks. | |
Heaven-Sent | 3/3 | If possible, try and get either 1 or 3 points in Heaven-Sent, as it just makes hunts overall a bit safer and more streamlined when active. | |
Best Weapon Options | |||
Weapon Name | Weapon Element | Weapon Tree | Phial Type |
Royal Order Battleaxe+ | Raw | Royal Order Tree | Impact |
Vengeful Broadfeller | Blast | Scorned Magna Tree | Impact |
Vortax+ | Paralysis | Volvidon Tree | Impact |
Luna Eostre | Poison | Gold Rathian Tree | Impact |
Impact SAED Skills & Weapon
Next, we have the Skills and weapon choices for the Impact SAED build. It's important to note that this particular build doesn't achieve the same high damage output as the Elemental or CSS builds mentioned earlier. However, it remains consistently effective in dealing damage overall and excels in unrelentingly staggering or knocking out the monster.
Plus, players do not have to concern themselves with the tedious task of configuring a distinct build corresponding to each Element or researching the vulnerabilities of monsters before embarking on a hunt. Consequently, this particular option is undeniably the most efficient and streamlined. However, it does fall short in terms of damage output, which is why the ultimate endgame build heavily relies on Dereliction to bridge that gap:
Skill Name | Minimum Levels Equipped | Reasoning | ||
|---|---|---|---|---|
Dereliction | 3/3 | Only CB build that uses Blue Scroll on this Skill. A massive bonus to Attack and Stun. | ||
Resentment | 5/5 | With Dereliction, Resentment is always active which means a flat +25 Attack when combined. | ||
Resuscitate | 3/3 | 'Abnormal Status' is a deceptive description, Resuscitate is triggered by basically any negative status effect, including Dereliction and Dragonheart. | ||
Artillery | 3/3 | Gives Phials a 30 percent damage buff for each Phial Explosion. | ||
Dragonheart | 2/5 | Obviously, this build doesn't care about Elemental damage, so the Dragonblight from this Skill doesn't matter. Additionally, it gives huge Elemental Resistances when active. | ||
Load Shells | 2/2 | Mandatory on any CB Build since Lvl 2 Load Shells mean players have full vials when they're yellow instead of red. | ||
Rapid Morph | 3/3 | Some say it's only necessary for convenience, others say it's mandatory, either way having it reduces all transition animation time from Sword to Axe mode, vice versa, and the AED/SAED animations as well. | ||
Guard Up | 2/3 | It makes unguardable moves more guardable, players will be getting used to blocking over avoiding attacks and this makes Guarding almost always the safer option anyway. | ||
Guard | 4/5 | Should probably have at least Guard 4 if not Guard 5. Doing so makes it so most attacks can be Guard Point'ed and players won't have that long recovering animation after blocking. | ||
Focus | 2/3 | Makes it easier to get to Yellow Phial charge in fewer attacks. | ||
Intrepid Heart | 2/2 | Every 68 hits players get 75 percent damage resistance on the next attack that hits them (if at Rank 2). Plus, that same attack will also ignore damage reactions, which means Savage Axe mode is interrupted less. | ||
Shock Absorber | 1/1 | This Skill replaced Flinch Free after Title Update 5 and has since made multiplayer so much more fun overall thanks to friends not being able to interrupt each other's attacks. | ||
Best Weapon Option | ||||
Weapon Name | Weapon Element | Weapon Tree | Phial Type | |
Grand Gordlock | Raw | Garangolm Tree | Impact | |
Mixed Armor Set Reccomendations
For the next aspect of each build, let's discuss the combination of armor sets. It is important to note that the Element and Impact SAED armor recommendations share a similar blueprint, whereas the CSS build stands out as more unique. However, it should be noted that despite their similarities, the active Skills of both sets may differ in the end due to the significant role played by Decorations.
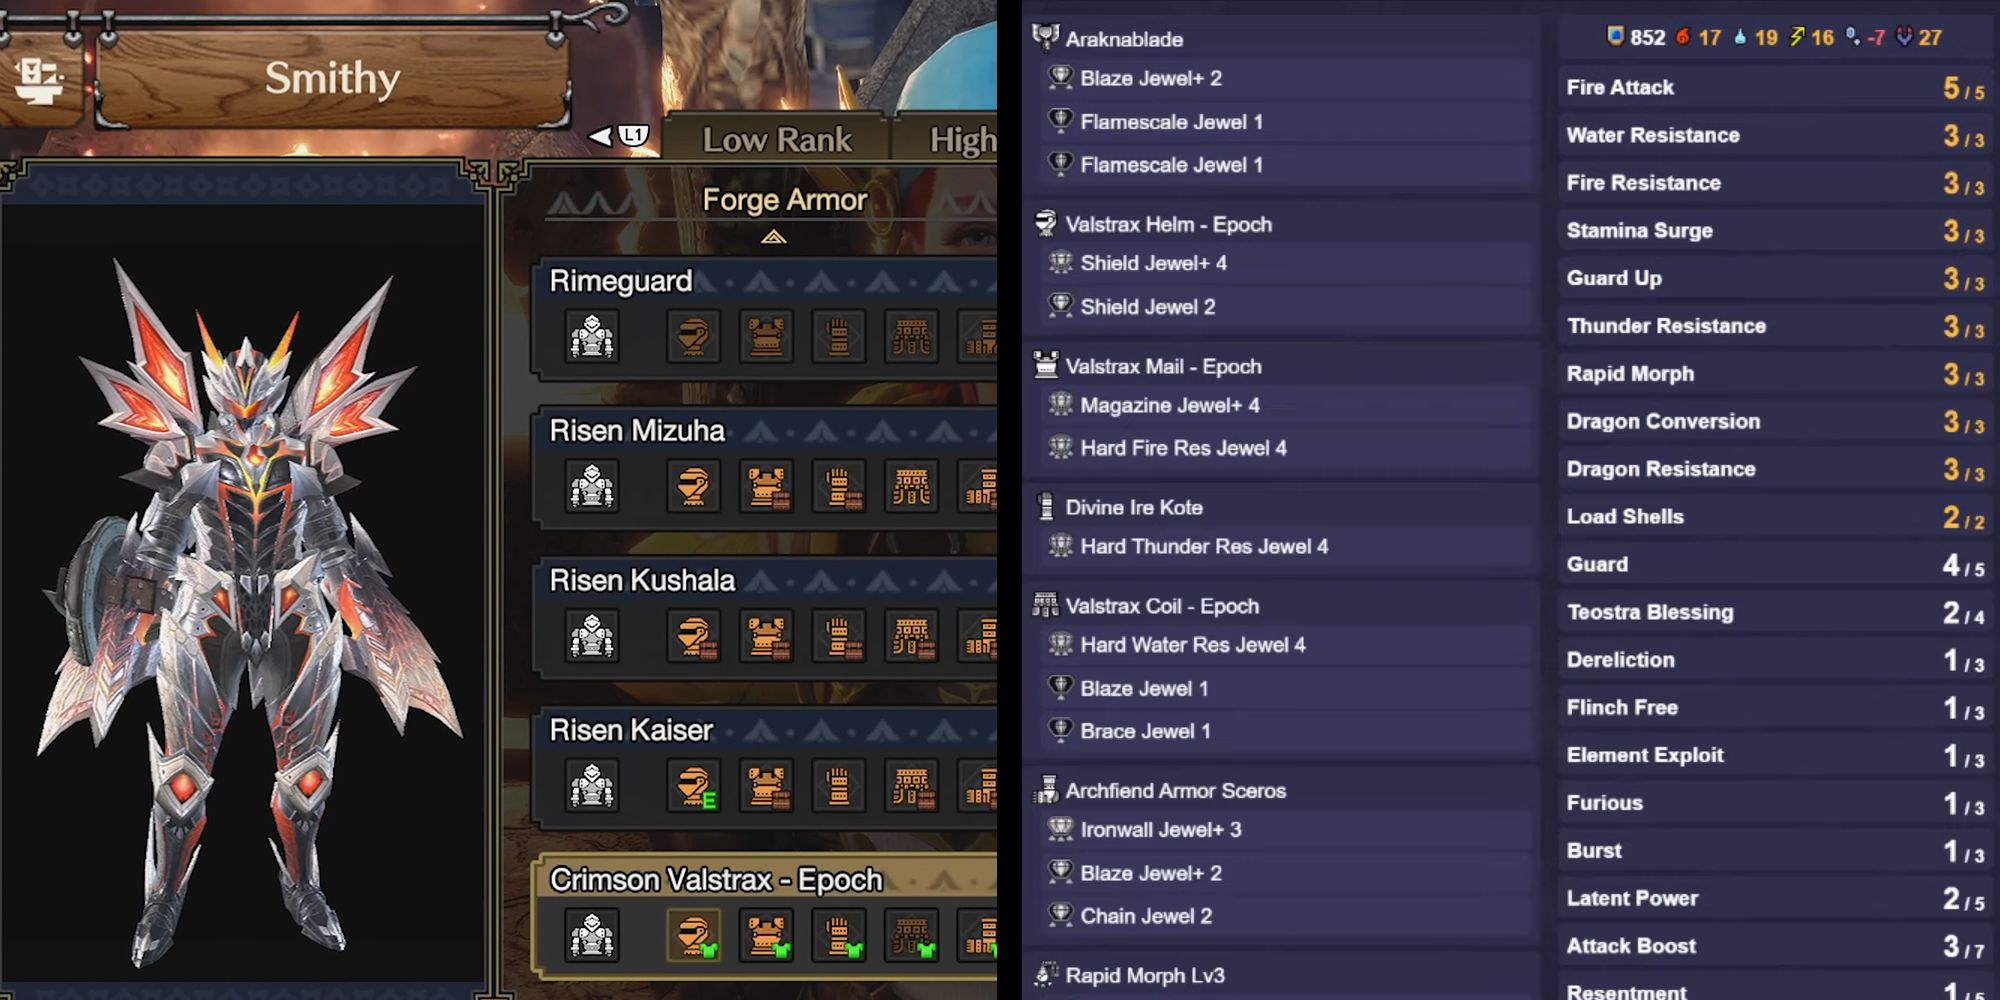
Elemental SAED Mixed Sets
Set Builder Images were made by using GameCat's Armorset Builder
The Risen Valstrax Armor introduced in Title Update 4 is fully utilized by the Elemental SAED mixed set. Sadly, the sets unveiled in Title Update 5 did not have the same impact as Charge Blade (CB) players had hoped for. However, the crucial Dragon Conversion Skill present in this armor set plays a vital role in boosting Elemental Phial Explosions to extraordinarily high levels of damage. By combining this already formidable DPS with the bonuses acquired from Dereliction, Furious, and Resentment, it becomes apparent how these builds can achieve over 1000 damage per Phial Explosion.
Armor Type | Armor Name | Important Skills |
|---|---|---|
Head | Valstrax Helm - Epoch | Dragon Conversion x1 Latent Power x2 Attack Boost x1 |
Chest | Valstrax Mail - Epoch | Dragon Conversion x1 Dragon Resistance x3 Attack Boost x1 |
Arms | Archfiend Armor Epine | Dereliction x2 Resentment x1 |
Waist | Valstrax Coil - Epoch | Dragon Conversion x1 Stamina Surge x3 Attack Boost x1 |
Boots | Archfiend Armor Sceros | Dereliction x1 Resentment x1 |
The Safer Elemental SAED Build Option
There is an alternative loadout available for this build, addressing the potential vulnerability caused by insufficient resistances from Dragon Conversion and the continuous HP Drain from Dereliction. This alternative build offers a safer option that minimizes the risk of players experiencing the feeling of defeat by carting. Please refer to the following table for the details:
Armor Type | Armor Name | Important Skills |
|---|---|---|
Head | Valstrax Helm - Epoch | Dragon Conversion x1 Latent Power x2 Attack Boost x1 |
Chest | Valstrax Mail - Epoch | Dragon Conversion x1 Dragon Resistance x3 Attack Boost x1 |
Arms | Divine Ire Kote | Furious x1 Critical Eye x2 |
Waist | Valstrax Coil - Epoch | Dragon Conversion x1 Stamina Surge x3 Attack Boost x1 |
Boots | Divine Ire Hakama | Furious x1 Evade Extender x2 |
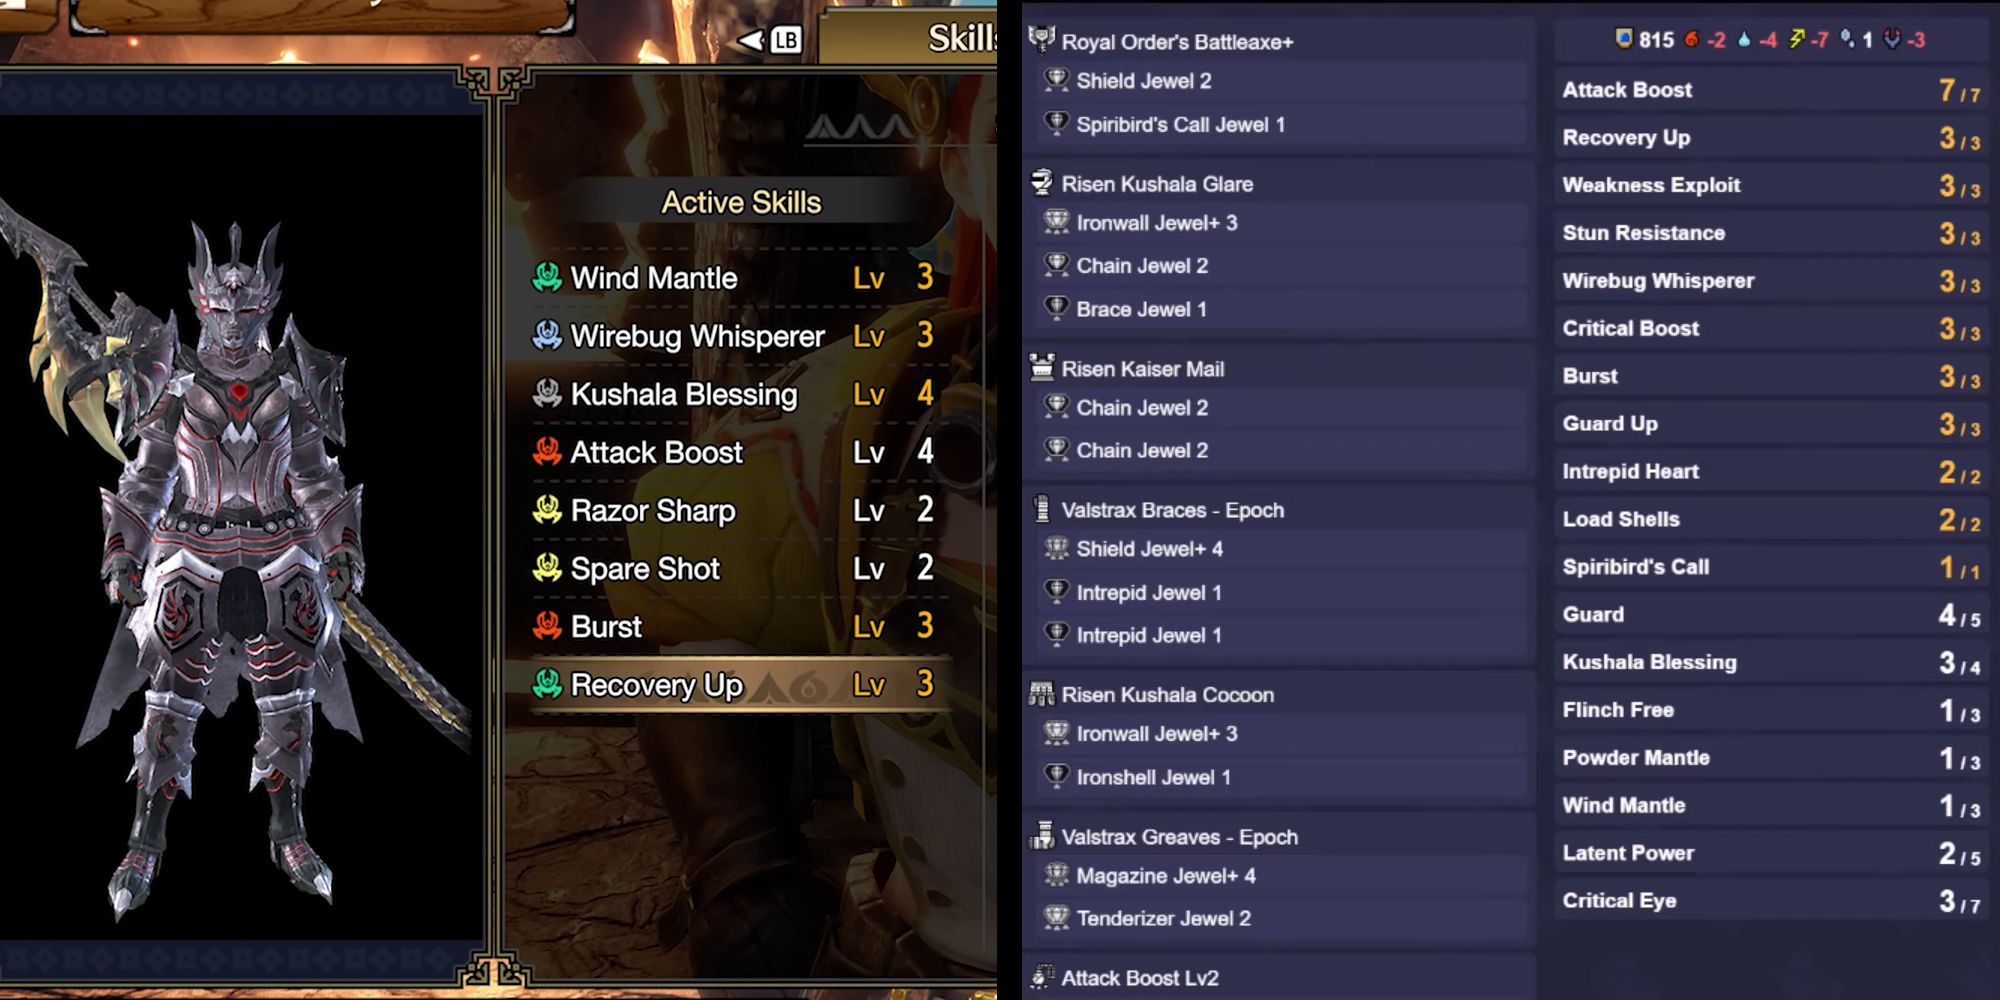
Condensed Spinning Slash (CSS) Mixed Sets
Set Builder Images were made by using GameCat's Armorset Builder
The next mixed set utilizes a lot of different skills to achieve the optimal play style for the pizza cutter, such as:
Wind Mantle: to have Ready Stance or Counter Peak Performance up as often as possible.
Kushala Blessing Rank 3: to partially counteract the HP Drain of Dereliction.
Powder Mantle: to capitalize on the multi-hit potential of the Savage Axe.
Dragonheart: to give a general boost to Resistances since CSS builds don't worry about Elemental damage.
Other than those Skills, the remaining ones on the featured armor pieces may seem mismatched, yet they provide significant assistance. Additionally, the Decoration Slots on these Armor Pieces play a vital role in carrying a lot of the load:
Armor Type | Armor Name | Important Skills |
|---|---|---|
Head | Risen Kushala Glare | Wind Mantle x1 Wirebug Whisperer x3 |
Chest | Risen Kaiser Mail | Powder Mantle x1 Weakness Exploit x1 Critical Eye x3 |
Arms | Valstrax Braces - Epoch | Critical Boost x2 Latent Power x2 Attack Boost x1 |
Waist | Risen Kushala Cocoon | Kushala Blessing x2 Attack Boost x2 Recovery Up x3 |
Boots | Valstrax Greaves - Epoch | Critical Boost x1 Stun Resistance x3 Attack Boost x2 |
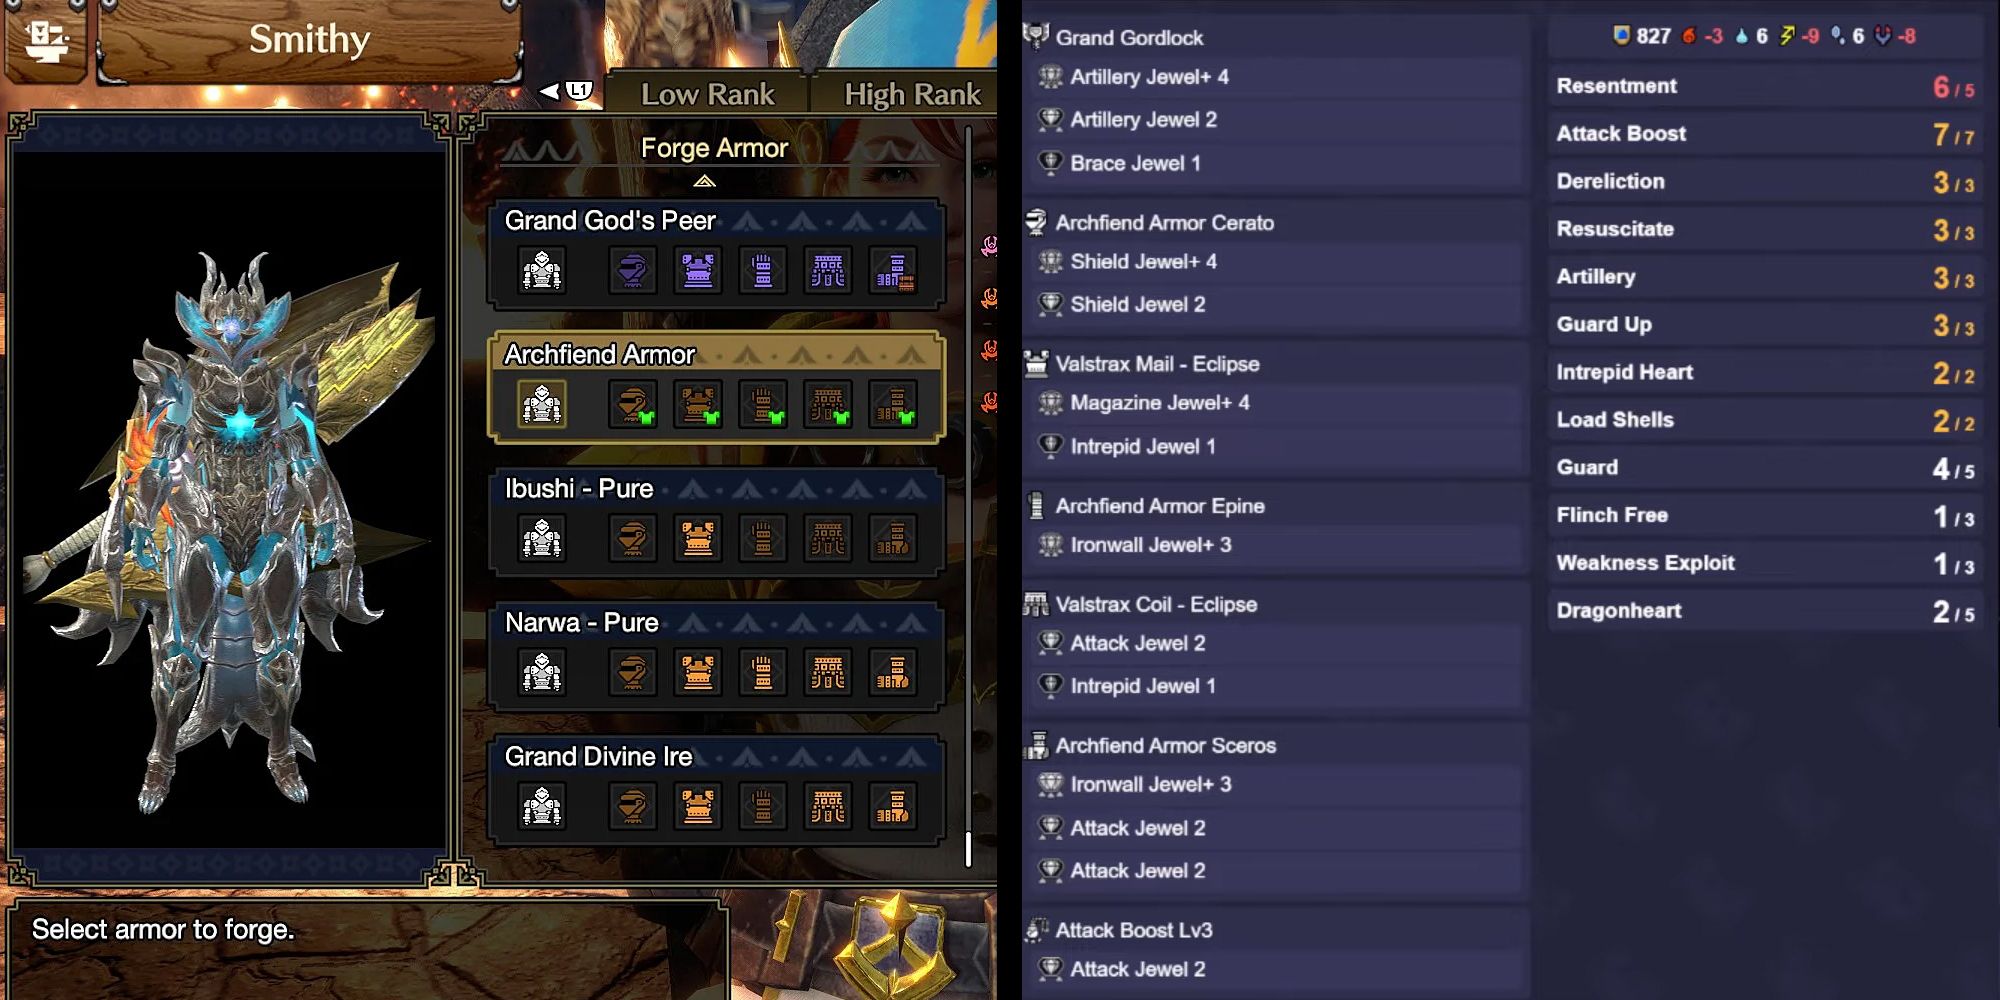
Impact SAED Mixed Sets
The Set Builder Images were created using the Armorset Builder tool by GameCat.
For the Impact SAED mixed set, the rationale is straightforward. To optimize damage output, players equip the Archfiend Head, Arms, and Greaves for Dereliction and Resentment. Additionally, the Valstrax Chest and Waist are worn to maintain constant activation of Dragonheart. This setup ensures that players consistently benefit from Dragonheart, HP Drain from Dereliction, and the constant activation of Resentment and Resuscitate, resulting in maximum damage output.
Armor Type | Armor Name | Important Skills |
|---|---|---|
Head | Archfiend Armor Cerato | Weakness Exploit x1 Resentment x2 |
Chest | Valstrax Mail - Eclipse | Dragonheart x1 Resuscitate x2 |
Arms | Archfiend Armor Epine | Dereliction x2 Resentment x1 |
Waist | Valstrax Coil - Eclipse | Dragonheart x1 Resuscitate x1 Resentment x2 |
Boots | Archfiend Armor Sceros | Dereliction x1 Resentment x1 |
Augment Skills To Look For In Quiro Armor Crafting

Moving on to the final aspect of Charge Blade builds in Rise, it is important to note that players should not feel obligated to continuously roll for the precise skills mentioned below. This process can become unreasonably monotonous and devoid of enjoyment. Instead, while engaging in the augmentation process for the sake of amusement or to enhance one's quality of life, it is advisable to consider incorporating these skills into each build as well:
Augment Skill | Reasoning |
|---|---|
Elemental SAED Build | |
Strife | The longer a player's red health, the more benefits this gives. Not enough benefit to warrant putting into regular build over other Skills |
Furious | By far the best thing to get on any Augment for this build. At Max Rank Furious gives bonus Defenses which give more Elemental damage from Dragon Conversion |
Condensed Spinning Slash Build | |
Razor Sharp | Spinning Axe burns through Sharpness, so this is just convenient. |
Weakness Exploit | More Weakness Exploit can't hurt, it's only ever a benefit. |
Burst | Burst, previously known as Chain Crit by the way, is only worth running at Rank 1 or Max Rank, and Max Rank benefits are pretty noticeable. |
Impact SAED Build | |
Attack Boost | Raw Damage build takes any flat bonuses to Attack it can find. |
Rapid Morph | The build, sadly, doesn't have much room for Rapid Morph, so getting it in an Augment Skill is nice. |
Burst | Burst is only worth running at Rank 1 or Max Rank, and Max Rank benefits are pretty noticeable. |
Monster Hunter Rise
Franchise Monster HunterPlatform(s) Switch, PCReleased March 26, 2021Developer(s) Capcom See at Xbox Games Store


