
The Ultimate Guide to Capturing Flawless Audio on iPhone
Record audio on your iPhone effortlessly using the Voice Memos app Learn how to rename, share, and delete voice recordings Simplify your communication by speaking instead of typing
Key Takeaways
Record audio on your iPhone with the Voice Memos app by simply opening the app, tapping the large red button to start recording, and tapping it again to stop.
To rename a voice recording in the Voice Memos app, choose the desired recording, tap on the current recording name to edit it, and input a new name.
To share your voice recordings, use the iPhone's standard share menu. This enables you to send the recordings via email, save them to the Files app, or upload them to Google Drive.
Learn how to effortlessly record and share your audio recordings on your iPhone using the convenient built-in Voice Memos app. Discover how to make your very first voice recording with simple steps. Say goodbye to recording limits, as your iPhone's ample free storage allows you to keep recording to your heart's content.
Record Audio on iPhone With the Voice Memos App
To make your first audio recording on your iPhone, open the Voice Memos app on your phone.
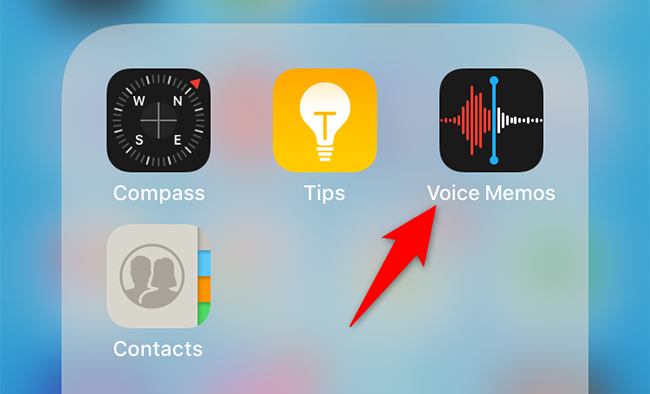
In Voice Memos, at the bottom, tap the large red button to start recording.

Your iPhone is currently using its internal microphone to capture audio. You are welcome to express yourself through singing, jotting down a note, or verbally narrating anything that you wish to save; your iPhone is attentively tuned in.
When you are done and want to stop the recording, tap the large red button at the bottom of Voice Memos.
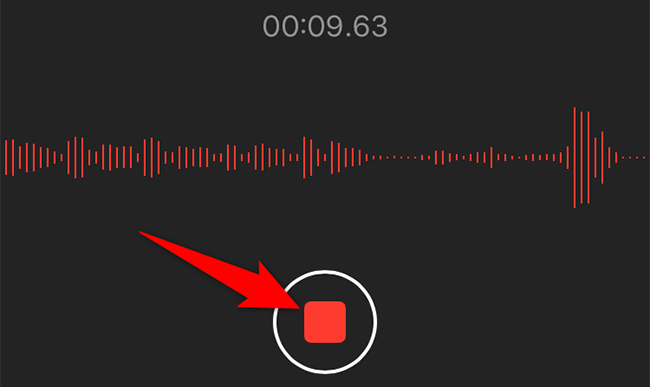
Your audio recording is now saved in the app. To play it, tap the recording and then tap the play icon.

And that's the method to create voice recordings on your iPhone without the need for a third-party app. If you frequently utilize Voice Memos, there's a convenient way to launch it directly from Control Center.
Rename a Voice Recording on iPhone
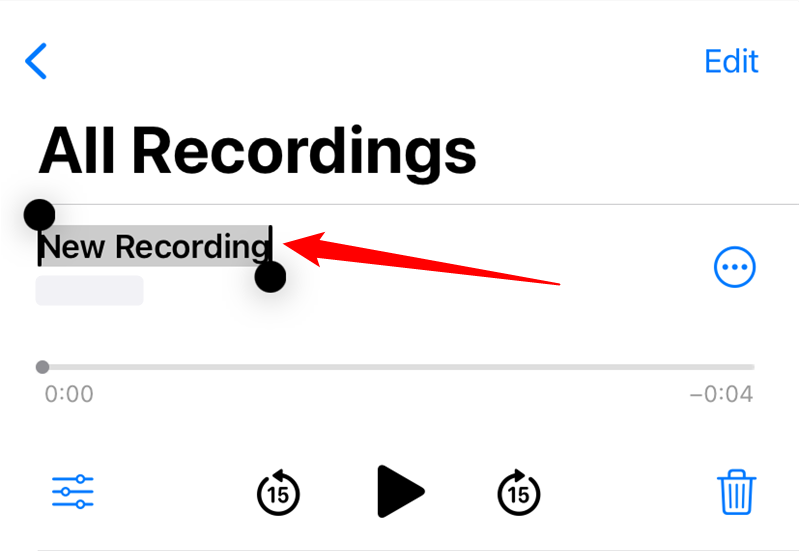
To ensure easy recognition, consider giving your recordings identifiable names. In Voice Memos, simply select the recording you wish to rename, tap on the current name and edit it accordingly. Once you have entered the new name, press Enter to save the changes.
Your recording now uses your newly specified name.
Share a Voice Recording on iPhone
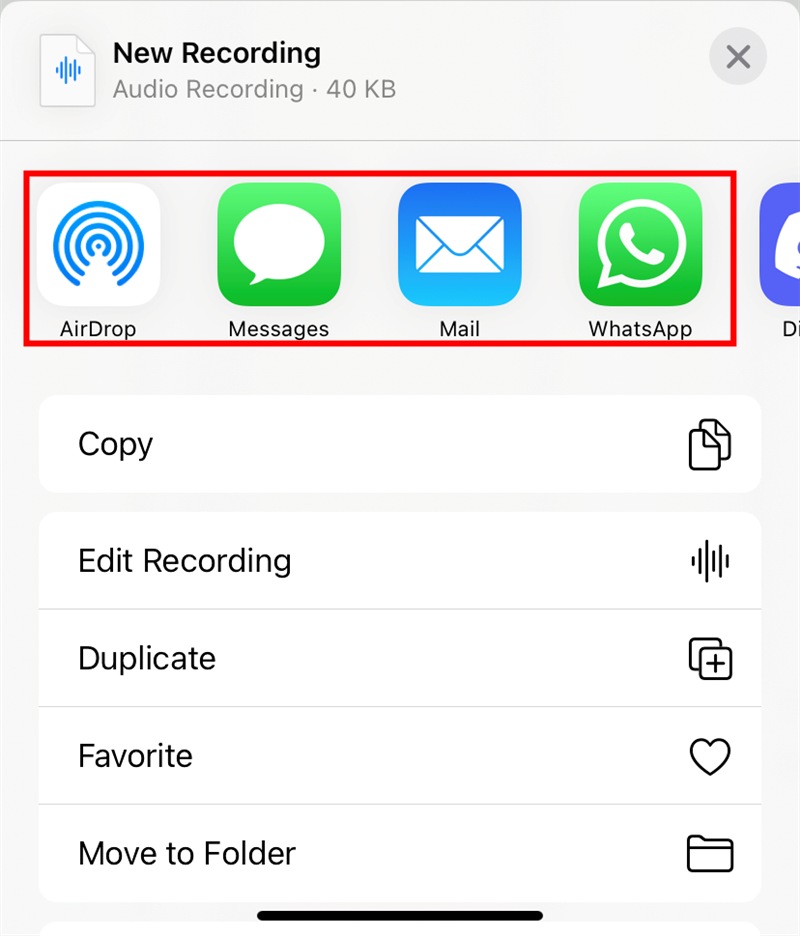
Sharing your Voice Memos recordings on your iPhone is made easy with the standard share menu. This feature allows you to effortlessly share your recordings through various platforms such as the Files app, Google Drive, and even via email to others.
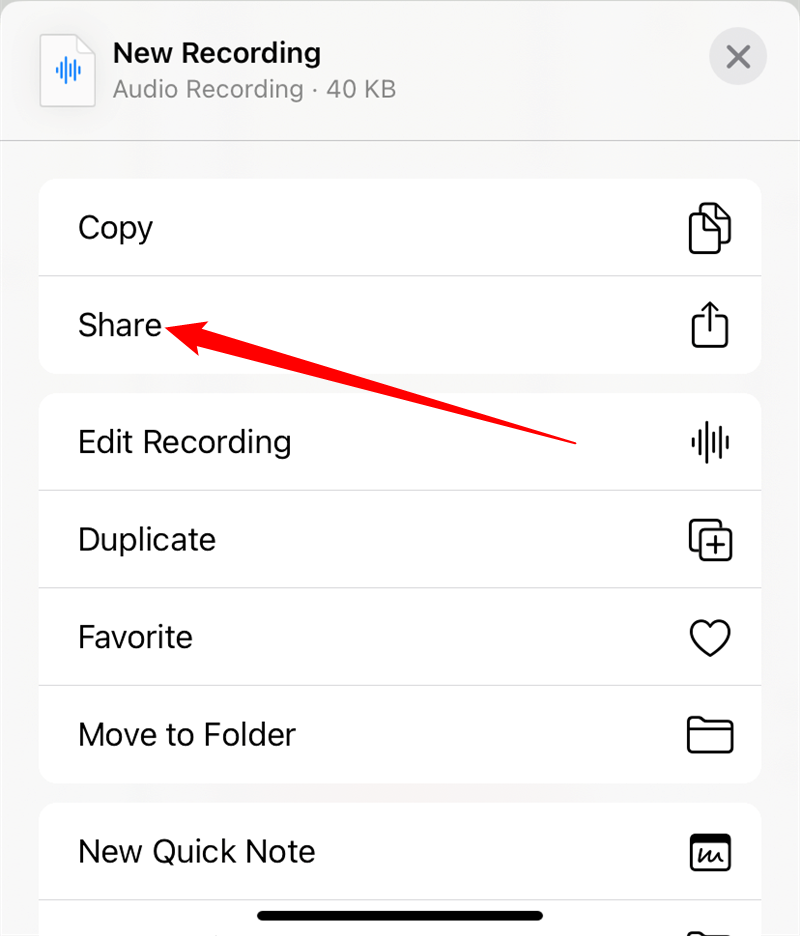
To access the share menu, open Voice Memos and tap the recording to share. Tap the three-dot menu icon in the upper-right corner to display the "Share" option.
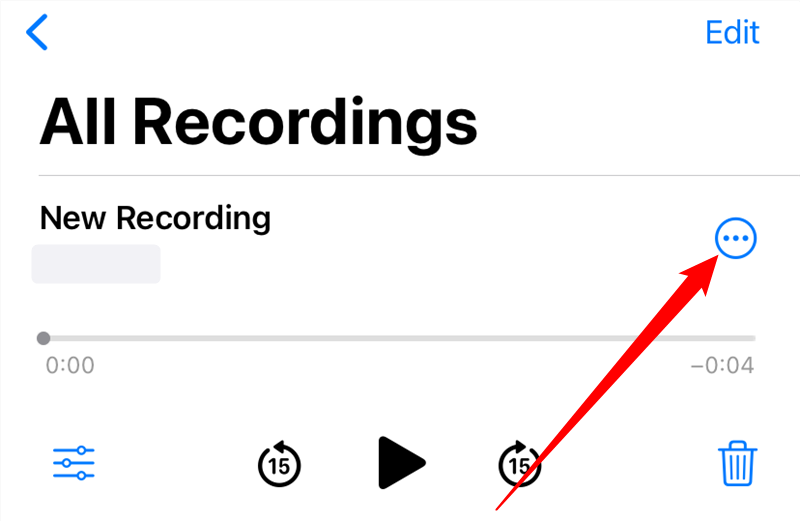
From the menu that appears, select "Share."
Your iPhone's standard share menu will open. Here, select where you'd like to share your recording.
Delete a Voice Recording on iPhone
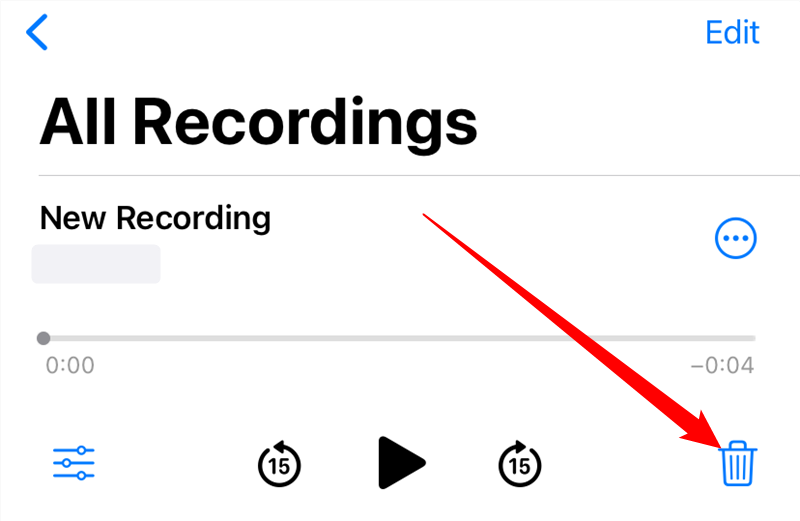
If you no longer need a voice recording, you can delete individual or multiple recordings at once in Voice Memos.
To do so, open your recordings, select the recording you'd like to delete, and then tap the trash can icon.
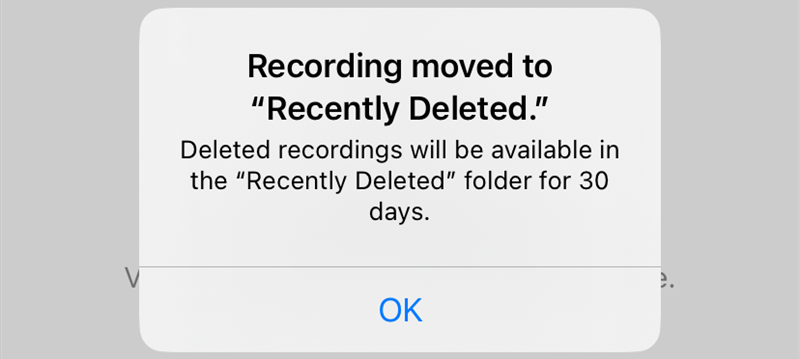
Voice Memos will move your selected recordings to the "Recently Deleted" folder. The recordings will stay here for 30 days after which they will be permanently removed.
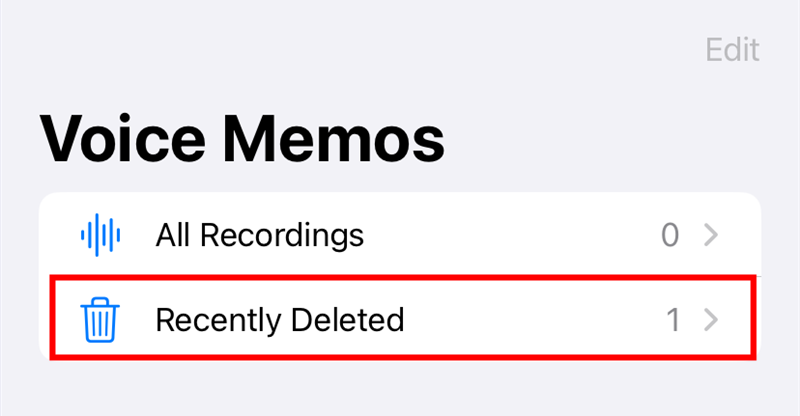
If you'd like to get rid of your recordings permanently without them staying for another 30 days, then tap the "Recently Deleted" folder on Voice Memos' main screen.
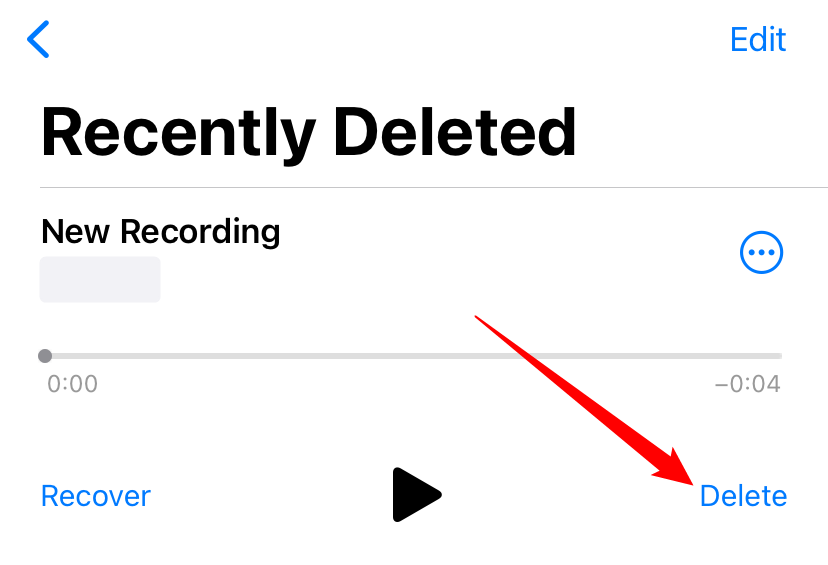
At the bottom-right corner of the "Recently Deleted" screen, tap "Delete."
If you'd like to restore your deleted audio recordings, then tap the "Recover" option instead.
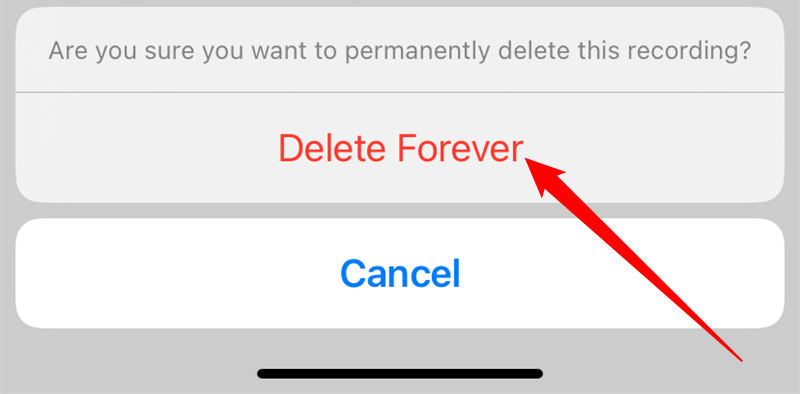
Make sure you definitely want to remove the recording, then select "Delete Forever" in the menu that opens at the bottom of the screen.
You cannot restore your recordings once they are permanently deleted. Make sure you really want to delete them before tapping "Delete Forever"
Your recordings are now deleted.
Voice Memos is an extremely useful app to make those quick audio recordings. It's a perfect tool for when you want to note something but you can't type. Enjoy!
Did you know you can even record phone calls on your iPhone? There are multiple ways to do that, and you can also save voicemails to your iPhone.


