The Ultimate Guide: Mastering the Art of iPhone and iPad Recovery Mode
Learn how to effectively utilize Recovery Mode on your iPhone or iPad without losing any precious data Safely restore your device using our step-by-step guide on both Mac and Windows platforms
Key Takeaways
Recovery Mode is used to fix severe software malfunctions on iPhones and iPads.
To access Recovery Mode on recent iPhones, swiftly press the volume up button, followed by the volume down button, and then hold down the side button until the Recovery Mode screen is displayed.
When performing a recovery on a Mac or Windows PC, opt for the Update option initially to retain files and settings. If this proves unsuccessful, select the Restore option, which will erase all data on the device but may resolve severe software issues.
What is Recovery Mode?
Apple produces some of the most durable mobile devices on the market, with iPhones and iPads known for their longevity. However, no device is exempt from occasional malfunctions. If you encounter an issue with your device, you can follow these steps to access Recovery Mode and resolve the problem.
Recovery mode is utilized to fix severe software malfunctions on your iPhone or iPad. When you activate Recovery Mode, you have two primary options to choose from: Update or Restore. These options serve different purposes.
Update - This option downloads the most recent iOS version and attempts to repair any issues with the operating system using the update process. Your data remains unaffected.
The Restore option completely wipes your iPhone or iPad and downloads iOS again. Generally, it is advisable to begin with the Update option unless it is absolutely necessary to erase all the data on your phone. However, if the Update option fails, you will likely have no choice but to proceed with the Restore option.
The first step to accessing the Recover option or the Update option is to enter recovery mode on your iPhone or iPad. The process of doing so differs depending on the device you have, which is why we have explained each method separately.
Enter Recovery Mode on the iPhone 8 or Later
All iPhones manufactured since 2017 have used the same method to access recovery mode. As of September 2023, the included models are:
iPhone 8, and 8 Plus
iPhone X, XR, XS, and XS Max
iPhone 11, 11 Pro, and 11 Pro Max
iPhone SE (Second and Third Generations)
iPhone 12, 12 mini, 12 Pro, and 12 Pro Max
iPhone 13, 13 mini, 13 Pro, and 13 Pro Max
iPhone 14, 14 Plus, 14 Pro, 14 Pro Max
iPhone 15, 15 Plus, 15 Pro, 15 Pro Max
To enter the recovery mode screen, start by pressing and releasing the volume up button. Next, press and release the volume down button. Then, hold down the power button until the screen appears. Please note that it may take around 15 seconds or more, so please be patient before attempting it again.
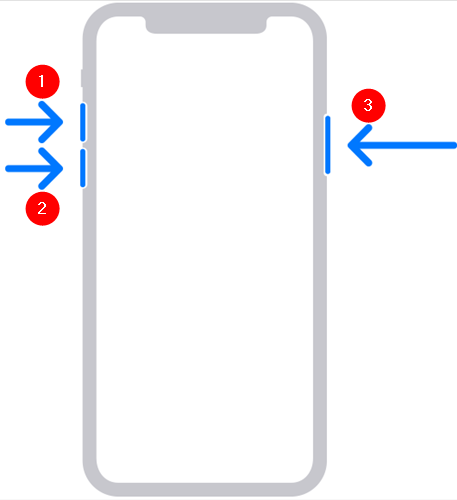
Once the recovery mode screen appears you can plug your phone into your computer with a Lightning cable.
Enter Recovery Mode on the iPhone 7 or iPhone 7 Plus
To initiate the recovery process on an iPhone 7, 7 Plus, or the 7th generation iPod, begin by powering off your device. Next, press and hold both the volume down button and the power button simultaneously. Keep holding them until the recovery screen appears. You may see the Apple logo initially, but do not release the buttons at that point. Wait until the recovery screen is displayed.

It'll look very similar to this:
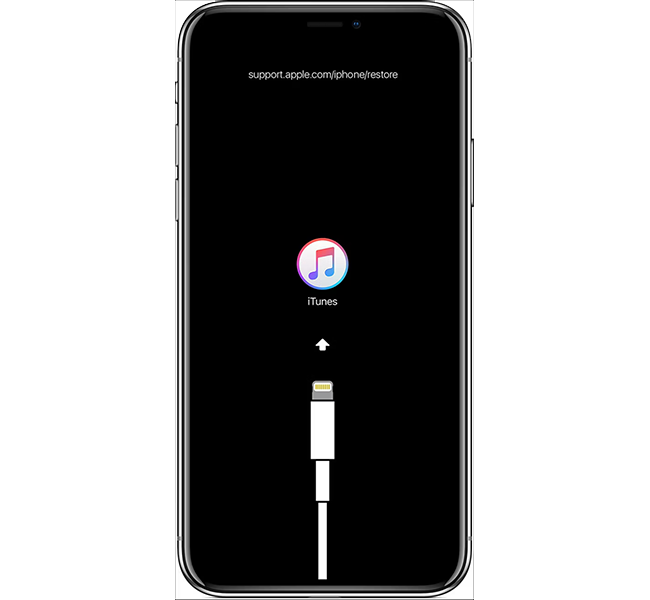
Once that screen appears, go ahead and connect your device to your computer via Lightning cable.
How to Enter Recovery Mode on iPads with Home Buttons
Some iPads in Apple's lineup — like the iPad 10.2 — have retained their home buttons, and most iPads made prior to 2018 had home buttons.
If your iPad is equipped with a home button, you can easily enter Recovery Mode by simultaneously pressing and holding the Home button and the power button for approximately 10-15 seconds. This process mirrors the procedure used for older iPhone models.

The Recovery Mode screen will appear and you'll be prompted to plug your iPad into your Mac or Windows PC.
How to Enter Recovery Mode on iPads without a Home Button
Newer iPad models, released between 2017 and 2018, no longer feature Home buttons. Thus, if you own such an iPad, the steps to enter Recovery Mode are similar to those of newer iPhones. Firstly, press and release the volume button situated near the power button. Next, press and release the other volume button, and finally, hold down the power button until the recovery screen appears.
There are a couple of different button configurations you'll find on iPads, though. If your iPad has the volume buttons along the top, it'll look like this for you:

To operate iPads with volume buttons on the sides, follow these steps: first, press and release the top volume button and then the bottom volume button. Next, hold down the power button. Once the Recovery Mode screen appears, release the button.

The Recovery Mode screen will display a cable connecting to the iPad — once that appears, connect your iPad to your computer.

Recover an iPhone or iPad on a Mac
To begin, connect your Mac to your phone or tablet. If this is your first time doing so, you will see several prompts asking if you trust this device during the recovery process. Make sure to confirm your trust whenever you come across such an option, as recovery cannot be performed without it.
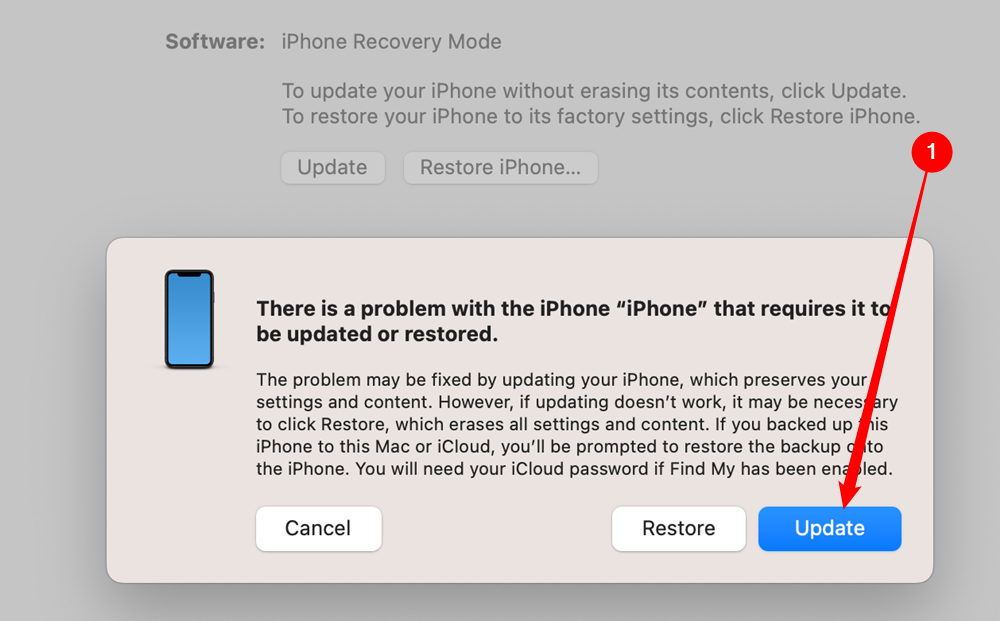
Once you have established trust with your phone and unlocked the device, a popup similar to this will appear. We recommend selecting the "Update" option as the first step. This option is specifically designed to safeguard your files from being erased, retain all of your customized settings, and is our preferred choice for beginning the update process.
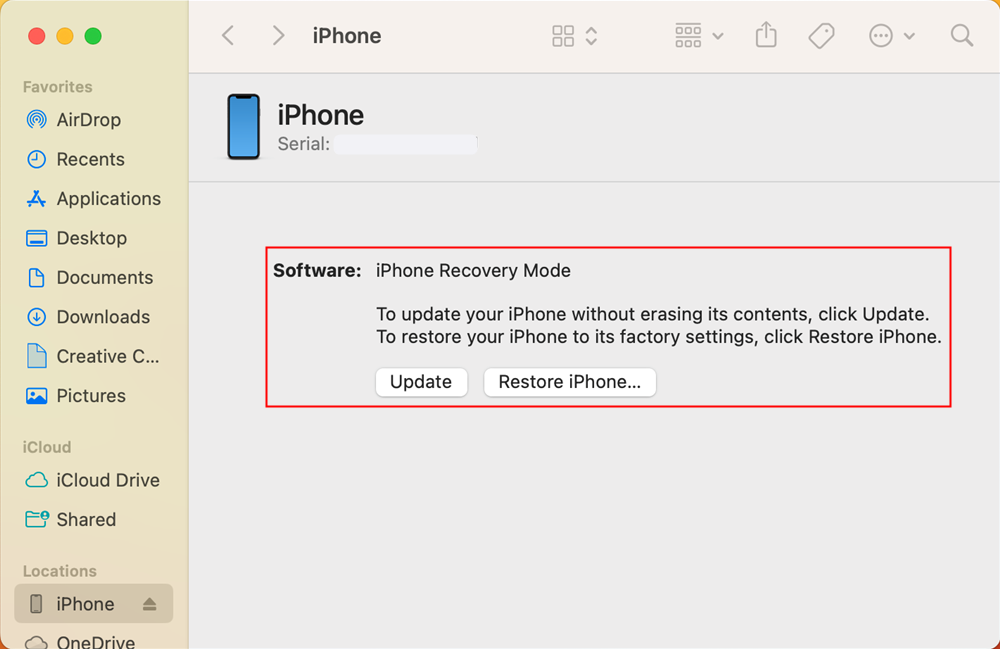
If you don't see that popup, open the Finder app, select your iPhone or iPad in the left hand sidebar, then select "Update" in the Finder window.
The update and recovery process may take a significant amount of time, so it is important to be prepared. iOS updates are usually several gigabytes in size, which means that downloading them can be time-consuming. Additionally, your phone will need to install everything, which can also take a while. It is important to note that even if your phone appears to freeze during this process, it is best to keep it connected for longer than you may think is necessary.
If these steps do not work, you may need to put your iPhone (or iPad) into Recovery Mode once again, but this time select the "Restore" option. Restoring your device will completely erase all data and perform a fresh install. While this can help repair a serious software issue, it is crucial to understand that all of the data on your device will be permanently deleted.
Recover an iPhone or iPad on a Windows PC
To recover your iPhone using a Windows PC, it is important to ensure that you have the most up-to-date version of iTunes. You can easily download iTunes for Windows from Apple's website or through the Microsoft Store.
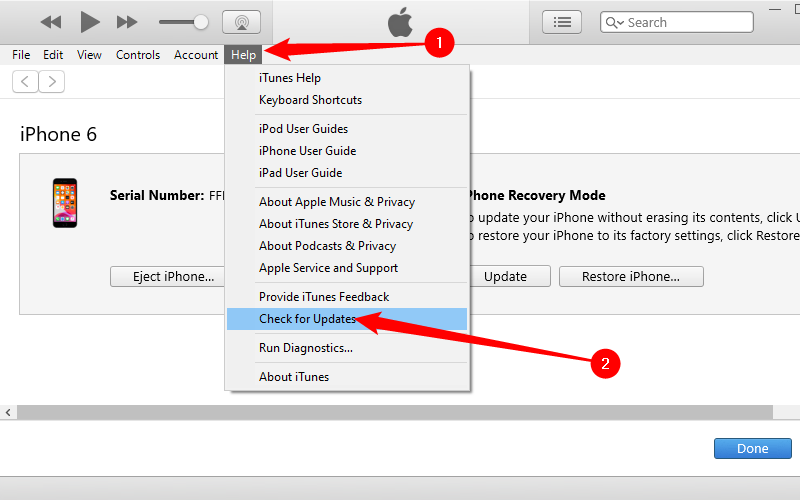
After it is installed, open up iTunes, click the "Help" tab, then click "Check for Updates."
Ensure to download and install any available iTunes updates without delay. In the event of a failed update or suspicion of improper updating, simply revisit the Apple website to redownload the installer for Windows.
Once your device enters Recovery Mode, you have approximately 15 minutes before it automatically exits. Should you fail to act promptly and your phone exits Recovery Mode, simply repeat the aforementioned button presses to reenter it.
A window like the one below will pop up on your computer once you've successfully entered Recovery Mode on your phone or tablet. You will be prompted to Restore or Update.
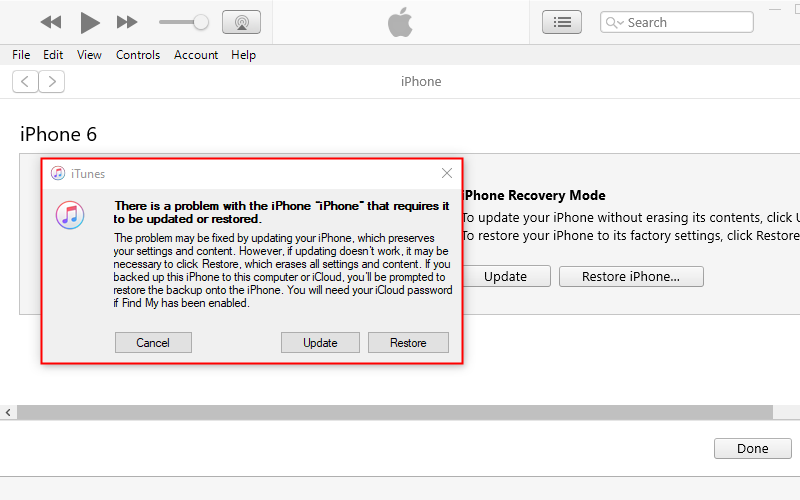
Try starting with the "Update" option as it may resolve your issues without the need for a complete operating system reinstallation. This option ensures that all your files and settings are preserved, saving you the hassle of setting everything up again. Additionally, it prevents any potential loss of data that you may have overlooked when backing up. However, if the "Update" option doesn't work, you'll have to return to the Recovery Mode screen and select "Restore." While not ideal, this could be the only solution to fix your iPhone or iPad.