
Looking for a free alternative to Plex? Jellyfin puts your home entertainment in your hands. Here’s a guide to getting started.
Streaming online content is becoming increasingly challenging as more services and fees emerge. Amazon's recent announcement of ads for Prime subscribers has frustrated many. To bypass the ads, an additional $3 must be paid. Netflix has also raised its prices in 2023. Furthermore, Paramount+ subscribers through Walmart+ cannot add Showtime to their package.
Sometimes, it all becomes overwhelming. You begin to question whether it’s worth it. That’s where Jellyfin comes in - an open source solution for streaming your personal content collection from anywhere. While the initial setup can be challenging, we are here to guide you through every step.
Follow these instructions to set up your own Jellyfin server and start streaming your owned content without any additional fees.
Contents
What is Jellyfin?
Jellyfin, an open-source media server, is lightweight and easy to install on a wide variety of devices. With Windows and macOS apps available, it can be used without a dedicated device. Jellyfin offers flexibility for home setups, with a range of compatible hardware options to suit individual needs and preferences.
Is Jellyfin worth it?
In the long run, Jellyfin will probably save you money if you begin to unsubscribe from unnecessary services. It can also be as cheap or as expensive as you want to make it.
You can use Jellyfin to easily convert hard-to-find shows from Blu-Ray or DVD into streamable content, providing an ad-free viewing experience. While using a VPN to access region-restricted shows is an option, the quality of the stream or rip may be compromised. Jellyfin provides a straightforward solution for this, as long as it is set up correctly.
Jellyfin & self-hosting will save you money
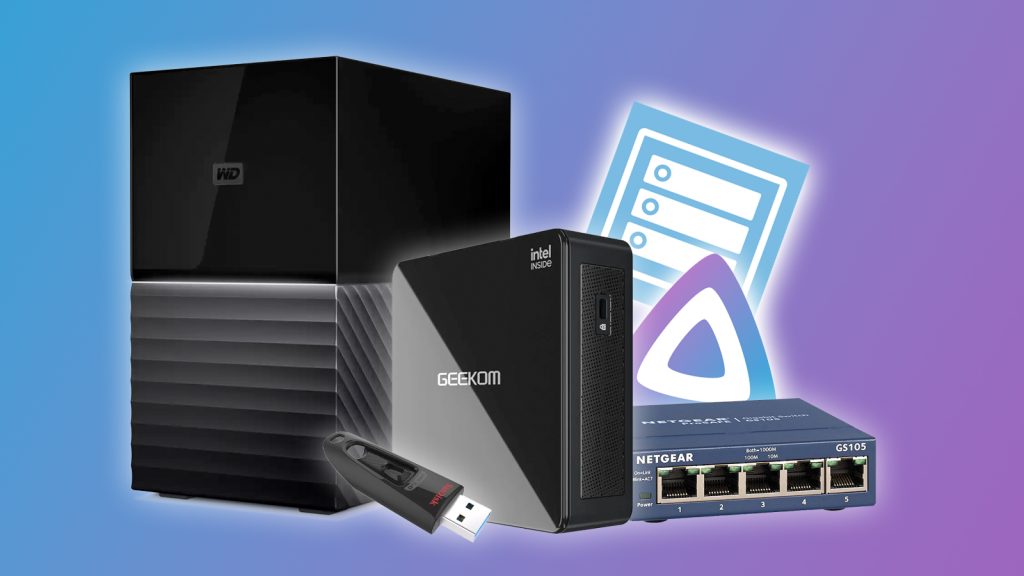
The costs of Netflix and other streaming services are continuously increasing, and with a plethora of options available, the expenses could accumulate to thousands of dollars over a five year period or longer. In contrast, setting up a highly efficient Jellyfin server can be achieved for approximately $500, covering the cost of a PC, storage, and additional useful accessories.
For a 4K media server, powerful hardware is essential to ensure smooth streaming and encoding of streams. While some modern iGPUs, such as those found in the latest Intel chips, can handle 4K streaming, a dedicated GPU is recommended. Investing more money in your server will yield better performance.
However, if you only want to play directly without remote access and don't have large file sizes to deal with, a dedicated GPU or stronger iGPU is not necessary.
Jellyfin can also convert your 4K media to 1080p for easier network playback. For this, you will need more powerful hardware to quickly and seamlessly convert the file to a smaller size. Alternatively, you can choose to use a 1080p server that can be transcoded on almost any PC.
Hardware needed for a Jellyfin server
If you are in need of a dedicated server that requires minimal maintenance, having a spare laptop or PC on hand is essential. In such cases, compact mini PCs such as Geekom’s MiniAir 11 are a perfect fit, particularly for those seeking lower-resolution streams.
Geekom MiniAir 11 specs
Processor: Intel Celeron N5095
RAM: 8GB DDR4
Storage: 265GB NVMe SSD
Get the Geekom Mini Air 12
We suggest choosing the Mini Air 12 instead of the 11 because it is currently more affordable. While its specifications are not outstanding, it is capable of delivering content over the network promptly and also functions as a file and web server. These tasks are achieved through the use of Open Media Vault and Docker, which we will elaborate on later.
You have a wide range of options for a Jellyfin server, but some configurations are not recommended. For example, using a Raspberry Pi to host your server may result in subpar performance, and the new Raspberry Pi 5 is not compatible due to hardware limitations.
AMD CPUs that end with a G prior to the 7000 series do not require a GPU. However, certain AMD and Nvidia GPUs, such as the RX 6400 and Nvidia’s GT 1030, lack encoding hardware. It's advisable to avoid extremely low-end components if you are not opting for a mini PC setup.
For now, it's safest to stick with Intel. However, be aware that any Intel chip with an F after its name will not have an integrated GPU. See our recommended mini PCs below:
| Mini PC & Processor | Where to buy |
|---|---|
| GEEKOM Mini PC Mini Air12 (12th Gen Intel N100) | Get from Amazon |
| Ayaneo Mini PC (AMD Ryzen 7 5700U) | Available via Inidiegogo |
| Beelink S12 Pro Mini PC (12th Gen Intel N100) | Get from Amazon |
| Beelink Mini PC (AMD Ryzen 7 5700U) | Get from Amazon |
Streaming devices
, Roku device, or any other streaming device that supports Jellyfin. Additionally, consider getting a network switch to increase available ports, as there is no supported app for Xbox and PlayStation.
Get a Roku Stick
If you’re on an LG TV or Android-based TV, the app should be readily available for you to download and use.
However, on Samsung Tizen TVs, the app is built and maintained by the community instead. It’s also not available directly and requires additional work.
Storage
We recommend choosing HDD over SSD because of the price. Even though the cost of SSD storage per GB is decreasing, it is still much more expensive with little advantage. Unless you want excessive storage, a large HDD will generally provide a great user experience.
We suggest opting for drives like the Western Digital Red, which are designed for long, sustained use and are less susceptible to breakdown.
Get NAS-ready HDD drives
As we’ll be using Balan Etcher to write our new operating system to a USB stick for installation, we also want to get hold of an 8GB USB Stick (at the very least).
Get a USB stick
Network switch
If your router is located near your planned server, you can utilize a network switch to divide your connection. This will conserve a port while also expanding your network. If you are utilizing a powerline adapter, this method should also be effective.
We advise against using Wi-Fi as it is not reliable. While connecting to the server via Wi-Fi is acceptable, streaming data over it is not recommended.
Get a network switch
Software needed to run Jellyfin

The hardware is not the most daunting aspect of this. It's actually the software that may deter some people. If you are operating a direct service with no external networking beyond your typical Internet connection, you can proceed to the next step.
You’re going to need two pieces of software. For a new operating system, we’re going to use Open Media Vault and Docker.
What is OpenMediaVault?
What is Docker?
Docker is a software tool designed to make it easier to create, deploy, and run applications by using containers. Containers allow a developer to package up an application with all of the parts it needs, such as libraries and other dependencies, and ship it all out as one package. It runs in the background and can be accessed using your IP address and port number in a web browser.
Docker Compose
Docker Compose makes use of the YAML file format to provide guidance on Docker installation. It handles all the setup for you, allowing you to focus on configuration. However, installing it has become somewhat cumbersome with Open Media Vault 6.
How to install OpenMediaVault
Downloadon your PC or laptop
Grab the OpenMediaVault ISO
Plug in your USB stick and open Etcher
Select the ISO and choose your USB stick
Let it write to the device and then safely unplug your USB stick
Boot via USB
Next, proceed to your preferred device and insert the USB stick. If you opted for an older Windows PC or followed the aforementioned suggestion, you simply need to access your BIOS and rearrange your boot order.
Connect a keyboard to your device and get to your BIOS.
Using the keyboard, navigate over to the boot priority list
When prompted to choose a device for installation, be sure to select your preferred drive. I personally opted for the pre-installed SSD.
Follow the onscreen instructions and, eventually, you will encounter a black screen with a command line asking for a login. Use 'root' as your username and enter the password you chose during the installation process. After that, input 'ip addr' to retrieve your IP address.
The networking device you set up during installation should be located nearby. Mine had the following appearance: 192.168.X.XX. Yours may begin with 10. This is when Open Media Vault becomes "headless" and we can switch to another device.
Please open your web browser, go to the designated IP address, and log in using the admin username and the password you have previously set up. This will take you to the "Workbench", which serves as the central hub of operations. It provides a comprehensive overview of the tools and resources being utilized. The settings can be customized as needed, but for now, let's proceed with the installation of Jellyfin.
Install Docker on OpenMediaVault 6
Prior to installing Jellyfin, it is necessary to first install Docker. However, the process has been altered by OpenMediaVault in recent versions, requiring additional steps. Unlike previous installations, OMV now includes hidden extras that need to be addressed during the installation process.
To access your server from another PC or Mac, open your terminal or command prompt. We will use SSH to establish a connection and install the necessary software. To SSH into your device, enter the following command:
Open Terminal or Command Prompt
Type: ssh root@[your server ip]
After you’re logged in, you’ll then want to use this script from OMV-Extras.org:
wget -O – https://github.com/OpenMediaVault-Plugin-Developers/packages/raw/master/install | bash
This will then allow us to add more extras to the OpenMediaVault, including things like file browsers, and more importantly, Docker and Docker Compose.
Install Docker via OMV Extras
Install Docker Compose on OMV6
After adding the repo to our server, you can proceed to the 'omv-extras' section. Check the box for the Docker repo and save the changes. Once saved, refresh the page for safekeeping and then return to the sidebar. You will now find all the extras in your plugin menu.
Navigate to the plugins section and search for "compose" to install. Once installed, we're ready to go.
Additionally, consider installing the file browser while you're here. This will simplify the process of uploading files to your server from any device on your network in the future.
Running Docker
Now that you have all the necessary components, it is important to configure Docker to run. This involves creating a shared folder using one of your linked drives. Although it is not advisable to install it on your primary drive, we took a bit of a risk and went ahead with it anyway.
It has been two months without any issues, but it is advisable to keep it isolated from your primary installation drive. When checking your Docker Compose settings, you may notice that Docker is not running. To resolve this, simply click the small plus sign at the top and select an attached drive to store your Docker files.
Alternatively, you can do this via Storage > Shared Folders > Create (plus button) > Choose a drive.
Browse the directory until you find a spot to place it into.
The selected folder will now be sorted in green text and then display END OF LINE. Proceed to the next step. If a yellow box appears prompting confirmation, be sure to click it. This functions as the "apply" button similar to Windows.
Setup drive ready for Jellyfin
Return to the Compose tool, select the drive you just shared, and click on Save. Then, proceed to "reinstall Docker" to activate the software. Once the installation is complete, make sure to refresh the page to ensure that it appears as installed.
Install Jellyfin via Docker on OpenMediaVault 6
Ensure that your RAID or large storage device is accessible to the rest of the server. Utilize the previously mentioned method to configure your storage device for housing your media, granting Jellyfin access to establish its default file path.With everything installed, you can install Jellyfin. SSH back into your device and use the following from Dockerhub by pasting the following into your terminal:
docker pull linuxserver/jellyfin

This is showcasing a different app as an illustration, yours will feature information about Jellyfin.
The process involves using Docker and Compose to set up Jellyfin. After completion, you can view it running in its new container by accessing Compose > Containers.
The major issue has been resolved, and Jellyfin is now installed and ready for your media. To access Jellyfin, go to your server's IP address and add the port number at the end, which defaults to 8096. It will appear like this in your URL bar:
192.168.x.xx:8096 or 10.x.x.x:8096
Install Jellyfin via Docker Compose
Grab it from the same website we got the terminal code from. It’s further down the page and will look like this:

To install using this method, go to Compose > Files > Create (plus).
Once you have pasted it in, you will need to specify the installation location. By default, Jellyfin will create file paths in an 'appdata' folder. This option allows you to override that and select the location of your choice. However, you will still need to ensure that it points to the existing folders by making the following changes:
Library volumes are located at /path/to/library and /config, TV series volumes are located at /path/to/tvseries and /data/tvshows, and movie volumes are located at /path/to/movies and /data/movies.
/srv/dev-disk-by-uuid-[stringofnumbers]/[SharedFolderName]/tv:/[FolderName]/[TV shows folder]
/srv/dev-disk-by-uuid-[stringofnumbers]/[SharedFolderName]/movies:/[FolderName]/[Movies folder]
We found it easier to simply copy-paste files into the newly created files set by Jellyfin.
Setting up Jellyfin
When you first open Jellyfin, you’ll discover that it’s remarkably user-friendly. Simply follow the instructions to create a profile, set a password, and select your folders. If you opt for the default settings, be sure to choose your folders when prompted.
If everything went smoothly, you’ll notice that your selected folders are now accessible. They will begin populating as soon as the setup is complete.
Have you installed the recommended file browser? Open it and it should be configured to [your server IP]:3670 by default. Since we've already set up the shared folder, just go to the settings page under File Browser in the Services menu.
This File Browser plugin allows for easy navigation of folders without the need to use SMB or FTP. Since we primarily work on a Macbook over Wi-Fi instead of Ethernet, uploading via SMB or FTP still maintains the same level of speed and efficiency.
SMB & FTP
If you are connected to the network, you may find SMB and FTP more convenient. To enable these, just go to the Services options in your settings. Once SMB is activated, it will be accessible as a network device.
If you are using macOS, you can connect to a sever by going to Finder and selecting "Go" from the menu bar, then choosing "Connect to a server".
Once it’s set up, you can access
Organization
it by adding your IP address as a network storage device. For FTP, you’ll need to grab it from the Plugins menu. You can access this easily via software like FileZilla, by tapping in your IP, port, and login information. This way you can simply drag-and-drop in the program.Organization
Find the Jellyfin appdata folder or your media folders. Just drag and drop your video file into the appropriate location and Jellyfin will handle the rest. You can organize these into separate folders to avoid things getting out of control as you add more content, including artwork and subtitles.
For TV shows, it's best to create individual folders for each show. It's not ideal to have over 100 episodes of Battlestar Galactica in one unorganized folder.
We split them by show, then the sub-folders are done by season and then dumped in the right location.
Metadata
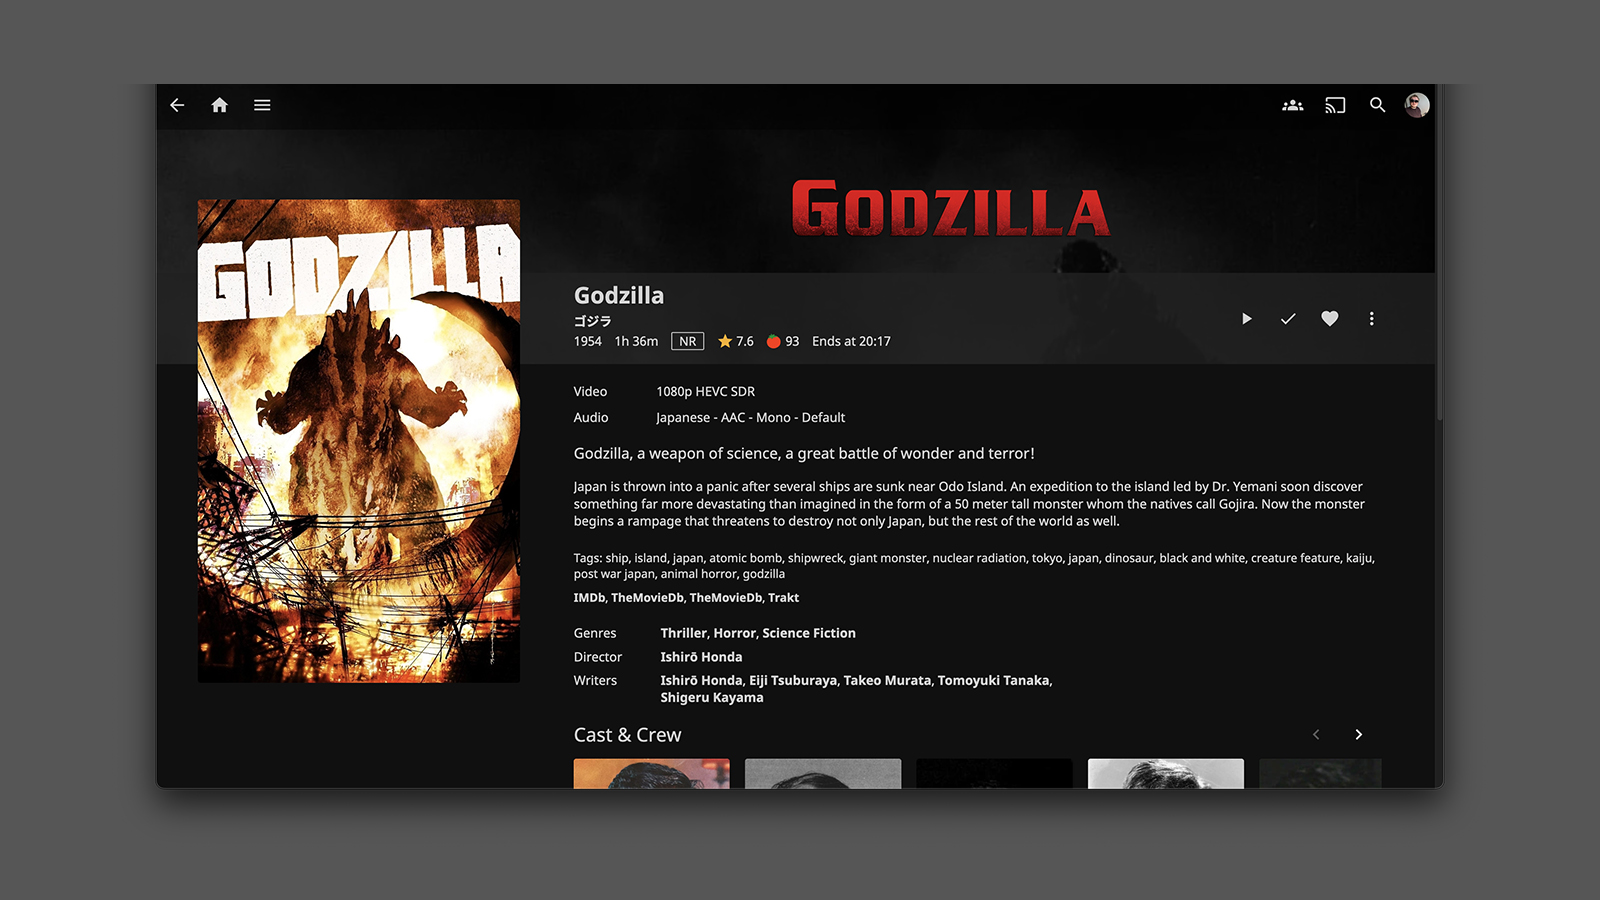
Frequently, Jellyfin can automatically retrieve metadata for popular movies without any help. However, when it comes to more obscure films like the recent Metalocalypse movie, you might encounter difficulties. In such cases, you have the option to manually add the metadata yourself or use the 'Identify' feature if the information is still unavailable.
Subtitles can be added to the same folder as your show or movie, although Jellyfin may add them automatically at times. The primary challenge with subtitles on devices like a Roku stick is that they may not always display, likely due to limited resources for file formats other than .srt, based on our tests. Farewell to the .ass file format.
Using .srt files should work well, and these can be obtained from various sources. We prefer to use Subscene for several movies.
How to add subtitles to Jellyfin

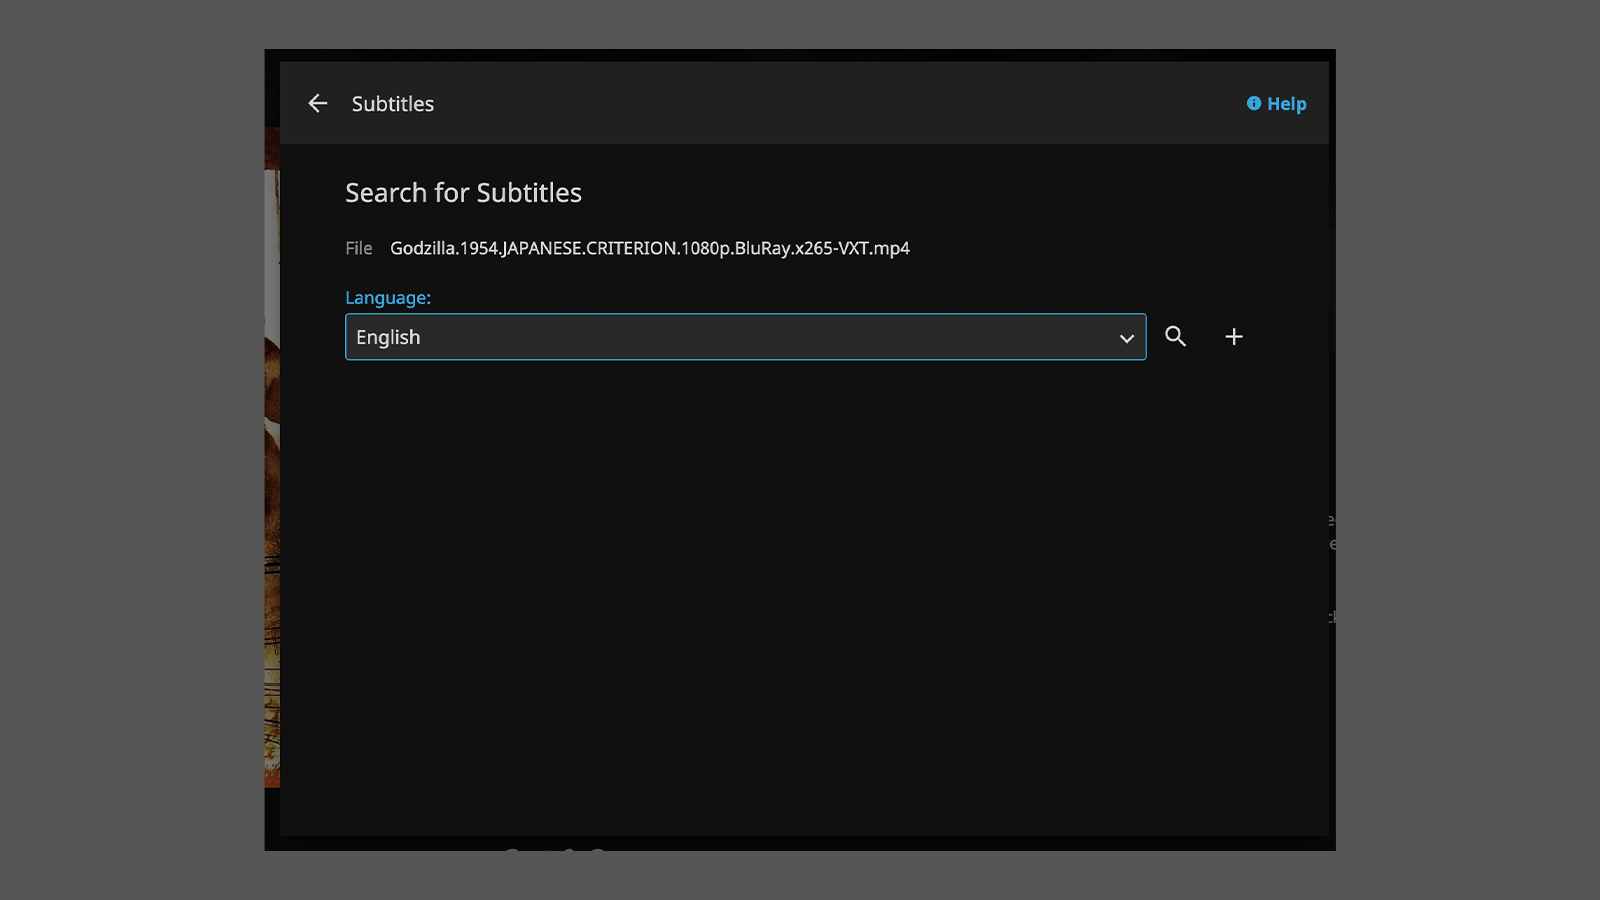

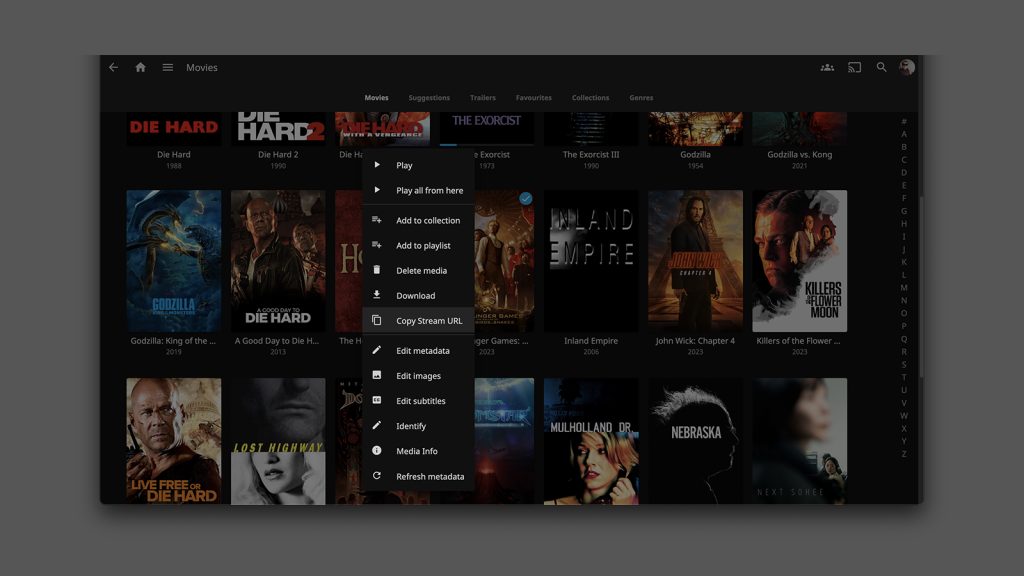
To add subtitles, simply go to the movie, click on the three-dot menu, and select “Edit Subtitles”. This will open a menu where you can either search for subtitles online or upload your own.
How to turn on subtitles on Roku Jellyfin
Press the OK button while the movie is playing and the options will be up in the top left. Navigate with the arrow keys and you’ll be able to choose the subtitle file.
Don’t add subtitles while the movie is playing. You’ll need to reload the app to turn them on.
Hardware acceleration
Using hardware acceleration may not always be essential, particularly when working with lower-quality 1080p files. The Geekom PC we utilized had no trouble playing long movies without requiring any acceleration.
However, for larger video files, and individuals interested in transcoding a 4K movie over the network, hardware acceleration will be beneficial. Generally, any device manufactured after 2016 should be able to handle a range of codecs. To utilize the new AV1 codec, an RTX 40-series or similar GPU is necessary for support.
Configure any other options, save and it’ll be active.
How to access Jellyfin from outside your home network

Now, onto the more intricate part. You will need to have your own domain for this. Free domains can be obtained from websites like Freenom. However, we do suggest opting for a paid provider for better service.
Once you've obtained a domain, we also need to register for Cloudflare. Cloudflare offers a system known as Tunnelling, which effectively bypasses any potential security vulnerabilities in processes such as port forwarding or reverse proxies. While both methods are acceptable, we're not exactly operating a high-security platform here. Our goal is simply to be able to stream Babylon 5 from anywhere in the world, whenever we want. That's not asking too much, is it?
Cloudflare
Cloudflare may appear to require payment, but there is likely a free option available when they request funds. Look for it at the bottom of the page. Keep in mind that this free option is limited to personal use. Follow the sign-up instructions, including entering your domain, to start transferring your nameservers to Cloudflare.
The detailed onscreen instructions provided by Cloudflare may still be difficult to follow if you are unable to locate your nameservers. These can be found in your domain registrar’s admin panel, rather than in a platform like CPanel. Each registrar will have the nameservers located under an information panel typically labeled as DNS settings.
After transferring your nameservers to Cloudflare, it will take some time for the changes to take effect. In our experience, it only took five minutes, but the initial implementation took over a day before Cloudflare was ready. It's important to be patient and return to this process once the changes have been activated.
Nameservers on old domains
If you’re using an old domain and the records are still there, it’s best to delete them. Cloudflare provides a way to do this, although we discovered that CPanel was holding onto them. While it’s not mandatory to delete the records, it can be beneficial. In any case, we won’t require any records since this isn’t a standard access to the website.
With everything now set up, we can proceed to create our first tunnel. Accessing this through Zero Trust was not available initially, so we had to navigate through the Access menu, which informed us that it was deprecated and redirected us to Zero Trust.
In Zero Trust, you will be prompted to sign up as a "team" and select the free option. After completing this step, follow any additional on-screen instructions to initiate the process.
In the Access menu, find Tunnels
Choose Create Tunnel
It’ll ask for a name, and then send you to the connector panel
We’re going to choose Docker (but choose and follow instructions for any operating system you’re running Jellyfin through)
Copy the script
SSH back into your server via a terminal
Run the script
You’ll notice on the configuration page, that it’ll automatically refresh once it’s picked up a connection
Type in your in-home IP to Jellyfin (this will be 192.168.x.xxx or similar)
If you’re running it locally, just use localhost:8096
Make sure to set it to HTTP or it’ll fail
Don’t worry about this, Cloudflare will ensure things are protected
This is found under SSL/TLS settings and under Overview.
Cloudflare Tunnel disconnects when I close terminal or command prompt
Now the weird thing is that if we close those terminal windows, it’ll shut down our tunnel. We don’t want that.
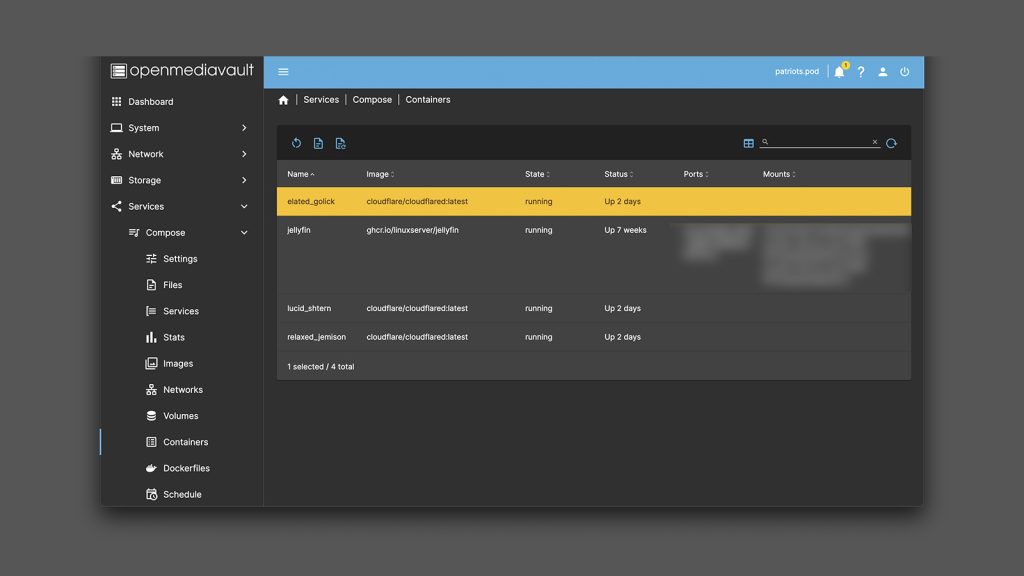
Return to your OpenMediaVault or Docker container manager. In OMV, navigate to Compose > Containers. Look for the new container with Cloudflare and select it. If it's not running, click "restart" on the top bar. This will reboot the container and restore your connection without the need to keep terminals open all day.
That's all there is to it. Enjoy, watch a movie, and catch up on a unique show that you haven't been able to find on streaming services.
If you click on a product link on this page we may earn a small affiliate commission.


