
Securing Your Windows System Drive: A Guide to Encrypting with VeraCrypt
Encrypt your Windows system drive effortlessly with VeraCrypt, a free and reliable encryption tool Safeguard your data and privacy with ease
Key Takeaways
VeraCrypt is a free and open-source tool that enables full-disk encryption on Windows PCs, providing protection for sensitive data against theft or unauthorized access.
Setting up VeraCrypt is a simple process that guides users through secure password practices and encryption. It seamlessly encrypts data in the background while allowing uninterrupted use of the computer. Furthermore, VeraCrypt provides advanced security features such as creating hidden operating systems for enhanced protection and plausible deniability.
Certain Windows 10 devices come with "Device Encryption" pre-installed, while other computers may require an additional payment of $99 to access BitLocker for complete disk encryption on Windows Pro. Alternatively, if you prefer not to pay, you can utilize the free and open-source VeraCrypt software to achieve full-disk encryption on any Windows version.
This article on Cybersecurity Awareness Week is sponsored by Incogni.
What is VeraCrypt?
VeraCrypt is a tool that allows you to implement full-disk encryption on any Windows PC, and the best part is that it's completely free and open-source. Not only does it work seamlessly on both Windows 10 and Windows 11, but it is also compatible with earlier versions of Windows.
The usage of it is not complicated either. Once it is set up, all you need to do is enter your encryption password when booting your PC. After that, you can use your computer as usual. VeraCrypt takes care of the encryption in the background, making everything happen transparently. Additionally, it offers the convenience of creating encrypted file containers, although our focus here is on encrypting your system drive.
VeraCrypt is a project that builds upon the source code of the discontinued TrueCrypt software. It includes various bug fixes and supports modern PCs with EFI system partitions, which is the configuration used by most Windows 10 PCs and all Windows 11 PCs.
What is Full-Disk Encryption?
Encryption scrambles files into random-looking gibberish using special kinds of mathematical algorithms, ensuring that no one can read them without a special key or password.
Full-disk encryption ensures that your entire drive is secure. This means that even if someone is able to get their hands on your physical hard drive, they will still require your password (or key file) to access the contents of the drive. Please note that this protection does not guard against malware attacking your PC while it is operational; rather, it prevents unauthorized access in the event of theft or an attempt to view your files. Considering the amount of sensitive data typically stored on our computers, it is important to safeguard it similar to how you would protect a social security number.
Why Use VeraCrypt to Encrypt Your Drive?
One significant benefit of VeraCrypt is its compatibility with nearly all computer systems and its cost-free nature. While BitLocker serves as Windows' encryption software (usually not free), macOS features its own integrated drive encryption, and Linux boasts a range of available options, VeraCrypt can effortlessly operate on any of these platforms. It is even compatible with devices equipped with ARM-based processors like the Raspberry Pi.
VeraCrypt also does a good job of guiding you through the process and take the appropriate precautions.
How to Install VeraCrypt and Encrypt your System Drive
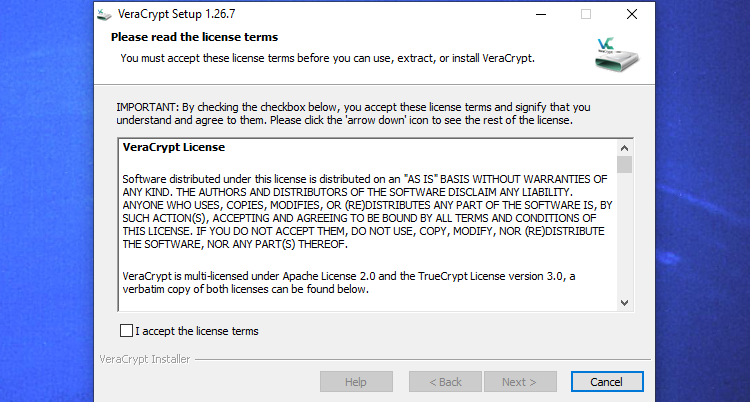
Download VeraCrypt to begin. Install the software by running the installer and selecting the "Install" option. You can accept all default settings during the installation process - just continue clicking until VeraCrypt is successfully installed on your computer.
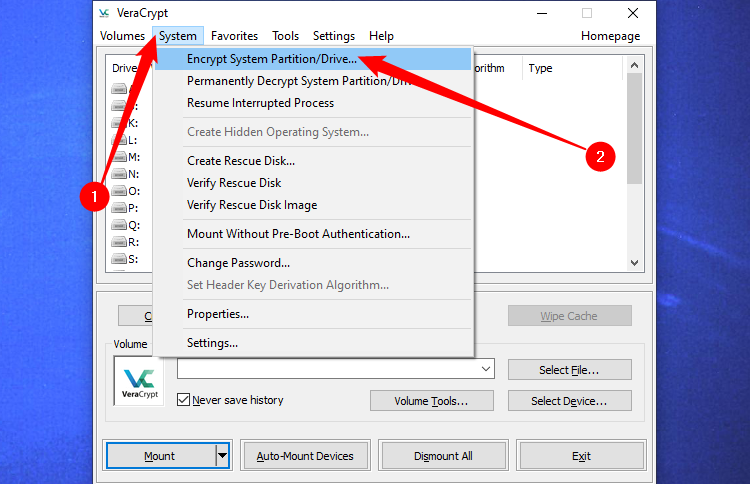
Once VeraCrypt is installed, open your Start menu and launch the "VeraCrypt" shortcut.
Click System > Encrypt System Partition/Drive in the VeraCrypt window to get started.
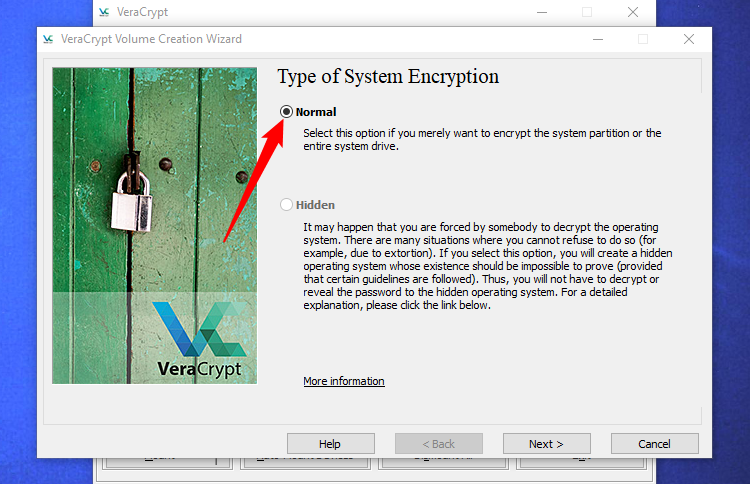
You'll be asked whether you want to use "Normal" or "Hidden" system encryption.
The Normal option allows for normal encryption of the system partition or drive. Upon computer boot, an encryption password must be provided in order to access the encrypted content, ensuring that files remain inaccessible without the correct password.
On the other hand, the Hidden option enables the creation of a VeraCrypt volume, where both a hidden "real" operating system and a "decoy" operating system coexist. By entering the real password during PC boot, users can access the hidden operating system, whereas entering the decoy operating system password will boot the decoy system instead. This feature proves useful in situations where you are compelled to grant access to your encrypted drive, as providing the password to the decoy operating system will not reveal the presence of a hidden operating system.
In regards to encryption, utilizing "Normal" encryption ensures the same level of security for your files. A "Hidden" volume only proves beneficial if you are compelled to reveal your password and wish to deny any knowledge of additional files.
If you are uncertain about your preference, opt for "Normal" and proceed. In this guide, we will walk you through the steps of creating a system partition with normal encryption, as this is the choice favored by most individuals. For further details regarding hidden operating systems, refer to VeraCrypt's documentation.
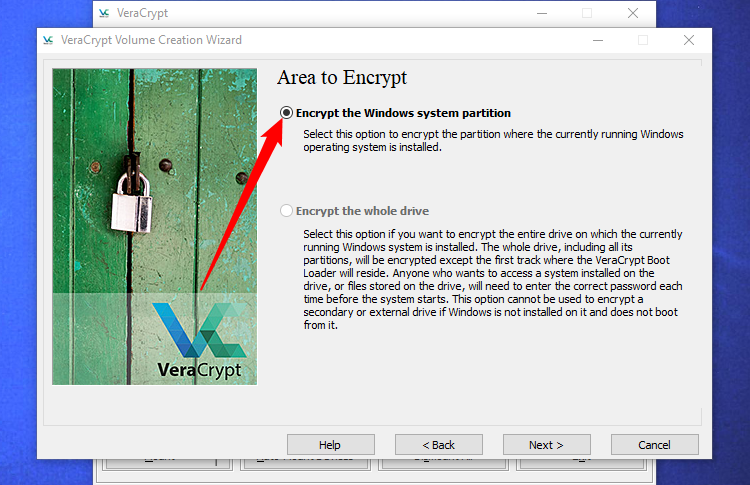
You can choose to either "Encrypt the Windows system partition" or "Encrypt the whole drive". It's up to you which option you prefer.
If the drive contains only the Windows system partition, the options available will be similar. If you prefer to encrypt just the Windows system partition and leave the other partitions untouched, select "Encrypt the Windows system partition".
In case you have multiple partitions that store sensitive data, such as a system partition at C: and a files partition at D:, choose "Encrypt the whole drive" to ensure that all your Windows partitions are encrypted.
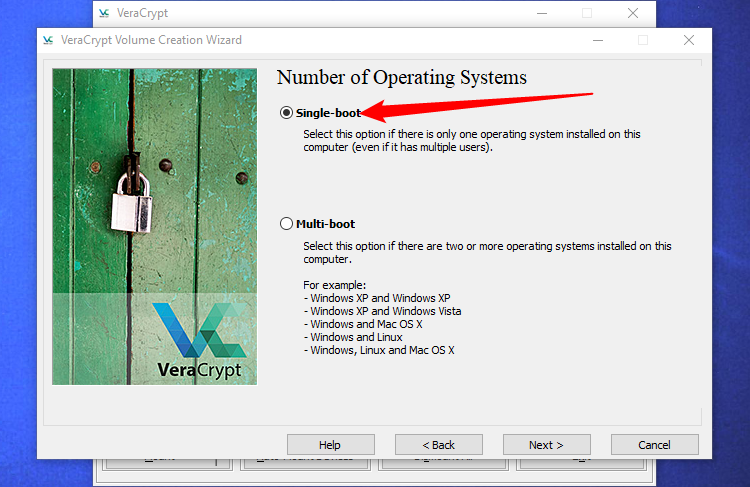
When setting up VeraCrypt, you will be prompted to select the number of operating systems installed on your PC. If you have only one operating system installed, such as Windows or Linux, please choose the "Single-boot" option. However, if you have multiple operating systems installed and you are presented with a boot menu when starting your computer, please select the "Multi-boot" option.
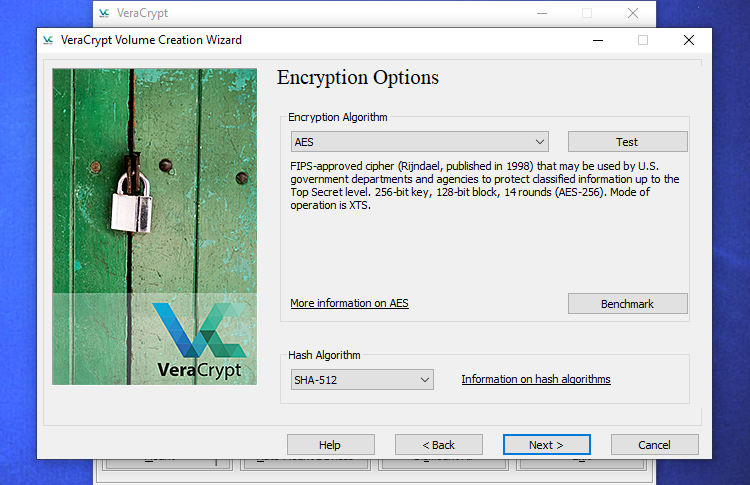
Once you reach this step, you will have the option to select the desired encryption type. Although there are various choices available, we suggest sticking to the default preferences, which include the "AES" encryption and the "SHA-256" hash algorithm. These two options are reputable and reliable encryption schemes.
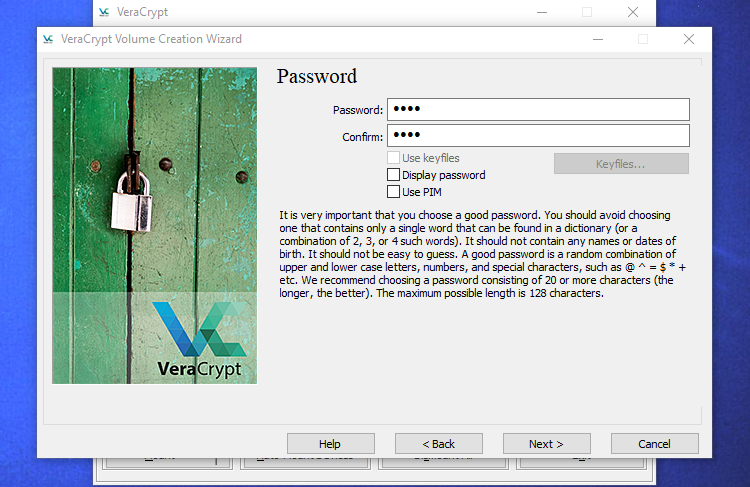
After that, you will be prompted to input a password. It is of utmost importance, as highlighted by VeraCrypt's wizard, to select a strong password. Opting for a password that is easy to guess or too simple will leave your encryption susceptible to brute-force attacks.
The wizard suggests selecting a password consisting of 20 or more characters. You have the option to enter a password with a maximum of 64 characters. An ideal password includes a random assortment of various character types, such as uppercase and lowercase letters, numbers, and symbols. It is essential to remember the password to avoid losing access to your files.
There are a few additional options available, but they are not obligatory. You can ignore these options unless you intend to utilize them.
Enable the use of keyfiles: You have the option to enable the "Use keyfiles" feature by providing specific files that must be available, such as on a USB drive, in order to unlock your drive. In the event that these files are lost, access to your drive will be lost as well.
Unhide password: By selecting this option, the password entered in the password fields will be displayed in plain text in this window. This allows you to verify that the typed password is accurate.
If desired, you can utilize PIM (Personal Iterations Multiplier) in VeraCrypt. By enabling the "Use PIM" checkbox, you can set a higher value which can enhance security against brute force attacks. However, it is important to note that you should remember the number you enter and include it along with your password. Therefore, in addition to your password, you will also need to remember this number. Feel free to select any of these options and proceed by clicking Next.
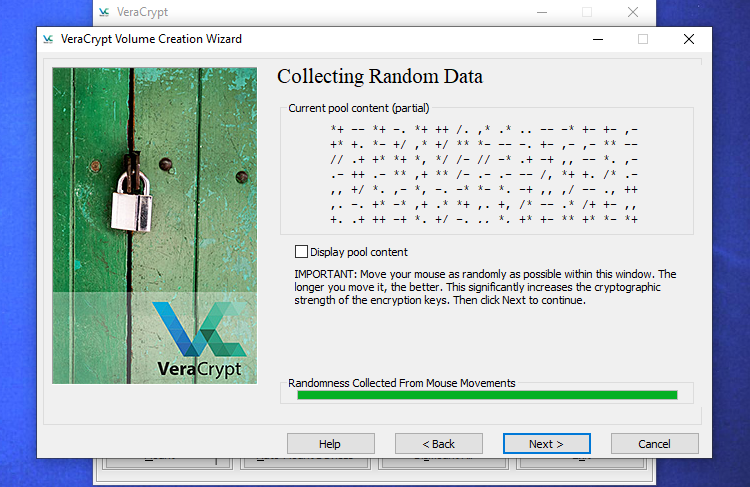
To enhance the security of your encryption keys, VeraCrypt will prompt you to move your mouse randomly within the window. By utilizing these unpredictable mouse movements, the strength of the encryption keys is augmented. Once the meter is completely filled, click on "Next".
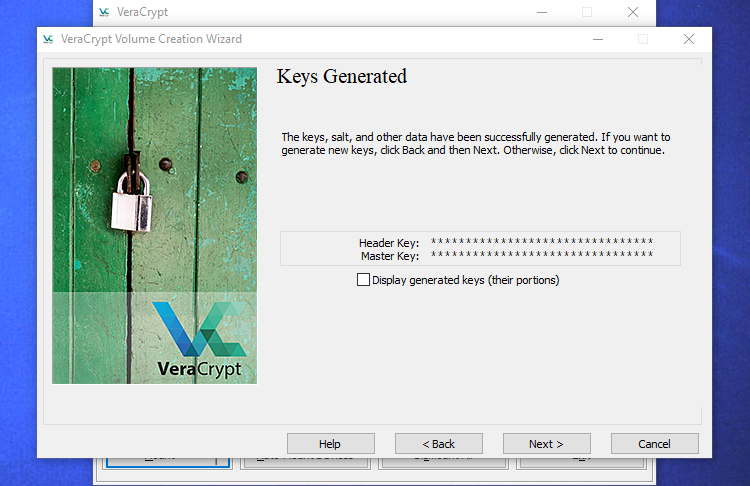
The wizard will inform you it's generated the encryption keys and other data it needs. Click "Next" to continue.
The VeraCrypt wizard will force you to create a VeraCrypt Rescue Disk image before continuing.
In case of bootloader or other data damage, decryption and access to your files can only be achieved by booting from the rescue disk. Additionally, the disk holds a backup image of the initial drive contents, enabling restoration if needed.
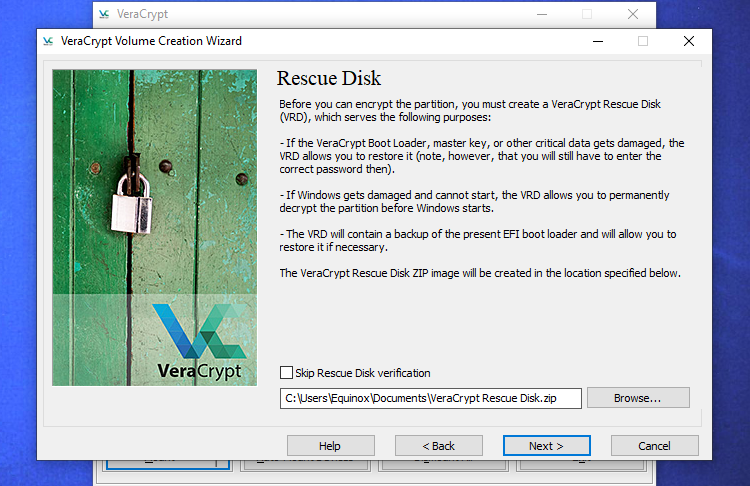
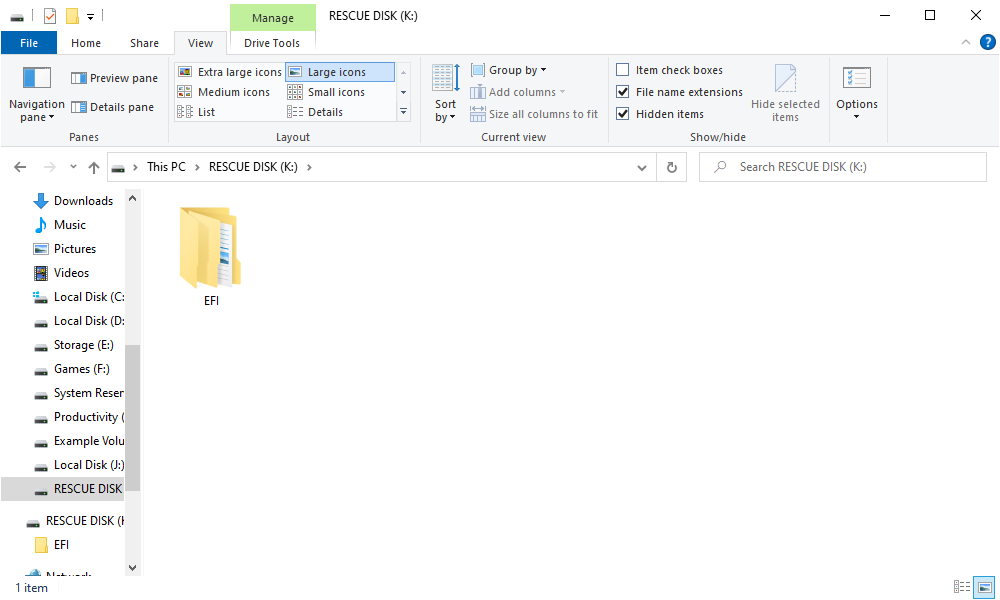
Please note that even with the rescue disk, you will still be required to enter your password. Therefore, it is not a universal key that grants access to all your files. By default, VeraCrypt will generate a rescue disk ZIP file at "C:\Users\NAME\Documents\VeraCrypt Rescue Disk.zip". From this ZIP file, you will need to extract the EFI folder onto a flash drive or burn it to a disk. To verify that you have completed this step correctly, VeraCrypt will prompt you to click "Next" several times. Remember to create a backup of the rescue disk so that you can access your files in case of any issues. It is important to note that you cannot use the same VeraCrypt rescue disk on multiple computers; each PC requires its own unique rescue disk. For more details on VeraCrypt rescue disks, please refer to the documentation provided by VeraCrypt.
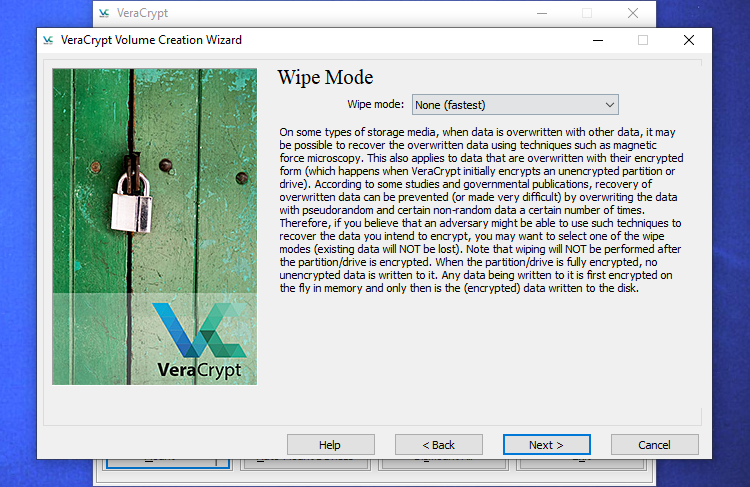
Next, you'll be asked for the "wipe mode" you want to use.
To protect your sensitive data from potential examination and recovery, it is advisable to choose the "1-pass (random data)" option. This will overwrite your unencrypted data with random data, making it extremely challenging or even impossible to retrieve.
Alternatively, if you are not worried about this scenario, you can opt for the "None (fastest)" option. This will ensure a faster encryption process as the drive won't be wiped. Keep in mind that the duration of the encryption process will increase with a higher number of passes.
This setting only applies to the initial setup process. After your drive is encrypted, VeraCrypt won't need to overwrite any encrypted data to protect against data recovery.
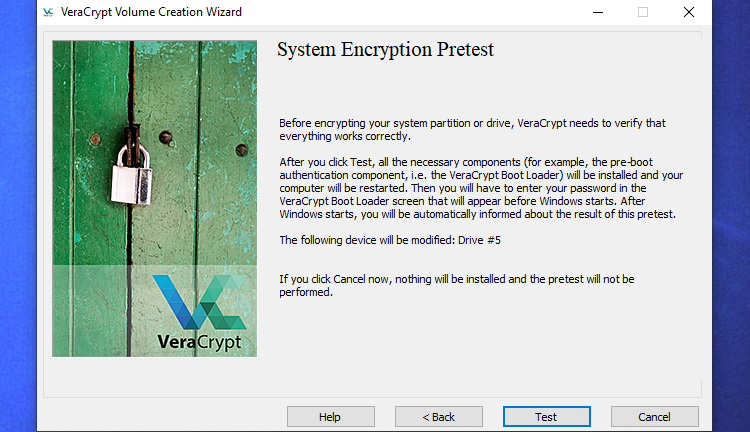
Before encrypting your drive, VeraCrypt will perform a verification process to ensure everything is functioning properly. To initiate this, click on the "Test" option. Subsequently, VeraCrypt will install its bootloader on your computer and proceed to restart. When your system boots up, you will be prompted to enter your encryption password.
If you encounter issues with starting Windows, VeraCrypt offers guidance on troubleshooting. To begin, restart your computer and, at the VeraCrypt bootloader screen, press the "Esc" key on your keyboard. This will prompt Windows to initiate and present you with the option to uninstall the VeraCrypt bootloader.
If the previous step does not resolve the problem, proceed by inserting the VeraCrypt rescue disk into your computer and booting from it. Within the rescue disk interface, navigate to Repair Options and select Restore Original System Loader. After completing these steps, restart your computer.
Click "OK" and then click "Yes" to restart your PC.

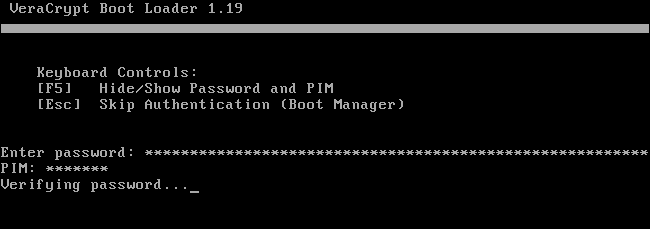
When your PC starts up, you will be prompted to enter your VeraCrypt encryption password. If you haven't set a custom PIM number, simply press "Enter" at the PIM prompt to accept the default.
Please sign into your PC when the regular welcome screen is displayed. You will then see a window stating "Pretest Completed".
VeraCrypt strongly recommends that you create backup copies of the files you are encrypting. In the event of a system power loss or crash, some of your files may become permanently corrupted. It is crucial to have backup copies of your important files, especially when encrypting your system drive. If you need to back up your files, simply click the "Defer" button and proceed with the backup process. You can then reopen VeraCrypt at a later time and click on System > Resume Interrupted Process to continue with the encryption procedure.
Click the "Encrypt" button to actually encrypt your PC's system drive.

VeraCrypt will inform you about the appropriate circumstances to utilize the rescue disk. Following that, it will initiate the encryption procedure for your hard drive. Once the process concludes, your drive will be encrypted, necessitating the entry of your password during each PC boot.
If you decide you want to remove the system encryption in the future, launch the VeraCrypt interface and click System > Permanently Decrypt System Partition/Drive.


