
Mastering the Art of Effortless Photo Transfer: Unleashing the iPhone-to-PC Magic!
Effortlessly transfer photos from your iPhone to a PC using various methods Explore options like File Explorer, Windows Photos, and iCloud Photo Library to seamlessly sync and import your precious memories
Key Takeaways
To transfer photos from your iPhone to a Windows PC, connect your iPhone to the PC using a USB cable. When prompted, tap either "Trust" or "Allow" to authorize the photo transfer. After that, navigate to File Explorer on your PC and access your iPhone to begin transferring videos and images.
To transfer photos and videos from an iPhone to a Windows PC, you do not require any specialized software or even iTunes. Simply utilize the Lightning-to-USB cable used for charging. It is worth mentioning that Apple's iTunes software does not offer a native method for copying photos from your iPhone to your PC. Its photo sync feature is solely designed for transferring photos from your PC to your iPhone.
Use File Explorer or Windows Explorer
Connect your iPhone or iPad to your computer using the included Lightning-to-USB or USB-C cable to get started. This is the same cable you use for charging your phone.
The initial connection between your computer and

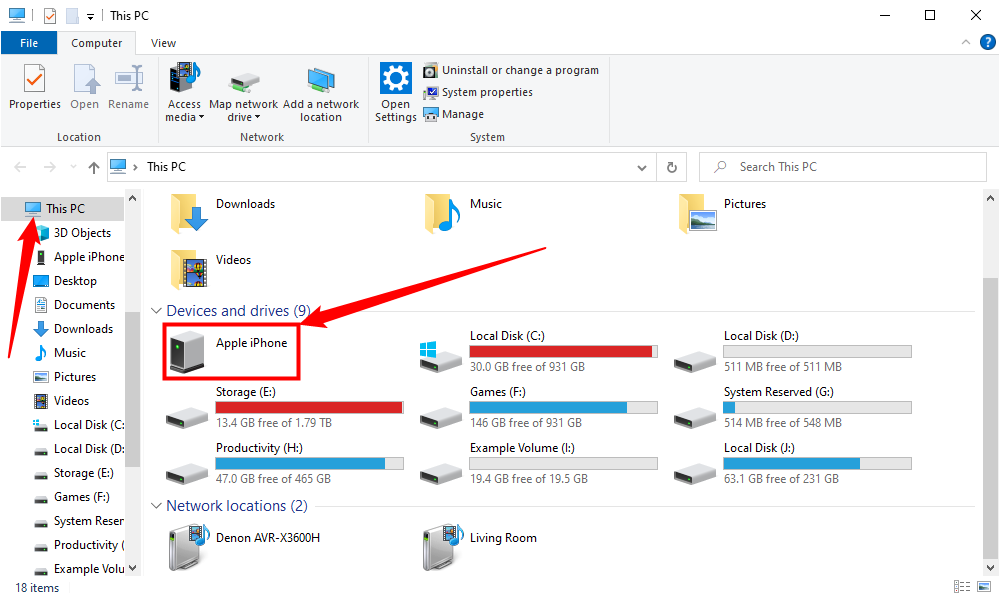
Your iPhone will be displayed as a new device in File Explorer on Windows 10 or Windows 11 under "This PC." Simply navigate to that location and double-click on it.
If you cannot find your iPhone listed under This PC or Computer, try unplugging it, then plugging it back in, and make sure it is unlocked.
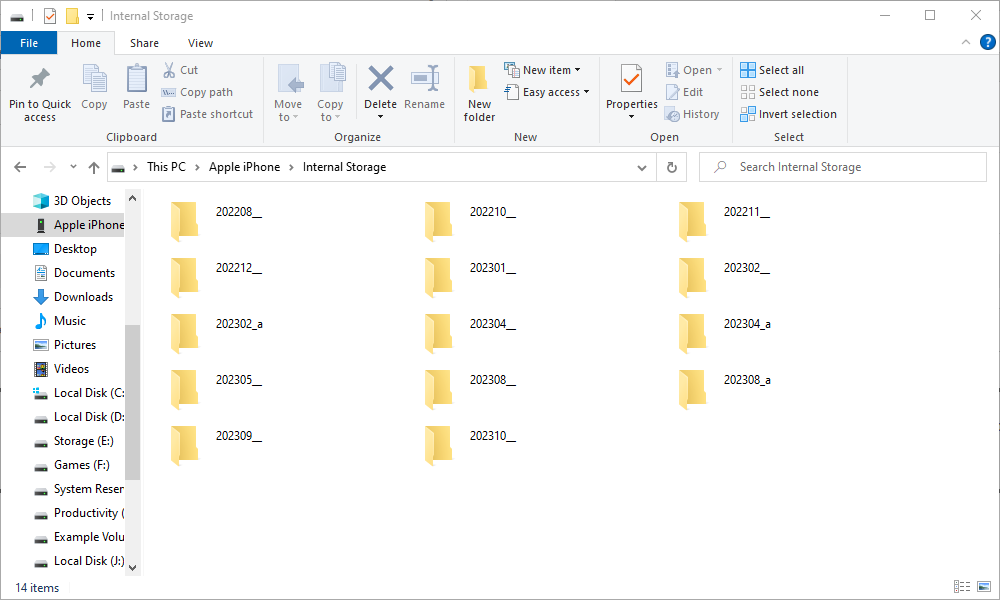
On modern versions of iOS you'll see a number of folders with numerical names that contain your photos.
On previous versions of iOS, a folder called DCIM would be displayed, housing your photos and videos in a 100APPLE folder. In cases with a large quantity of photos and videos, supplementary folders such as 101APPLE, 102APPLE, and so on, would also be visible. Additionally, if you opt to store your photos in iCloud, you will encounter folders labeled 100Cloud, 101Cloud, and so forth.
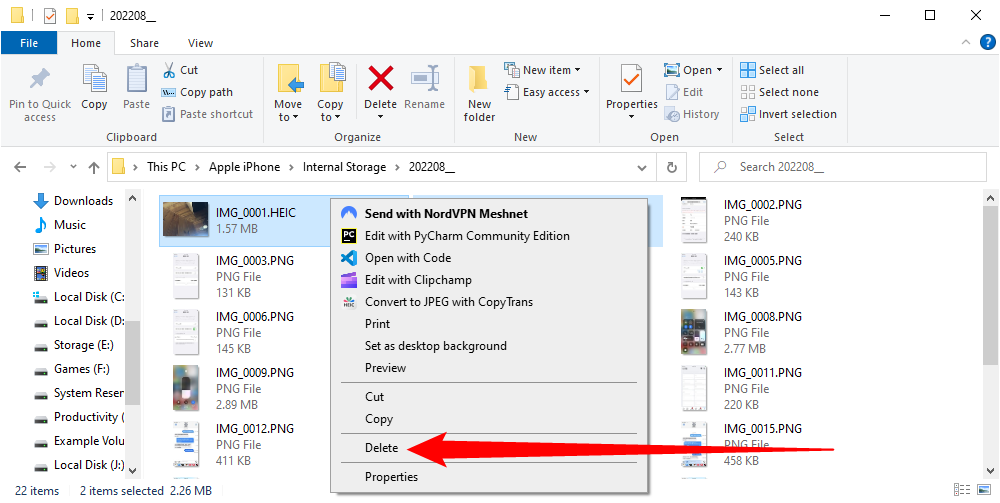
Photos on your iPhone are typically saved as .JPG or .HEIC files, while videos are stored as .MOV files and screenshots as .PNG files. You can easily view these files by double-clicking on them directly from your iPhone. Additionally, you have the option to transfer them to your PC using drag-and-drop or copy-and-paste methods. Keep in mind that if you delete any item from the DCIM folder, it will also be removed from your iPhone's storage.
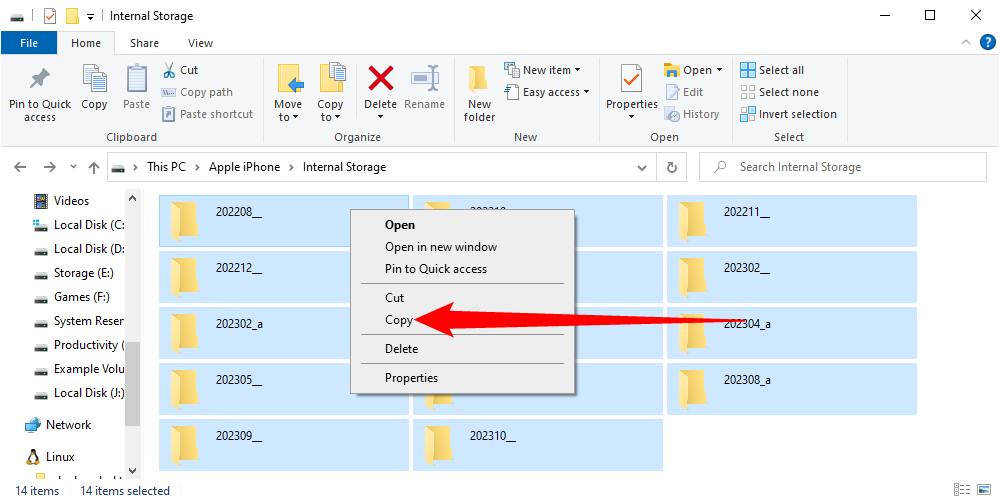
To import all contents from your iPhone, you have two options. Firstly, you can simply copy-and-paste or drag-and-drop the 100APPLE folder (and any other folders) located inside the DCIM folder. Alternatively, you can choose to transfer the entire DCIM folder. However, please remember to copy the items rather than moving them if you wish to retain them on your phone.
In case you come across files having the .HEIC file extension, it signifies that your iPhone captures photos in the HEIF image format. This is the default setting starting from iOS 11 and beyond. However, in order to view these files on Windows, you must install the HEIF image extension.
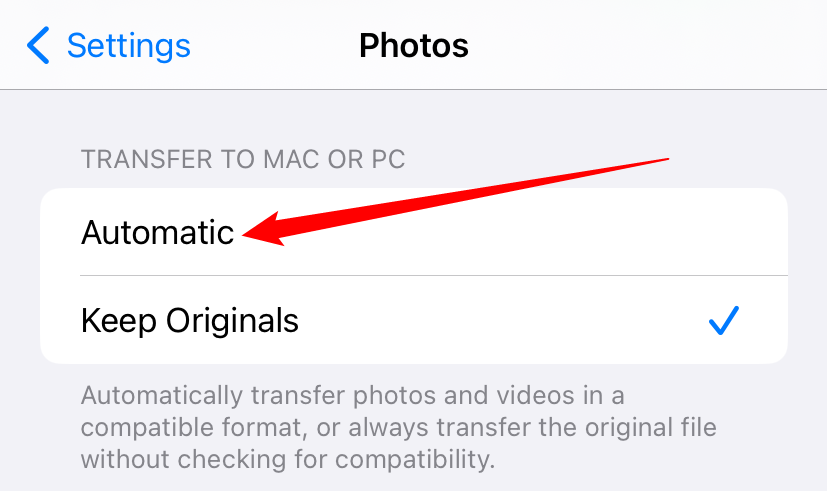
Instead, disabling HEIF on your iPhone is not necessary to enhance compatibility with these photos. To achieve this, navigate to Settings > Photos on your iPhone, scroll down, and select "Automatic" under Transfer to Mac or PC. By doing so, your iPhone will automatically convert the photos to .JPEG files upon importing them to a PC. Alternatively, if you choose "Keep Originals," your iPhone will provide you with the original .HEIC files.
Import Photos With Windows Photos (or Other Applications)
Any application that can import photos from a digital camera or USB device is capable of importing photos from an iPhone or iPad as well. The iPhone functions like any other digital camera to PC software since it exposes media folders. To establish a connection, simply use a Lightning-to-USB or USB-C cable (depending on your iPhone model) and select "Trust" on your phone when prompted.
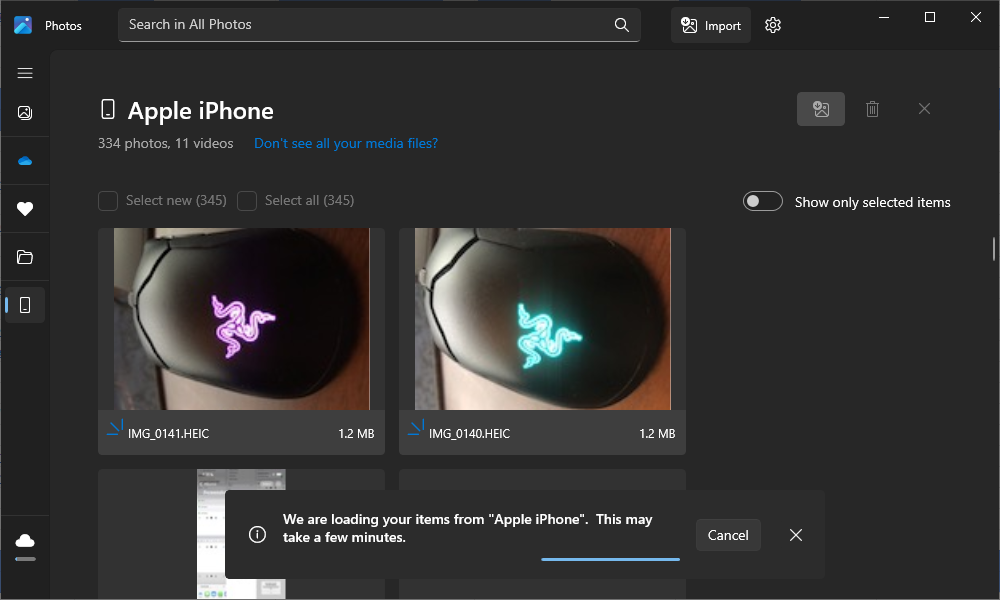
For instance, you can utilize the Photos application provided with Windows 10 or Windows 11. By clicking the "Import" button on the toolbar, you can enjoy a seamless import experience. The photos imported using this method are stored in your Pictures folder.
Any other application that has the functionality of "Import From Camera" or "Import From USB" should also be compatible with your iPhone. Several other software programs for managing images and photography also provide this feature.
Sync Your Photos With iCloud Photo Library (or Other Services)
In addition to connecting your iPhone to your PC via a cable, you have the option to utilize online photo synchronization services. These services not only facilitate the uploading of photos from your iPhone to the cloud, but also enable the downloading of these photos from the cloud to your PC. This results in having a duplicate copy stored online as well as one on your PC.
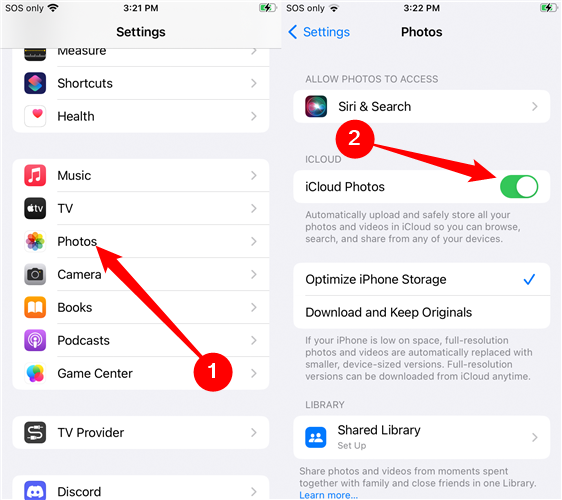
To enable iCloud Photo Library on your iPhone, simply navigate to Settings > Photos and activate the "iCloud Photo Library" option, if it isn't already enabled. Once enabled, your iPhone will automatically upload your photos to your Apple iCloud account.
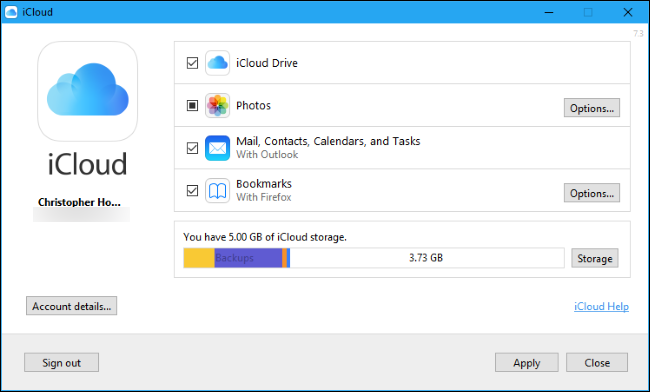
After installing iCloud for Windows, you can sign in using your Apple ID and activate the "Photos" feature in the iCloud control panel. By clicking the "Options" button, you can manage the storage location of your photos on your PC and customize additional preferences.
Your newly captured photos will be seamlessly synced to your iCloud Photo Library and subsequently downloaded to your computer through the iCloud software.
For synchronizing photos to your PC, there are alternative applications available. Apps like Dropbox, Google Photos, and Microsoft OneDrive offer automatic photo-upload features for iPhone. Additionally, Windows users can utilize tools like Dropbox, Google Backup and Sync, and OneDrive to automatically download these photos to their PC.
Bear in mind that by using these services, the folders are being synchronized. This means that any item you remove from a synchronized folder on your PC will also be deleted on your phone.


