
Mastering Disk Space Management: Effortlessly Monitor and Optimize Disk Usage on Linux Terminal
Master Linux's df and du commands to effortlessly monitor and manage your disk space Discover the total, available, and used disk space, and swiftly identify what's consuming your valuable storage Level up your Linux skills today!
Key Takeaways
The df command displays the available and used disk space for all mounted filesystems, while du shows the size of directories and sub-directories.
You can customize the output of df and du using options such as -h, -B, -i, and -t to explore disk space usage in more detail and align it with your requirements. Both df and du commands provide information on disk space usage within the Bash shell, which is commonly used on Linux, macOS, and other Unix-like operating systems. By using these commands, you can easily identify the factors consuming your system's storage.
View the Total, Available, and Used Disk Space on Linux
Bash includes two commands that are quite helpful when it comes to disk space. For determining the amount of available and used disk space, the df command (disk filesystems, occasionally referred to as disk free) is used. On the other hand, the du command (disk usage) is utilized to identify the specific files or directories that consume the used disk space.
Enter df in a Bash terminal window and hit enter to begin. You will be greeted with a plethora of output resembling the screenshot provided. By using df without any additional options, you will be presented with information regarding the available and utilized space for all mounted filesystems. Initially, it may appear daunting, but it is actually quite simple to comprehend.
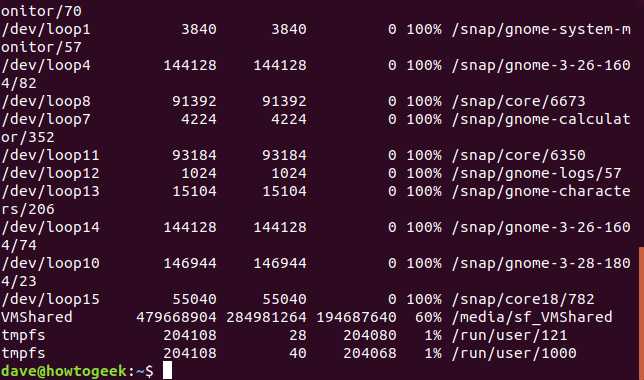
Each line of the display is made up of six columns.
Fileystem: The name of this filesystem.
1K-Blocks: The number of 1K blocks that are available on this filesystem.
Used: The number of 1K blocks that have been used on this file system.
Available: The number of 1K blocks that are unused on this file system.
Use%: The amount of space used in this file system given as a percentage.
File: The filesystem name, if specified on the command line.
Mounted on: The mount point of the filesystem.
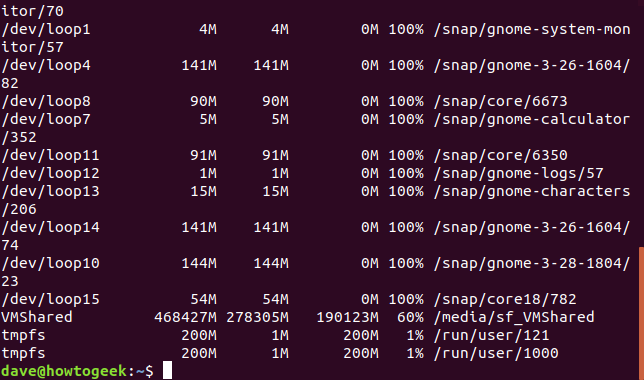
To display more meaningful output, you can utilize the -B (block size) option to replace the 1K block counts. Simply enter the command "df -B" followed by a letter from the options list: K, M, G, T, P, E, Z, or Y. These letters correspond to the kilo, mega, giga, tera, peta, exa, zeta, and yotta values in the 1024 scale.
For example, to see the disk usage figures in megabytes, you would use the following command. Note there is no space between the B and M.
df -BM
By using the -h (human readable) option, df determines the most suitable unit for the size of each filesystem. In the following output, it is evident that there are filesystems ranging from gigabyte to kilobyte sizes.
df -h

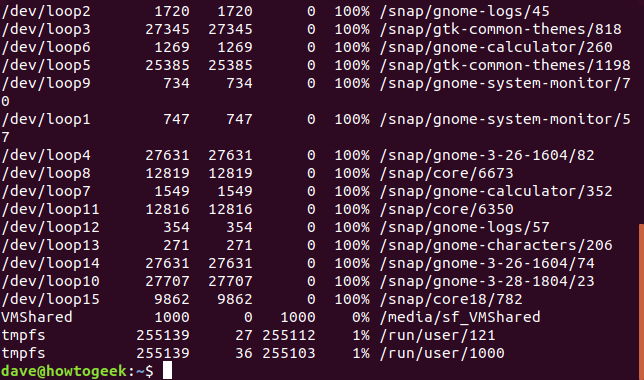
To view the information displayed in the form of inodes, utilize the -i (inodes) option. Inodes serve as data structures employed by Linux filesystems for the purpose of outlining files and storing metadata associated with them. In Linux, inodes preserve data like the file's name, modification date, location on the hard drive, and other relevant details for every file and directory. Although most individuals may not find this information valuable, system administrators occasionally need to refer to such specifics.
By default, df provides information on all mounted file systems, which can result in a cluttered display with a large amount of output. For instance, the lists may include pseudo file systems like /dev/loop that allow files to be mounted as partitions. If you are using the new Ubuntu snap method to install applications, you may have many of these pseudo file systems. However, since they are not actual file systems, the available space on them will always be 0. Therefore, there is no need to include them in the output.
We can specify to df that certain filesystem types should be excluded. To achieve this, we must identify the filesystem type we want to exclude. By using the -T (print-type) option, we can obtain this information as it instructs df to display the filesystem type in the output.
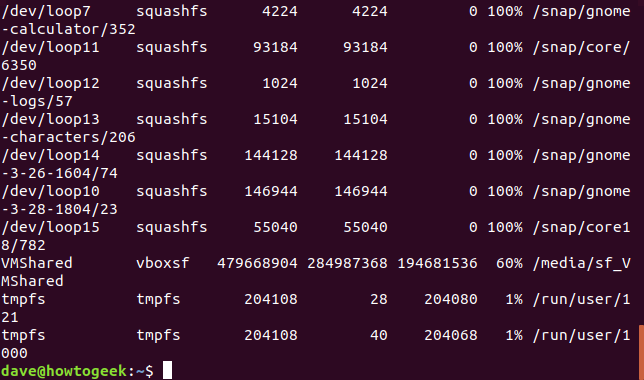
The /dev/loop entries are all squashfs filesystems. We can exclude them with the following command:
df -x squashfs
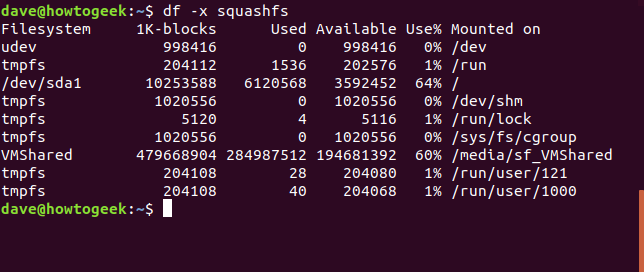
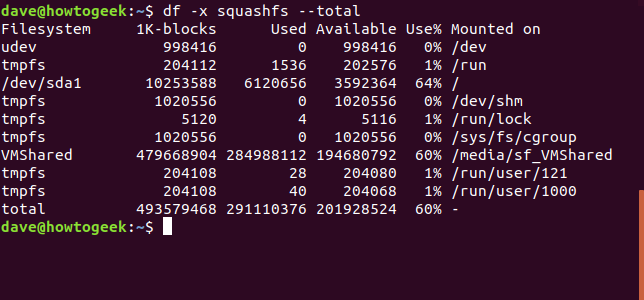
That gives us a more manageable output. To get a total, we can add the --total option.
df -x squashfs --total
We can ask df to only include filesystems of a particular type, by using the -t (type) option.
df -t ext4

To view the sizes of a set of filesystems, we can specify them by their names. In Linux, the drive names are in alphabetical order, starting with /dev/sda for the first drive, /dev/sdb for the second drive, and so on. The partitions are numbered accordingly. Hence, /dev/sda1 refers to the first partition on the drive /dev/sda. To obtain information about a specific filesystem, we use the "df" command followed by the name of the filesystem as a command parameter. Now, let's examine the first partition of the initial hard drive.

Please keep in mind that wildcards can be used in the filesystem name. The asterisk (*) represents any set of characters, while the question mark (?) stands for any single character. To browse through all partitions on the initial drive, you can utilize the following syntax:
df /dev/sda*
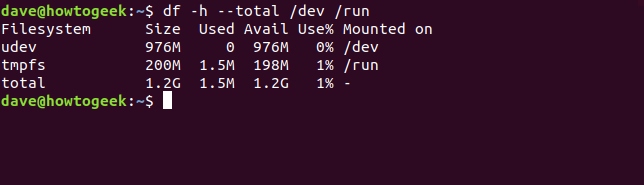
We can ask df to report on a set of named filesystems. He we are requesting the sizes of the /dev and /run filesystems, and we'd like a total.
df -h --total /dev /run
To customize the display further, we can specify the columns to include by using the --output option. Provide a comma-separated list of the desired column names, ensuring there are no spaces in the list.
fstype: The type of the filesystem.
itotal: The size of the filesystem in inodes.
iused: The space used on the filesystem in inodes.
iavail: The available space on the filesystem in inodes.
ipcent: The percentage of used space on the filesystem in inodes, as a percentage.
size: The size of the filesystem, by default in 1K blocks.
used: The space used on the filesystem, by default in 1K blocks.
avail: The available space on the filesystem, by default in 1K blocks.
pcent: The percentage of used space on the filesystem in inodes, by default in 1K blocks.
file: The filesystem name if specified on the command line.
Please use dfto to show information about the first partition on the first drive, using human-readable numbers. Include the columns for source, file system type, size, used space, available space, and percentage used.
df -h /dev/sda1 --output=source,fstype,size,used,avail,pcent

To create an alias for long commands, we can use the following shorter command and press Enter:
alias dfc="df -h /dev/sda1 --output=source,fstype,size,used,avail,pcent"
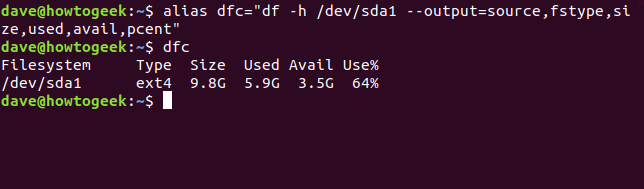
Typing dfc and pressing enter will have the same effect as typing in the long command. To make this alias permanent add it to your .bashrc or .bash_aliasesfile.
We have been exploring methods to enhance the output generated by df to align with your specific needs. If you prefer a comprehensive approach and desire df to provide all the available information, you can use the -a (all) option along with the --output option as demonstrated below. The -a option instructs df to include every filesystem, and by not specifying a comma-separated list of columns with the --output option, df will encompass all columns.
df -a --output

Piping the output from df through the less command is a convenient way to review the large amount of output this can produce.
df -a --output | less
Find Out What's Taking Up the Used Disk Space
Let's do some investigation and find out what's taking up space on this PC. We'll start with one of our df commands.
df -h -t ext4

The first partition of the initial hard drive is utilizing 78% of its disk space. To identify the folders that contain the largest amount of data, we can utilize the du command. Executing the du command without any options will present a comprehensive list of directories and sub-directories located within the directory where the du command was initiated. However, if this command is executed from your home folder, the resulting listing will be excessively lengthy.
du

The output format is straightforward, displaying the size and name of each directory on separate lines. By default, the size is presented in 1K blocks. To modify the block size, employ the -B option with a corresponding letter from the list of K, M, G, T, P, E, Z, and Y, as demonstrated earlier in the df example. For instance, to utilize 1M blocks, execute the following command:
du -BM
Just like df, du has a human-readable option, -h, which uses a range of block sizes according to the size of each directory.
du -h

The "-s" option provides a total for each directory, excluding the display of sub-directories. The below command instructs "du" to present a summary of information, using human-readable numbers, for all directories (*) beneath the current working directory.
Command: du -h -s *
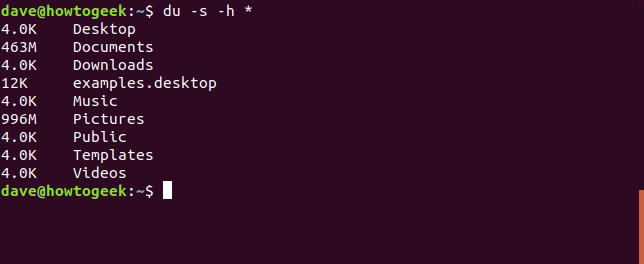
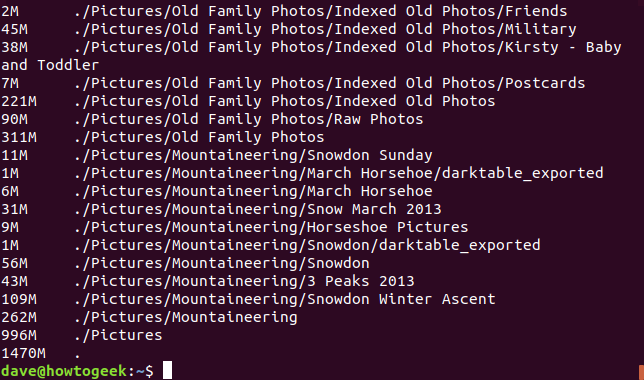
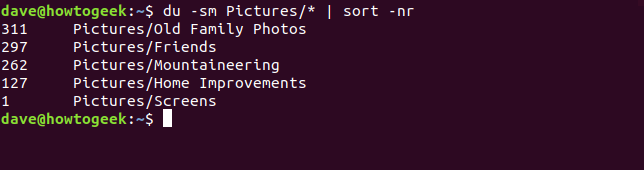
The Picture folder holds the most data by far. We can ask du to sort the folders in size from largest to smallest.
du -sm Pictures/* | sort -nr
By improving the data provided by the df and du commands, it becomes simpler to determine the amount of utilized hard disk space and identify its contents. This enables informed decision-making regarding transferring data to alternative storage, incorporating an additional hard drive, or removing unnecessary data.
These commands offer a wide range of options. While we have described the most valuable ones here, you can consult the complete list of options for the df command and the du command in the Linux man pages.


