Master Your Git Version: The Ultimate Guide to Checking and Updating

Learn how to effortlessly check and upgrade your Git version on Windows, Mac, and Linux to stay up-to-date with the latest advancements in Git technology
Key Takeaways
You can check your Git version on any operating system by running "git --version" in a Terminal window or other command-line interface.
Updating Git on Windows depends on the current version you have. For versions 2.14.2 to 2.16.1, use "git update". For later versions, use "git update-git-for-windows".
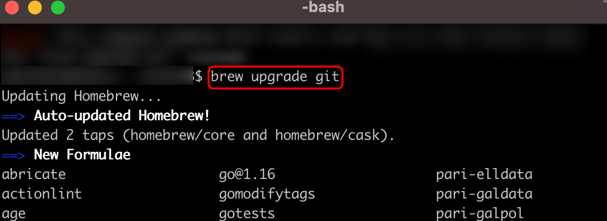
On Mac, update Git by using Homebrew in Terminal with the command "brew upgrade git". Alternatively, you can download the latest installer from Git's download portal.
Linux automatically updates Git with system updates.
Check Which Version of Git You're Using
Ensuring that your Git installation is always up to date is crucial in order to benefit from the latest enhancements, bug fixes, and additional features. In the following steps, you will find out how to determine the currently installed Git version and effectively update it to the most recent release.
To check your Git version, execute the following command after opening Command Prompt (Windows), Terminal (Mac), or the Linux terminal:
git --version
The Git version you're currently using will be returned.
Now that you know which version of Git you're using, you can decide if you want to update it or not.
How to Update Git on Windows
To update Git on Windows, the command you should execute depends on the version of Git you are currently using. For versions ranging from 2.14.2 to 2.16.1, enter the following command in Command Prompt:
git update
If you're using any version after 2.16.1, then you'll need to run this command instead:
git update-git-for-windows
You will either update your Git version or receive a message indicating that you already have the latest version, regardless of which command you choose to use.
When you execute this command, a dialogue box will likely appear on your screen. Do not be alarmed if it states "uninstalling" as this is perfectly normal.
If your version is older than 2.14.2, you will need to acquire the latest installer from the download portal and update your Git version in the same manner as when you initially installed Git.
How to Update Git on Mac
To update Git on your Mac through Terminal, you can utilize Homebrew, a widely used package manager for Mac. If you are already using Git on your Mac, it is highly probable that you already have Homebrew installed. In case you don't, you can install Homebrew by executing the provided command and then following the instructions displayed in Terminal.
/bin/bash -c "$(curl -fsSL https://raw.githubusercontent.com/Homebrew/install/HEAD/install.sh)"
With Homebrew installed, run this command from Terminal to update Git:
brew upgrade git
If you aren't using the latest version of Homebrew, then Homebrew will update first. Once finished, Git will update.
Alternatively, you can go to Git's download portal and get the latest installer.
How to Update Git on Linux
If you use Git on Linux, it will automatically update whenever a system update is applied. If you are unsure about the process, refer to our guides on how to update Ubuntu and update Arch Linux.
There are numerous exciting possibilities with Git, such as software installation or cloning a GitHub repository to collaborate on a project. Ensuring Git is regularly updated guarantees access to the most up-to-date features it provides.


