Installing Git on Windows

Learn how to effortlessly install Git on your Windows system Say goodbye to confusion and discover the simple steps to get started with this powerful version control tool
Key Takeaways
To obtain Git, simply download the Git installer from git-scm.com, and execute the downloaded file. Another option is to install Git by entering the following command in PowerShell: "winget install --id Git.Git -e --source winget".
Git is a crucial tool for coding tasks. It offers a convenient way to handle various versions of code within a repository (repo). Moreover, Git is widely used to access GitHub, which happens to be one of the largest code repositories globally. Now, let's explore a few methods for installing Git on Windows.
Install Git with the Windows Executable
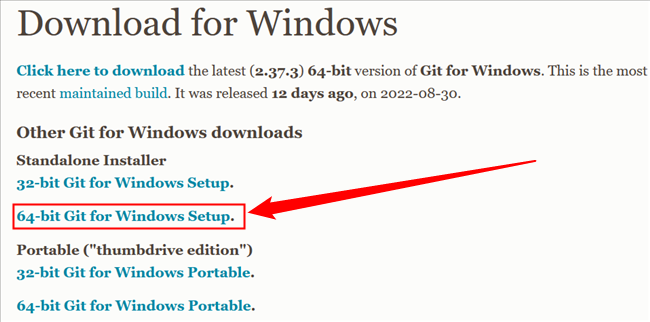
To obtain Git, simply download the executable file from the official Git website. Click on "64-bit Git for Windows Setup" to initiate the download. The file size is approximately 50 megabytes, so the process should be fairly quick.
To begin, double-click on the executable you have recently downloaded. Afterwards, proceed by clicking "Next" to navigate through the installation prompts. Throughout the installation process, you will come across numerous options. It is important to note that most of these options do not require much attention. The default choices will suffice, except for two particular options that require your attention.
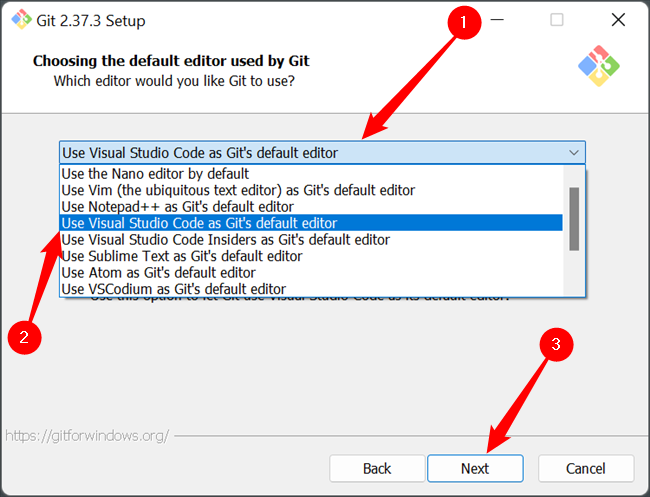
Git uses a text editor as its default selection, which is Vim. Vim is widely used and commonly found in command-line interfaces, but its unique commands can be overwhelming to learn. It would be advisable to choose a different text editor such as Visual Studio Code, Sublime, NotePad++, or any other preferred option. To do this, simply click on the drop-down menu and choose the desired program from the provided list.
Try Visual Studio Code if you don't know which one to pick.
The second is the way Git integrates itself into your PC's PATH. Make sure that the "Git From The Command Line And Also From 3rd-Party Software" is selected.
Click through the remaining choices and patiently wait for the completion of the download process. The duration needed for the download will differ based on your selection for installation. By default, the chosen option will result in a download size of approximately 270 megabytes.
Use Winget to Download Git
You can also use Winget to download Git if you're a fan of command-line interfaces.
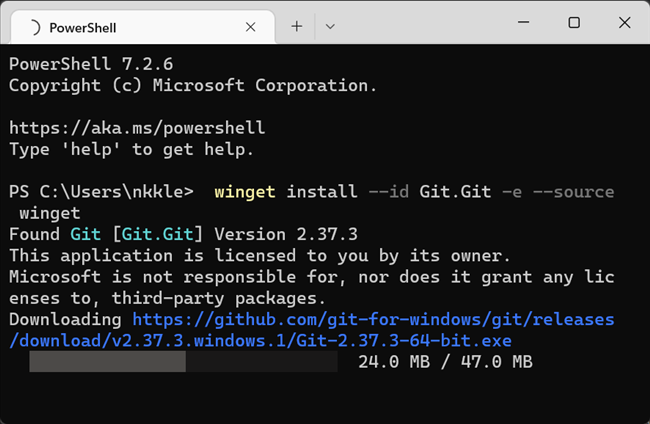
Open up PowerShell, or Windows Terminal with a PowerShell tab, and then paste or type:
winget install --id Git.Git -e --source winget
You'll see a few download bars appear in the Terminal window while Winget fetches everything it needs.
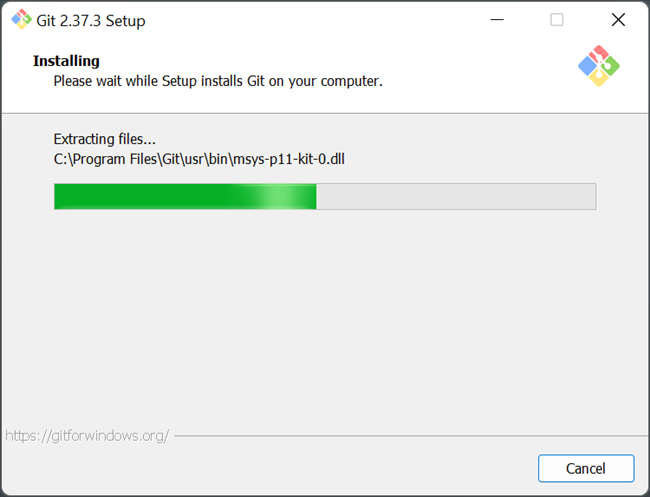
A normal Windows installation window will appear as the final part of the installation process.
Once that window closes, you will be all set. Git has been successfully added to the PATH, allowing any installation requiring it, such as Stable Diffusion, to function properly.


