
How to Enable Auto Login in Windows 11
Discover the convenience of automatic login in Windows 11 without worrying about unintended mishaps Follow these steps to enable and enjoy hassle-free access to your device Say goodbye to tedious sign-ins and enjoy a seamless user experience
Some Noticeable Information
To begin, open the registry and set the value of "DevicePasswordLessBuildVersion" to "0". Once this is done, open the "netplwiz" window. Uncheck the option that says "Users must enter a user name and password to use this computer". Finally, enter your account's password. Windows 11 will now sign you in automatically.
You Generally Shouldn't Use Auto Login
If your computer is always at home and you don't require a password, setting up automatic login can eliminate the need to enter your password each time you power on or restart your PC. This guide provides all the necessary information to enable auto login.
Automatically signing in puts your sensitive data at risk if someone gains physical access to your PC. Although not as severe as removing your Windows 11 password entirely, it still poses an unnecessary threat.
When someone has physical access to your PC, they will likely have full administrative control, allowing them to retrieve your Microsoft password if desired. Consequently, it becomes effortless for them to gain entry into your Microsoft account and access all the information stored within.
If you're going to use automatic login, we recommend you use a local account instead.
If you just don't like having to type a password, consider using Windows Hello webcam sign-in instead.
Enable the Option to Bypass Sign-in
By default, Windows 11 disables the automatic sign-in feature. However, it is possible to enable it again by making adjustments in the Registry Editor (Regedit). Another option is to conveniently download and use the registry key we offer in the following section named "Enable_Automatic_Login_Option.zip." This will take care of all the necessary steps automatically.
The Windows Registry is crucial for the proper functioning of the Windows 11 operating system and the majority of applications that you install. It is important to exercise caution when making modifications to the registry, as deleting or altering values incorrectly can lead to significant errors or render your computer inoperable. If you are not already familiar with the Windows Registry, it is recommended to familiarize yourself with it to avoid any complications.
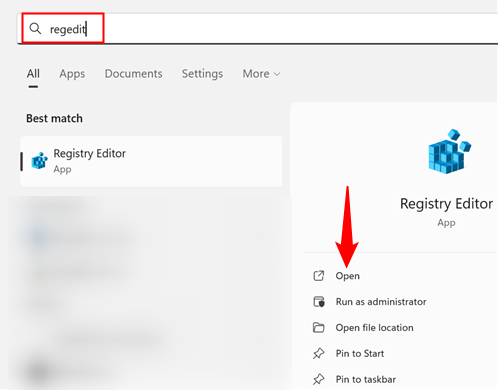
To access the Windows Registry, simply click on the Start button, enter "regedit" into the search bar, and press Enter or select "Open."
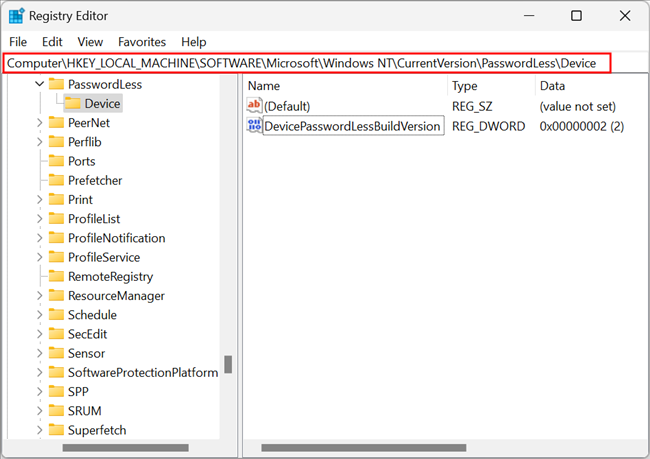
Navigate to the following address by pasting it into Regedit's address bar:
Computer\HKEY_LOCAL_MACHINE\SOFTWARE\Microsoft\Windows NT\CurrentVersion\PasswordLess\Device
Double-click the DWORD named "DevicePasswordLessBuildVersion," change the Value Data from "2" to "0", then click "OK."
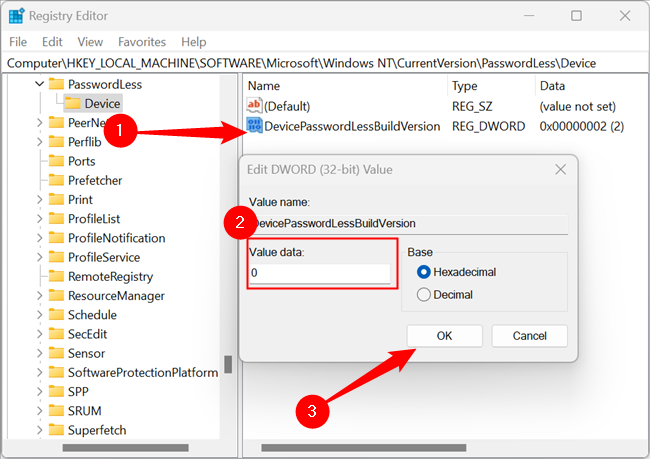
Changing the value from 2 to 0 is what enables automatic login. Our work on the registry is done, and you can close Regedit.
Use Our Registry Hack to Enable the Option Instead
To avoid manual manipulation of the registry, you can opt for our pre-made REG file that automates the change. Simply download "Enable_Automatic_Login_Option.zip," extract its contents using your preferred file archiving software, and then double-click "Enable_Automatic_Login_Option.reg." In case you change your mind, the ZIP file also includes a "Disable" file to revert the change.
Clicking "Yes" when prompted with a popup warning is necessary, as REG files can potentially harm your PC. It is important to note that malicious REG files can cause a variety of issues. To ensure safety, you can audit a REG file by opening it in a plain text editor such as Visual Studio Code, Atom, Notepad, Notepad++, or any similar software. However, in this particular scenario, the REG file will only perform the actions already mentioned, so you can proceed by clicking "Yes."

Enable Automatic Sign-in
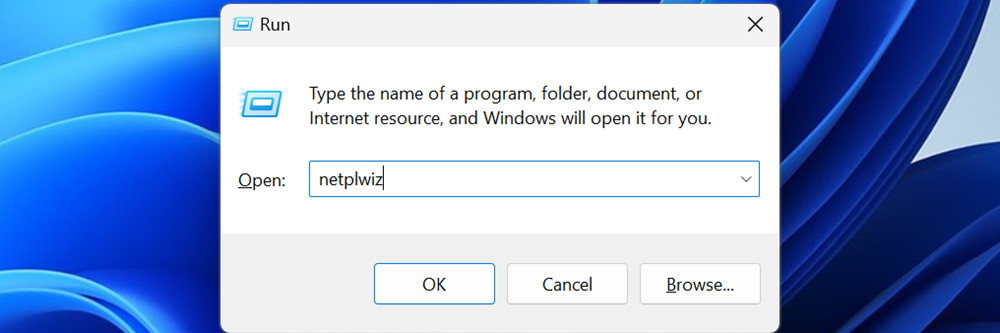
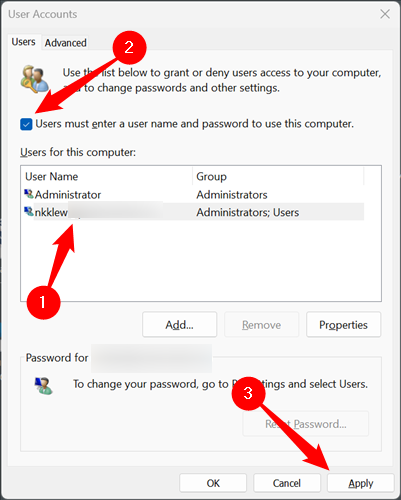
The registry modification proved to be a challenging task, but now all that remains is enabling local login. To do this, simply press the Windows and R keys simultaneously to open the run window. Next, enter "netplwiz" into the provided field and press Enter or click on the "OK" button.
Select your account, untick the box next to "Users Must Enter A User Name and Password To Use This Computer," and then click "Apply."
Please enter your username and password on the following screen. If you are using a Microsoft account to log in to Windows, you should use your Microsoft password.
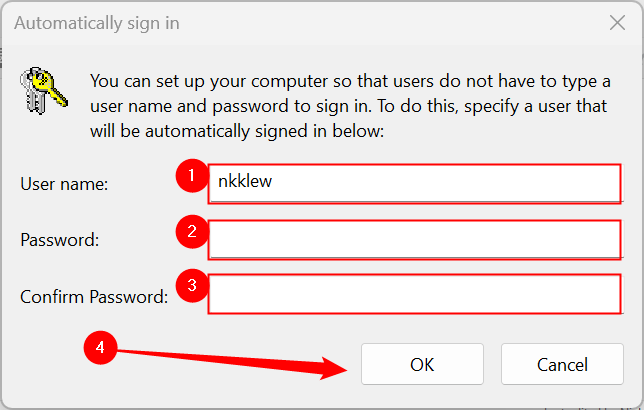
That is it — you're done. The next time you restart your computer, you'll automatically log directly into your chosen account. Just keep in mind the security implications.
Editor's P/S
As a Gen Z netizen, I have mixed feelings about the convenience and security of automatic login in Windows 11. On one hand, I appreciate the convenience of not having to type in my password every time I start my computer. It saves time and makes the login process more seamless. On the other hand, I am concerned about the security risks associated with automatic login. If someone gains physical access to my computer, they could easily access my sensitive data without having to know my password. This is a major concern for me, as I store a lot of personal information on my computer.
Overall, I think the convenience of automatic login is outweighed by the security risks. I would rather take the extra time to type in my password and ensure that my data is protected. However, I understand that some people may prioritize convenience over security, and for those people, automatic login may be a good option.


