
How to Easily Mount an ISO Image on Windows 7, 8, and 10
Learn how to effortlessly mount ISO images in Windows 7, 8, and 10 without relying on third-party tools Discover the easy steps for mounting ISO images in both Windows 8 or 10, as well as Windows 7 or Vista
Some Noticeable Information
Right-click an ISO file and click "Mount" to mount it on Windows 10 or Windows 8. You don't need third-party software. Windows 7 requires specialized software, like WinCDEmu.
Windows finally offers a built-in way to mount ISO disc image files on Windows 10, Windows 11, and Windows 8. If you're using Windows 7, you'll need a third-party tool.
Mounting an ISO Image in Windows 8 or Windows 10
On Windows 8 (and 8.1) and 10, Windows offers a built-in feature that allows you to easily mount ISO disc image and VHD virtual hard drive image files. You have three available options:
1. Mount an ISO file by simply double-clicking on it. Please note that this method may not work if your ISO files are associated with another program on your system.
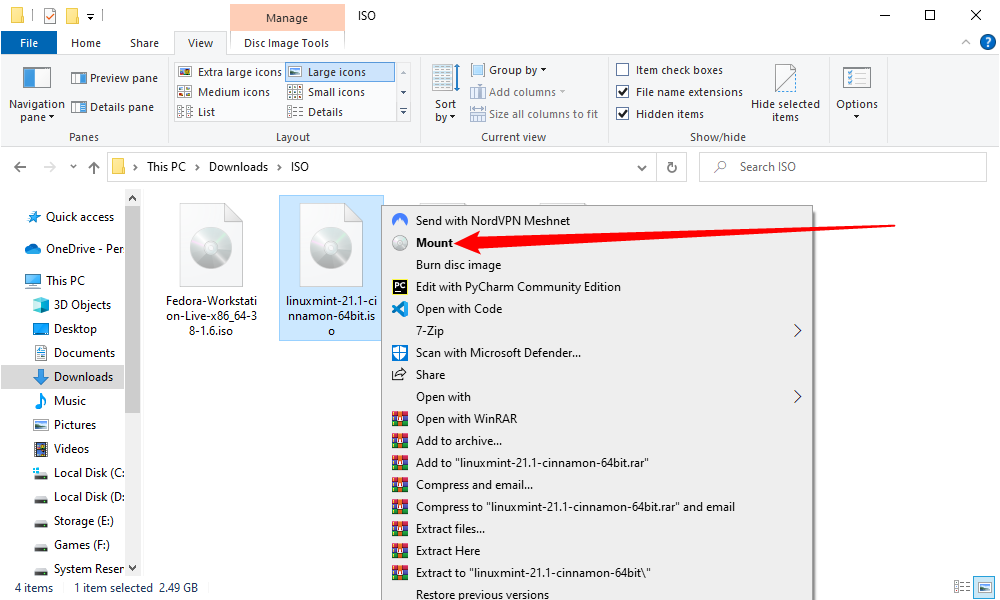
Right-click an ISO file and select the "Mount" option.
Select the file in File Explorer and and click the "Mount" button under the "Disk Image Tools" tab on the ribbon.
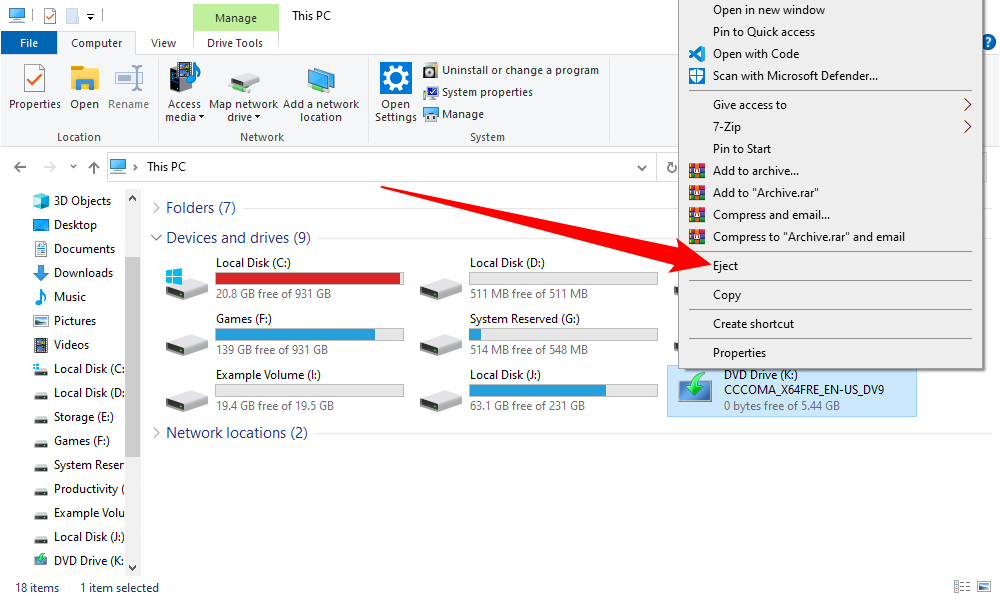
Once you've mounted the disc image, you'll see it appear as a new drive under This PC. Right-click the drive and select "Eject" to unmount the ISO file when you're done.
Mounting an ISO Image in Windows 7 or Vista
To mount ISO image files on older versions of Windows, a third-party application is required. One recommended program is WinCDEmu, which is a user-friendly and open-source disc mounting software. It not only supports ISO files but also various other disc image formats.
Even on Windows 8 and 10, where built-in support is lacking, WinCDEmu proves to be valuable by allowing you to mount BIN/CUE, NRG, MDS/MDF, CCD, and IMG image files.
Install WinCDEmu and grant it permission to install the necessary hardware driver. Once this is done, simply double-click on a disc image file to mount it. Alternatively, you can right-click on a disc image file and select "Mount" from the context menu.
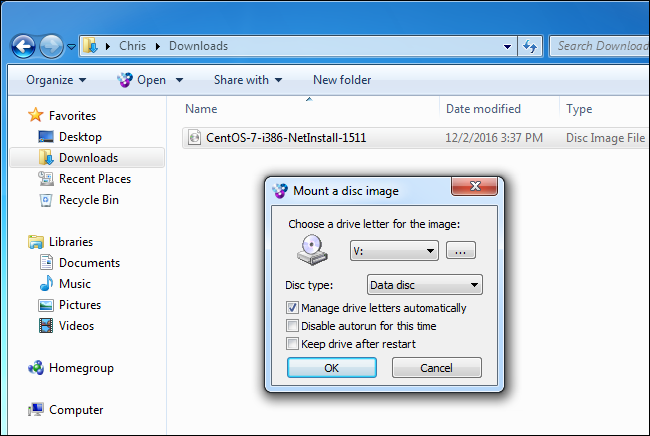
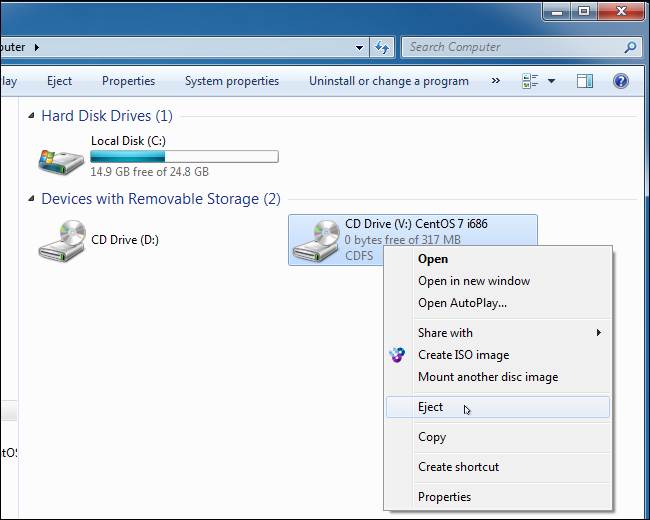
You will find a user-friendly interface that allows you to select the desired drive letter and other fundamental preferences. Simply click "OK" and the mounted image will promptly appear under Computer. To detach the disc image when you have finished, right-click on the virtual disc drive and choose "Eject".
Of course, just because Windows 10 doesn't require a program to mount an ISO file doesn't mean you can't use one. There are plenty of programs out there that offer additional ISO functionality.
Editor's P/S
As a passionate fan of technology, I am always eager to learn about new and easier ways to perform tasks on my computer. One task that I frequently perform is mounting ISO images, and I was thrilled to learn that Windows 10 now offers a built-in feature to do this. This means that I no longer need to rely on third-party tools, which can be a hassle to install and configure.
The process of mounting an ISO image in Windows 10 is incredibly simple. All I need to do is right-click on the ISO file and select the "Mount" option. The ISO file will then be mounted as a new drive under This PC, and I can access the files inside it just like I would any other drive. To unmount the ISO file, I simply right-click on the drive and select "Eject".


