The Ultimate Guide to Mastering the chroot Command on Linux
Unlock the power of chroot on Linux! Discover the simplicity of setting up secure environments with chroot Learn when and how to use this powerful command for ultimate convenience
The chroot command can send you to jail, keep your development or test environments isolated, or just improve your system's security. We show you the easiest way to use it.
What is chroot, and What is a chroot Jail?
The chroot command allows you to set up and execute programs or interactive shells within a self-contained filesystem. Within this chroot environment, all activities are confined and isolated from the regular filesystem. Without root privileges, nothing within the chroot environment can access anything outside of its designated root directory. Because of this, this type of environment is commonly referred to as a chroot jail. It is important to note that the term "jail" used here should not be confused with FreeBSD's jail command, which offers a more secure version of the chroot environment.
When assessing the usefulness of a command, it is crucial to consider both its functionality and user-friendliness. If a command is overly complex or convoluted, it becomes discouraging for people to utilize, rendering its functionality effectively zero. If no one is actually using the command, it ultimately serves no purpose.
When discussing with Linux users, whether in-person or on forums, it appears that the chroot command is commonly regarded as difficult to use or overly complicated to set up. Consequently, this fantastic utility is not being utilized to its full potential.
However, there is actually a very simple method for utilizing chroot, and we will provide you with a specific example of how to do so. We will use standard Linux commands that are applicable to all distributions. It is important to note that while certain Linux distributions offer specialized tools like debootstrap for setting up chroot environments, we will remain agnostic to any specific distribution in this explanation.
When Should You Use a chroot?
A chroot environment offers a more lightweight alternative to a virtual machine, providing similar functionality. Unlike virtual machines, a chroot environment does not require the installation and configuration of a hypervisor like VirtualBox or Virtual Machine Manager. Additionally, there is no need for a separate kernel installation in the chroot system as it shares the existing kernel.
Chroot environments share similarities with containers like LXC rather than virtual machines. They are efficient, easy to set up, and can be automated. Similar to containers, it is practical to install only the necessary components of the operating system for the specific task at hand. Determining the requirements of the chroot environment depends on how it will be utilized.
Common applications include:
Software Development and Product Verification involve two key processes: software writing by developers and testing by the product verification team (PV). On occasion, PV encounters issues that cannot be reproduced on the developer's computer. This discrepancy arises because the developer's computer is equipped with various tools and libraries that are not accessible to the average user or PV. In many cases, newly developed software functions smoothly for the developer but fails for others due to the utilization of certain resources on the developer's PC that have not been included in the test release of the software. To address this, developers utilize chroot, which allows them to create a controlled environment on their computer. Within this captive environment, the software is thoroughly tested before being handed over to PV. This captive environment can be configured with only the essential dependencies required by the software.
To mitigate development risks, developers can create a dedicated development environment to ensure that any actions within this environment do not impact their actual PC.
Running Outdated Software: There are occasions when it is necessary to have an older version of software running. However, if the requirements of the old software clash or are incompatible with your Linux version, you can create a chroot environment specifically for that software.
Recovery and Filesystem Upgrades: In the event that a Linux installation becomes inoperable, chroot can be utilized to mount the damaged filesystem onto a designated point on a Live CD. This allows you to work within the damaged system and attempt to fix it as if it were mounted normally at the root directory ("/"). Consequently, the expected file paths within the damaged system will be accurately referenced from the root directory, rather than from the mount point of the Live CD. A similar technique was employed in the article that detailed the process of migrating the Linux filesystem from ext2 or ext3 to ext4.
Ringfencing Applications. In order to enhance the security of your system, it is advisable to run an FTP server or any other internet-connected appliance within a chroot environment. By doing so, the potential harm caused by an external attacker can be significantly mitigated. This step serves as an effective measure to harden the overall security of your system.
Creating a chroot Environment
We require a root directory for the chroot environment. To have a convenient way of referencing this directory, we will create a variable and assign the directory name to it. In this case, we are establishing a variable to store the path to the "testroot" directory. It is not important if this directory does not currently exist since we will soon create it. If the directory does exist, it should be devoid of any content.
Variable: chr = /home/dave/testroot

To create the directory, use the following command. The -p (parents) option will ensure that any missing parent directories are also created simultaneously.
mkdir -p $chr

List the directories required for the chroot environment setup: {operating system portions directories, minimalist Linux environment, Bash interactive shell, touch command, rm command, ls command}.
mkdir -p $chr/{bin,lib,lib64}

Now we'll change directory into our new root directory.
cd $chr

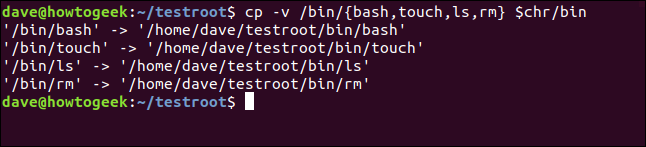
To populate our chroot "/bin" directory in our minimalist Linux environment, we can transfer the necessary binaries from your standard "/bin" directory. By utilizing the -v (verbose) option, cp will provide us with detailed information about each copy action it performs.
cp -v /bin/{bash,touch,ls,rm} $chr/bin

The files are copied in for us:
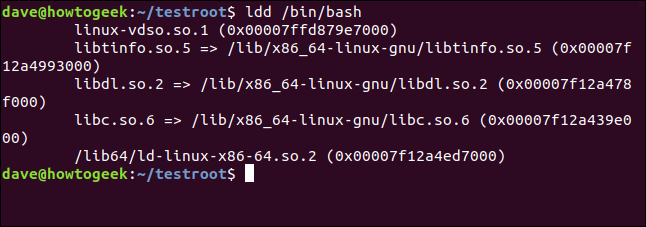
The binaries mentioned above have dependencies that must be identified and copied into our environment. Without these dependencies, the functionality of bash, touch, rm, and ls will be impaired. Each of the selected commands must undergo this process. We will begin with Bash and utilize the ldd command to determine its dependencies.

The dependencies are identified and listed in the terminal window:
We need to copy those files into our new environment. Picking the details out of that listing and copying them one at a time is going to be time-consuming and error-prone.
Fortunately, there is a way to partially automate this process. We will compile a comprehensive list of dependencies and then proceed to transfer the files by looping through this list.
To achieve this, we utilize the "ldd" command to generate a list of dependencies and feed the results into "egrep" through a pipe. "Egrep" functions similarly to "grep" with the extended regular expressions option enabled ("-E"). Additionally, the output is refined using the "-o" flag to only display the specific components of each line. Our objective is to locate library files that end with a numerical digit [0-9].
list="$(ldd /bin/bash | egrep -o '/lib.*\.[0-9]')"

We can check the contents of the list using echo:
echo $list

Having obtained the list, we can now iterate through it using the following loop and proceed to copy the files individually. In order to traverse the list, the variable i is used. For each element in the list, we duplicate the file to the designated chroot root directory, which is represented by the value stored in $chr.
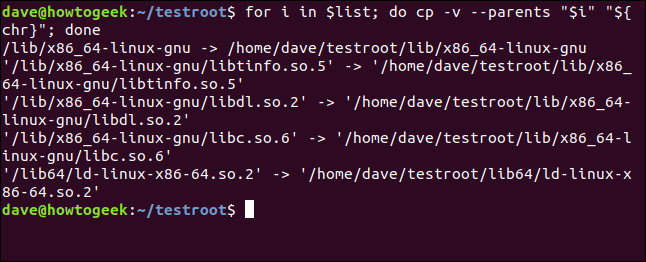
The cp command will announce each copy it performs by using the -v (verbose) option. Additionally, the --parents option ensures that any missing parent directories are created in the chroot environment. To execute this operation on multiple items listed in "$list", use the following command:
for i in $list; do cp -v --parents "$i" "${chr}"; done

And this is the output:
We will utilize this technique to record the dependencies of every other command. Moreover, we will employ the loop technique to carry out the copying process. The great news is that we only have to make a small modification to the command responsible for gathering the dependencies.
To retrieve the command from our command history, simply press the Up Arrow key multiple times and make the necessary edits. The looping copy command remains unchanged.
Using the Up Arrow key, we have located the command and replaced "bash" with "touch".
list="$(ldd /bin/touch | egrep -o '/lib.*\.[0-9]')"

We can now repeat the exact same loop command as before:
for i in $list; do cp -v --parents "$i" "${chr}"; done
And our files are copied for us:
We can now edit the list command line for ls:
list="$(ldd /bin/ls | egrep -o '/lib.*\.[0-9]')"

Again, we'll use the same loop command. It doesn't care what files are in the list. It blindly works through the list copying the files for us.
for i in $list; do cp -v --parents "$i" "${chr}"; done
And the dependencies for ls are copied over for us:

We edit the list command line for the last time, making it work for rm:
list="$(ldd /bin/ls | egrep -o '/lib.*\.[0-9]')"

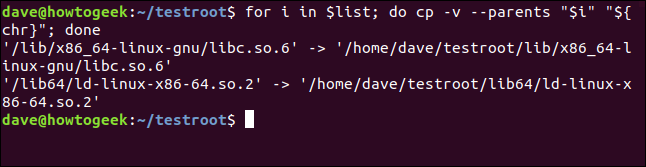
We use the looping copy command one last time:
for i in $list; do cp -v --parents "$i" "${chr}"; done
The remaining dependencies have been transferred to our chroot environment. Now we can proceed with the usage of the chroot command. This command establishes the root of the chroot environment and designates the application to be executed as the shell.
Use the following command:
sudo chroot $chr /bin/bash

Our chroot environment is now active. The terminal window prompt has changed, and the interactive shell is the being handled by the bash shell in our environment.

We can try out the commands that we have brought into the environment.
ls
ls /home/dave/Documents
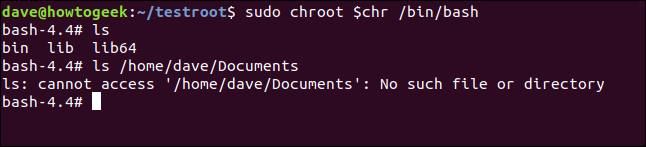
The ls command works as we'd expect when we use it within the environment. When we try to access a directory outside of the environment, the command fails.
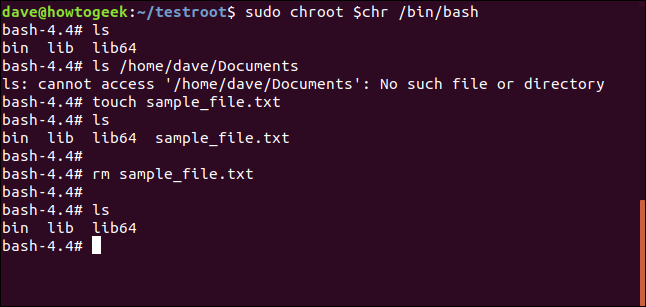
We can use touch to create a file, ls to list it, and rm to remove it.
touch sample_file.txt
ls
rm sample_file.txt
ls
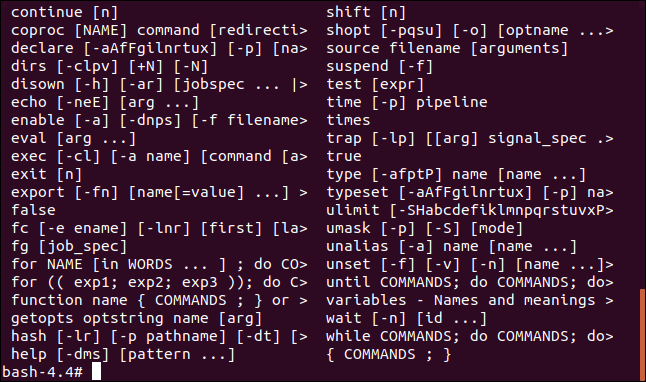
Of course, we can also use the built-in commands that the Bash shell provides. If you type help at the command line, Bash will list them for you.
help
Use exit to leave the chroot environment:
exit

If you want to remove the chroot environment, you can simply delete it:
rm -r testroot/

This will recursively delete the files and directories in the chroot environment.
Automate chroot for Convenience
If you believe that chroot environments could be beneficial but find them challenging to configure, remember that you can simplify repetitive tasks and minimize risks by utilizing aliases, functions, and scripts.